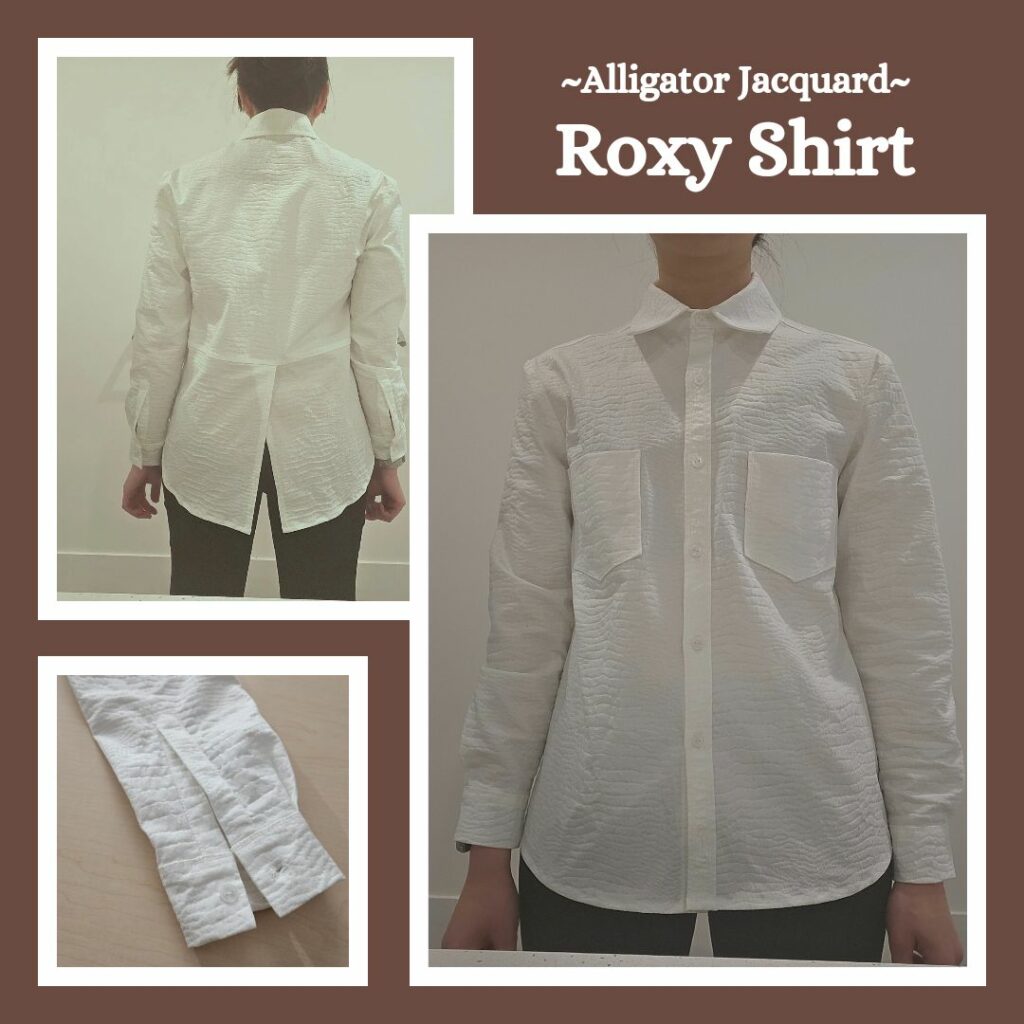
Planning and Design
I’d kinda given up on finding women’s shirt patterns without prominent bust darts (I have tried to adjust patterns before to remove this but was never really satisfied with the outcome) but then I discovered Style Arc. They sure know how to pair their patterns in appealing ways, I really loved the Roxy Shirt + Sable Boyfriend Cardigan combination. Well I’ve crossed the cardigan off the list (after a lot of mishaps that were all my fault lol) and I did a test of the Roxy pattern (where I learnt that shirt-sleeve-with-cuff patterns really make me overthink and mess up which one goes on which side…) but felt like the back split didn’t have enough structure. So off to Remnant Warehouse I went to try and find some fancy, stiffer fabric. I ended up getting two but running with the alligator jacquard cos it looked cooler 😋
For buttons, I had a look at what was available at Spotlight, since I was buying buttons from there for other projects. I chose the buttons with an embossed edge because I felt like they looked ‘chomped on’, which to me fit the alligator theme 😁
Materials
- Pattern – Roxy Shirt (Style Arc)
- Fabric – Ivory Alligator Cotton Jacquard Sateen (Remnant Warehouse)
- Buttons – Hemline Embossed Edge 2-Hole 18 Button White 11 mm (Spotlight)
Construction
I knew from doing the prototype that I really don’t like bias only sleeve openings 😣 So I decided to draft my own sleeve placket and used these two websites as a guide. I think I could probably make it even ‘slimmer’ next time since I kinda went with the men’s shirt measurements (because not imperial measurements…).
I did look into if I could be lazy and just use the overlocker and was wondering if I could widen the stitch. I found out that no, I couldn’t widen it, but I also learnt that the placement of the cutting knife affects the neatness/tension of the overlock stitch. So I played around a bit and now the stitches look very nice haha. Not that they looked bad before they they definitely look better now.
For the collar, I realised I didn’t know how to go around a corner with a twin needle… I referred to this video but it didn’t work out quite right because my angle was even sharper than 90 degrees 😅 Next time…I will practice first…maybe…
Because I had done a practice run I didn’t have issues with insetting the sleeves, thankfully. Also jacquard is quite nice to work with, although I had problems trying to figure out which side was right way up haha…
Reflections
This is a nice shirt pattern and I like that it buttons up all the way but doesn’t feel contricting. Not sure if jacquard was the way to go though. I wanted the structure so the back split would fall nicely but overall the entire fit ended up stiff (of course…). Maybe it will relax the more I wear it (thus negating the entire reason I chose the fabric lol). Also maybe next time I’ll make the back normal without a split since I don’t think it adds that much since I myself can’t see it lol.
Things I learnt:
- How to draft my own sleeve placket piece
- That the position of the overlocker knife affects the tension of the overlocked seam
- That I fail at going around corners with a twin needle
- Jacquard might not be ideal fabric for a shirt
Categories: Sewing
1 reply ›