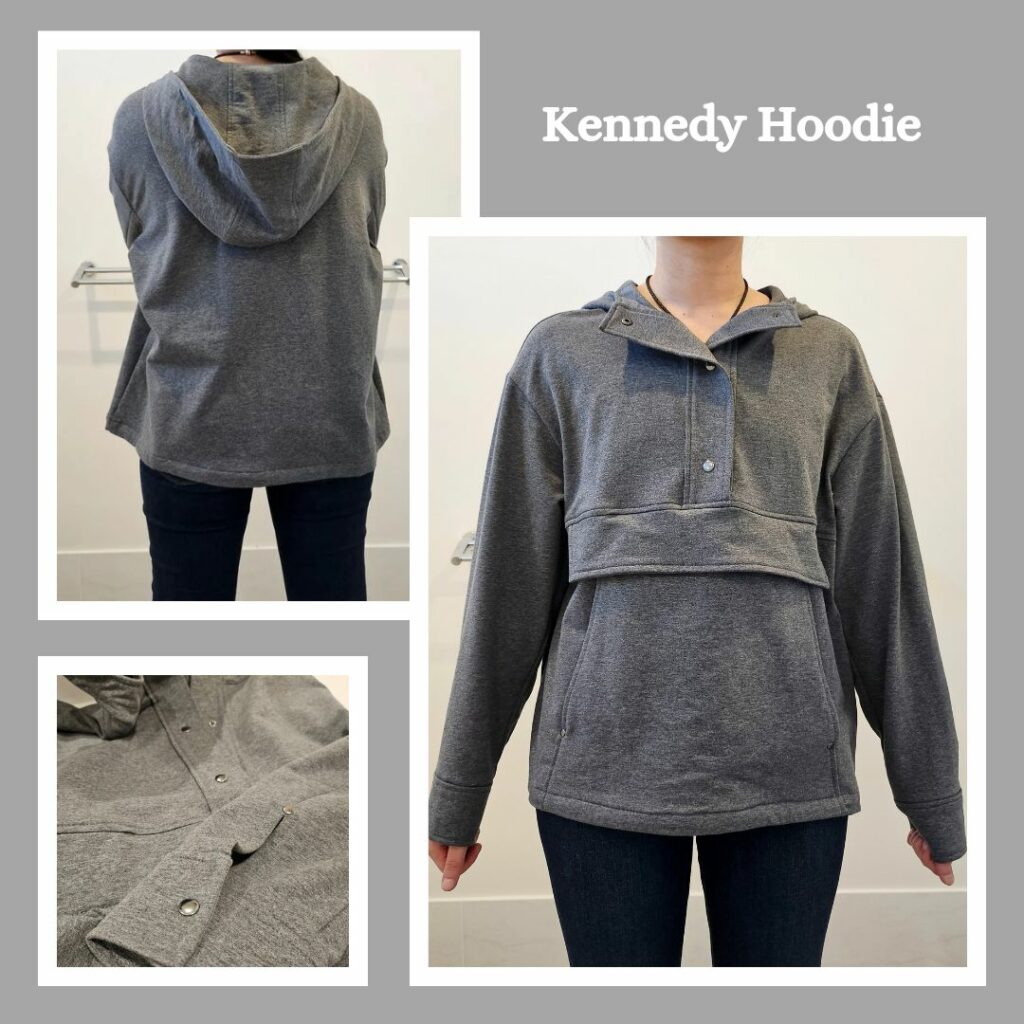
Planning and Design
The Kennedy Hoodie was one of the first patterns from Style Arc I thought looked really cool. But I felt like I couldn’t justify making it when I was making so many (nerd) hoodies. But after I decided to make the Anakki Flannelette ‘Hoodie’ in separate parts (hoodie under a shacket) I felt like this was the perfect excuse to make this 😝 Plus I realised that I needed some non-nerd clothes lol

Materials
- Pattern:
- Kennedy Hoodie (Style Arc)
- Fabric:
- Dark Melange Grey Cotton French Knit (Homecraft Textiles)
- Buttons
- Gunmetal Fashion Snaps Size 20 (Snaps Australia)
Construction
So I knew from the illustration that this pattern used the sew on snap buttons but I also knew I hated these and so decided to buy metal snap buttons to use with my button press. And while I was at it I got grommets and rivets as well, with the intention of using the grommets for this pattern too. But when I thought about it, I always remove any drawstrings from clothes I buy, so why should I go to the effort of including it when I make it myself??? Also, once I read in the instructions to use bar tacks (which I also hate), I got pretty excited to replace them with rivets instead 😁
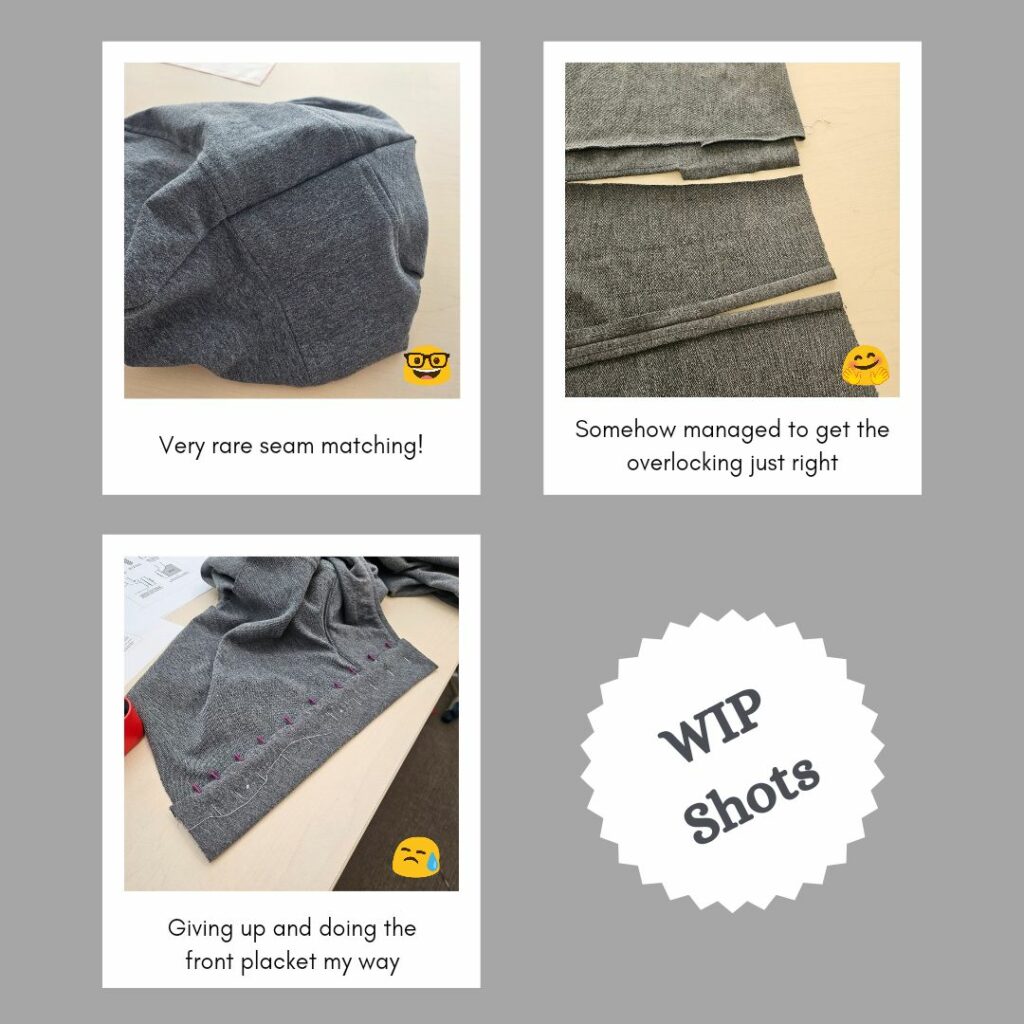
I had a quick win at the start 😁 Usually I don’t get the hood seams lined up and just ignore it and continue but it was all perfect this time wooo. I was also a good girl and basted the hood inner seam before sewing although I still didn’t catch all of it first time around, at least I didn’t wing it with pins and have to unpick 😅
Then I got to the instructions on adding the front tab and was like ‘HAAH?’. For starters, the text doesn’t match the image, nowhere does it say to fold and press the edges. And if I were to follow the text and sew one edge to the hood/front, I would do that *first*, then sew the top seam of the tab and turn out. But since I had already clipped the corner, turned out and pressed, I semi-followed the second image by handbasting and just top stitching the whole lot… It works I guess (except that the top of the front for the inner tab didn’t fully catch and I only noticed when I went to install the buttons, so had to just topstitch over that bit. Luckily my thread blends in very well with the fabric and it was the inner tab, so no one will likely notice).
Then for the pocket, I overlocked the three edges and before folding over and hemming. It was at this point I realised at no point do the instructions mention finishing edges? I had actually been wondering about this since I cut out the sleeve pieces, like how was I going to overlock that awkward cut out. I tried anyway, hoping that my top stitching helps secure the ends.
I then installed the tab buttons and rivets. Had a bit of trouble since I accidentally mixed up the top/bottom die pairings, but a quick visit to the Snaps Australia website made me realise what I was doing wrong.
The rest of the jacket was pretty straightforward to put together. I did get a bit confused (again) comparing the illustrations to the instructions. They never mention any topstitching in the written instructions so I guess it’s optional? But some of the stitching lines look super awkward…

Reflections
It’s pretty nice to wear and handy that I can unbutton the front placket and sleeve cuffs if I feel like it. I doubt I’ll ever use the kangaroo pouch though so that’s very much jist for the looks.
Things I learnt:
- How to install rivets
Categories: Sewing
1 reply ›