Planning and Design
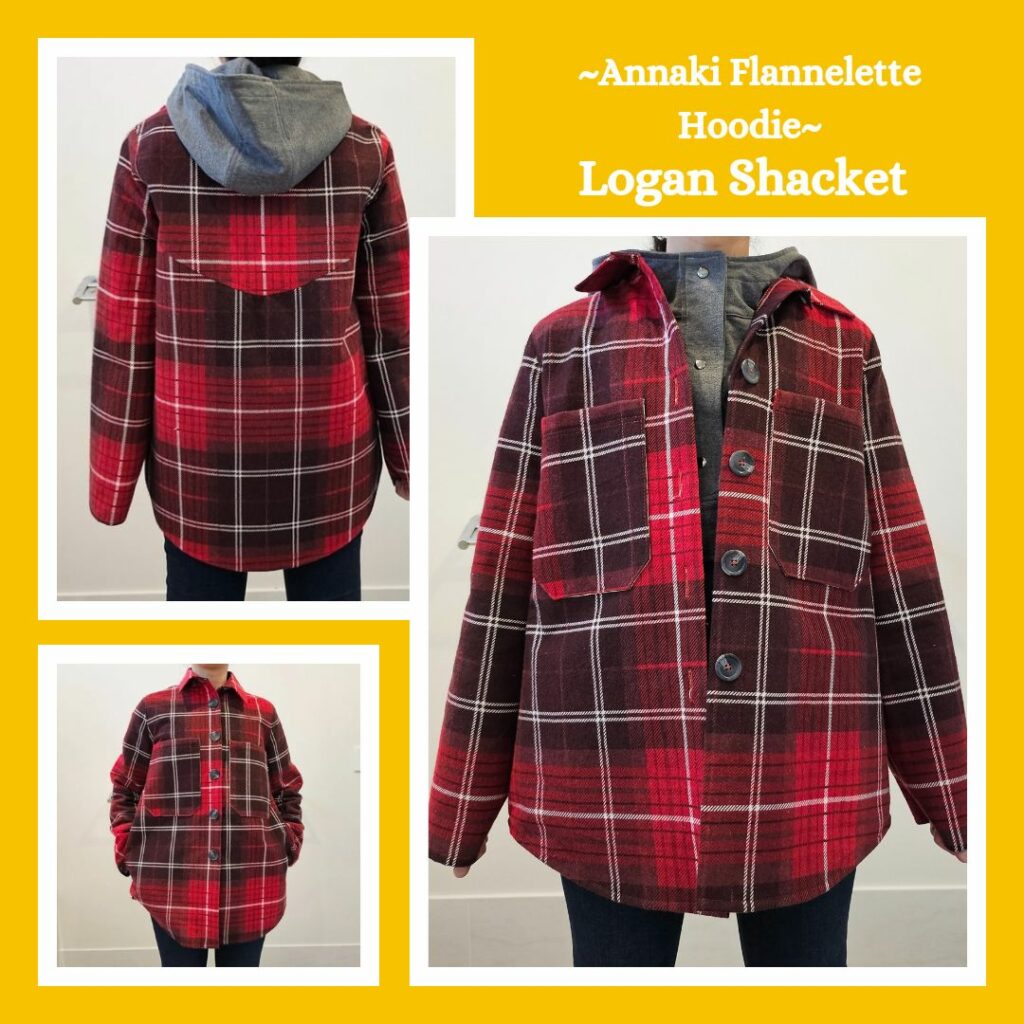
I’m a big fan of flannelette. I love how soft but light it is. Before I met my husband I used to use flannelette sheets and bedding in winter 😍 But I can’t do that anymore because he would overheat and die haha. But I’ve never worn flannelette clothing before (pajamas don’t count). So I was interested in recreating this because I thought it would be a nice way to get my flannelette fix 🤣
I started off by looking at hoodie patterns where you can detach the hood. Because I figured that while the Splatoon design has the hood attached, I probably wouldn’t want to wear it with the hood IRL. But in that case, why bother even making the hood portion? My goal this time after all was to make something I would actually wear. Would I wear a flannelette jacket? Yeah I would. Would I wear a grey hoodie? Yeah I also would. Would I wear them together? Nope, but that’s fine I can just wear them separately except for the one time I take a photo of the ensemble together for this blog post LOL
I’d been looking at the Logan Shacket pattern for a while and once I’d made the decision above I knew it would be perfect for this project. I’d also been looking at the Kennedy Hoodie and now I had an excuse to make that too 😁
The hardest part was finding the flannelette fabric. It seems like it’s pretty hard to find patterned flannelette that isn’t like whimsical forest or sea animals? Plus I was really fussy about the combination of red and black. I didn’t want it as boldly black like the game because I’m not a huge fan of the red/black combination. In the end I was looking mostly at sheet or quilt sets haha. Flannelette, truly the fabric for comfy bedding. I really liked how the Catherine Lansfield design I settled on had contrasting top and bottom fabrics. I decided to use the bottom fabric as the lining.
Used in my Splatoon 3 Heavy Edit Splatling Noveau outfit.

Materials
- Pattern:
- Logan Shacket (Style Arc)
- Fabric:
- Catherine Lansfield Brushed Cotton Tartan Check King Duvet Set Red
- Interfacing
- Very Fine Iron-on Interfacing (Homecraft)
- Buttons
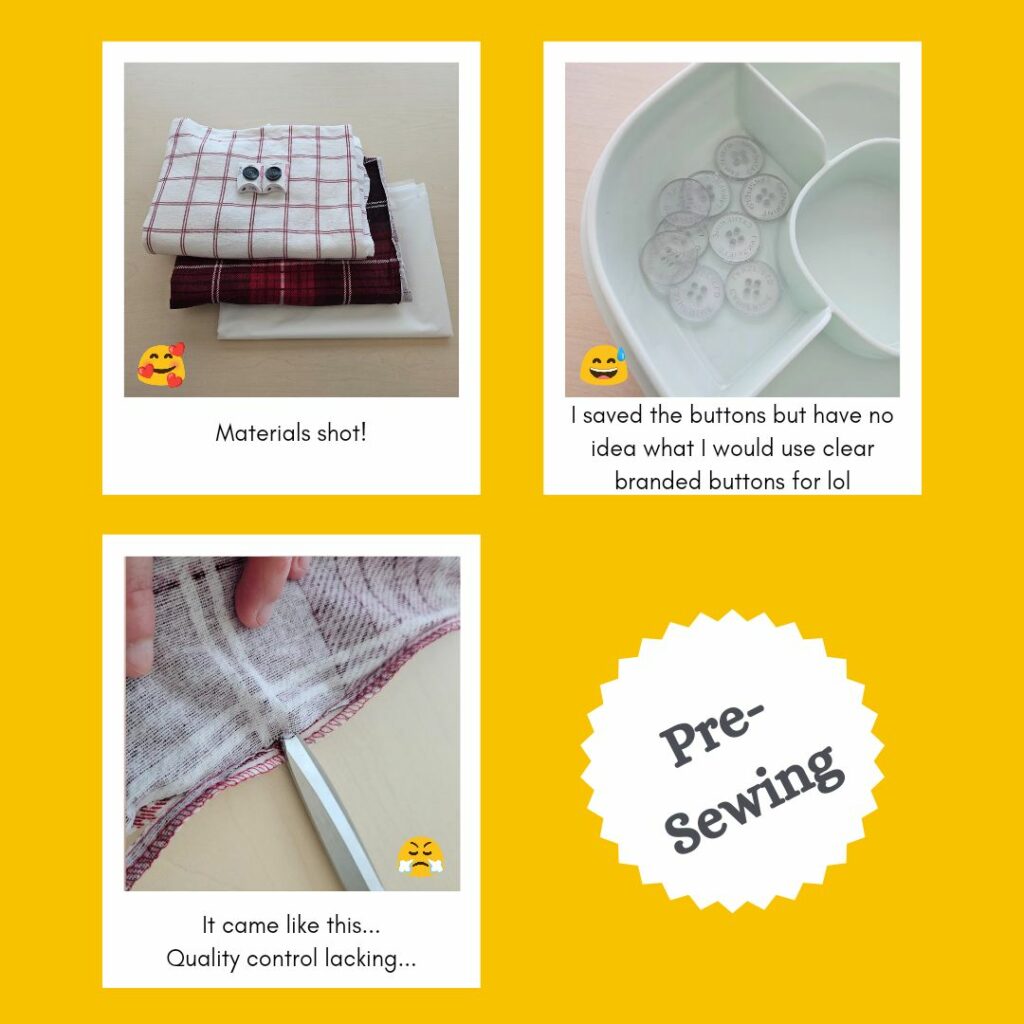
- Hemline Marble Style 4-Hole Button Grey 28 mm
Construction
First step was to take apart the quilt cover. Bedding brands seem to have an issue with seam quality assurance LOL. I kinda understand since I’ve made my own quilt covers before and it’s really easy to have your seams misaligned, but I feel like I’ve come across this problem with at least three different bedding brands. Maybe I’m being overly critical, but I’m guessing a lot of people who buy bedding (like the entire world?) wouldn’t be able to easily fix a dodgy seam 😅
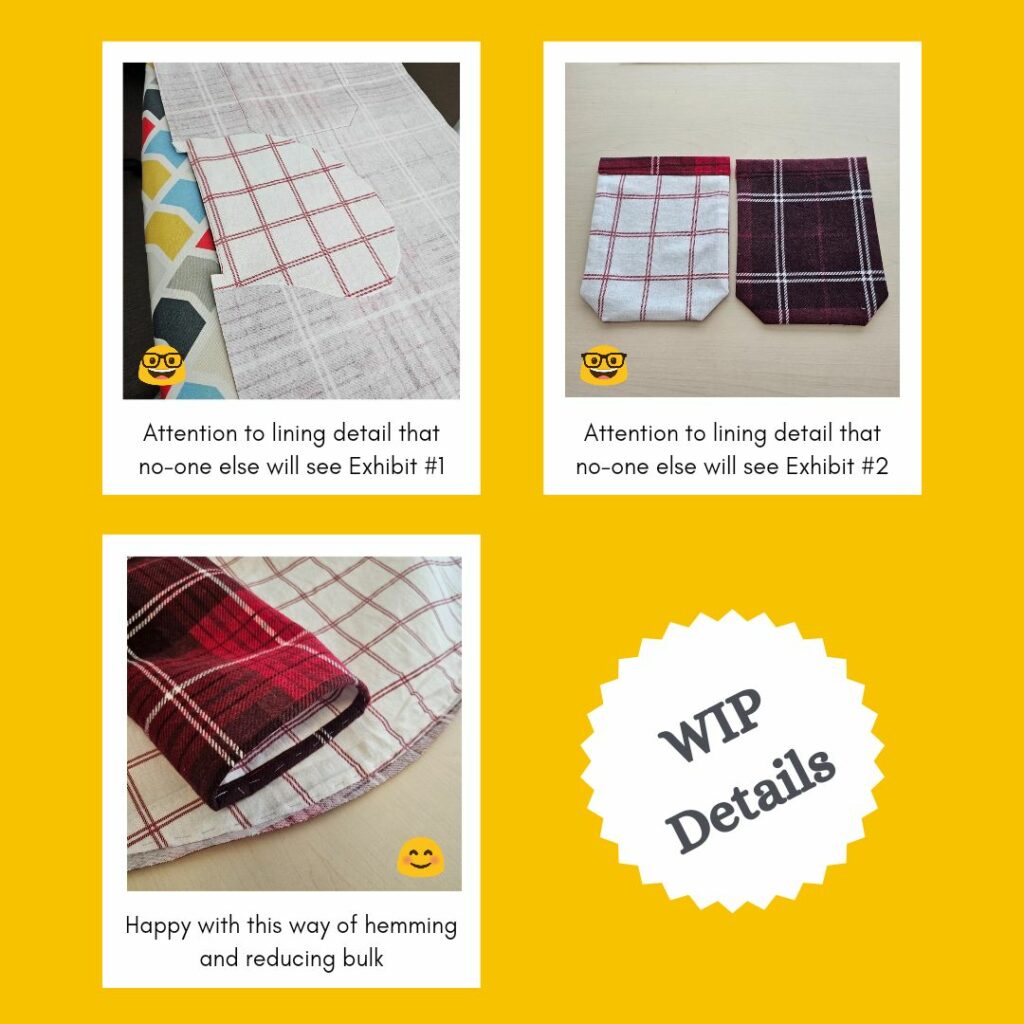
Then I applied very light interfacing using my heat press to the main red fabric. I tried my best to save as much fabric as possible because I want to make more things with this fabric 😙 I cut the white ‘lining’ fabric to the hem fold marks on the main pattern to save fabric there as well.
Because the pattern is unlined I had to make a few adjustments to the construction method, mostly around the sleeve and body hems. I cut 1 cm off the lining hem edges and then encased it with the 1 cm fold of the main fabric and then turned over one more time to fully secure. I think it turned out well in terms of thickness!
The pattern itself was pretty simple and fun to make.


Reflections
I suppose because I interfaced and lined it and didn’t size up, the shoulders feel a little tight? It’s not terrible, mostly just when my arms are at a particular angle. I’m hoping the interfacing will relax a bit more as I wear it. But I do love the contrast between the main and lining fabric patterns, Catherine Lansfield (whoever she is) knows what she’s doing with her designs 😝
Things I learnt:
- Flannelette is also called brushed cotton…no wonder I was having troubles getting hits on my search for a fabric
- Iron fabric before heat pressing the interfacing – while the heat press will get rid of any creases, it will reduce wrangling in front of the hot plate and increase peace of mind and none of the creases will get heat set in 😂
- Size up jacket patterns if I want them to be roomy/overcoat style. It worked well for the Beatrice Peacoat, I just didn’t do it for this one because I read reviews saying it was nice and loose (but then again they probably didn’t line it like I did)
- Don’t trust the automatic buttonhole foot gauge 😂 I couldn’t fit the button into the little holder, but when I did a test buttonhole with the holder at max width and the adjustment to max L, the buttonhole was WAAY too big.
- If some of the adhesive from heat pressing the interfacing transfers and sticks to the teflon cover sheet, use the Silhouette vinyl scraper tool to remove and then clean with a wet wipe 👍
Categories: Sewing
1 reply ›