Planning and Design
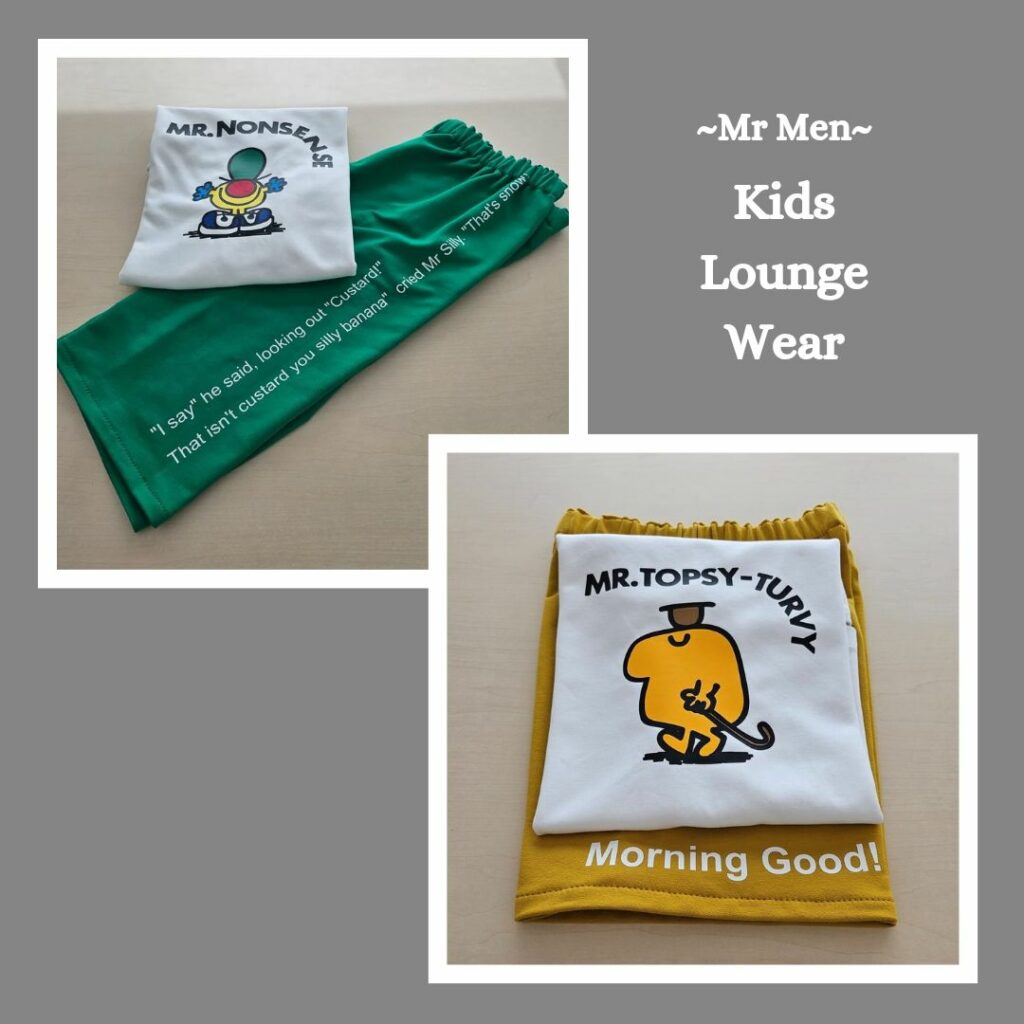
This year we didn’t put much effort into planning a birthday present for my eldest niece because she loves Pokemon and there is no shortage of Pokemon merchandise available in-store. But then one evening when we were walking through the CBD, we noticed that Peter Alexander are doing Mr Men & Little Miss pajamas. Niece #1 is obsessed with Mr Nonsense and Mr Topsy Turvy, so we went in to have a look at the range. It was pretty disappointing tbh LOL. The charm of each character was lost in a sea of pastel pinks and purples 😒 And of course they didn’t have anything for the two niche characters my niece likes. Hence this idea was born. But I decided to make it lounge wear rather than pajamas so she can wear it a bit more (might as well since she’ll grow out of it sooner rather than later).
To reduce the amount of work I needed to do, we bought plain t-shirts from Uniqlo. Then I found a free kids pants/shorts pattern and bought some coordinating fleecy from Homecraft Textiles (since it’s local I could count on it arriving fast).
Materials
- Pattern:
- Free Pajama Pants, Bottoms & Shorts Sewing Pattern (Sew Can She)
- Fabric:
- Emerald Green Cotton French Terry Knit (Homecraft Textiles)
- Mustard Cotton French Terry Knit (Homecraft Textiles)
- T-shirts:
- KIDS AIRism Cotton Crew Neck Long Sleeve T-Shirt
- KIDS AIRism Cotton Crew Neck T-Shirt
- Thread:
- Gutermann Maraflex Mid-green 396
- Gutermann Maraflex Gold 968
- HTV:
- Remnants from stash
Construction
Designing and Applying the HTV
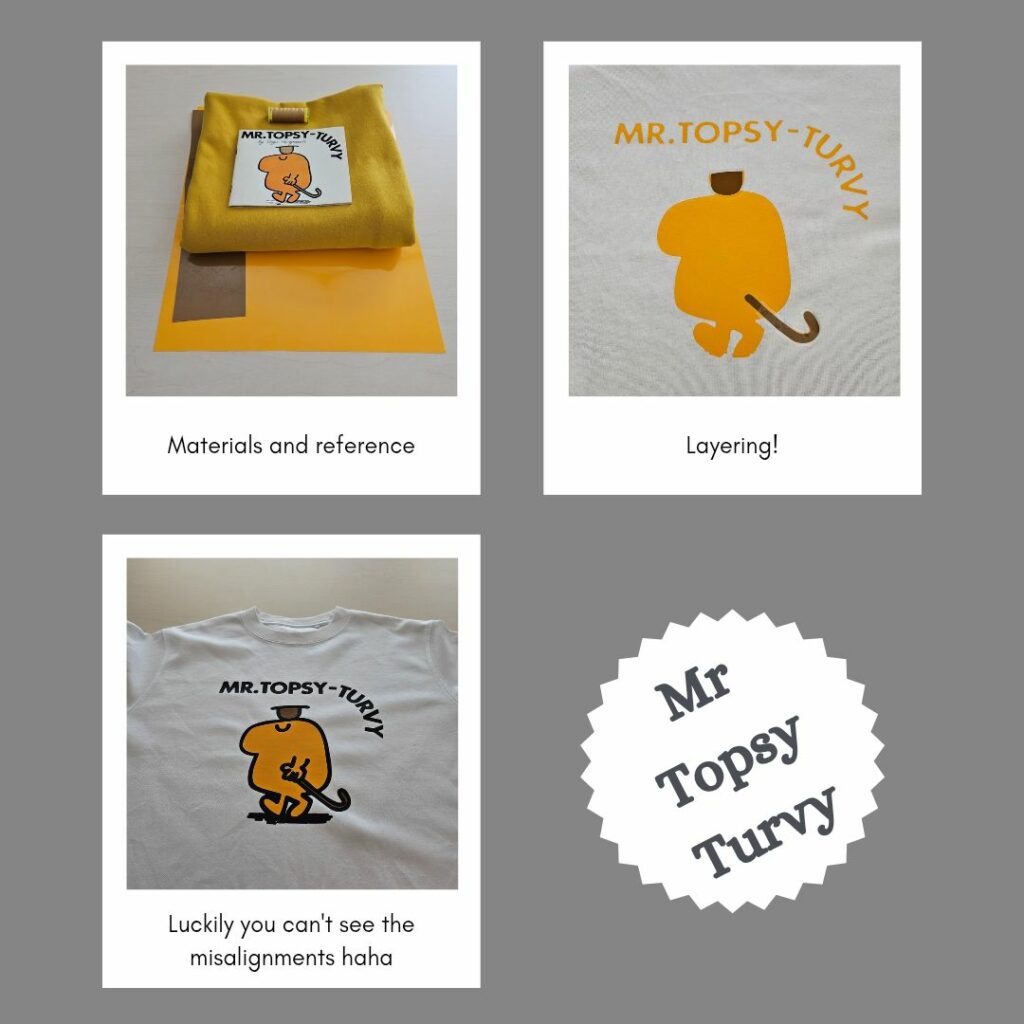
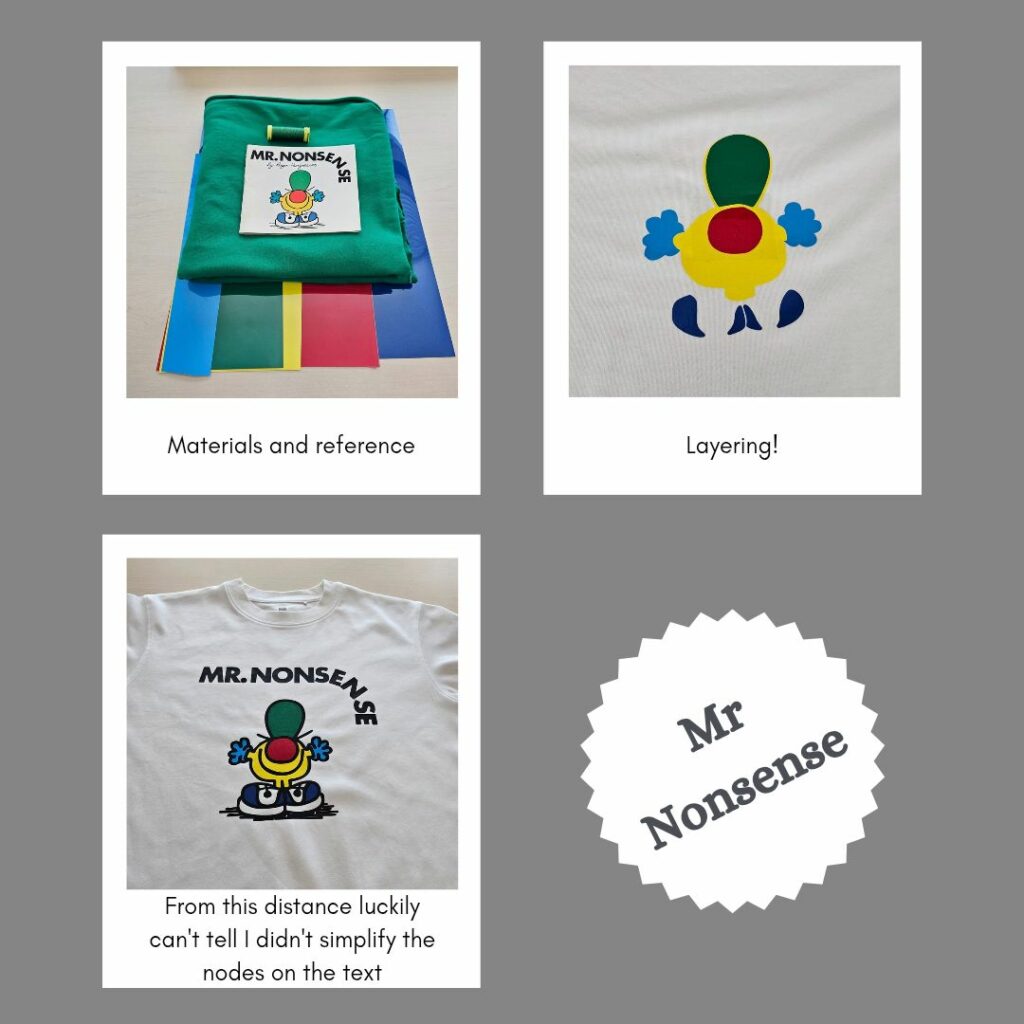
I started by trying to trace images from the internet in Silhouette Studio. It work ok for Mr Topsy Turvy (except I realised later it wasn’t the right pose) but I couldn’t get anything decent for Mr Nonsense. I even tried manually tracing it using Krita on my big Boox tablet, but the starting resolution was too low so it the edges were very ragged.
Then I asked my lil bro to bring over the Mr Men books from my mum’s house. And realised I could scan the images in high resolution. This worked out really well despite the discolouration due to the books being so old 🤣 (they are well-loved since the time I was a kid).
I learnt a bit about how to deal with bezier curves when refining the cut lines. They have always been a bit of a mystery to me, but I think having a stroke line that I am editing, rather than trying to create one from scratch, helped me understand them a bit better. Also I learnt how useful the Simplify tool is in Silhouette Studio 😝 I forgot to go back and apply it to the Mr Nonsense design though (whups!)
I definitely was a bit lazy in creating my layers. I should have reduced the underlayers to all be smaller than the black outline layer but I was so paranoid about misaligning things 😅 And I don’t know what my thought process was behind Mr Topsy Turvy’s hat, but it wasn’t logical and I had to re-apply another brown layer on top and fudge the black outline to mostly cover all the underlayers. It was a good learning experience though 🙃
Sewing the Bottoms
So according to The Sewing Book, you are meant to cut your fabric out right sides up. I had no idea 😅 Anyway, so I tried doing it that way this time. Also, you should only put pins in the corners unless it’s a long edge, to avoid distorting the fabric. So I tried that too. Finally, they recommend cutting the fabric out using a rotary blade. I think I might need a smaller blade to do that and I definitely need a larger cutting mat, so compromised by using my angled dress shears I got as a present from friends a while ago. Back then, I had no idea what Merchant and Mills was 🤣 Damn these things are heavy duty, it’s like a work out trying to use them. But now I know more about Merchant and Mills it kinda makes sense. Lots of their patterns seem hardwearing.
I have not made pants in this way before (no side seam). I suppose it just means less of a hip curve. But essentially it’s the same as any other elasticised waist pant. I used Maraflex and remembered to widen the stitch this time, go me 🤣 One thing I did differently this time though was use woven elastic. I have gotten a bit tired of braided and knitted elastic rolling in the casing.


Reflections
The tricky thing about preparing presents for kids is that what they were obsessed with last week might be old news this week haha. Luckily that was not the case this time 😁 In fact, I got a pretty good reaction to the text on the shorts/pants haha. And my husband and brothers were impressed by the layered HTV. But the biggest compliment actually came from my SIL who exclaimed over how cute the sets were and confirmed with me that they weren’t pajamas because she was keen for my niece to wear it outside the house 🤣
So overall a satisfying project that didn’t take too long or feel too stressful 😊
Things I learnt:
- How to properly pin fabric and cut it out
- Simplify tool in Silhouette Studio 🤩
- A better understanding of bezier curves
Categories: Sewing
Leave a Reply