Planning and Design
Brainstorming
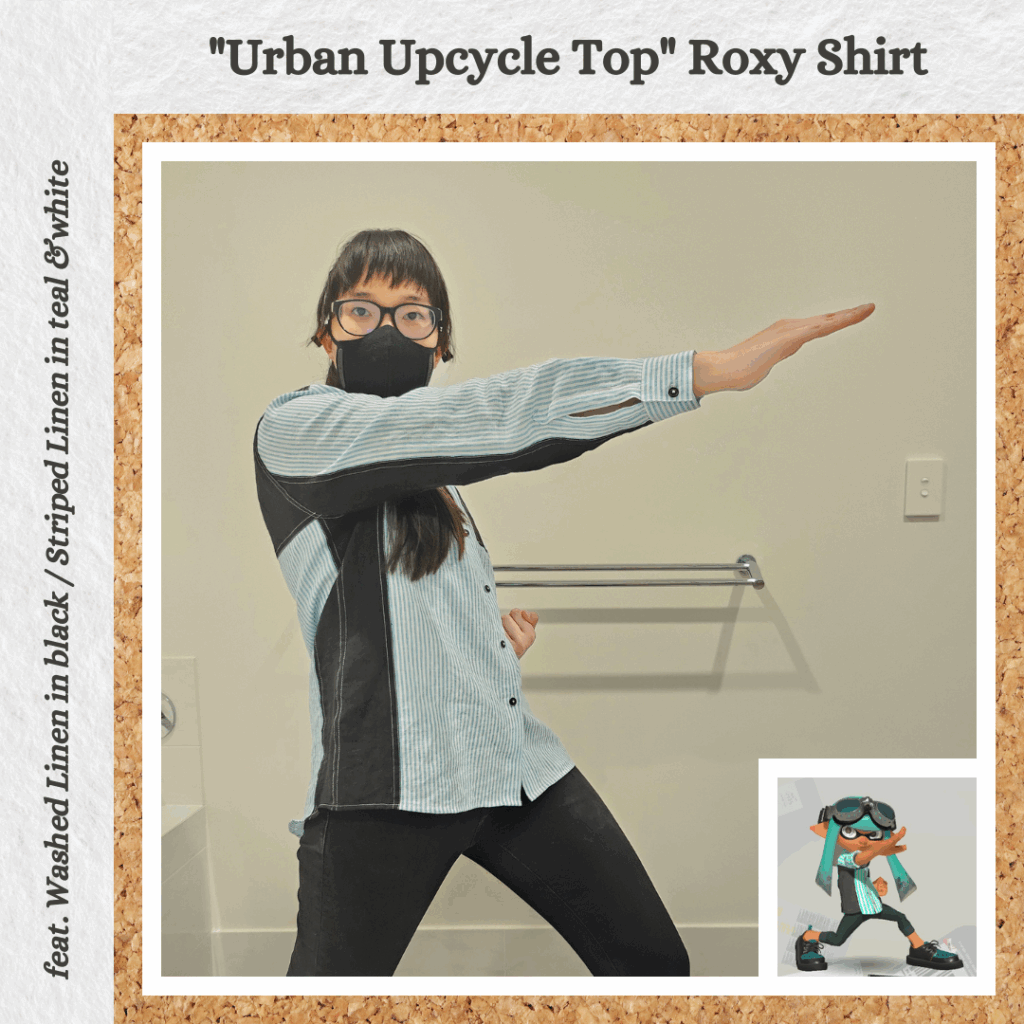
So before I decided to completely replace my work wardrobe, I had planned to make all the Barazushi shirts from Splatoon 3 for fun. Cos I didn’t have that many sewing projects, lol how that has changed. Basically starting to plan all my Splatoon bootlegs got me interested in sewing clothes again 😅
I wanted natural fabrics so did a search for teal and white striped cotton or linen. I found a narrow stripe on MaaiDesign (my introduction to the store) and they also had a black washed linen so I thought that should be a decent texture match. I also kinda liked that the stripes were so thin because fat stripes remind me of pajamas…
Pattern Adjustments
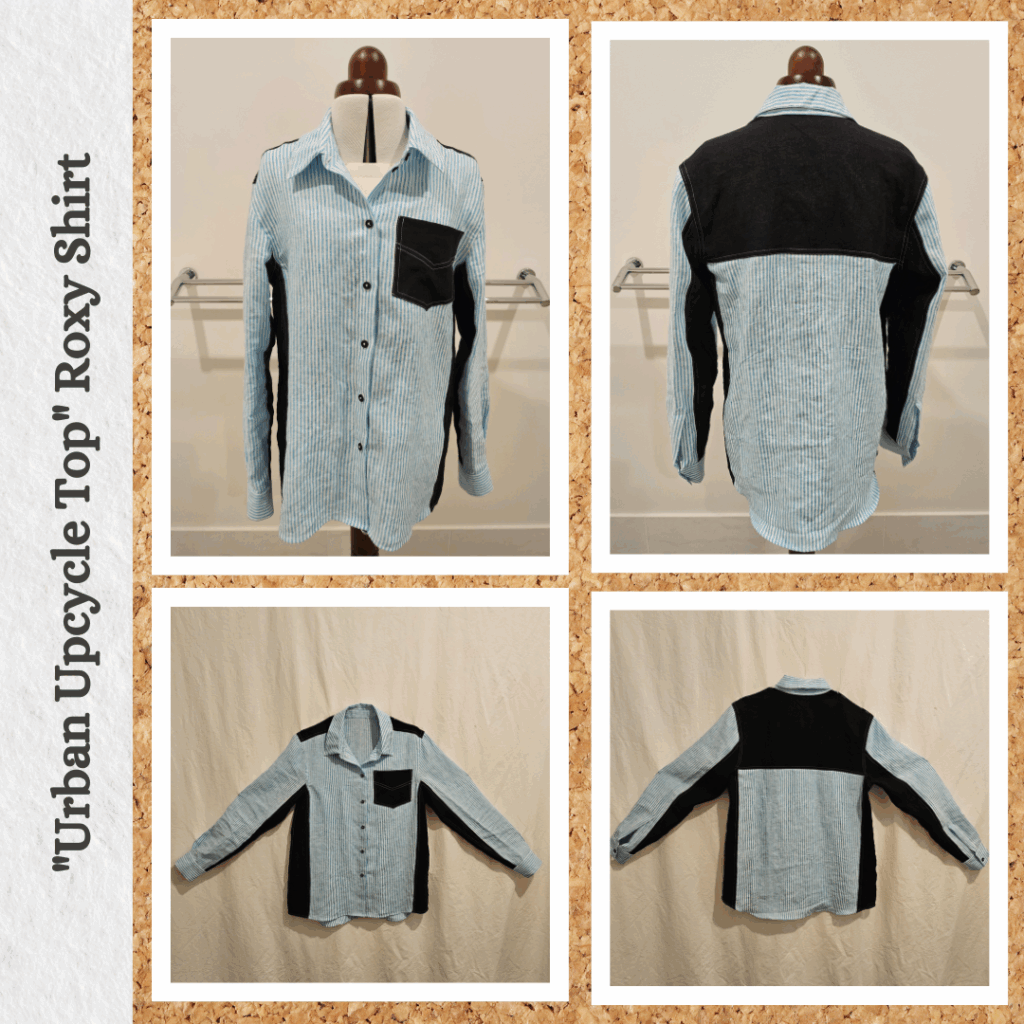
I chose the Roxy Woven Shirt because I wanted to try make this without the back split. So made quite a few changes:
- Removed the bust dart. I’ve been reading about small bust adjustments but given the dart is pretty small, I decided to forgo the calculations and just completely remove it
- Joined upper and lower back into a continuous piece (no lower back split)
- And then split it higher up for a yoke
- Adjusted pocket placement
- Used the sleeve placket from the Kalle shirt
- Adjusted side and shoulder seams for flat-felling
- Split body and sleeves for contrast panels
Deviations from Source
Barazushi’s ‘thing’ is splicing two completely separate garments into one which isn’t very practical so I made this contrast panels instead. Other changes:
- Made it long sleeve so it’s more likely that I will wear it
- Made back yoke black instead of checkered grey, wanted to keep the colour theme to three colours
- Made the collar band same as the main body instead of black
I bought the fabric and buttons quite a while back and had decided at that point to not include the roll-up sleeve tab. I changed my mind during planning until I counted my buttons and was forced to return to the original plan 🤣 But now I remember why I thought this way and I agree with it: if I wear this shirt it will be as an under layer (I have a bit of an aversion to stripes lol, don’t ask me why I’m making this if that is the case, it’s for fun ok!) so I’ll theoretically never need to roll the sleeves up.
Materials
- Pattern
- Roxy Woven Shirt (Style Arc)
- Fabric
- Washed Linen – Black (MaaiDesign)
- Stripe Linen – Turquoise (MaaiDesign)
- Buttons
- Cotton Buttons 11m – Sweeps Scrim (Miss Maude)
- Interfacing
- Fine Light Iron-on (Homecraft Textiles)
I also completed the Shirt-making Course on Closet Core before tackling this project. I bought a bunch of new tools in preparation for this and future shirt making:
- Clover 18mm Rotary Cutter
- Judi’s Studio Point Presser/Clapper
- Gingher Applique Scissors
- Aleene’s Stop Fraying Glue
- Clover Buttonhole Cutter
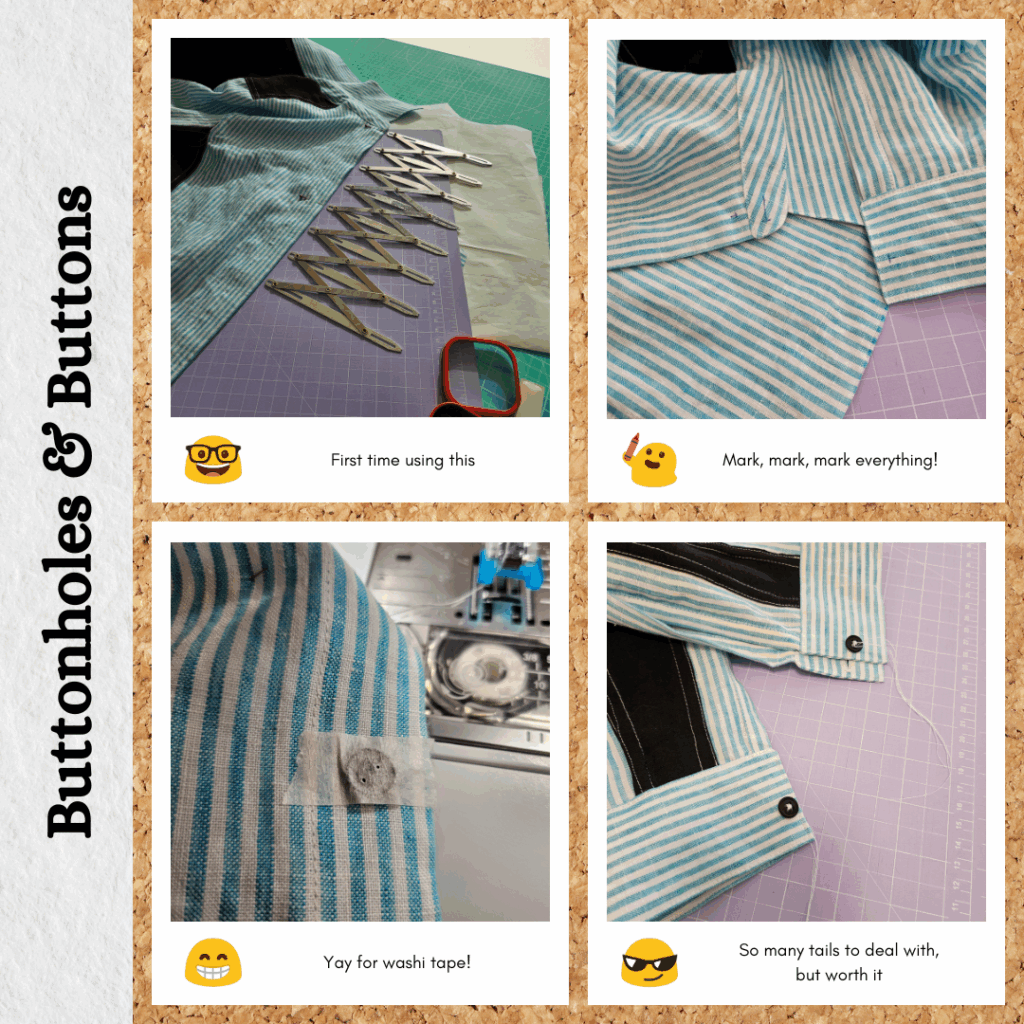
- Simflex Expanding Gauge
Sustainability Check
My specific aim for this shirt was to make it sustainable so let’s see how I went!
👍 Both fabrics are 100% linen so fully biodegradable
👍 The buttons are cotton so I assume they are also biodegradable
🤏 Rasant thread is OEKO-TEX® certified but not biodegradable
👎 Interfacing is 100% polyester. This prompted me to look for alternatives and it seems 100% cotton interfacing does exist. But first I need to get through my current stash (since I have it I should use it, not throw it since that would be wasteful)
Construction
Panels
This was my first time cutting out fabric with a rotary cutter. I started to get the hang of it towards the end 😅 Not that happy with the 18mm Clover rotary cutter though….it squeaks! I bought Clover because their other stuff is usually pretty high quality but I did some research and it sounds like I should have gone with Olfa instead, oh well.
Instead of drafting separate pattern pieces for the panels, I instead sewed a block of fabric then cut it to the pattern pieces. Kinda easier this way except for the part where I was rationing my contrast fabric lol.
I learnt my lesson from the Business Animal Safari Sam Shirt so kept the top-stitching white for the entire project.
And I have duckbill scissors now which make it so much faster to grade my flat-felled seams 😊 Gingher quality is amazing, it’s that whole ‘cutting through butter’ feeling 😳

Yoke and Body
I often turn the front band outwards and do topstitching as a feature aspect but since the stripes makes it look quite busy I folded it inwards instead.
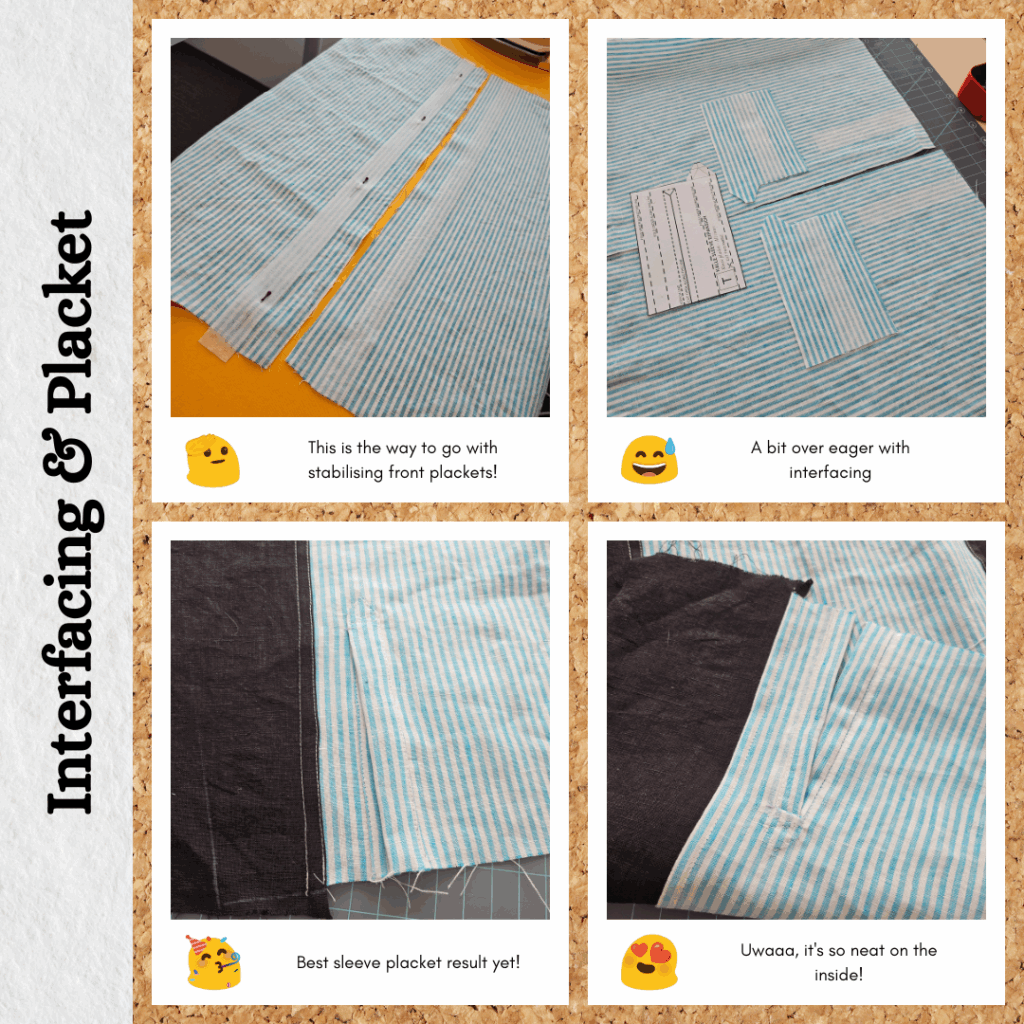
I also used the interfacing method suggested by the Shirt-making Course. It makes a difference and I like that is not that thick.
I also figured out the needle position settings required to match the yoke top-stitching to the flat-felled seams 😁 This will come in handy for later projects (except that it’s been so long since I took the photos I don’t remember what’s what lol. Well, perhaps still good reference on a starting point for next time).
Sleeve
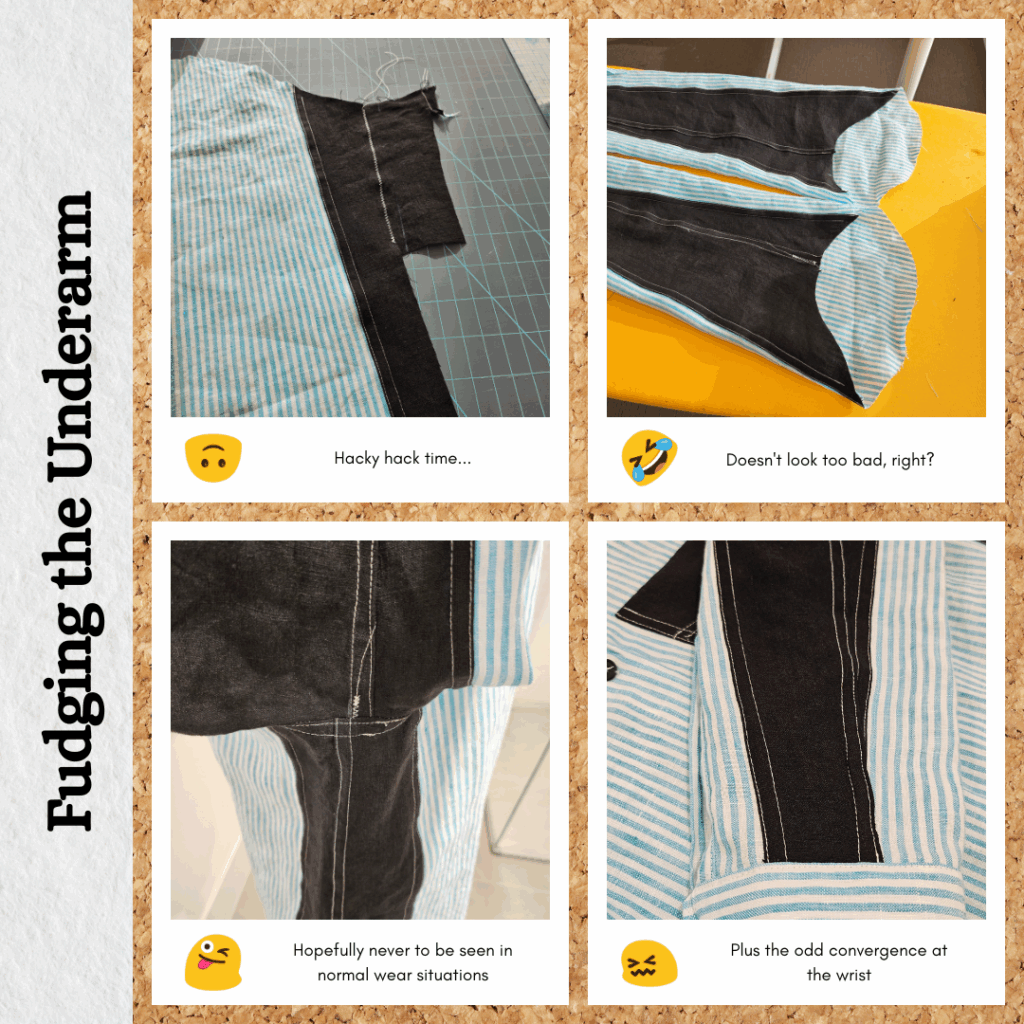
The panels for the sleeves were very awkward. I matched it to the sides of the body, but that resulted in the sleeve panels kinda converging weirdly on the sleeve seam. Oh and my fabric rationing? I misjudged and saved fabric when I didn’t need to anymore and messed up by under allocating, whoooops. So one sleeve is very hacky at the underarm 😅
I printed out the Kalle shirt placket to apply to the project and because I could then follow along with the Shirt-making Course instructions. This was definitely my neatest placket so far 😯 I also like that is a very slim placket. I think I realise now why the inside of my previous plackets weren’t all nice and neat. By splitting the piece into two pieces to follow the other tutorial, I made it trickier to ensure everything on the inside lined up.
I interfaced the placket as recommended by the Shirt-making Course but I also interfaced the slit on the sleeve itself and that was a mistake 😅 It makes the placket seams bulkier and shows up (even though it’s on the inside). Luckily I was able to lift and kinda tear away most of it.
So definitely need to make a cardboard template of the placket piece to use as a pressing guide. Pre-pressing everything simplifies the entire process for sure. And for finishing, I whipstitched the seams down then topstitched and I am very happy with the results. It does take more time but being confident I will catch the entire edge makes the whole experience much more enjoyable. I did think though, if I wanted to be super lazy, I could use water soluble thread for the whipstitching so I don’t need to remove the stitching later 🤣
I definitely need to practice more with the burrito method on the cuffs. I think my issue is with the rolling of the sleeve. I think I either overroll it or don’t position the rolled part in an ideal location so parts get caught. I’m not too worried though, I just need to practice this lots until it clicks.
Collar
So Closet Core recommended trimming 1/8 inch from the under collar which made sense in theory but turned out terribly in practice. So I ended up ironing it down and trimming along the collar band edge ☹️ Which I didn’t check to make sure it was even and so one collar is longer than the other by about 3mm lol. But their improvement on the thread-pulling corner turn out was perfect! Amazing! I’m so impressed 🤣 The stay-stitching plus clipping was also nice.
The burrito method worked really well on one collar band side (maybe from practising on the cuffs) but the other side there was part of the shirt front that wasn’t captured? Don’t know that happened…I ended up making a mess trying to fudge-fix it with a zig zag stitch but ended up unpicking it all and interfacing it for stability and sewing it all over again. It turned out ok but this is why trimming seams when sewing is scary LOL


Body and Buttons
Ah, something familiar lol. Sewing the side seams and attaching sleeves was business as usual. This time though I topstitched from the right side to make sure it looked nice and even.
Then, a break before tackling the buttons 😅 Although it was actually really straight forward. Being confident makes such a difference. And marking out everything with the Frixion pen aided with that. The fabric being stripey helped with aligning my buttonholes so they were straight the first time round, no unpicking required lol. And I might have a formula for getting an appropriately sized buttonhole from my automatic buttonhole foot:
- Place button in foot and close until snug
- Undo two clicks to remove button
- Redo two click in plus two more for a smaller buttonhole
The anti-fray glue was simple to use (why wouldn’t it be haha) but also dried pretty fast. It dried in the time it took me to look up how to install the button foot…(I felt like I understood what was meant to happen but didn’t know how to actually get it to snap on…) and do a test button. Using the chisel was also easy and strangely satisfying. I had to be very careful though because my buttonhole was almost too small.
I’ve never used the button foot before, but figured I should give it a go. I didn’t like snipping the threads from the top because it looked bad so left long tails to manually thread through to the back. And I used washi tape to keep it in place before I got one set of holes sewn. If I pressed down on the washi tape enough I could see the button locations. But this was a bit hit and miss so I realised that I could pre-poke holes in the washi tape as a guide haha. Overall, I think I’m a convert to machine sewn buttons. I don’t think it’s any faster so it really comes down to:
- Do I prefer fiddling with washi tape to position the button or precariously gripping it and the fabric at the same time in my left hand?
- Do I prefer positioning the button under my sewing foot to ensure the needle goes through the holes or trying to guess where the holes are from beneath the fabric and inadvertently pricking myself multiple times in the process?
- Do I prefer thread loose ends from the top to the back and tying off with manual knots or running my handsewing thread through the thread glide and finishing knots handsewing style (this is probably the part of handsewing I hate the most. I hate taking a ‘little bite’ of the fabric to anchor the knot, I think it’s ugly and hard to unpick)
Also, I aligned the front buttons in the centre of the buttonhole despite what I ‘discovered’ last shirt time. The Shirt-making Course did it centred and honestly that makes more sense to me.
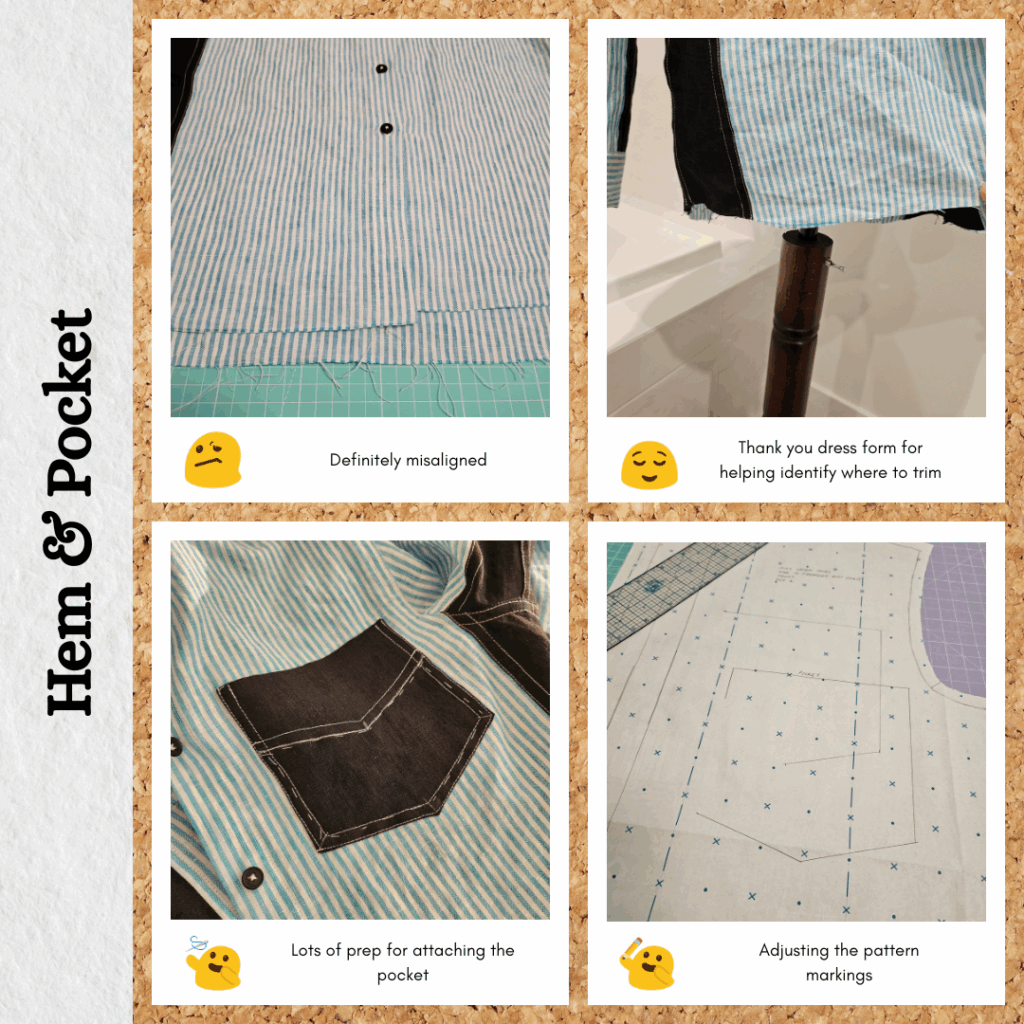
I’m glad I didn’t do the hem first because once buttoned up, it was very misaligned. I got to use my dress form for actual sewing for the first time 😝 The fabric was too shifty when trying to place it flat on my work table but putting it on the dress form helped me figure out where I needed to trim. I used 5mm hem allowance, I think this is the ideal hem width. I also whipstitched the hem before topstitching. And forgot that if there is a curve the ditch foot isn’t good for topstitching 😅
And I almost forgot to include the pocket! I remember last Barazushi shirt I was unhappy with the inner pocket folds being raw so I pre-pressed all the edges 5mm before sewing the 1cm guide/seam. And I should have marked the corners earlier, it would have ensured I didn’t overshoot with the outer row of topstitching lol. I also put the shirt on to figure out where I want the pocket. It’s a bit nervewracking shoving in pins from the front while you are wearing the garment 🤣 I then transfered this position to my pattern piece, it actually ended up being quite far off the recommended placement 😳
Reflections
So I managed to ‘duct tape’ a lot of my mistakes but there’s no getting away from the collar length difference LOL Guess that makes this a unbuttoned top button shirt. Maybe if anyone notices I can try and convince them it’s an optical illusion because of the stripes 🙃 But I honestly think I’ll still get use out of this, even buttoned up (like pairing it with a scarf 😝)
The front dart removal seemed to work fine. The back adjustment also is probably fine but I think I’m used to shirts with a back pleat which results in a lot more ease around the hips. I’ll have to wear it a bunch of times to see if I have a preference.
I’d say just as many things went wrong with this as the Business Animal Shirt LOL. But the difference this time is that I knew I was learning a bunch of things I hadn’t tried before so it didn’t feel that unexpected when things went wrong. I also had a better idea on how to deal with the contrast panels. Which is worthless knowledge now because I think I’m done with contrast panels haha!
Regarding the Shirt-making Course, it was very uplifting to realise I was on the right track with a lot of the changes I had started making based on my googling. It was like the approach was the same but I learnt a lot of ways to achieve the goal more easily. Which was awesome. One thing I didn’t need this time though was the clapper. I guess linen just presses so easily it wasn’t required. But I do wish I had a tailor’s ham (it’s currently in transit).
Lastly the actual design with the stark black panels against the vertical stripes isn’t very good LOL. Black and vertical stripes are slimming right? And since I’m already slim it makes me look like a twig haha.
Things I learnt:
- Interface the middle of the front placket (only) for stability without bulk
- Pre-press the entire sleeve placket before installing. No need to interface the sleeve itself.
- Make a cardboard template to aid with pressing the sleeve placket
- How to use a button sewing foot
- Improved sharp collar points method
- Cotton buttons are awesome
I’m pretty motivated to make more shirts now, so I’d say this project is a success despite the amount of fudging that went on 😝
Categories: Sewing
1 reply ›