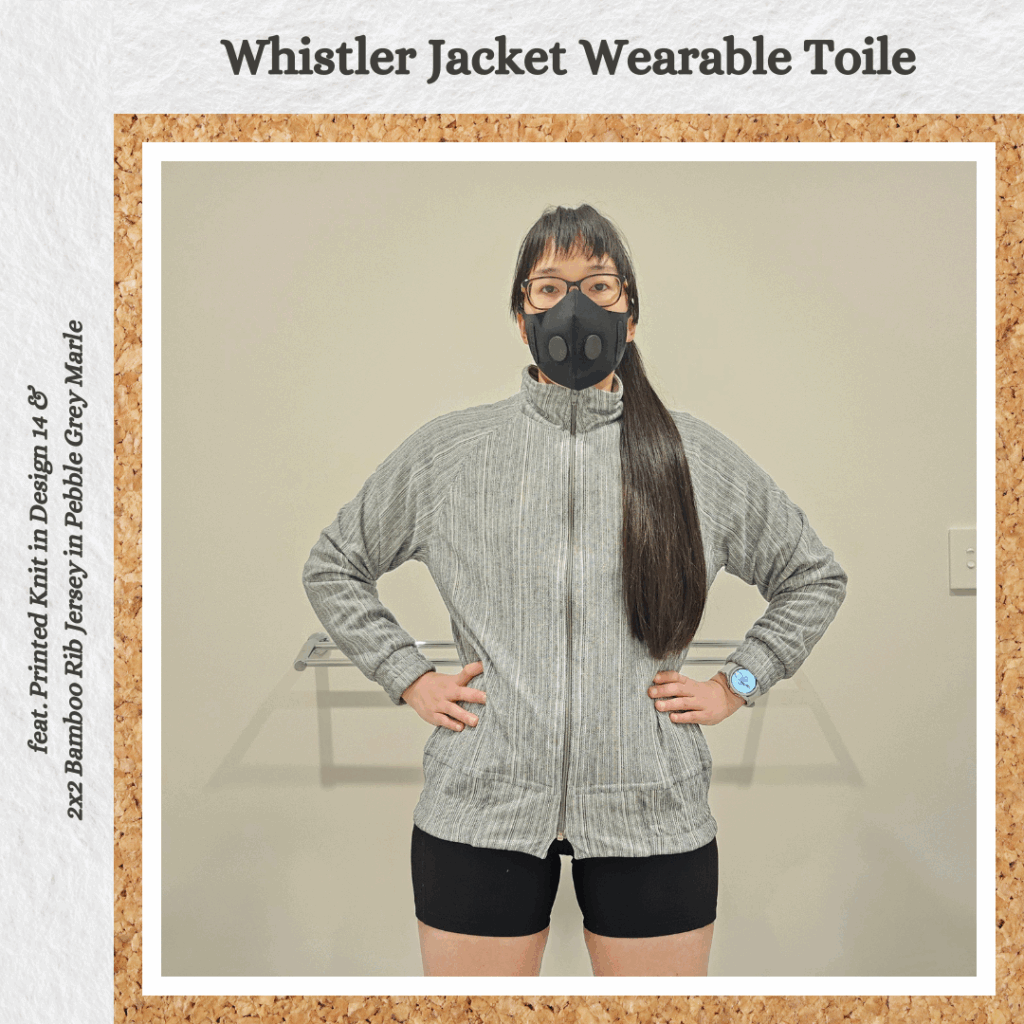
Planning and Design
This is a wearable toile for an upcoming project. Also a way to use up some knit fabrics I bought but weren’t suitable for what I had in mind:
- One from Homecraft Textiles. Their knit section covers all sorts of knits and I didn’t realise this one was sheer and that the texture would be so rough. Was planning on making a knit blouse.
- Bamboo ribbing from The Remnant Warehouse. Super deluxely soft…to the point where it drapes too much and requires a lining. Probably only suitable for loungewear/pajamas. Also quite heavy.
I wanted to modify the Whistler Jacket to be lined, as well as have elasticised hem band and cuffs. This required a big departure from the instructions/order of construction so this toile was a must.
Materials
- Pattern
- Whistler Jacket (Greenstyles)
- Fabric
- Printed Knit – Design 14 (Homecraft Textiles)
- 2×2 Bamboo Rib Jersey – Pebble Grey Marle (The Remnant Warehouse)
- Scrap Cotton Sheeting – White (Homecraft Textiles)
- Notions
- YKK Nylon Open-end Zip No 5 col. 577
- Knitted Elastic 5mm – White
- Rasant Thread col. 0189
Sustainability Check
👍 Bamboo jersey is, well, bamboo. With some elastane. I’m not sure on the exact percentages but I imagine it would be 5% or less which makes it biodegradable
👍 Cotton sheeting for interlining is biodegradable too
🤏 Rasant is OEKO-TEX but not biodegradable
👎 Knit fabric is 100% polycotton so not biodegradable
👎 Zip is plastic and zipper tape is also plastic. I also cut some of the tape so unlikely to be able to repurpose this if I took the jacket apart. I found out though that YKK are doing a more sustainable zipper than uses recycled polyestee but I’m assuming this isn’t available for home sewists yet.
👎 Elastane is not biodegradable. This got me curious if there is a sustainable alternative and I found out about ROICA™ V550. Sounds like it’s currently an input into fabrics and not available at retail level, but it’s heartening to know there’s something on the horizon!
Construction
Preparation
It’s really nice having lots of washers to use as paper weights. Probably going overboard but why not haha.
I’m never really sure what settings to use when sewing with knits… I decided to use a walking foot, jersey needle and 3 length stitch.
It was tricky to tell front/back with the bamboo jersey so used my Clover Wonder pins to mark the right side. This was good because when I use normal pins they just end up falling out 😅
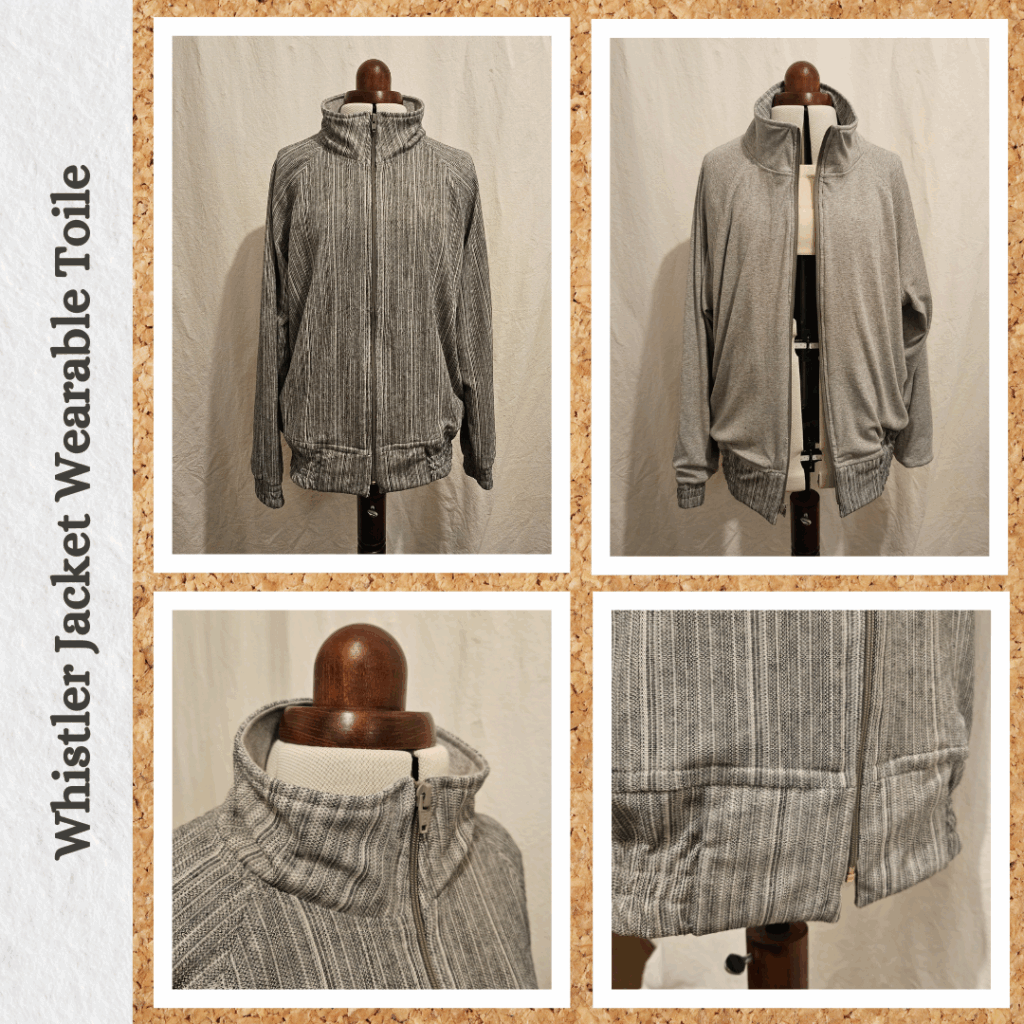
I also used leftover cotton sheeting from the Stacie toile as interlining instead of using interfacing because of the gaps in the knit. I figured it shouldn’t need any stiffness added due to the shape of the collar when fully zipped up.

Waistband and Cuffs
For the waistband I decided to add hem band panels to be similar to the Miele Bomber Jacket, since I wanted to follow that method for lining the jacket. Luckily using the hem band as is and tacking on square band panels made it the perfect length for attaching to the body of the jacket.
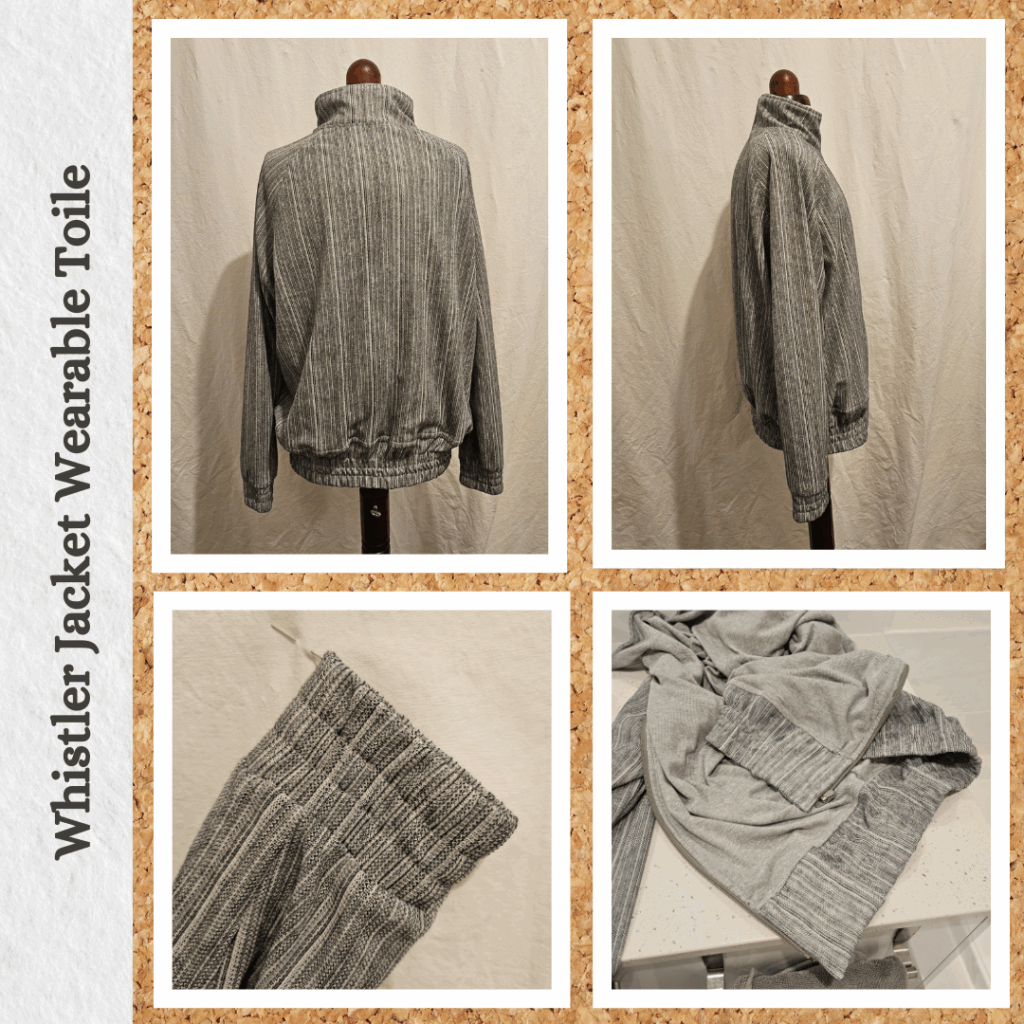
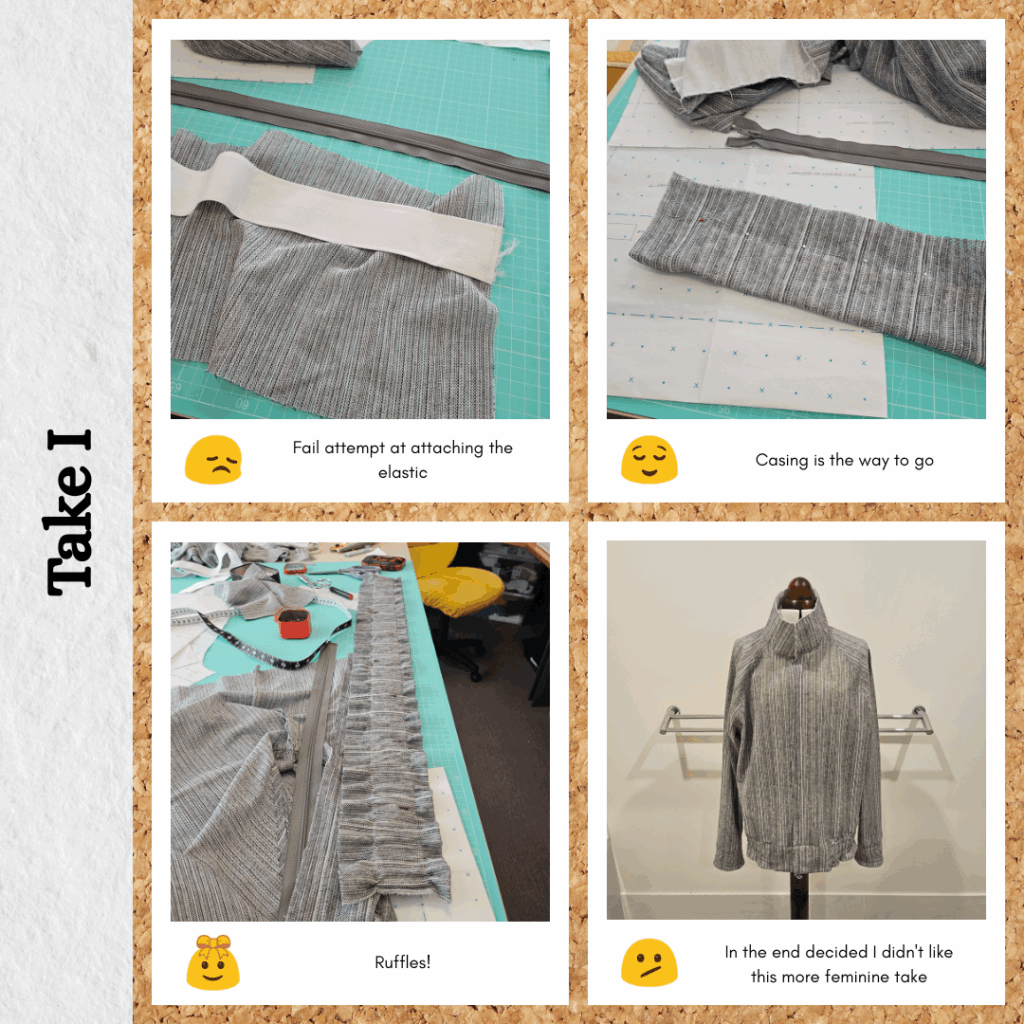
When I got to the point of adding the elastic, I realised that 50mm probably isn’t wide enough for the look I’m going for and definitely not the right width to fill the hem band. So I tried creating a casing for for the elastic since I needed the total length as is to use the zip I had bought. It ended up giving a ruffled appearance which I thought was ok, but after leaving it for a week I decided I didn’t like it and redid it so the casing was at the very bottom. So it’s kind of more like the top part of the hem band is an extension of the body haha. I guess this way I got lots of practice on top-stiching elastic. Especially since I wasn’t happy with the elastic length on the sleeve (wasn’t gathered enough) and redid that too. I also extended the pattern piece for the sleeve cuff fabric since the elasticity comes from the actual elastic itself.
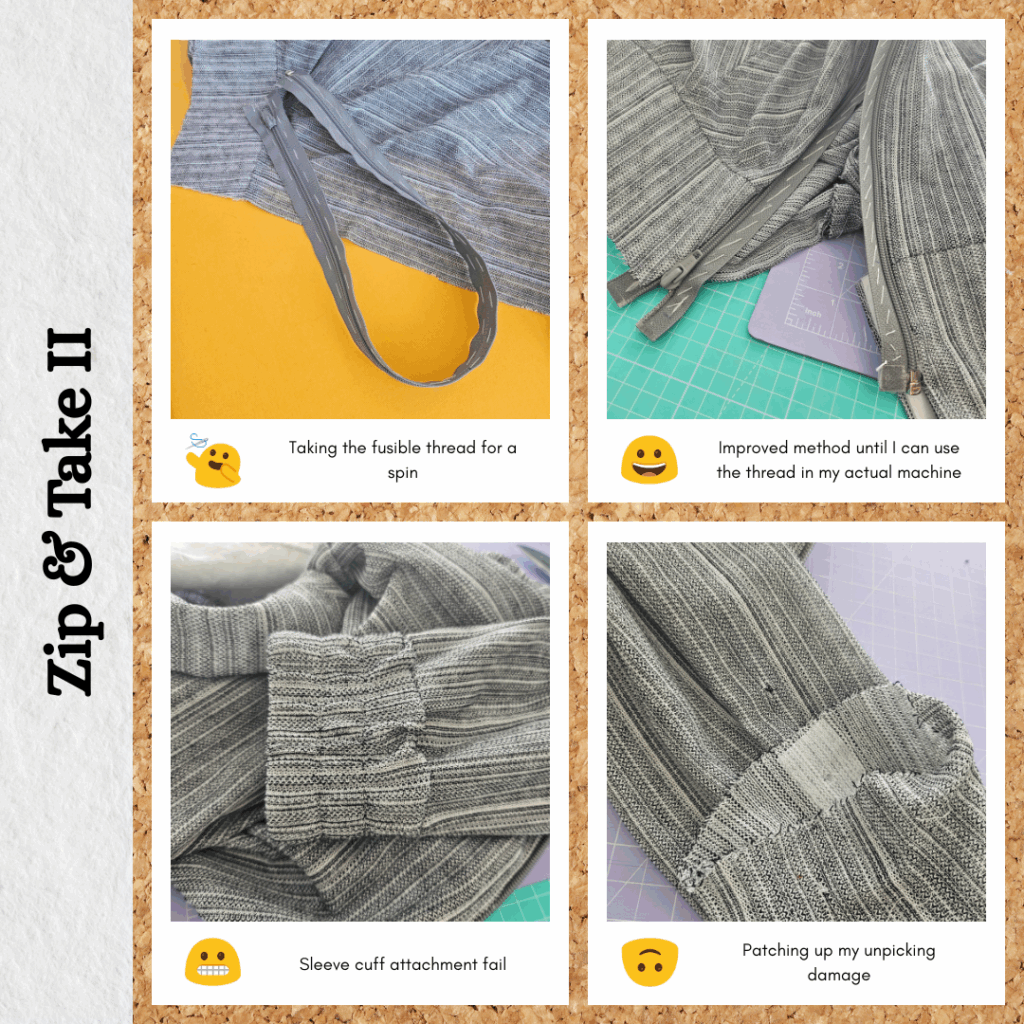
So all the re-doing ended up damaging the fabric. But even parts that weren’t redone had somehow gotten snagged 🙁 I guess it would have been an inevitability anyway since I have cats. So I’ve learnt that I very much do not like this type of knit. In these cases it was fusible interfacing to the rescue. Noticeable but only if you look closely.
Attaching the Zip
I still haven’t managed to fill a bobbin with the fusible thread (haven’t bought a thread stand) but really wanted to test it with applying a zipper, so hand stitched it down. Hand stitching fusible thread is PAIN. Can’t wait to be able to just use my machine 😣 It worked pretty well given there was very little fusible thread coverage. It did make sewing the zip itself so much easier. I stuffed up putting the second zipper tape on (didn’t match the hem band and collar very well) but it was simple to remove the zipper, re-stitch the fusible thread (I did a different stitch to increase surface area) and re-place for testing. It’s nice that I can put the jacket on without sewing the zip down. I do need to look up how to make the top of the neckband/zipper look more uniform. Probably hyper-focusing on something that is good enough, but it bothers me and I do need to generally get better and more confident at attaching zips.
I did end up sacrificing one needle to the needle gods. I thought I was well clear of the metal stopper but I was not 🙃 Adding another habit I need to learn – ALWAYS handwheel turn when approaching metal parts, just in case.
Attaching the Lining
Thanks to the Miele Bomber I had a pretty good idea of how to attach the lining. I also updated my written instructions for this so happy about that. Some things I would do differently are do some guide stitching at the front corners to help with hand sewing these parts together after everything is turned right way out.
Reflections
I’m glad I took the effort to redo the parts I wasn’t sold on, even if that meant damaging the fabric. I don’t think this would be a problem with most other fabrics though (the damaging part). It was very good practice for a jacket I want to get right. And it made me realise I need to make a couple of alternations to the pattern before doing the real thing:
- Adjust pattern pieces to match the elastic width I end up going with. I’m thinking 100mm for the waistband and 70mm for the cuffs.
- Shorten the jacket body. I want the waistband higher up, the way it is right now it super stretches over the widest part of my hip and it’s not comfortable and doesn’t look good.
Things I learnt:
- How to use fusible thread to attach zips before sewing.
- How to convert waistbands/cuffs to top-stitched elasticised bands
- I don’t like loose knits where the loops can easily snag
- Always handturn the needle wheel when sewing near metal zip parts
Categories: Sewing
Leave a Reply