This post has been written over almost the course of a whole year so it’s probably very disjointed hahahaaha. Also doesn’t have subheadings or a sustainability check because this pre-dates me doing those things.
Planning and Design
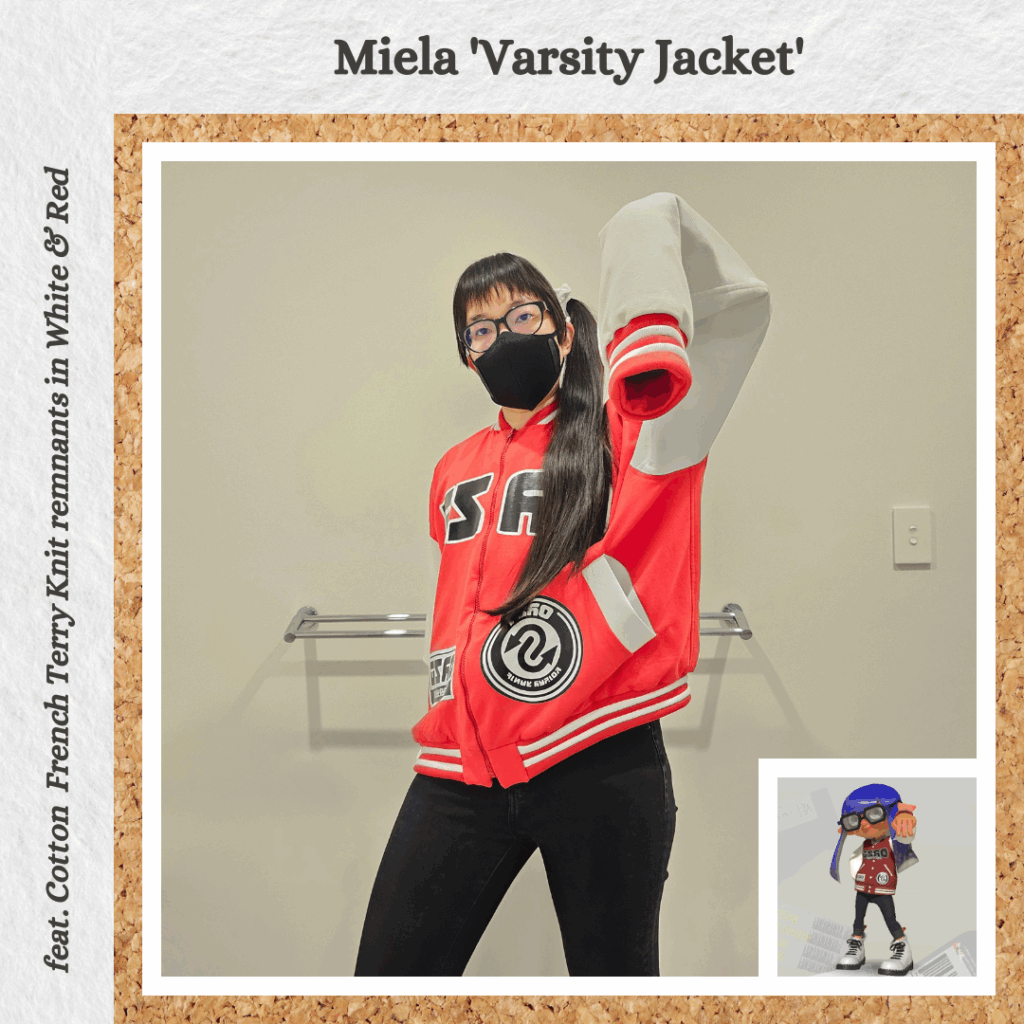
This project was partly practice for the eventual (?) Chompers Varsity Jacket and partly an excuse to use puff HTV since I had leftover red knit fabric from the Nin-Gojira Hoodie. I also had white knit fabric which I had bought intending to use for the Half Sleeve Sweater but (luckily for me?) Homecraft Textiles were out of stock of the black knit I needed and in the meantime I found some cooler fabric to use for that project instead LOL.
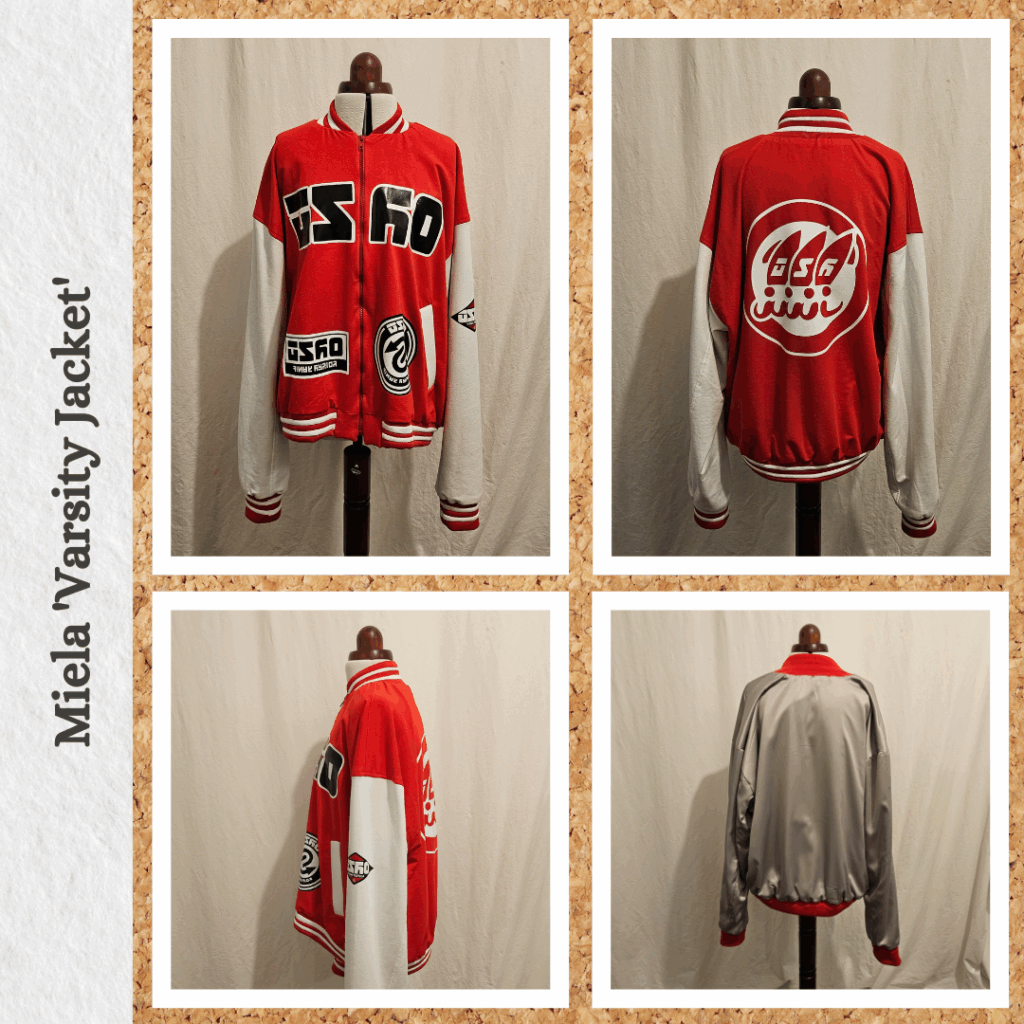
I was intending to use some white satin I had from back in the Splatoon 2 days when I had grand ambitions to make the Zapfish and Squid Satin Jackets. While I did make a start on the Zapfish one I ultimately never got that far on it and never started the Squid one (which is where the white fabric is from…where did the teal fabric end up I’m not sure hahahahaha). But turns out I vastly underestimated how much fabric is needed for lining (definitely more than 1 m) and ended up using some grey satin I have in my stash. Literally in the ‘this fabric is cool but I have no idea what I can use it for’ box. The shade of grey honestly doesn’t complement my skin tone at all but I love the soft feel of it so have hung onto it for a long time. And the previous owner also hung onto it for a long time – I received it from a friend of my mum who invited me to help myself to her mother’s fabric stash when she passed away 🙁 Because it had been stored in her mother’s garage for who knows how long, it definitely needed a clean so had to put it through the washing machine on a short cycle after re-unearthing it from my own box. But I kinda like the thought of being connected with this lady I never knew through our joint love of fabric and sewing ❤
I was super wishy washy on the HTV aspects. Started off by deciding to be minimalistic and just do the main logo and the back design. This was almost a requirement to stop me procrastinating because the thought of designing and testing and applying all that HTV was causing a motivational road block. But once I started designing the two parts I had short listed, I started having fun and did the other two front designs as well 🤣 And the sleeve part was a last minute addition, figured since I’m going 4/5 of the way why not just do all of it 🙃 I was pretty much past design phase at this point, cutting out the HTV on the Silhouette when I decided to tack on one more. Helps that I was familiar with the Zekko logo from my Splatoon 1 Booyah Base Bootlegs and had leftover red HTV to use.
Materials
- Pattern
- Miela Unisex Bomber Jacket (PatternCos)
- Fabric
- Cotton French Terry Knit Remnants – Red (Homecraft Textiles)
- Cotton French Terry Knit Remnants – White (Homecraft Textiles)
- Grey Satin (Stash)
- Ribbing Remnants – Red (Quick Response Fabrics)
- Ribbing Remnants – White (Homecraft Textiles)
- Notions
- Gutermann Maraflex col. 800
- Sullivans Zip Open End – Red
- Rasant col. X2000
- HTV
- Siser/Thermoflex Plus – White
- Siser/Thermoflex Plus – Black
- Siser – Red
Construction
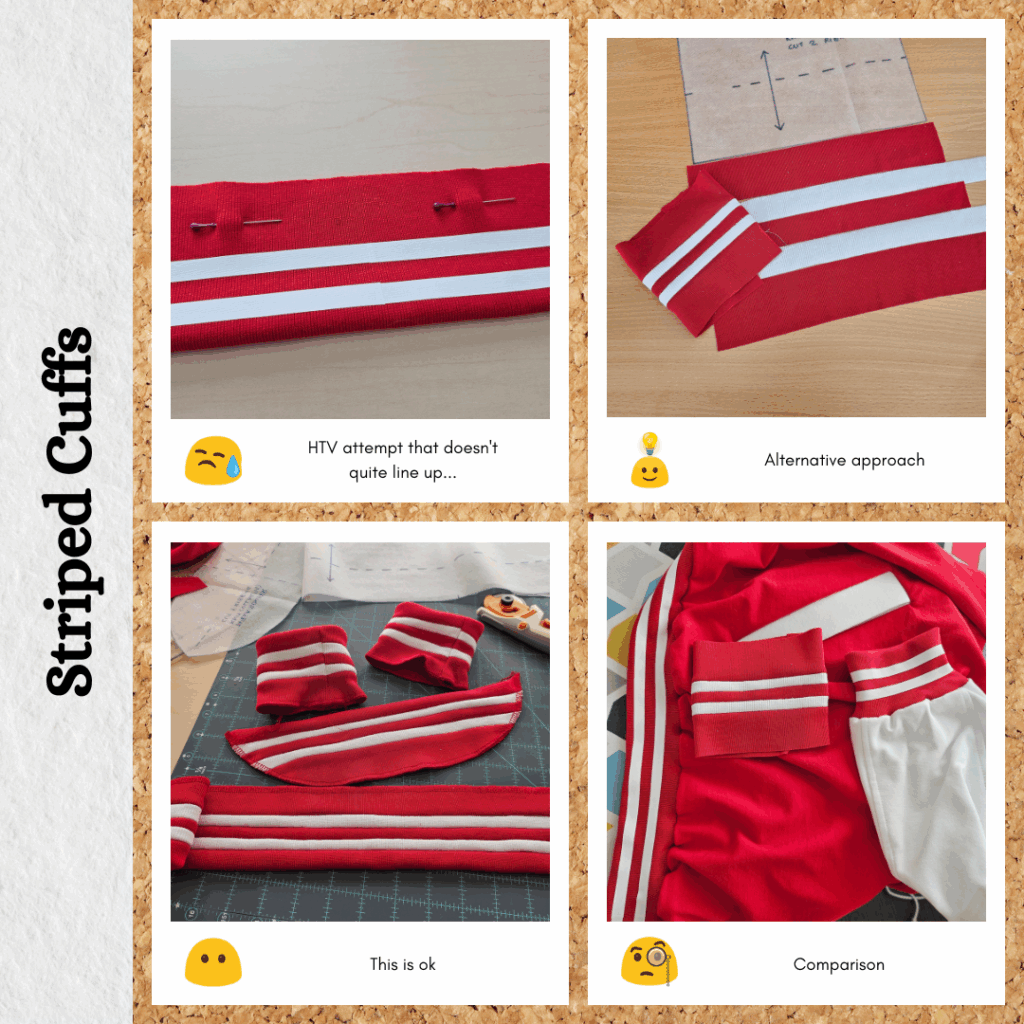
It was sooo hard finding striped ribbed fabric in the colours and stripe pattern I wanted 😣 So I decided to try making my own. I decided to try using stretch HTV by cutting strips and applying it to the ribbing. I did some research to see if I could hand cut HTV since my sheet was longer than my Silhouette cutting mat and found this tutorial that confirmed it was a thing that can be done. The craft knife was great for about 10 cuts but then it got hard to gauge how much pressure to use. However I was impressed by what a light touch is required to cut just through the HTV and not carrier sheet with a fresh blade. My sheet also wasn’t long enough for the waistband ribbing so tried to join it up but can’t say I was that happy with the result.
At the same time, I also applied the Zekko Logo HTV on the sleeve in place of the pocket that the pattern includes.
Then I moved onto what I thought would be the hardest part of the project, the welt pockets. I think I did it all right but in turning the pieces to the inside, might have stretched the knit fabric in those corner points which caused issues when sewing the inner pocket seams. Also next time I think I’ll only interface the front, not welt pieces. And sew along the hera knife markings I used to transfer the positions of the pocket, to reinforce the pocket opening. I think I understand how these pockets work now though and how to make the two tone/piece pocket openings instead of one wide welt (future me has done quite a few more of these and has an even better understanding of how they are constructed).
The jacket body and sleeves were pretty standard to put together. Although I did learn that what I thought was a flat-felled seam is not a flat-felled seam at all 🤣 This tutorial set me right. I think it’s unnecessary for this project since it’s fully lined, but I definitely want to try it on button up shirts (future me has done this)!
I didn’t adjust ribbing lengths and just kinda winged it. Honestly I was curious to see how things would look super ‘scrunched’. Also I realised as I was assembling the ribbing to the front bottom, the front bottom was against the grain the wrong way LOL. But at this point I was in ‘whatever! let’s just sew this’ mode so did nothing about it haha.
Instructions said 50-55cm zip and I went with the lower end. In hindsight the size I chose was actually the 3rd largest so I should have gone with 55 cm. But in any case, after assembling the front with the front bottom pieces, I actually want the zip to go all the way from top to bottom (not stop partway from the bottom edge like the pattern suggests), so bought a new 60cm zip.
And then after getting to the point that I could add the zip, I decided I didn’t like the HTV stripes on the ribbing ☹️ It definitely stretches when you stretch the ribbing, but once you release the pressure it goes back to normal. Which is great! That’s what stretch HTV should do. But it’s not want I want on my cuffs, hem and neckband. So what now…well in the time I was waiting for my replacement zip, I did some research on making your own ribbing. I was wondering if I could potentially even weave/knit my own (pretty extreme measure) and during my googling, found a really cool tutorial on making your own ribs using pintucks on jersey! I have plain white and red jersey in my stash so could definitely do this. Buuuut once I decided to actually try it, I realised: one, I don’t have a pintuck sewing foot (I thought I might in my random stash of sewing feet) and two, manually (or even via a pintuck foot), doing multiple pintucks across multiple stripes sewn together, was probably not going to work well… Back to square one 😭 Ideally it would be great if I could just join ribbing stripes but that wasn’t an option because I need to use a zig zag stitch to retain the ability to stretch and that wasn’t something I wanted to do for such narrow stripes….BUT WAIT A MINUTE! In the time between me originally mentally planning out this project and many weeks/months later, I had actually discovered the existance of Gutermann Maraflex for a different project, and had already bought some in preparation for that project, including in white. So I stole some for this project and it worked decently 😁 There were skipped stitches which is something I need to investigate for future projects (future me – it’s probably the needle I used) but not the extent that would affect this project. Much happier with this result 😊 I was a bit worried about lining up the ribs between the colours but then realised they are from different sources and are different widths so it didn’t matter haha.
As part of the ribbing replacement, I made the waist band longer since I could and I knew from the previous one that the pattern length was very tight with the ribbing I’m using. But I kept the cuffs the same as the pattern and the neckband too.
Then it was zip time and gosh even after all these years of sewing I still suck at inserting zips. But since I knew this I took my time and was prepared to do lots of unpicking and resewing. I got a longer zip intending to shorten it as required but damn is that annoying. I honestly think adjusting the pattern to match the zip would be easier 😅 Provided you do it from the start that is, not an option for me now. I only ended up sacrificing one needle to the zipper gods which isn’t too bad imo. Also I don’t recall ever making a placket for a zipped up jacket (I’m pretty sure I’m wrong here and have done it, just don’t remember at all) so I (re)learnt that too. The front bottom non-ribbed squares were tough to deal with though 😣 Would have been better without interfacing.
When it came to attaching the neckband, I had issues getting the ‘end’ end to match up with the relevant front piece. I realised I needed to sew the end first unstretched, then stretch the middle part as required. This is my first time doing this kinda collar.
Surprisingly I didn’t have too many issues attaching the lining. I did get stuck on the sleeve part, although I knew I had done the same thing before for the Beatrice Peacoat and don’t recall it being hard. I rewatched the tutorial video multiple times but couldn’t figure out where I was going wrong. So went looking for a tutorial and was saved by this one (that I didn’t save the link to whups). The pinning step and the specific mention of pulling it inside out via the bottom opening made everything make sense. I did have to fudge things a bit though with handstitching once everything was right side out, I think interfacing is not necessary when using a sweater knit as I found it very awkward to work with especially around the bottom front tabs and the placket.
It took a very long time to get to the point and now we get to the scary bit 🤣 I have a fully complete and functional varsity jacket and now I am going to attempt to apply HTV 😱 There are no second chances here. No pressure lol.
This was particularly nerve wracking because I did some test applications with the puff and they did not turn out well… So I did some research and realised it might be because of the pressure rather than the temperature. I always use max pressure because why not? I like it when HTV gets forced into the grain of the fabric. So now to figure out what ‘firm’ pressure on my heat press is.
Annnnd, back to the drawing board on this one. I tested with a range of temperatures and pressures and ended up where I started, and it worked! So I did another test with the same settings, and it didn’t work! So I did a bit more research and learnt that puff HTV is very fussy and found this helpful video, which also suggested making sure you didn’t have any seams in your pressing area in order to maximise even pressure. So I think this isn’t going to work out.

Coincidentally, a friend gifted me a punch needle kit for my birthday just a little while ago. I guess other than just wanting to try puff HTV, I also wanted a soft fluffy look to the designs, hence the puff route. But punch needle embroidery could also give that appearance 🤔 Thus! This project gets put on hold (November 2024) while I learn how to punch needle embroider!!!
………
Fast forward to March 2025 and I decided not to do the punch needle embroidery because it would take FOREVER. So I decided I would just usual HTV since I have so much black and white from back in the Splatoon 1 bootlegging days. Which are probably well past their shelf life hahahaha. Btw I haven’t found the time to learn how to punch needle embroider yet 🙃 But I do have a more suitable project planned to tackle this haha.
Since I was doing HTV that meant I actually needed to digitise the design nicely (instead of tracing it for embroidery purposes). I learnt quite a bit about bezier curves doing this… I tested out using Krita and a tablet pen but the results were not good. So the process ended up being:
- Trace in Silhouette Studio (from a very low-res image/screenshot)
- Use the simplify tool to remove some of the ‘fuzziness’
- Manually move the nodes and bezier curves to roughly match the original image
………
Then in June 2025 I finally got around to finishing this LOL. Because I like to try and do multiple HTV jobs if I’m going to get out the Silhouette Cameo 3 and heat up the heat press. And thus I run into a problem I was partially expecting. Because of the bulk of the zip/placket and interfaced welted pockets, the heat press plate actually can’t contact the HTV LOL. So I ended up using the iron (and had to google ironing settings for HTV…never thought I’d need to do this again since I own a very expensive heat press ahahaha….). I was expecting the HTV to look a bit burnt since I couldn’t apply even pressure to the designs (too big to fit under my iron in one go) but one thing I didn’t really take into account was that I need to treat HTV like normal vinyl when using an iron. As in, use the scraper tool to press the HTV down before trying to remove it. Which I didn’t on the right design but applied for the left and that side turned out much better. Also, thank goodness for my tailors ham. It really helped me get the iron into the areas very close to the zip/welts. Also, not sure if it was the heat press of my iron, but the zipper melted a bit 😓 Not sure if this is because I didn’t buy YKK (or anything that’s not cheap quality) or y’know, it’s plastic so I shouldn’t expect it to be able to take heat.
At least the back was large enough that I could use the heat press. I did notice when weeding the HTV though, that I can really tell what is Siser and what is Thermoflex. Siser just weeds so much more easily. There were times with the Thermoflex that I was expecting it to be smoother and it resisted and I ended up puckering the carrier sheet 😣 So I just need to be careful when using HTV from my stash. Anything new though will likely be Siser branded though.
Reflections
I tried this on multiple times as I was making it to check things and one thing that became apparent immediately was damn the sleeves are long 🤣 I know I was going an oversized fit but these are next level, like anime style lol. The neckband is also very snug but maybe it’s meant to be like that? I’ve never owned or worn a varsity jacket before.
After finishing sewing the jacket I wasn’t sure how I felt. I thought there were a lot of things that stood out to me in terms of not looking super professional. And obviously, very fail on the HTV side of things. It’s fairly comfy though… And the sleeves are pretty cute and not that impractical since the ribbing cuffs keep them pushed up when need be (i.e. most of the time haha).
Things I learnt:
- Don’t buy patterns without written instructions. I greatly disliked having to keep referring to and navigating through a video. I honestly didn’t even realise that was a thing, to not have any written instructions at all.
- HTV stretch doesn’t make good striped ribbing. But it does stretch well.
- I found an overcast foot while searching my stash for a pintuck one and in conjunction with the Maraflex thread, I’m wondering if I can go without a CoverPro machine for sewing knits 😳 (future me has tested this and decided, no, Maraflex with a zigzag stitch is not a suitable finishing replacement. but I have learnt I could use Rasant instead of overlocking thread).
- Don’t interface sweater knit.
- Reinforce welt openings with machine stitches, especially for stretch fabrics.
- Extend the ribbing for the waistband and potentially the neckband for this particular pattern
- How to sew a curved ribbed neckline
- Apply HTV first, before constructing any of the garment
- If using an iron to apply the HTV, use the scraper before trying to remove the carrier sheet. Also go super slow when removing the carrier sheet
- I don’t like working with zips much. I also think a varsity jacket looks better with buttons than with a zip.
- Given up on ever using Puff HTV hahahaha
I think I want to redo this bootleg, using snap buttons and a different pattern… I’ll think about it…I have so many other projects to tackle first. If I do, I will:
- Not line it, and use a brushed fleece instead
- Use snap buttons and look into sewing over HTV so I can get the front logo looking like the original
- Use smooth ribbing for the cuffs and waistband
- Not make it so oversized
- Buy new Siser so I know I’m matching Siser with Siser (and not accidentally using Thermoflex). Actually, get the biodegradable eco Siser!!!
Categories: Sewing
1 reply ›