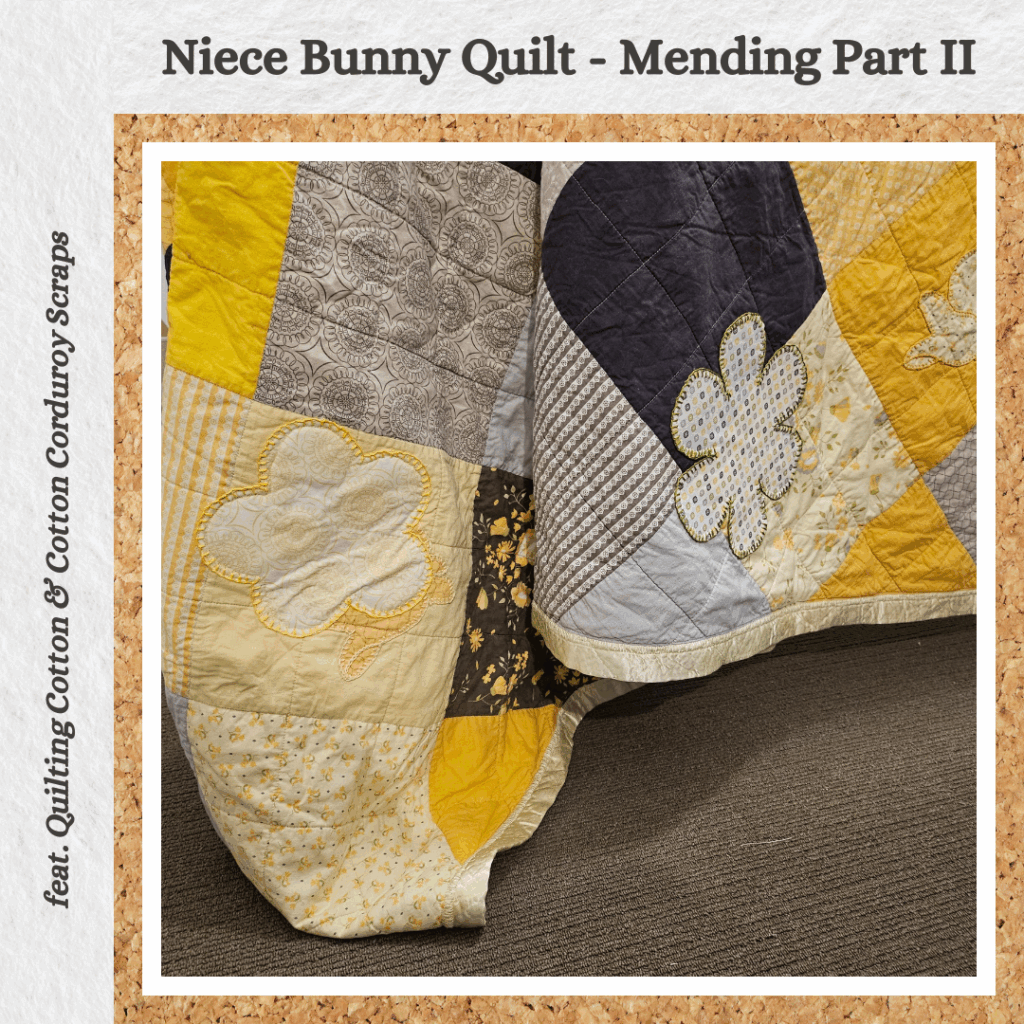
The quilt that I made for niece #1’s second birthday has been through a bit 😅 I’ve had to mend it once already after their Border Collie chewed through it… Two weeks after I sent back the mended quilt I asked my niece how the blanket was going and she sheepishly admitted it had been chewed through again. With my SIL adding that it was literally the next day but they were too ashamed to tell me 🙄 So back the quilt came to me, except I had ZERO motivation to tackle mending it again lol. So I’ve had it for over a year now I think…but since it’s winter and I’ve obtained a couple of new tools that might make the whole process a bit easier, I figured it’s probably about time I fix the damn blanket haha.
Design
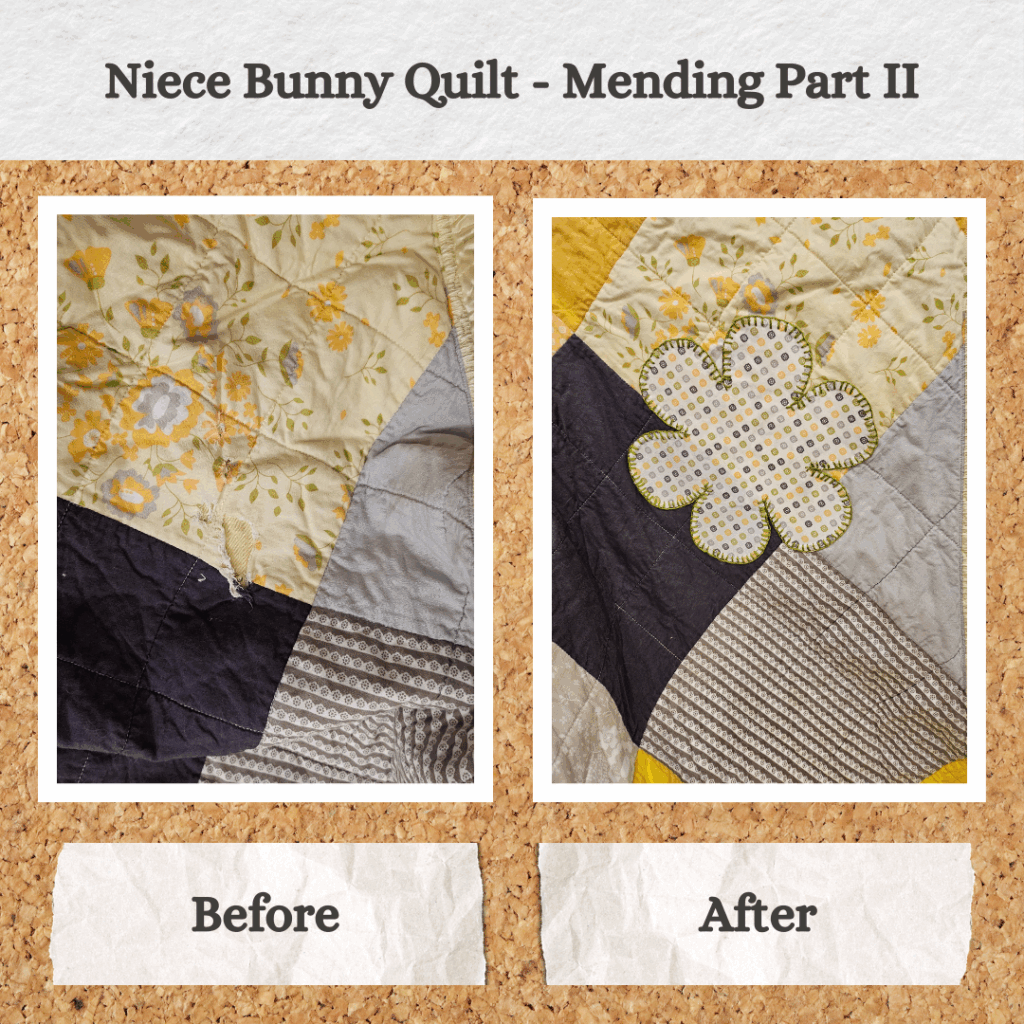
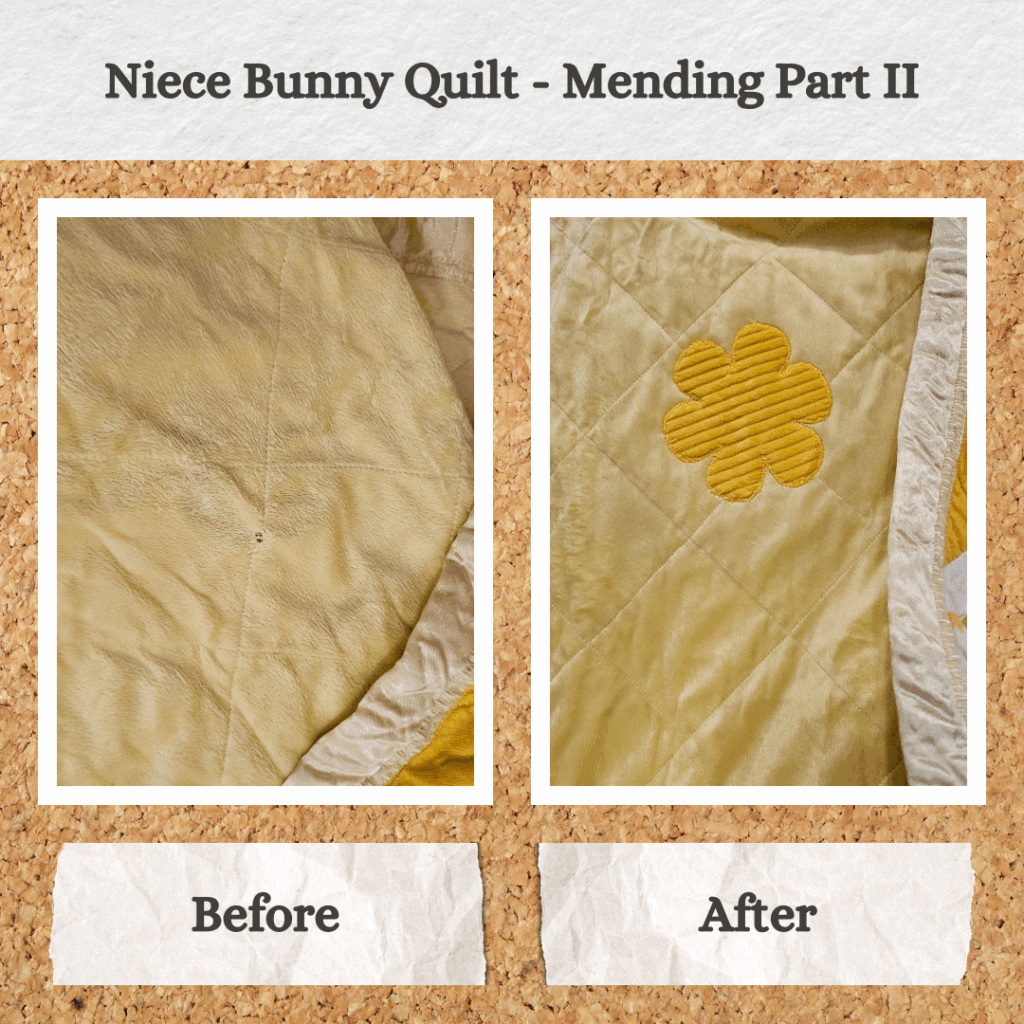
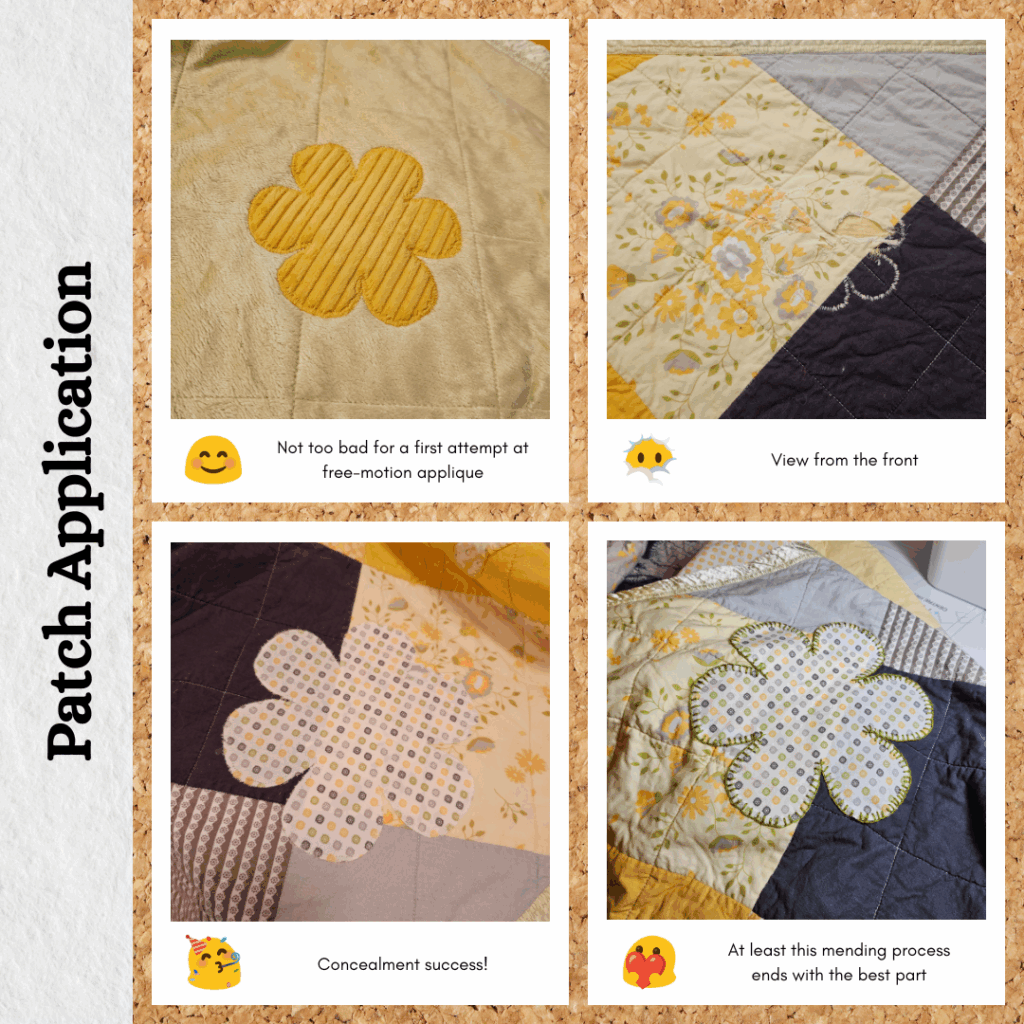
Luckily I kept the flower outline from last time. I think the damage is even more extensive this time, but luckily (one of my last yellow coloured) remnants from the original layer cake was just large enough. The back only had a small hole this time (and some…stiff portions around it…which I suspect is solidified dog drool lol. Washing the blanket isn’t in my scope for this project so it stays as is…) so I made a smaller flower out of remnant corduroy from my chair cover project, since this is also yellow and has a fluffy-ish texture. I probably have remnants of the grey blanket I used last time but it was a pain to sew with, at least the corduroy is 100% cotton.
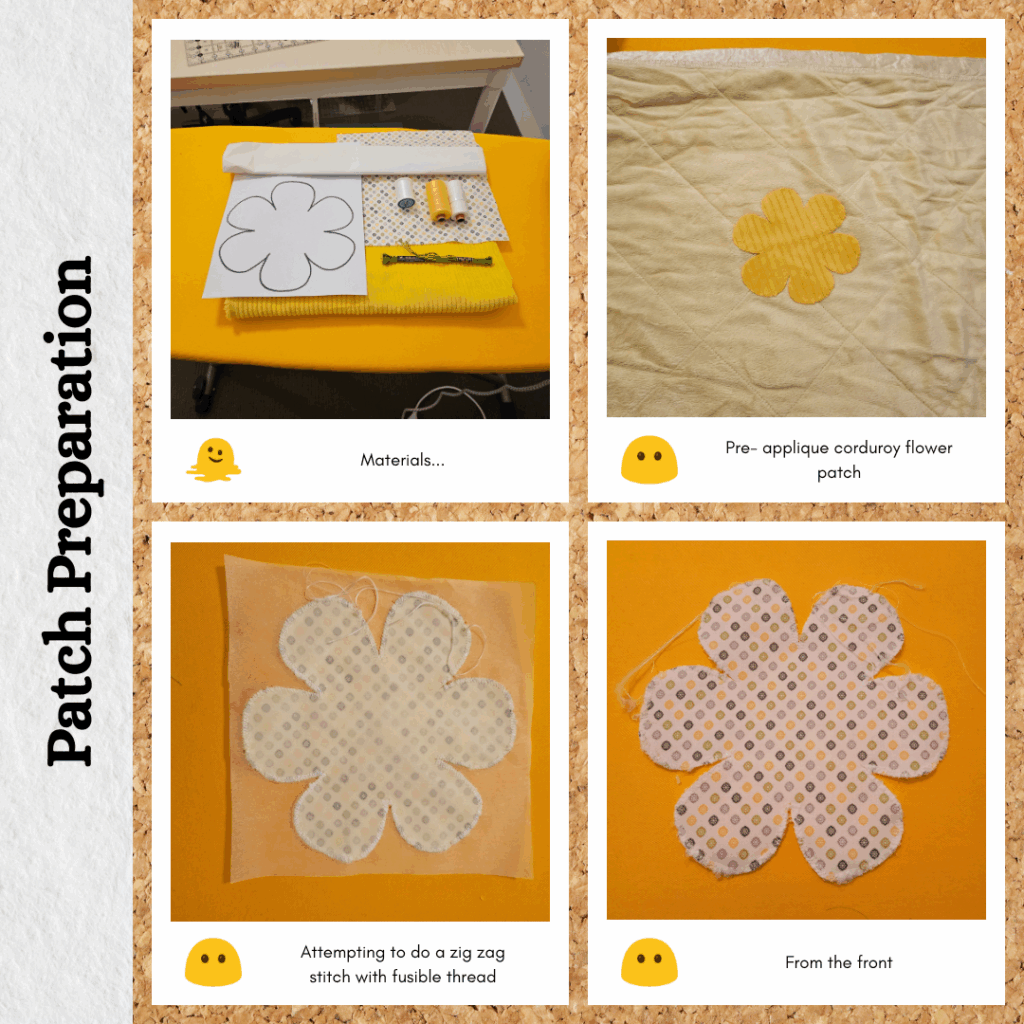
I didn’t have matching yellow embroidery thread in my stash but I did have a green one which is good, I probably would have had grey but that’s a bit dull.
Mending
I used Vliesofix but thought I could maybe also do a zig zag stitch on the edges with fusible thread (on the back) and matching Rasant on the top (technically in the bobbin since at the moment I can only use the fusible thread as the top thread). This way I could finish the edges without removing the fusible aspect. I gave up trying this on the corduroy because both sides had textures that just didn’t want to play nice with my presser foot (it wouldn’t feed through 😫). I managed to get ok results with the larger flower, after I put Golden Threads Quilting Paper over the Vliesofix. I didn’t manage to tear all the paper away from under the zig zag, but I figured it would eventually wash away or be fully encased and not really be visible anyway.
For the corduroy I just ironed the patch on and then attempted to free-motion applique it down with a zig zag stitch. I used the small and medium Octi-Hoops. It was not as painful (like literally, manoeuvring a full blanket around a flower shape is a recipe for cramped fingers and strained muscles) since I wasn’t locked into a single direction, but it was tedious moving it around to try and avoid putting the bulk of the quilt in the sewing machine arm. I ended up using the pattern of moving in one direction to the top of the flower petal, then flipping it around and going in the other direction for the remainder. I got pretty good at getting the needle to “zig zag” back onto the same spot at the pivot point haha.
After this was done, I ironed on the bigger flower patch on the right side, using baking paper to make sure the fusible thread that had pulled/shredded to the top wouldn’t affect my iron haha. I had tried to position the bottom flower so that the applique stitches would be covered by the larger flower and I was successful 😊 Then I did a blanket stitch using the embroidery thread. It was easier now that I have chenille needles, but it was still a finger workout 😫 The fusible thread on top ended up being pretty rough to the touch, but hopefully it won’t get touched often due to the raised profile of the embroidery stitches.
Reflections
So…turns out I used a different flower pattern 🤣 Oh well, I used different backing fabric anyway so whatever. Mending is mending.
In my head I had this idea that this was going to be a big hassle. I think that’s because I was basing on it on last time which was a very tiring endeavour. Just goes to show how big a difference having the right tools and materials is.
Hopefully there isn’t a next time, but if there is, I think I need to see if I can use the fusible thread in the bobbin. I theorise that if it’s in the bobbin, it has less far to travel and is less likely to self shred. And if it doesn’t self shred, hopefully it also doesn’t come up to the top layer. Failing that, then do a normal zig zag stitch to secure the edges and then run a couple of parallel straight stitches on top of this with fusible thread on the bottom side only. That should be enough to help secure the patch where the zig zag covers the Vliesofix.
Categories: Sewing
1 reply ›