Planning and Design
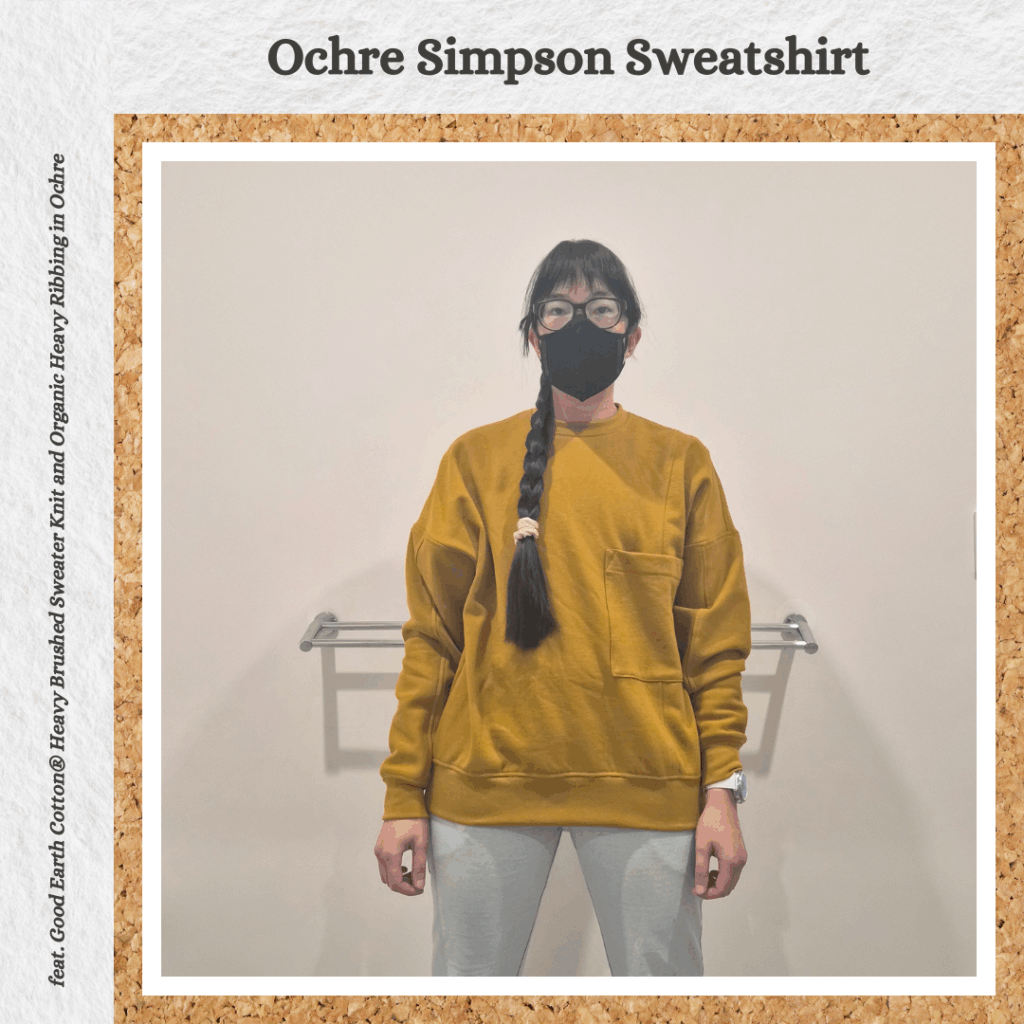
I really love my Simpson Sweatshirt so I wanted to make another one (without a hood). I’ve recently bought a whole bunch of yellow fleece to make colourful and comfortable sweaters for both home and outdoor wear so decided to tackle this one first because I have Maraflex thread that matches haha. Also was used as incentive to finally put snap buttons on my Patchwork Corduroy Bomber Stevie Jacket 🤣 (no make new thing til you finish old thing)
Back to the aim of ‘colourful and comfortable sweaters for both home and outdoor wear’. I kind of realised that my current wardrobe tends to fall firmly into either ‘home wear’ or ‘going out wear’. A lot of my home wear is way too plain or frumpy for me to feel, not necessarily proud, but not self-conscious I guess, when I wear it outside. So I tend to save my nicer clothes for going out and never really wear them around the house. Which is a bit annoying when I need to go out for a little bit because then I either have to change clothes (and then back again) or hope that no one is really paying attention to what I’m wearing. So my aim moving forward is to make clothes that I’ll happily wear at home because it’s comfortable but also looks nice.
Materials
- Pattern
- Simpson Sweatshirt (Style Arc)
- Fabric
- Good Earth Cotton® Heavy Brushed Sweater Knit – Ochre (MaaiDesign)
- Good Earth Cotton® Ribbing – Ochre (MaaiDesign)
- Notions
- Gutermann Maraflex col. 968
- 10mm Cotton Herringbone Tape – Mustard (Remnant Warehouse)
- Maxi-lock 3000yd Polyester Serger Overlocker Thread – Mother Goose
Sustainability Check
👍 Fabric is 100% Australian GEC Cotton. Good Earth Cotton is a cool initiative. Climate positive cotton growing 😮 And fully traceable from ‘grower to garment’.
👍 Ribbing is 96% Good Earth Cotton and 4% Elastic so biodegradable and climate positive and traceable.
👍 Maraflex is biodegradable
👍 Twill tape is 100% cotton
👎Maxi-lock is polyester (but I need to use it up before buying a replacement)
Construction
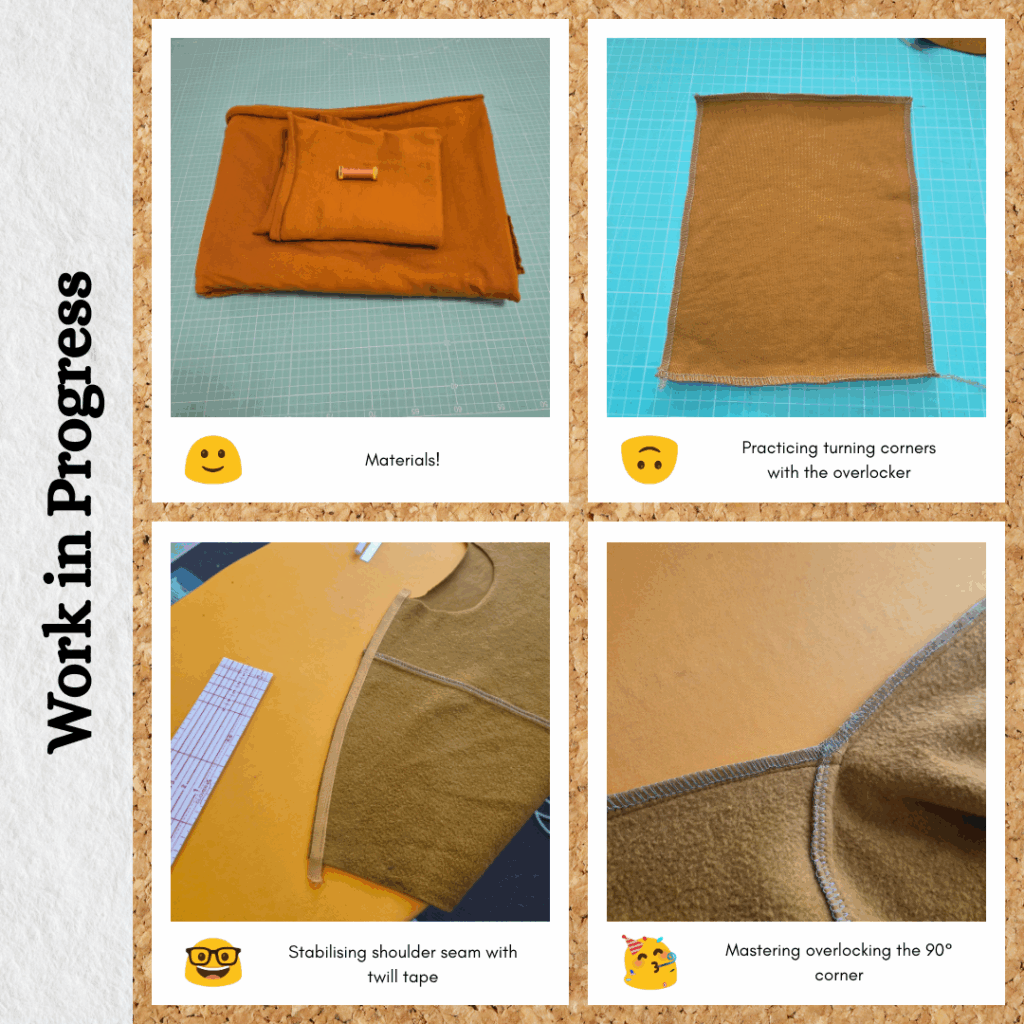
Prior to starting this project, I did a lot of testing with my overlocker because it seemed like the stitches were inconsistently off. Since it’s not a consistent issue (enough to help troubleshoot), I think it might be time for a service. But it wasn’t so bad that I couldn’t keep going with this project.
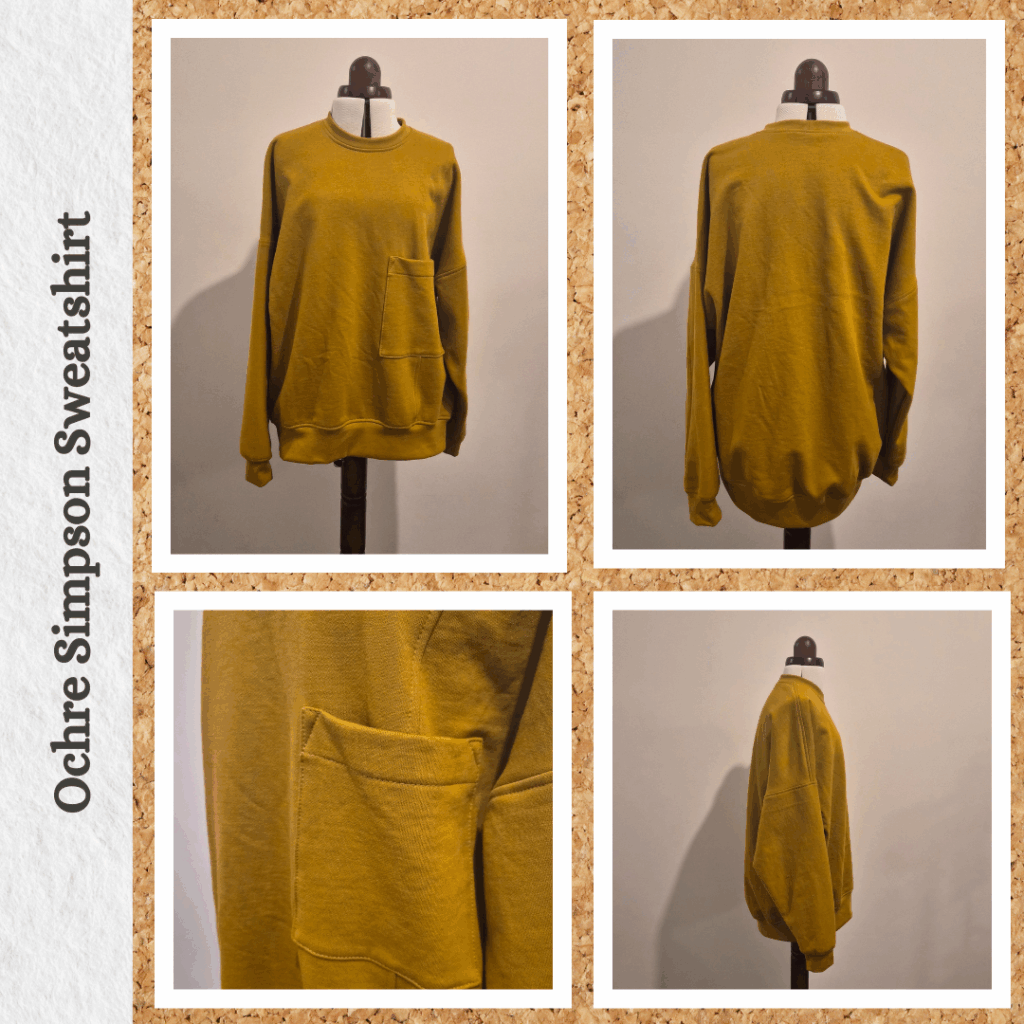
It was straight forward assembly of the front panels and sleeve panels. I decided to only topstitch on the side that the seam was pressed to instead of the double line Style Arc recommend, I just don’t see the point of doing a second lot of purely aesthetic topstitching. Besides, the topstitching will look slightly different on the different sides because of the difference in bulk and that annoys me 😅
I tried to overlock around the pocket at right angles and figured out that I only need to hand turn the needle wheel one rotation after I get to the end in order to turn it around and start overlocking the next side. I considered hand sewing the pocket to the front before topstitching like with the Maple Balloon Cardigan, but this fleece has less loft so I was able to just secure it with pins. I did mark out the triangle stabiliser at the top of the pocket, but I mis-judged where the line started as the edgestitch foot was obscuring the very end of the pen marking, so the topstitched triangles are not symmetrical. I didn’t think it was worth unpicking it though.
When I got to the shoulder seams I remembered reading about stabilising knits with plastic/elastic tape. I do have some of this, but I wondered if I could use twill tape instead since it’s natural. After referring to this tutorial by Helen’s Closet, I used the 1cm mustard twill tape I bought just in case for the Barazushi Corduroy Bomber Stevie Jacket. Glad it came in handy!
For the shoulder seams, I know in the past I’ve been quite annoyed by the pattern pieces/construction method. But now that I’ve made more garments, I’ve realised that it’s not that important to press the seam to the body, especially with something this loose fitting. So I pushed the seam towards the sleeve instead, which means that the side seam sits nicely. I also overlocked the sleeve seam, leaving the side seams un-overlocked. In the past I pre-overlocked, but I didn’t want to have a pressed open seam allowance for the sides this time. So after I sewed the right-angled side seam, I overlocked the sides together, but thanks to the Closet Core pants making course, I’ve learned some overlocking tricks and managed to overlock it all nice and straight.
The last two times I’ve made this sweater I used main fabric for the cuffs etc. This is the first time I used ribbing. I decided to test 80% of the cuff pattern piece and decided that it was nice and snug. But I didn’t want to do the same the neckline and hem because I felt it was too much of a reduction. But 90% (based on testing on the Whistler Jacket wearable toile) usually isn’t enough… So I tried 85% of the neckband and thought that was good and applied the same to the hem. But in hindsight, maybe I could have gone with 90% for the hem….
Reflections
It’s still very comfy, despite the tighter hem due to the ribbing. And I can really tell the difference in quality between this fleece and ribbing compared to others I’ve used – the ribbing feels stronger and both are almost silky to the touch. I’m assuming GEC also doesn’t pill so the back should remain super soft. I’m a fan 😆
Things I learnt:
- I took my overlocker to get serviced and described the issue I was having. After theorising a little bit, the local sewing centre gentleman took a look at my dials and immediately identified the issue 🤣 I had threaded the needle thread wrong! I assumed it was like the hook on my sewing machine and needed to just go under the dial but I was supposed to actually bring it into the dial so it would be held nice and taut. I had no idea because I usually use the existing thread to rethread the entire thing 😳 And now in hindsight, I think I understand why the seam didn’t work for the Maple Balloon Cardigan, I was using 3 threads but I probably really need 4 thread if I want it to be the seam.
- This pattern is better with main fabric instead of ribbing for the hem. Ribbing works fine for the cuffs and neckline though.
- I measured stretch percentage for the first time 😂
- Using twill tape to stabilise seams
Categories: Sewing
Leave a Reply