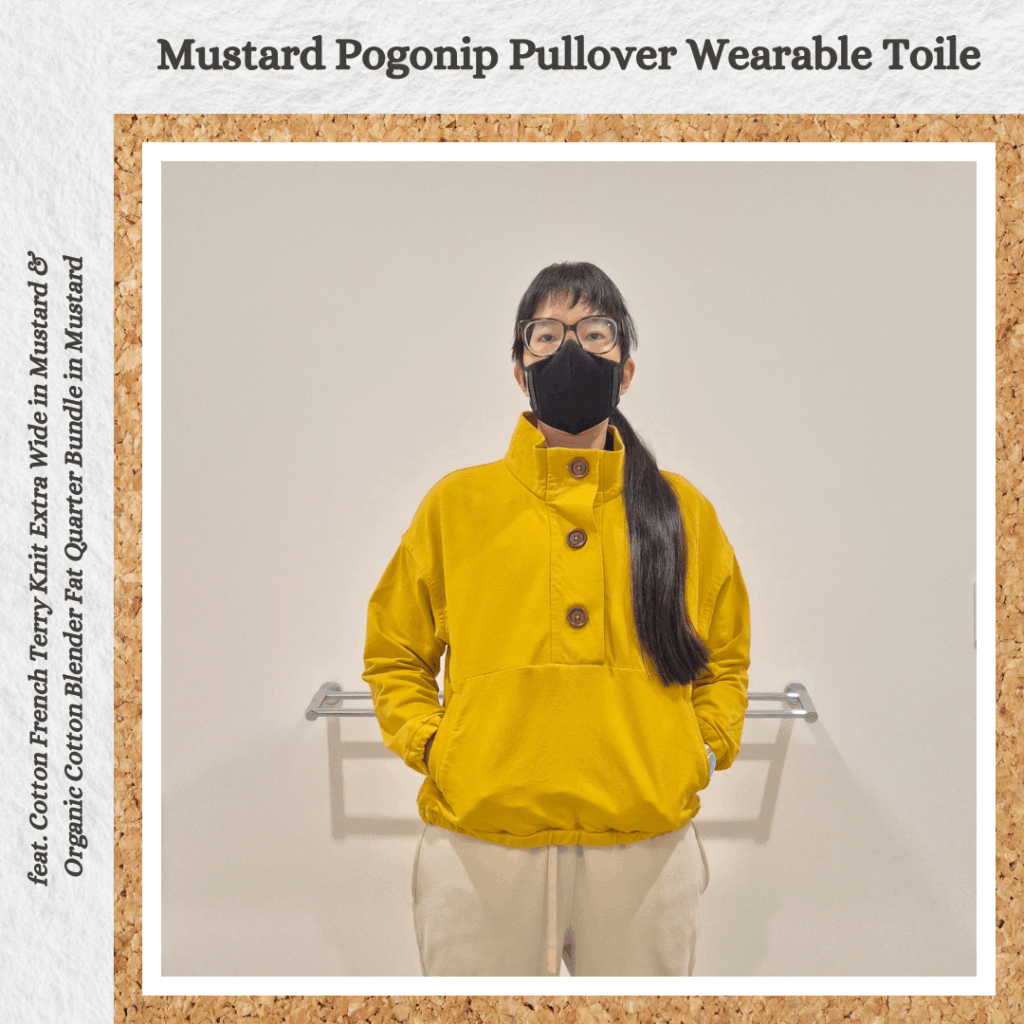
Planning and Design
When I made my niece her Mr Topsy-Turvey loungewear set I ended up with a decent amount of mustard cotton fleece which got me thinking about what I could use it for. And buying this fabric made me realise that I kinda like mustard/ochre (leading to my Yellow Sweater Collection project). So I ended up buying a bit extra with the intent to make the Pogonip Pullover. I was going to use the leftover yellow quilting cotton from my brother’s Pikachu Quilt as a lining and quilt the fabric. But then I ended up buying some much nicer fabric with the intent to make the same pullover, so turned this into a wearable toile instead.
Materials
- Pattern
- Pogonip Pullover (Friday Pattern Company)
- Fabric
- Cotton French Terry Knit Extra Wide – Mustard (Homecraft Textiles)
- Organic Cotton Blender Fat Quarter Bundle – Mustard (Spotlight)
- Buttons
- 4-Hole Classic Rimmed Wooden Button 28mm – Oak
- 4-Hole Classic Rimmed Wooden Button 18mm – Oak
- Thread
- Rasant col. 1504
- Notions
- Soft Round Elastic Cord – Mustard (Homecraft Textiles)
- Fusible/Iron on Non-Woven Interfacing Medium – White
Sustainability Check
👍 French Terry is 95% cotton, 5% elastane so technically biodegradable
👍 Fat quarters are 100% cotton
👍 Buttons are wooden
🤏 Rasant is OEKO-TEX but not biodegradable
👎 Elastic cord is likely mostly polyester
👎 Interfacing is 100% polyester
Construction
Preparation
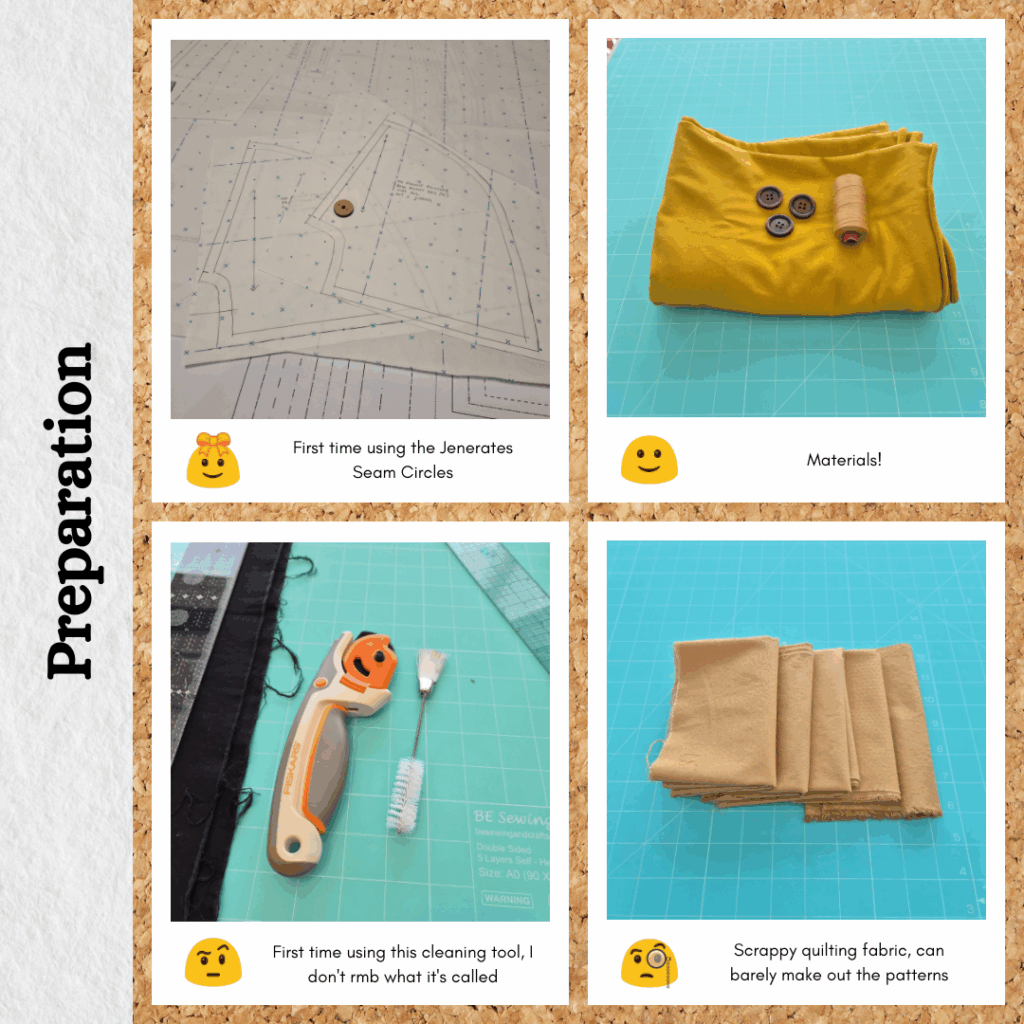
Since I decided I want to have the seam allowance marked on all my patterns for quick reference I got to use my Jenerates Seam Circles for the first time. My technique is terrible, but since I was marking the seam allowances on the inside it was fine since I just needed to tell at a quick glance what the seam allowance was meant to be and my technique wasn’t so bad that I would get confused haha.
I also used one of my cleaning tools on my rotary cutter as it was all fluffed up from previous Yellow Sweater Collection makes. I actually can’t remember where I bought this from…I thought it was from Punch With Judy but I couldn’t find any previous order details on it so maybe it was from the place I bought a bunch of pet fur cleaning implements 😝
I had to piece together the pieces for the inner lining because the fat flat wasn’t long enough. Figured it wouldn’t be that noticeable or add too much bulk. Also a good way to use more of the scrap fabric up.
I was lazy so lined up two fat flats and cut out the front and back pockets this way. This means that the fabric for the pockets will be opposites of the other, but this also probably won’t be visible that often so not a big deal.
While cutting out the lining pieces I remembered a technique to weigh down my quilting ruler while cutting. I stopped using this because all I had at the time was a dumbbell which didn’t sit very well, but now actually have some suitable weights to use, woo hoo!
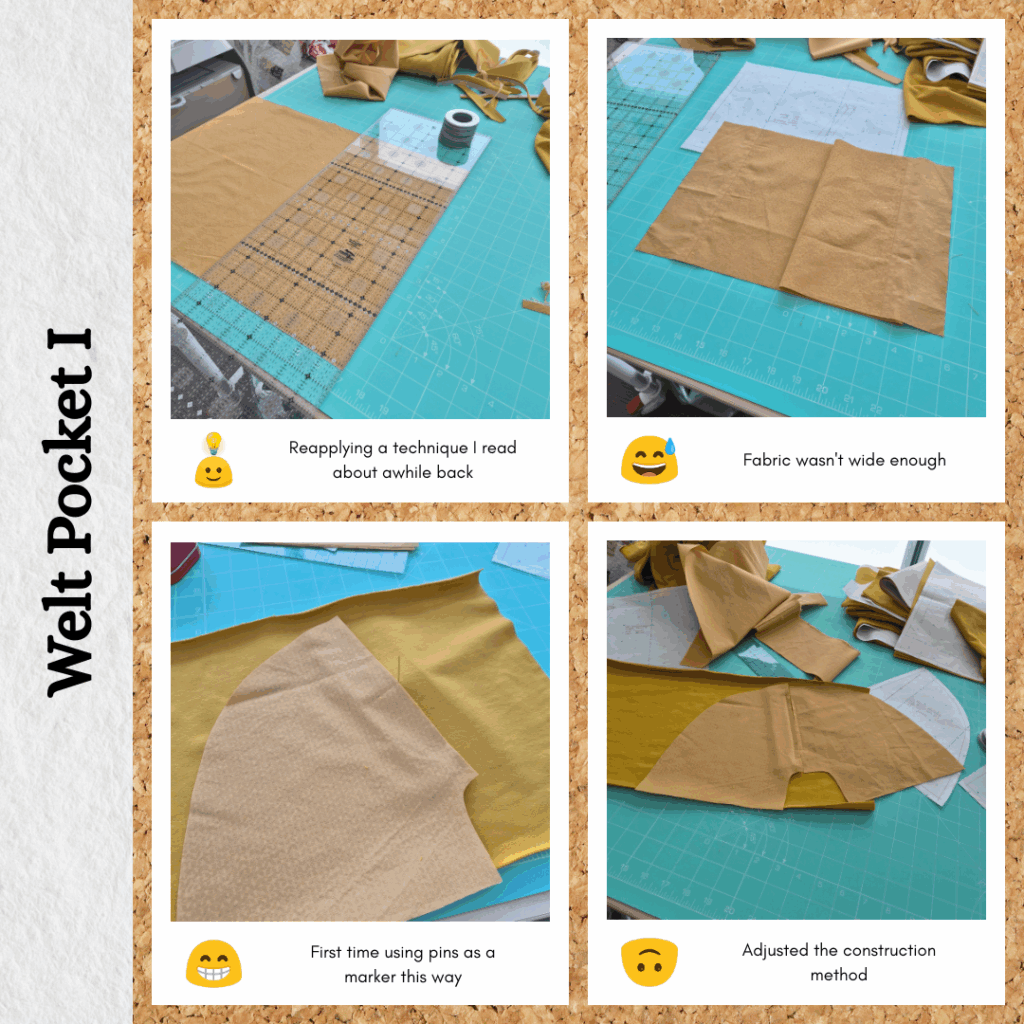
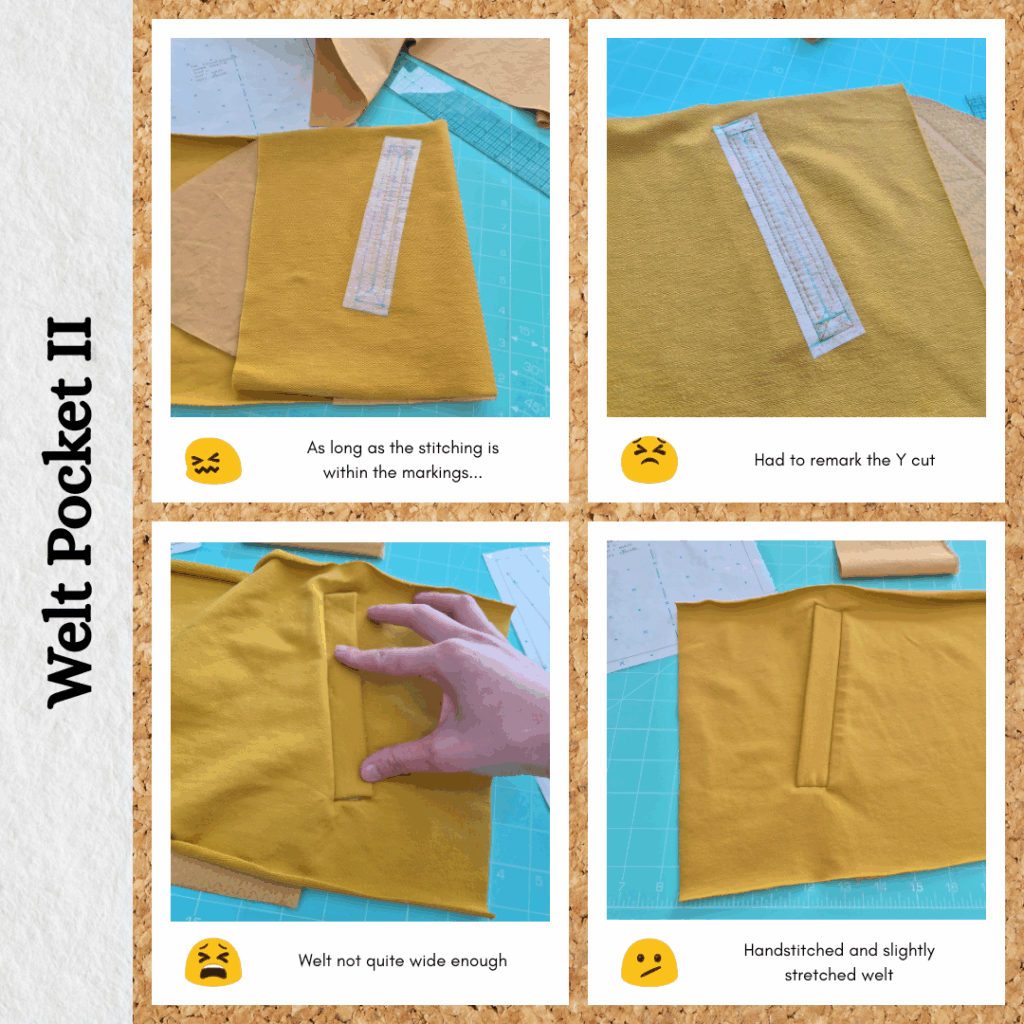
Welt Pockets
I wanted to use the Stitch Buzz templates I recently bought but realised the pocket design wasn’t going to work, as it would need to be a single pocket piece not two separate ones. I didn’t realise there were so many ways to do welt pockets. This method doesn’t secure the welt ends under the main fabric but topstitches the short ends of the welt to hold them in place. I had to hand stitch the welt ends to the body because the welt was slightly shorter than the opening but luckily it was a knit so could stretch. Or rather, it probably ended up not the right length because it was a knit and I knew from the Miela Varsity Jacket that I don’t like how thick interfaced cotton fleece becomes, but not interfacing it meant that things probably went wonky somewhere along the way.
While I didn’t use the welt pocket templates, I did use pins to mark out important points to help with inserting the welt, like how it was done in the tutorial video I watched. It works better than expected haha. But I think I don’t like this method of inserting a welt pocket, so will do it the other way next time I make this pullover.
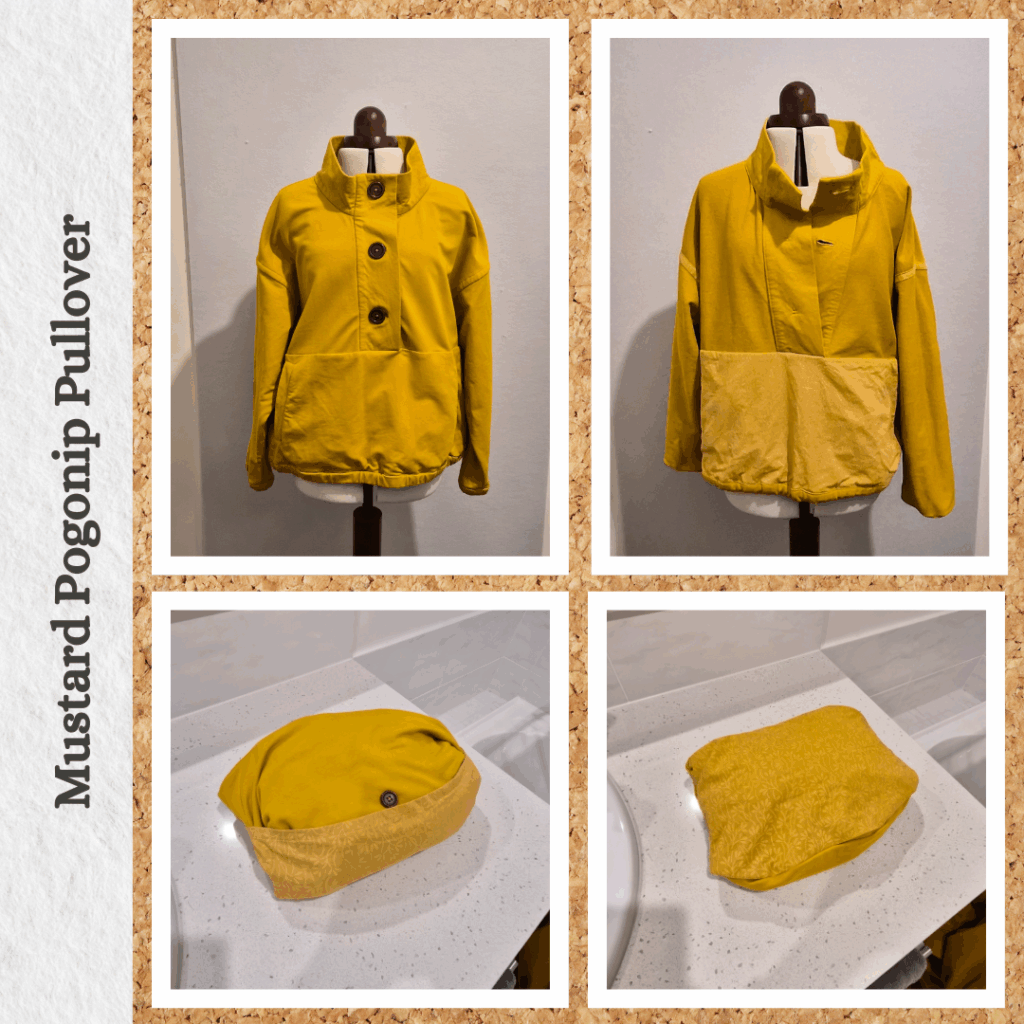
Packable Pocket
I’ve got experience assembling this with the Navy Flannelette Overshirt Wearable Toile so managed to get the pocket flap right way this time haha. I had the elastic I needed too, but realised I would need a button… Since I used wooden buttons from Homecraft Textiles, it made sense to get the same type of button in a smaller size for the back too. It was much nicer putting together this packable pocket since I was using quilting cotton and not a slippery lining fabric.
Collar
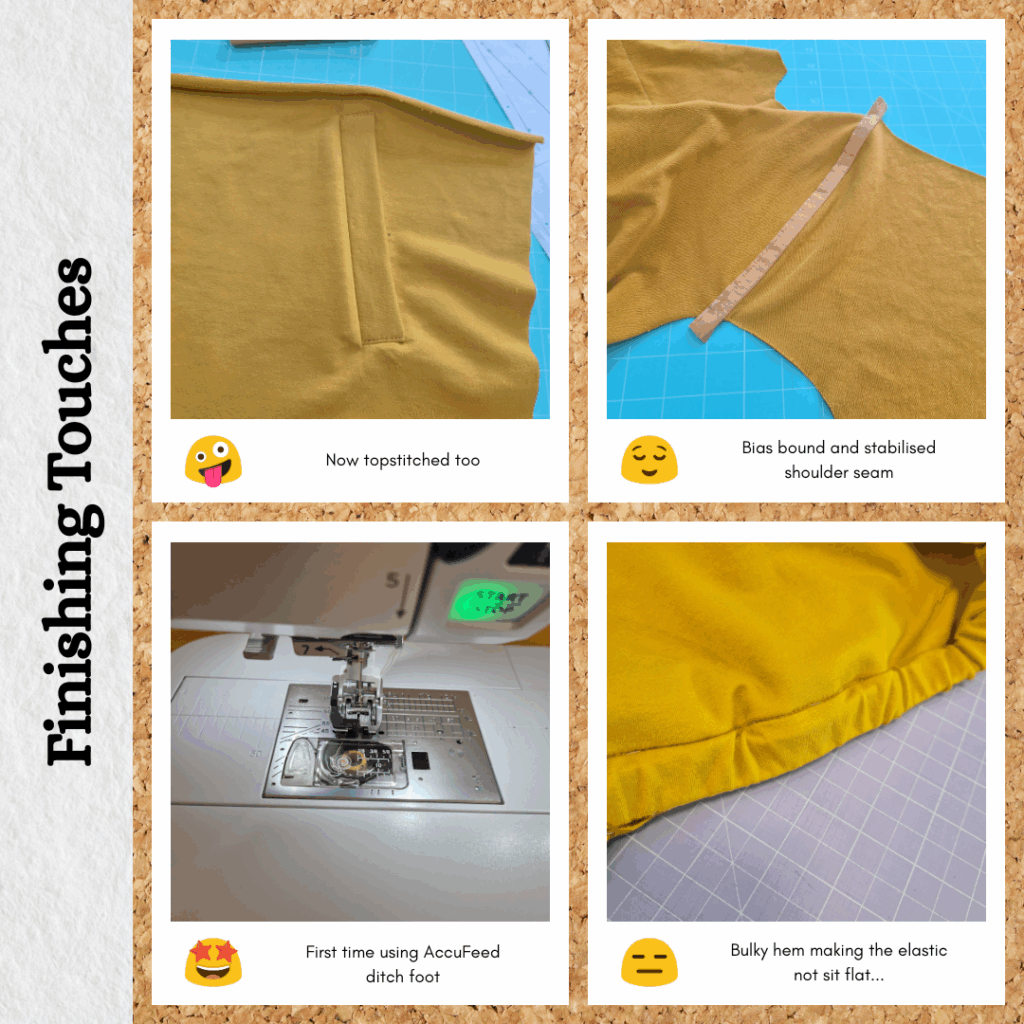
I interfaced the collar with medium interfacing and used the AccuFeed ditch foot to secure the folded back pieces. It works better than my normal ditch foot for sure. Attaching the collar was pretty simple. Although I did make sure to do the buttonholes before sewing the pieces to the body which is different to their instructions. I just thought it would be so painful trying to use the automatic button foot when it was already attached to the body.
Body Construction
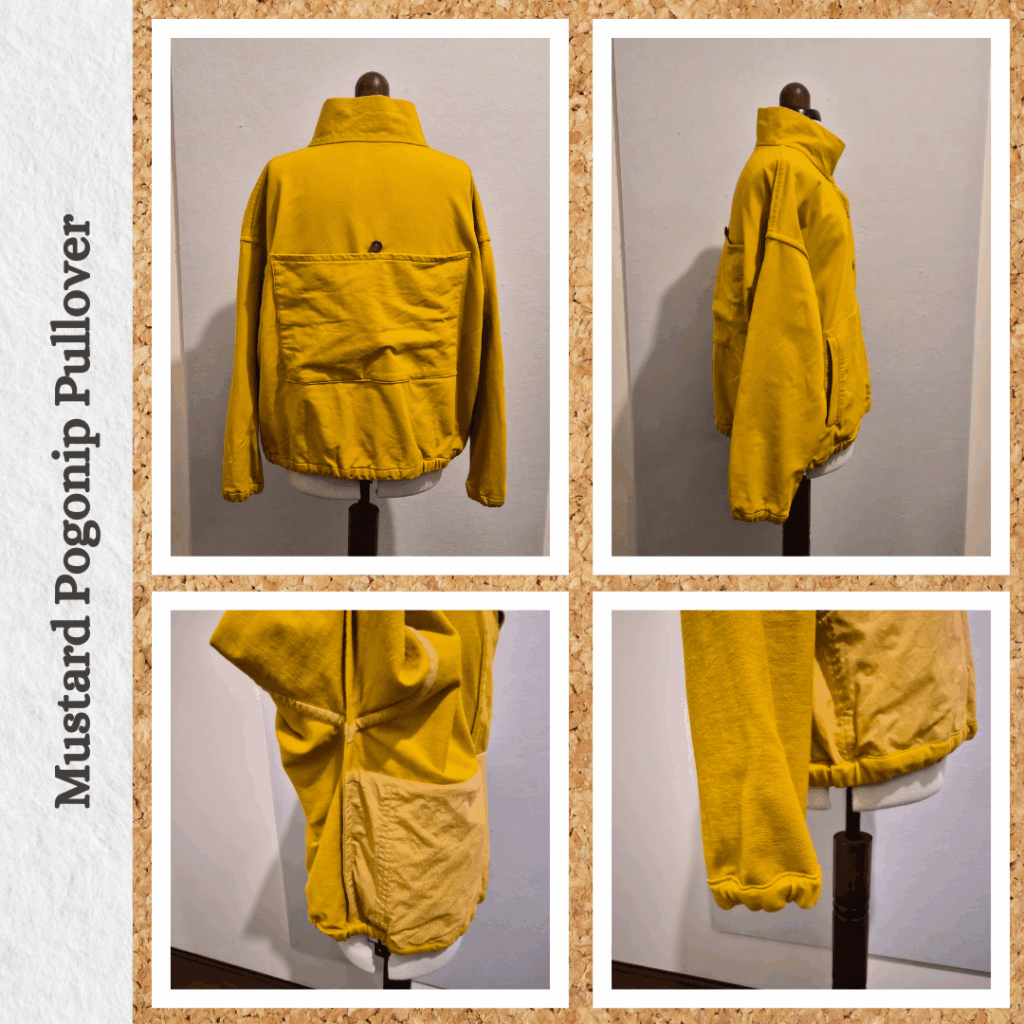
I made a last minute decision to make fully encased seams after creating binding to stabilise the shoulder seams. This wasn’t a problem with the collar or the lower front (already fully enclosed by design) but it meant that I had to do french seams on the side seams. I figured since this was a very relaxed boxy fit, it wouldn’t be such a big deal if I took off an extra 6mm or so on each side.
It also meant that when I attached the hem and cuff casings I had to fold under and in this case (in order to remain consistent) ditch stitch it down from the front. It was mostly fine except after inserting the elastic it didn’t really sit flat because the seam was quite bulky. But after I chucked it in the wash to remove the hand basting I did (with washable thread) it seemed to settle. So maybe all’s well that ends well?
Reflections
I’m really glad I made this wearable toile, it’s gotten me thinking about all the ways to make it better next time ’round 🤣 I’m fairly happy with how this turned out, but I do think that it would be better in a woven instead of a knit and with a quilted fabric because the interfacing makes the collar stand up nicely when buttoned up but very awkward when not buttoned up. I think the batting in the quilted fabric would be that ‘just right’ level of structure without the stiffness.
Things I learnt:
- Using Jenerates seam circles
- Another way to do welt pockets
- Using pins to mark placement of other pieces
- Using the AccuFeed ditch foot for when not doing topstitching
- How to change the AccuFeed sewing feet
Things that I will do for the actual Pogonip Pullover I want to make:
- Quilt the outer fabric to the backing only – use the lining fabric on all the body pieces to create a fully lined top
- For the hem and cuff casings, only add batting to half of the casing so that the inner casing will be less bulky
- Look up how to apply the other welt pocket method to this style of pockets
Categories: Sewing
Leave a Reply