Planning and Design
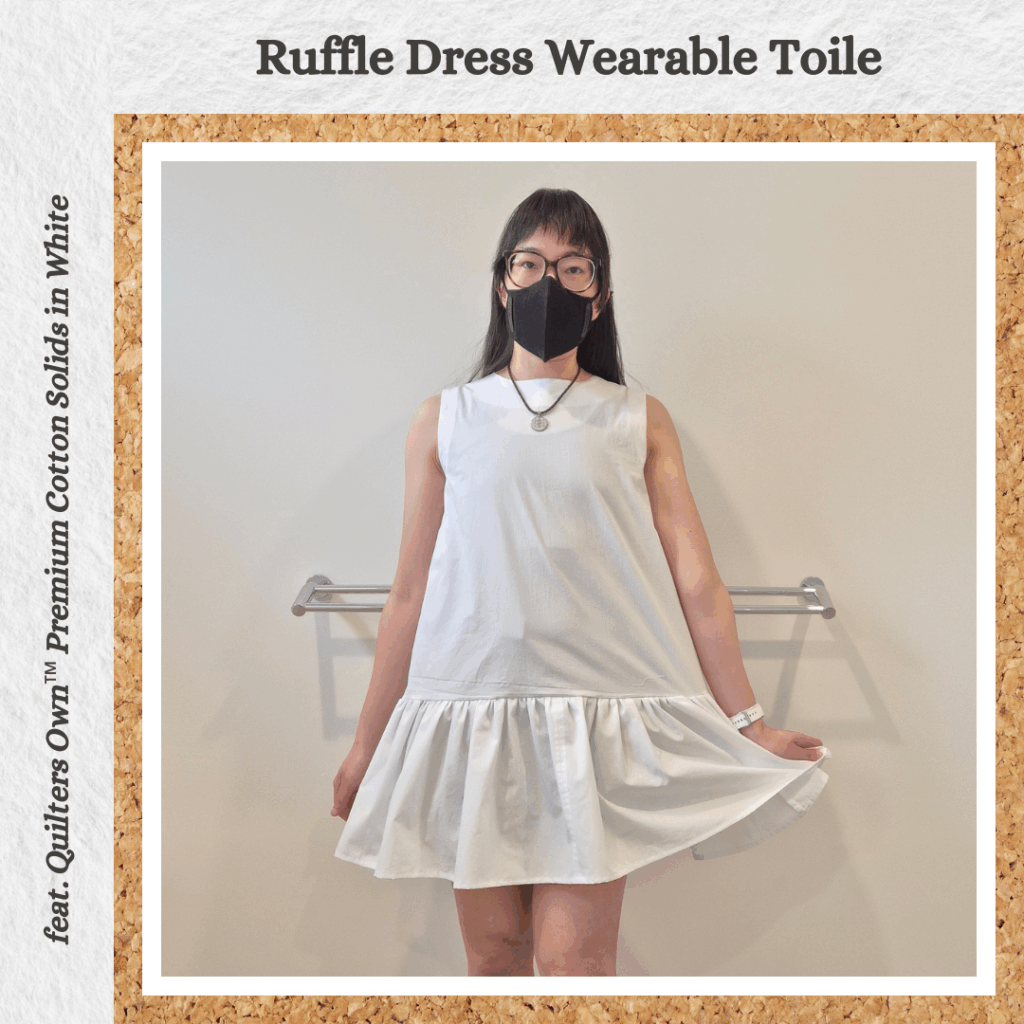
I saw this on the MaaiDesign website and I realised ‘this is why I haven’t liked any of the dresses I’ve made so far’. I have made mid-calf and knee-length dresses and I thought they all looked terrible on me. But a short dress? I think that would suit me much better. It was a pretty short timeframe between me discovering this pattern and actually buying it (with my Modern Makers PDF credit), I was that motivated to make it 🤣
I wasn’t sure if I would need to make any bust adjustments hence the wearable toile. Since the actual version (make that versions, I came up with another one I wanted to make in addition to the one I thought up when I found the pattern) I want to make is in a black fabric, I decided to make this one out of my white 10m roll of quilting cotton from Homecraft Textiles.
Materials
- Pattern
- Ruffle Dress (Puff and Pencil)
- Fabric
- Quilters Own™ Premium Cotton Solids – White (Homecraft Textiles)
- Thread
- Rasant col. X2000
- Madeira Aerolock Overlocker Thread – Super White
- Interfacing
- 100% Cotton Lightweight Fusible Shirting – White
Sustainability Check
👍 100% cotton solids are biodegradable
👍 100% cotton interfacing is biodegradable
🤏 Rasant is OEKO-TEX but not biodegradable
👎 Overlocker thread is polyester
Construction
Pattern Adjustments
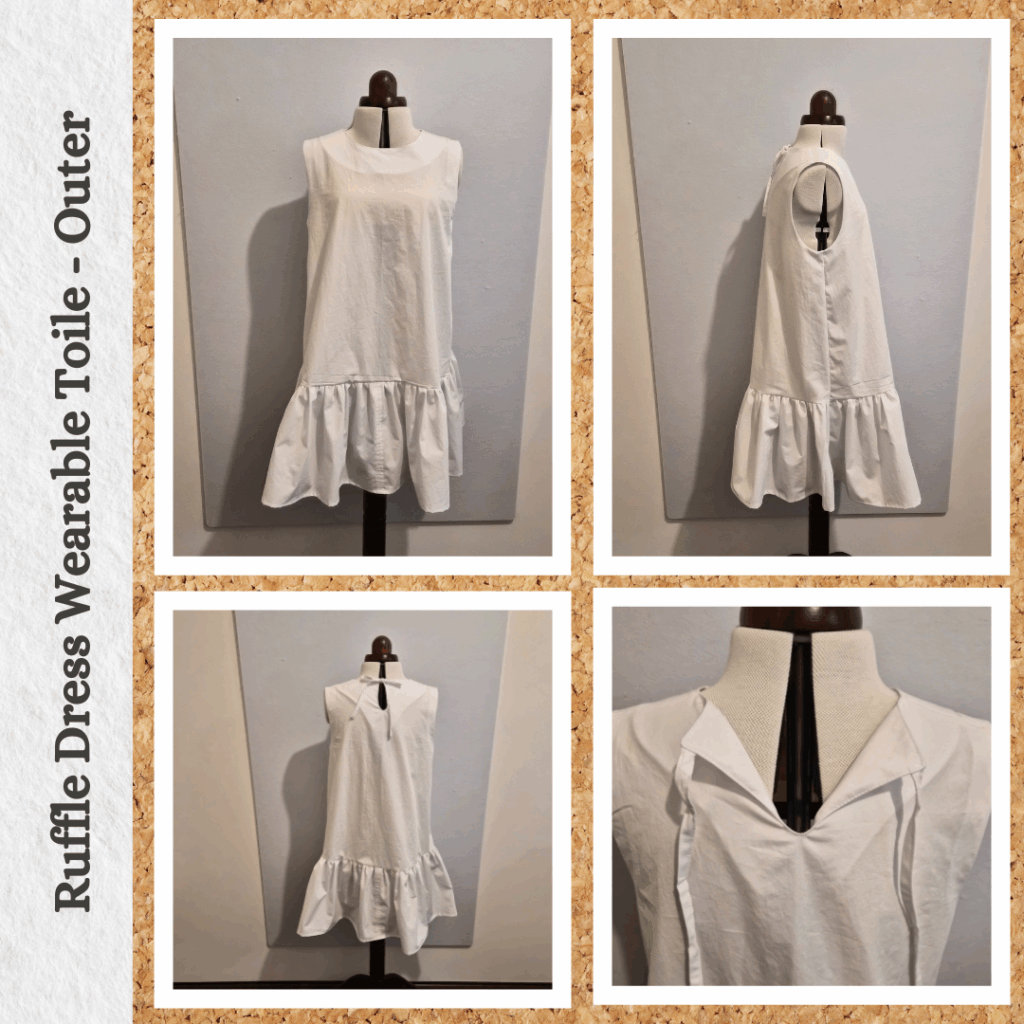
According to the instructions the most important measurement is the bust. This puts me in a size 4-6 (S). My other measurements are 8-10 but checking the finished measurements and they are all greater than my measurements so all good. And there is no bust dart! Was expecting to have to do a small bust adjustment.
I wanted it short and the pattern was designed for a person 3cm taller than me so I used the smallest size edge for the hem and didn’t add 5mm to the seam allowance (which I did everywhere else for french seams). The pattern had no lengthen/shorten line but I figured the ruffle could be adjusted easily for the small reduction in circumference from a S to XXS.
When tracing my seam line and pattern edge, I tried for the first time to measure lines directly from pattern. Since I wanted to extend seam allowance from 1cm to 1.5cm so I had to use the 5mm seam circle for the outer edge and the 1cm circle inwards for the seam line. Got a bit tricky where the lines were dense (collar, underarm) because it was hard to make out what was what through the pattern paper, but otherwise seemed to work well enough. My hand is steady enough with the seam circles now to be accurate 🤣
I realised properly when I started tracing the facings that yes, this pattern uses facings, therefore all the related seams only need to be 1cm. So had to trim some back from the body front and back pieces.
For the ruffle piece I followed the lines for the size S but only extended the seam allowance to 1.5cm on the top and sides. I didn’t want to shorten the ruffle from the design.
Cutting and Sewing
So I realised that the ruffle piece was too wide for the 112cm fabric and considered changing to a different wider fabric. But then remembered one of the versions I want to make of this is 112cm as well, so better to figure out how to arrange and split the pieces now. Only the ruffle needed to be split and I did this really quickly by adding 1cm at the fold line. If doing this way, I need 2.5m of 112cm wide fabric. But I think I can be smarter about where I split the ruffle piece and can adjust it so I only need 2m (which is what I have of the other fabric haha). Although it would be better to not have the split in the very middle…
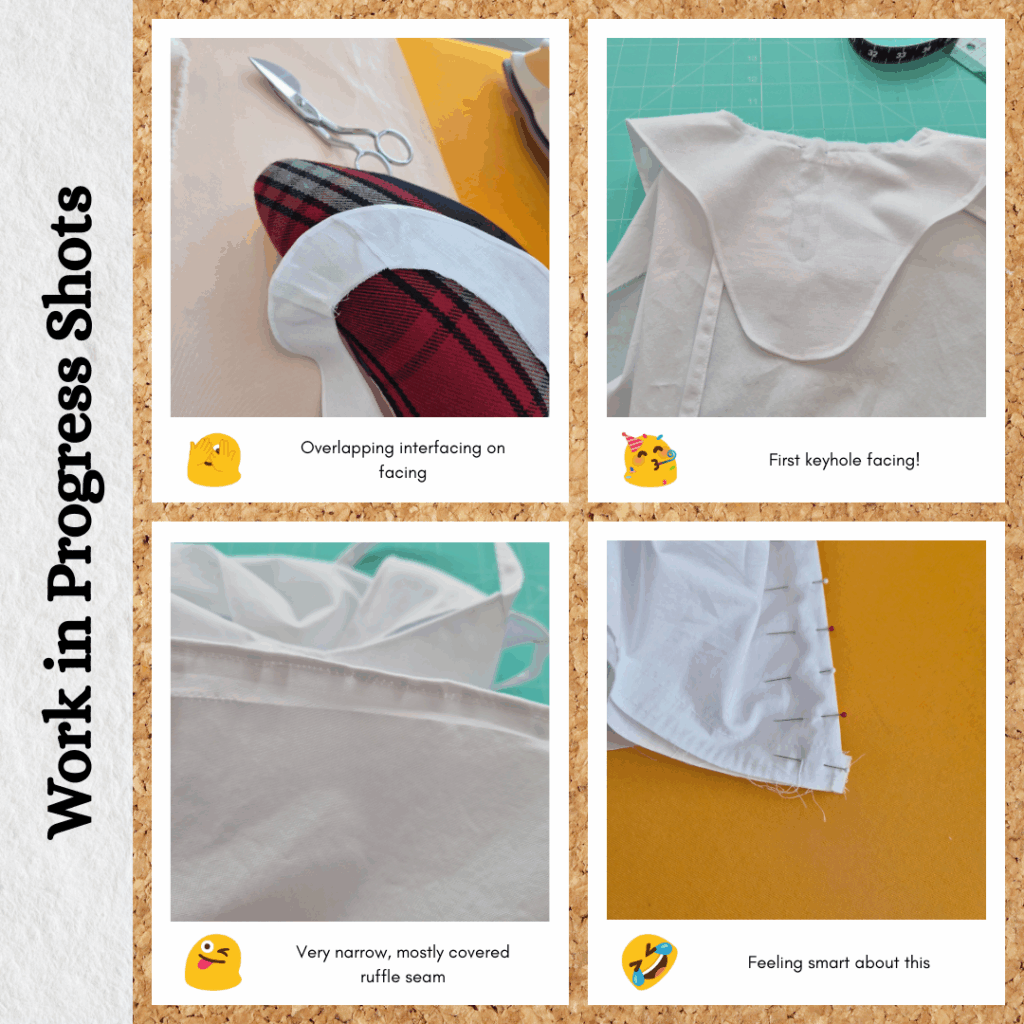
I french seamed the shoulders. Then used the Closet Core method of applying interfacing to facings. I found I needed to use the tailors ham to get the interfacing smooth. And I had to clip one part and overlap but otherwise it all aligned fine. Also, a benefit of using cotton interfacing is that I can iron directly on it, with no residue getting onto my iron.
For the keyhole, I should make a template as well as a separate pattern piece for the ties since I will always want to use the same fabric for these. And next time I should mark the keyhole stitching line on the facing not the main body, I only managed to get away with the other way around because the fabric was white haha. I made sure to reduce stitch length to 1.5 for the corners and entirety of the keyhole and I think this helped me turn everything right side out nicely.
This time I remembered I can use the overlocker to gather ruffles. Another note for next time – I should do guide-stitching on the ruffle pieces as it helps to make sure I gather the correct edge. Because first I broke a needle going too fast trying to create a tail with the gathering stitch settings (or maybe I was unconsciously pulling it since the needle bent…). I should reduce tension from 9 to 3 like I usually do for the tails. Followed by me gathering the wrong end of one of the ruffle pieces. And then gathering using a needle tension of 9 which ended up too tight and my tails weren’t long enough to account for ungathering that much fabric. So then tried a needle tension of 7 and then 6. 6 is probably the way to go since I only had to loosen the gathers a little bit and it’s easier to loosen than tighten the gathers.
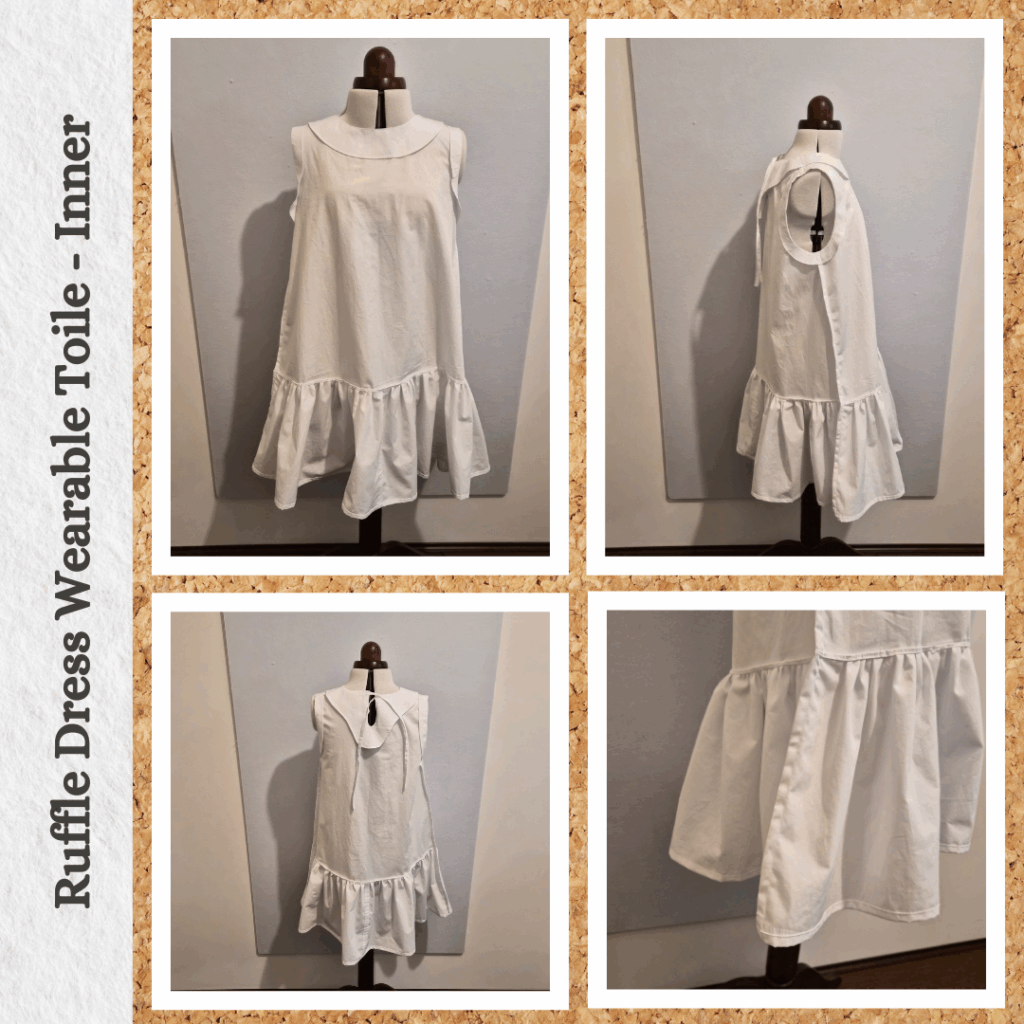
Because I wanted everything neat I tried to enclose the seams using this tutorial. I think I need to use 1cm fold overs instead of 6mm because it was extremely fiddly. I got it to work by topstitching just right of the original seam stitching. I think next time I will place the gathered panel lower to avoid having to trim away excess in the seam allowance plus get more defined gathers. The further away the stitch line is from the gather the less pronounced they are.
I feel like I’m finally starting to be able to think in french seams (if that makes sense haha) as I figured out how to account for the ‘bent’ hem allowance when doing the side seams. And I did guide stitching at 2cm and 1cm on different ruffles because I did the 2cm one first and thought that I should probably do it 1cm instead so that there’s no chance of seeing the guide stitching on the right side if I don’t fold it right.
I had prepared the arm facings when I did the collar facing and had made sure to clearly mark the front piece. Since I was using the Frixion pen, this meant I had to reapply it after every time I ironed but it was worth it 😂 The facings were the last step and not having to faff about figuring out which way everything went was great. The armhole facings definitely need the under-stitching (I didn’t do any under-stitching for the collar facing), but it also really needs to be anchored at the underarm on the side seam, not just along the shoulder seam like the instructions say. Also, I did start topstitching the collar facing down at the shoulder seam right after I attached it like the instructions say, but then thought ‘but I’ll have arm facings too’ so unpicked what I had done and did them all right at the end.
Reflections
It fits quite nicely! The length is fine. But I think I want it shorter. But it is good because I think this is the max length I would want a dress, so I can use it as a reference for the other dresses I want to make. I’ll start by removing 5cm and then I can reduce it more for the third version if that still isn’t enough.
Things I learnt:
- How to make a keyhole opening with ties
- Always make sure to change tension back to 3 when creating tails for gathered seams
- How to encase a gathered seam
- How to account for a double fold angled hem when using french side seams
- Keep track of which facing is front and back!
Categories: Sewing
Leave a Reply