Planning and Design
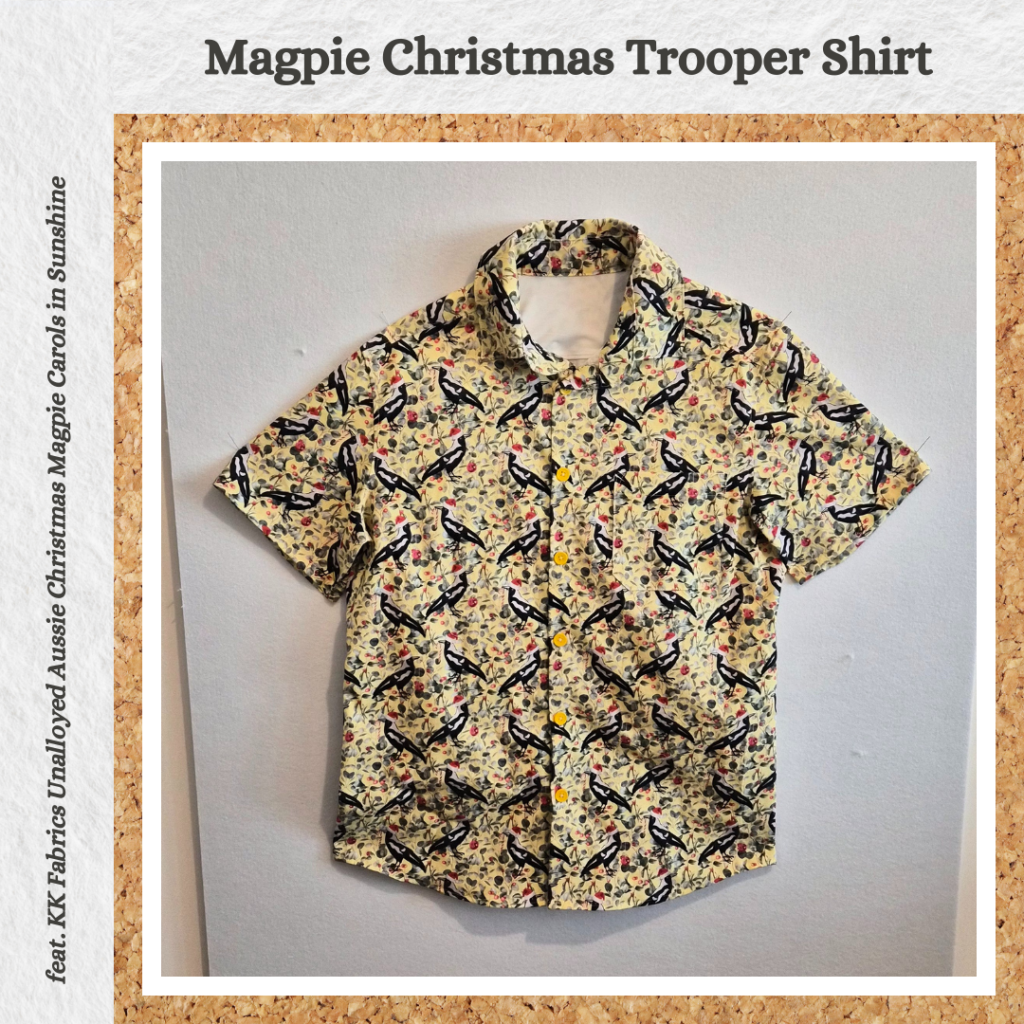
Fabric store newsletters are too effective. I have never considered making Christmas themed clothing before, but Wattle Hill Fabrics advertised their Christmas range in one of their newsletters, and I looked at it because I can’t help myself, and ended up buying a bunch of fabric 😅 I did run it past my husband first. I saw the magpie fabric and he loves magpies, so I asked him if he would wear a shirt or pajama shorts made of this fabric. And he said he would wear a shirt for sure. He is much more into the spirit of events than I am, so themed clothing is up his alley. And this way he can wear something that’s not polyester, with Airism in-built and nice and fitted the way he likes his shirts. So he can be comfortable but also stylissh on Christmas day 😁
I decided that this was going to be my entry into the Modern Makers Christmas Challenge. But then I sewed the Diabetes Gear Booklet Pouch. But since we are allowed multiple entries I will enter this one too 😝
Materials
- Pattern
- Trooper Shirt (Tadah Patterns)
- Fabric
- KK Fabrics Unalloyed Aussie Christmas Magpie Carols – Sunshine (Wattle Hill Fabrics)
- Buttons
- Yellow Rimmed 4-hole Buttons (from stash)
- Thread
- Rasant col. X2000
- Interfacing
- 100% Cotton Lightweight Fusible Shirting – White
Sustainability Check
👍 Fabric is 100% cotton
👍 Interfacing is 100% cotton
🤏 Rasant is OEKO-TEX but not biodegradable
🤏 Buttons are plastic but are salvaged/remnants from another project
Construction
Pattern Adjustments
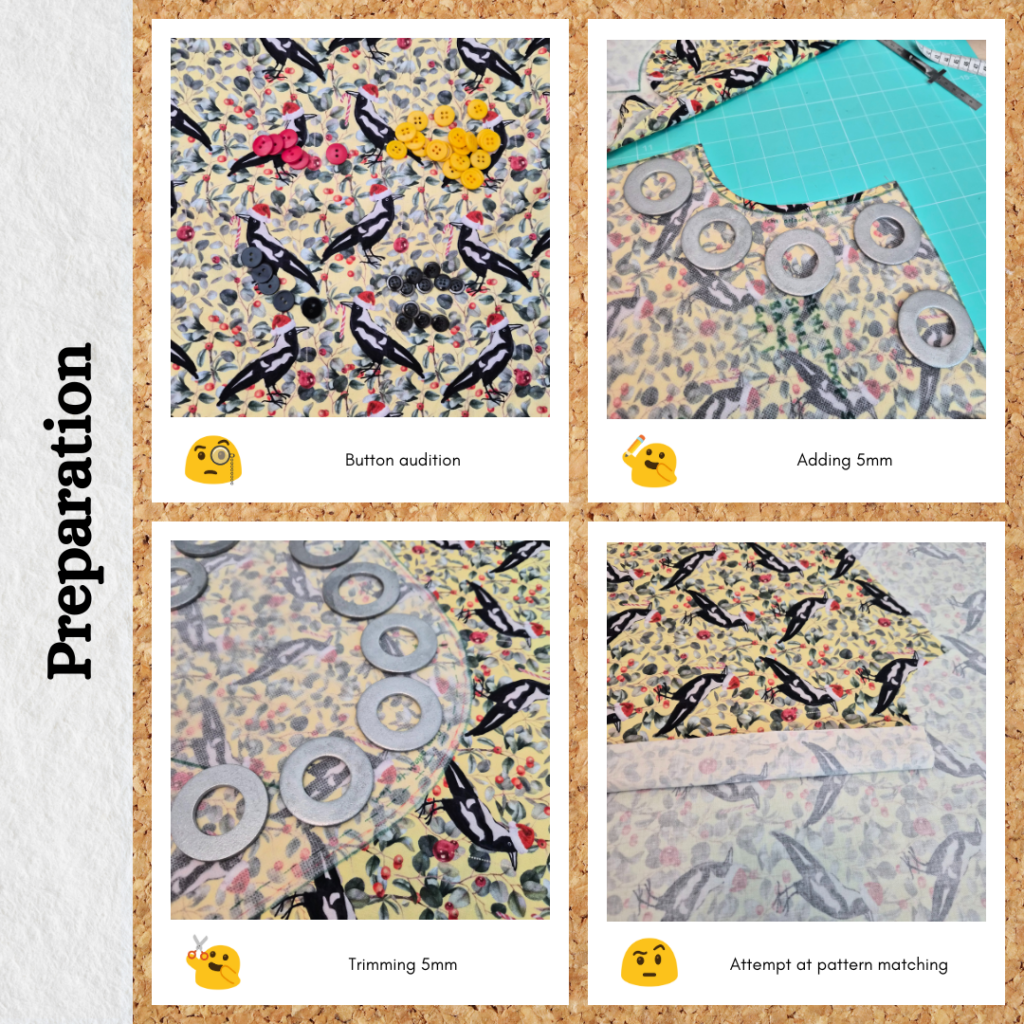
So I know now that I don’t like 1cm flat-felled seams on the shoulder seam, so adjusted the seam allowances on the fly (drawing 5mm extra for the body pieces and cutting off the extra 5mm on the sleeve piece). I really should re-draft all the pattern pieces because there’s no guarantee I will remember to extend the body piece seam allowances next time (and there are like 3 pieces to make sure I apply the adjustment to).
Preparing the Materials
I was so sure I had some spare airism left over from the previous Trooper Shirt projects, but I probably actually used it on the third version (I remember being impressed I could get three lots of yokes out of the small sized airism singlet my husband picked up). So I salvaged the yoke from the second Trooper Shirt because that’s a relax fit one so my husband never wears it. I was a bit worried about if it would match up ok since I had extended the armhole seam allowance a bit, but it’s a knit so it was fine.
I cut out the back without thinking about the pattern, but for the front, attempted pattern matching of the birdies. I don’t think I was that successful at mirroring it across front pieces, but at the very least the birds are kinda in a row so it won’t look too off. I also tried to think about direction of the birds for the collar piece. But then decided I should over-thinking it since it’s not that big a deal, honestly.
I thought about buying matching thread, but figured it wouldn’t make much difference (butter yellow compared to off-white) and I was motivated to sew this NOW.
Sewing
I felt pretty confident on the steps since I’ve made so many shirts now, but made sure to refer to the instructions anyway. I also had a couple of self-scares where I wasn’t sure if I had used the right pattern pieces lol. Because I had kept an old version of the pattern, I can tell because I used a different colour marker for the markings…except for the ones that I guess I use across both versions? So I really need to just re-draft the whole thing and chuck out the old pattern pieces so I don’t accidentally use the wrong thing.
I remembered to decrease my stitch length when doing the collar corners, but was so focussed on that I forgot to insert the threads to turn the collar corners out lol. So had to unpick and resew. And then I pulled too hard on one and pulled the edges of one collar corner out…I think I realise what the issue is here. Previous interfacing wasn’t woven, but this is, so it frays the same way the fabric does and in a way I guess, doesn’t stabilise it haha. So how to deal with this? Maybe I should cut the interfacing to exclude the seam allowance? But definitely need to be gentler when pulling on the threads.
Another thing that went wrong was when flat-felling the shoulder seams, I tried topstitching from the wrong side and it ended up bubbly. So instead, I first pinned it parallel to the seam line from the wrong side then re-pinned it perpendicular to the seam line from the right side. I did miss some of the flat-fell at the top of the shoulder as this is where it curves the most, so the flat-fell ended up not a tight 6mm (it spreads a bit), so I might need to water-soluble thread baste just this section. I don’t think I need to do the gentler curved parts of the seam which should save me a little bit of time (and thread).
Other than that everything went pretty normally as I’m pretty accustomed to sewing shirts now. But a highlight would be the neatest pocket topstitching I’ve done to date lol. And one other thing I did differently was french seam the side seams but then topstitch them down. I got the idea from the instructions, even though they don’t say to create a french seam, they still give the option of topstitching the seam down. And it made me realise I could do this for any pattern like this that doesn’t have inset sleeves. I just need to make sure it I do it from the inside (so it doesn’t get awkward to sew). I took a photo of this (as well as the pocket stitching) but I think the colours of the fabric confused the camera so they came out really fuzzy and I was too lazy to take new photos so they just will be omitted from this blog post LOL.
Then this got put to the side while waiting for husband to return from Japan so he can choose which buttons he wants. He veto-ed the two black options based on a photo but wasn’t sure on the red or the yellow and I figured it would be better for him to see them in person to make a decision. Technically November 2025 Sewathon – Project #7 but got shifted because of this.

Buttonholes and Buttons
Pretty standard methodology now. I did use my fairly new needle threader to when I got to the part of hide the thread ends (from attaching the buttons) in the button placket. Sooo much better than trying to ‘glue’ 8 thread ends with spit and somehow get it through a needle eye LOL
Reflections
If I was smarter/more organised I could have pattern matched the pocket. Not a big deal.
Things I learnt:
- Don’t keep multiple versions of a pattern in the same envelope because it’s confusing
- Be gentler when turning out collar points for a collar interfaced with woven interfacing
- Topstitch shoulder seam french seams from the top. Consider basting with water soluble thread on the tight part of the curves.
Categories: Sewing
Leave a Reply