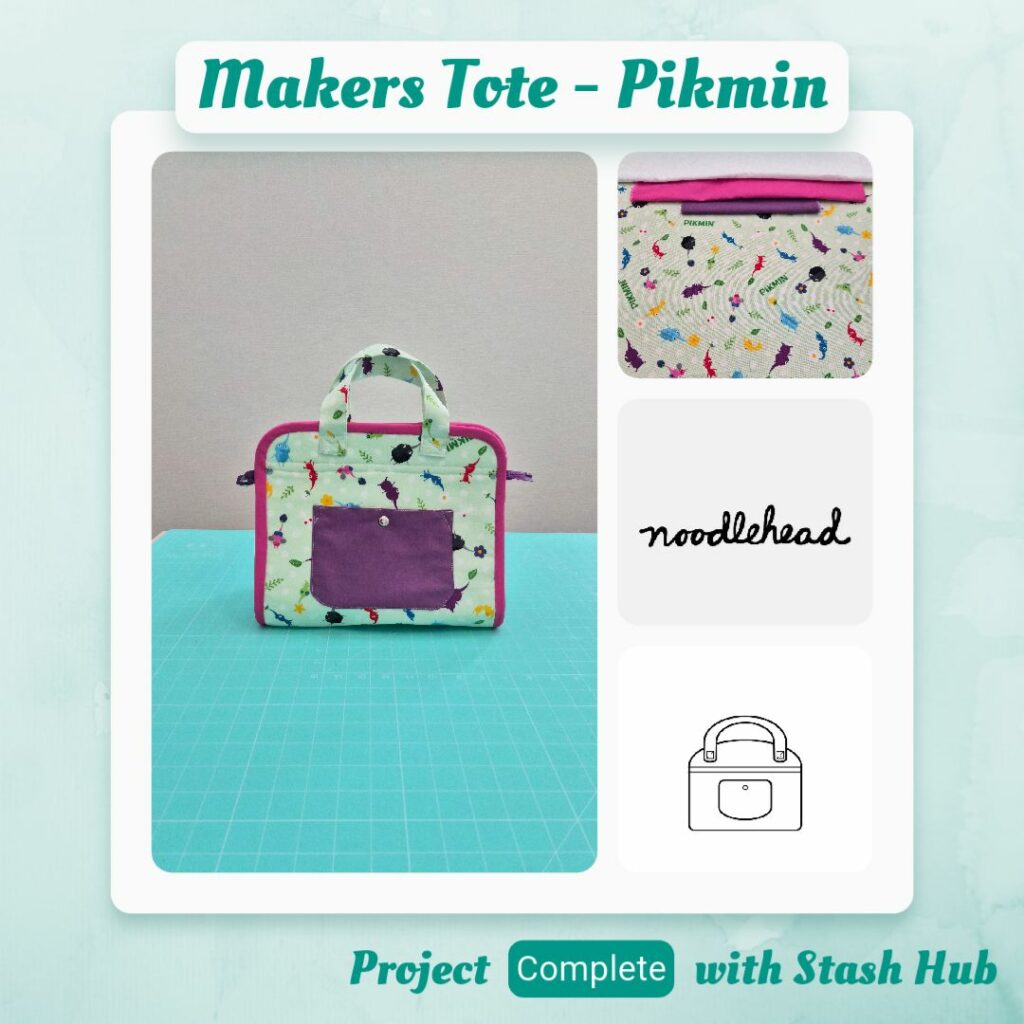
Main Fabric: Pikmin Quilting Cotton Fabric, Riley Blake Confetti Cotton – Purple, Devonstone Solid – Kylie
Lining Fabric: Riley Blake Confetti Cotton – White
Interfacing: 100% Cotton Lightweight Fusible Shirting – White, Heat n Bond Fusible Interfacing – Medium Weight Non-Woven
Batting: Matilda’s Own Bag Batting
Notions: Rasant col. X2000, BOO Chunky Zip Separating Purple 284 – 50cm (BOO! Designs), Double Cap Rivets 9mm – Silver (Snaps Australia)
Once again, I knew what fabric to use for the outer part of the bag, but hadn’t given any thought to the pocket or lining fabrics haha. So it ended up being a bit of a creative endeavour to find fabric in my quilting cotton stash that matched the print and was in the right dimensions for the pieces I wanted haha. Had to rearrange things about 3 times before I settled on something that would work.
I knew I had enough stabiliser for a small Makers Tote from the last (and first) time I made this pattern. And since I knew bag making uses a lot of woven interfacing, I had a big stash of that on hand (for collars/cuffs as well). The main things I was like ‘oh whoops, didn’t take that into account’ was this pattern also calls for non-woven interfacing. But turns I out I did have some final pieces of medium interfacing that I could use.
I was planning on using snap buttons since I hadn’t bought a zip, but I realised that I had a purple chunky jacket zip that was the wrong shade of purple for the project I originally intended it for. It was too long but figured I could use this opportunity to learn how to shorten a plastic zip. Luckily I had already bought the required tools quite a few months ago, because I knew that at some point I would have to stop procrastinating and learn how to do this haha. I remember seeing tutorials from various websites and feeling overwhelmed, but when I looked it up this time I found the Threads Magazine tutorial which laid things out really nice and simply. And once I realised that the plastic was just fused to the tape and so I just needed to pry it off, I felt a lot less intimidated. My main challenge was whenever I snipped the tooth part off it would go flying across the room somewhere…I figured out that if I cup my left hand over the nippers before snipping it would hit my palm and land on the table. It sure does sting though LOL. And more validation that buying supplies in advance is a good thing, I had the zipper stops from Jack Stock Haberdashery on hand which meant even though I suddenly decided to use a modified length zipper I didn’t need to wait for supplies to arrive and kill my momentum/motivation. I did use the wrong size for starters, I assumed since the zipper was chunky I would have to use the big stopper, but it was too loose and could slide up and down the zip tape. Also good that I bought multiple sizes since I had no idea which I would need 😂
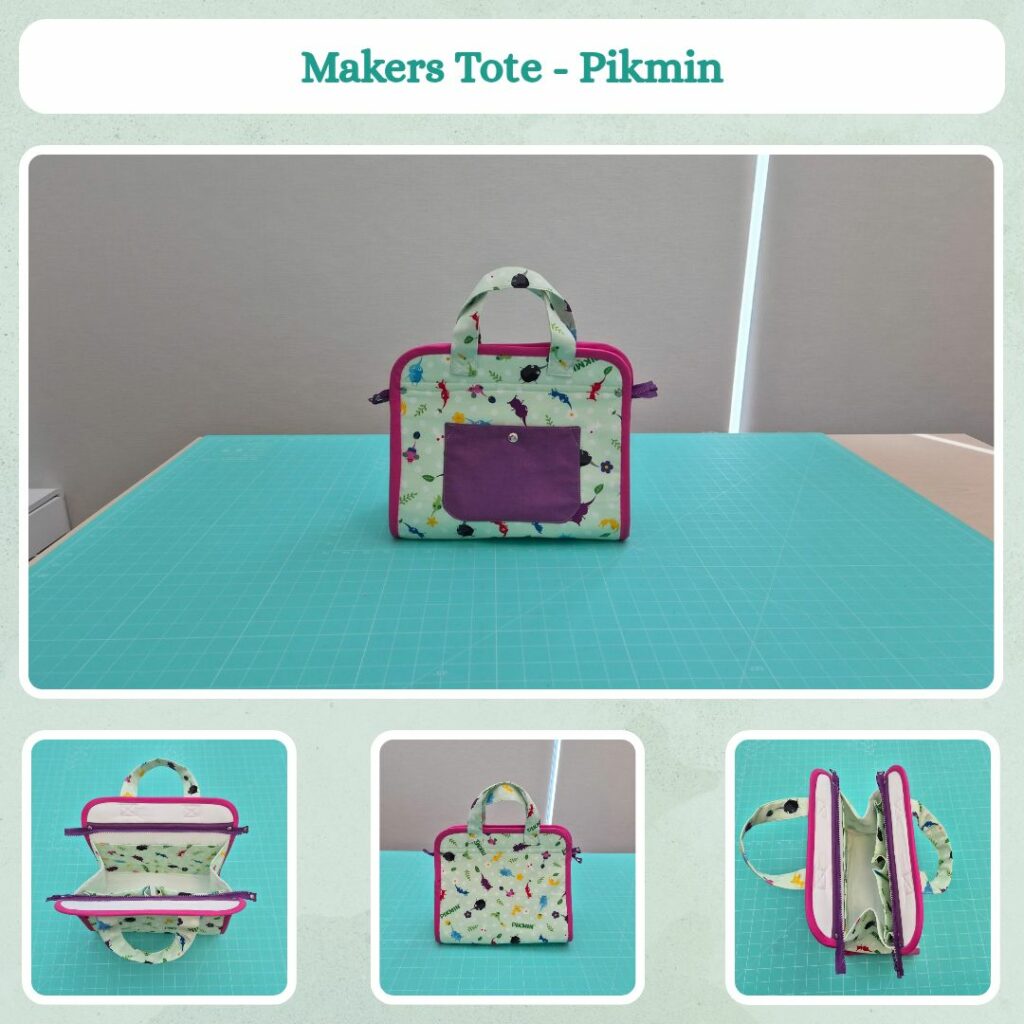
This was my first time making the patch pocket since the other bags I made had t-shirt designs that I didn’t want to cover up. Wonder tape helped a lot with placement. I really should have switched to the edgestitch foot to topstitch it down but was too lazy to switch from the walking foot to normal foot and ended up having to mess around with needle placements which wasn’t fun haha.
The inner pockets were straightforward to put together and I remembered from last time that I need to secure the pleated pockets down the centre lol. I messed up the direction of the gussets but noticed before I had finished handbasting it all together so was able to fix that without too much issue. I used a zipper foot this time to try and get closer but I think the reduction in contact with a sewing foot actually made it harder, so next time I’ll just use the normal sewing (not walking) foot.
I also think next time I might try using starched fabrics for the binding etc like the pattern suggests, because it would be nice to get really nice crisp edges. I ran out of wonder tape and opened a new packet and it had like no stick. So the stitching for the zips ended up a bit wonky. I wonder if it’s a bad batch issue or a storage by the seller issue 😣 I cut the zip at this point and wasn’t too sure how to finish the now raw zipper edges. I used some fabric mounting tape and double folded the edges over each other (spoiler, yeah this wasn’t sufficient LOL).
Then it was time for the binding which caught me by surprise because putting the bag together actually doesn’t take that long 🤣 I guess most of it is simple and I skipped the welt pocket this time which probably would have taken up the most time. What *did* take a long time though was handstitching the binding to the front with an ‘invisible’ stitch. Damn, I hate handstitching haha…but it did look good so it was worth it…I guess… I think my main issue is the bag is a little bulky and stiff so it’s hard to get a posture/position that is comfortable. So it feels like a battle when I’m already disinclined towards handsewing.
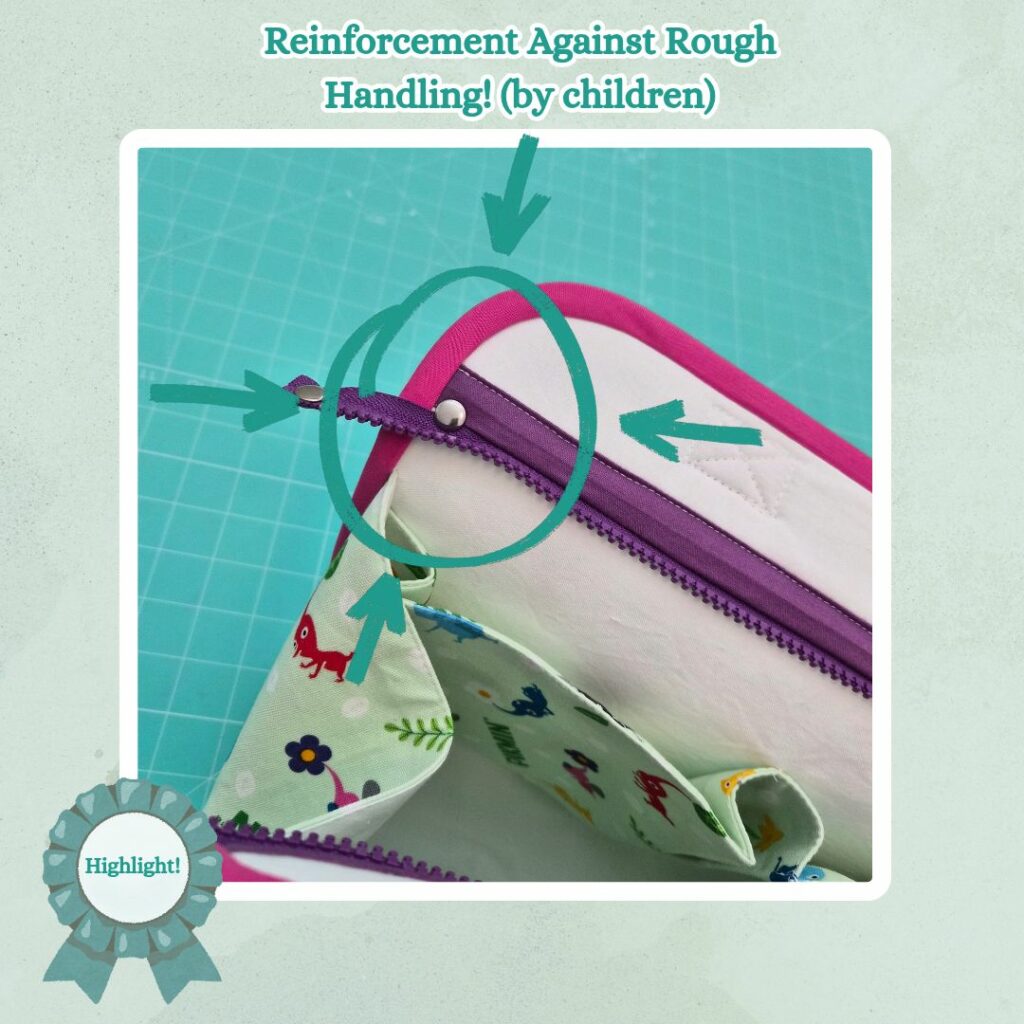
At this point I decided that I wanted to reinforce the zipper because this is a bag for a young child so it’s going to be roughed up a lot haha. I used silver rivets to match the snap button and decided to ‘finish’ the zipper tape with rivets too. It’s ok, I have to think of a nice way to seal it up, although in most cases the top zipper tape should be hidden within a garment, so it would really only need to be for bags I think. A fabric tab might be cuter. Last part was adding the handles which was easy to do thanks to the hump jumper and meticulously marking out the stitch lines with the Frixion pen.

The final product is very cohesive colour-wise, but not to my liking, which doesn’t matter because it’s not for me LOL. Now that I’ve made a version of this bag with the separating zip as intended, it works really well. I hope my niece gets good use out of it.
Categories: Sewing
Leave a Reply