Planning and Design
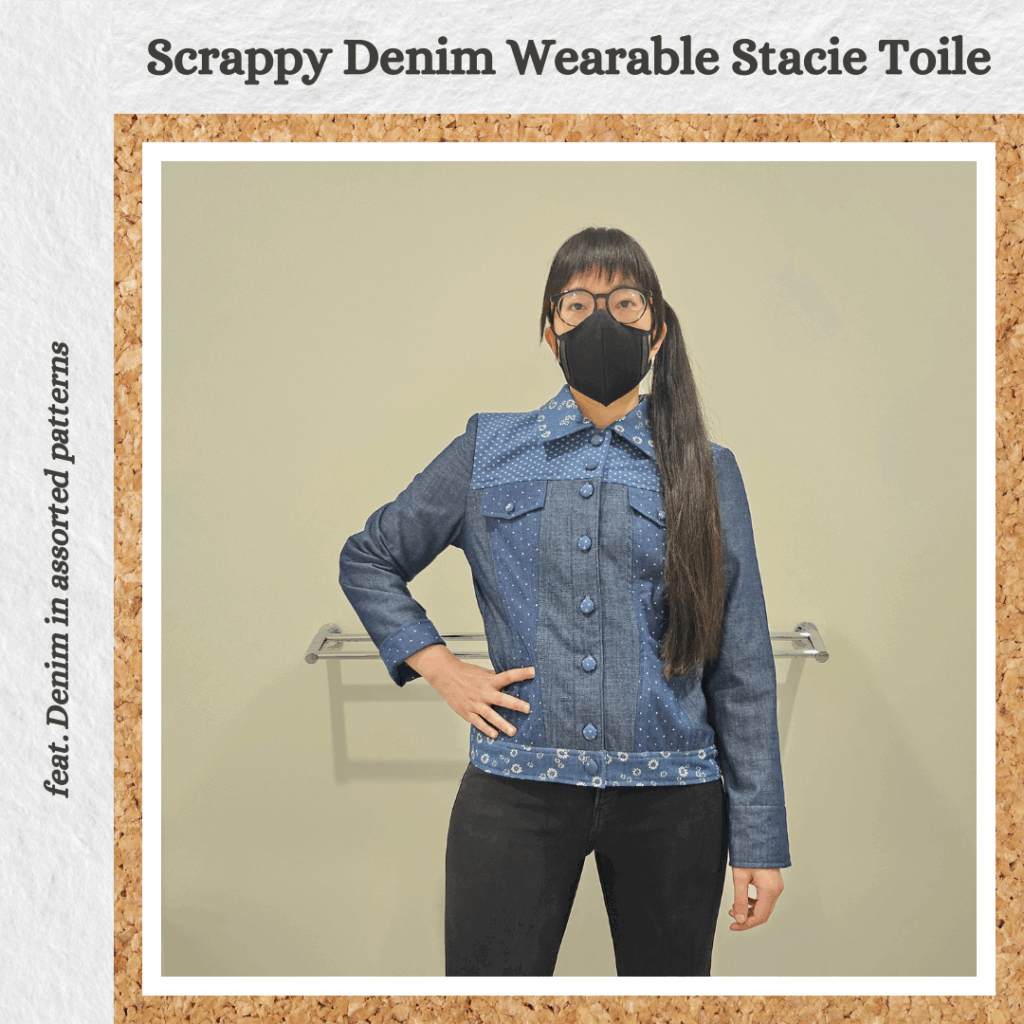
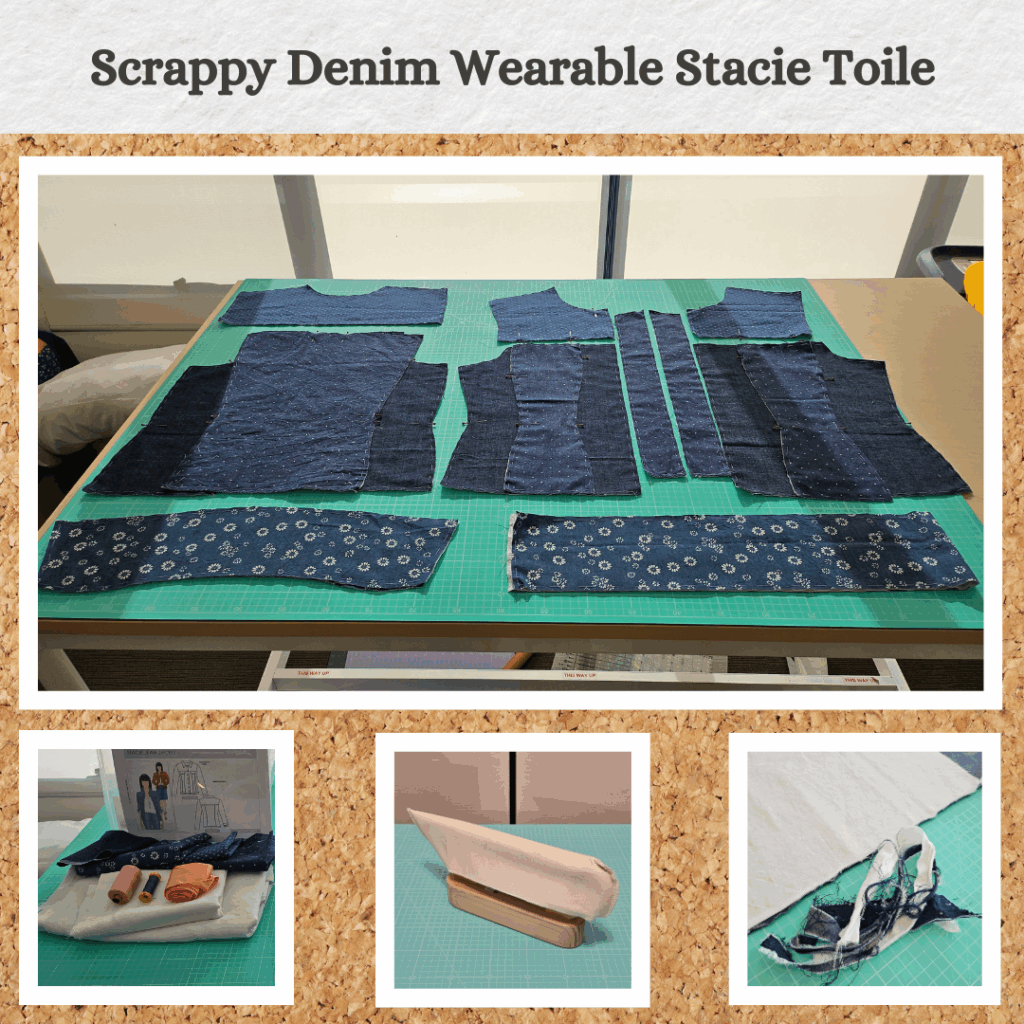
I bought some nice fabric to make the Stacie Jacket but I’ve been burnt enough times by Style Arc’s odd instructions that I figured I should do a toile first. This seemed like the perfect project to use up the denim scraps from my last run of shirts/subsequent scrappy irish chain heat press cover. It also would allow me to practice bias bound seams since I have never done them before.
Thr fabric I plan to use for the real deal is quite thick so I decided to use more scraps, this time some white cotton sheeting, probably from my Moon Flower Empress Quilt Cover, as interlining. I read about interlining recently from The Sewing Book.
I didn’t want the denim to look too random so planned out the sections based on the fabric I had and trying to match (eg yokes, sides) as well as balancing the prints with non-print.
Materials
- Pattern
- Stacie Jacket (Style Arc)
- Fabric
- Denim scraps (Spotlight)
- Cotton Sheeting scraps – white (Homecraft Textiles)
- Plain 147 cm Satin Deluxe Fabric scraps – coral (Spotlight)
- Thread
- Rasant col. X2000 & 1651
- Gutermann Denim col. 4888 & 5397
- Buttons
- Self-cover buttons 12mm & 18mm (Daiso)
Sustainability Check
👍 Using up scraps (including the Gutermann denim thread)
👍 Denim and cotton sheeting are 100% cotton
🤏 Rasant is OEKO-TEX but not biodegradable
🤏 Self-cover buttons are natural (metal and the fabric is cotton) but the fabric used makes the final button very project specific and I don’t think they can be re-purposed with new fabric
👎 Satin is polyester and spandex
👎 Gutermann denim threads are 100% polyester
Construction
Interlining
Ensuring the interlining and denim grains were aligned took a lot of time and a lot of fabric ripping 🤣 It’s tricky when you are using scraps since there isn’t always a selvedge. Luckily 100% cotton rips really well haha.
I focused so much on grainline and ensuring I had enough fabric for the pieces I wanted to cut out that I completely forgot about trying to ensure the cotton sheeting was the same way up/down when attached to the denim…oh well. It would have been hard to tell anyway since I did a lot of the interlining work at night in suboptimal lighting.
I need to get onto getting/making some pattern weights cos this is definitely the way I want to cut out fabric from now on. Especially since I have a nice big A0 cutting mat 😊 I first tried marking the pattern piece onto the fabric, handbasting, then rotary cutting the joined piece out. It was really awkward trying to handbaste it before cutting though. So I switched to cutting then basting, it only worked since the denim and sheeting both are quite stable and didn’t shift even when I spun them around for easier sewing.
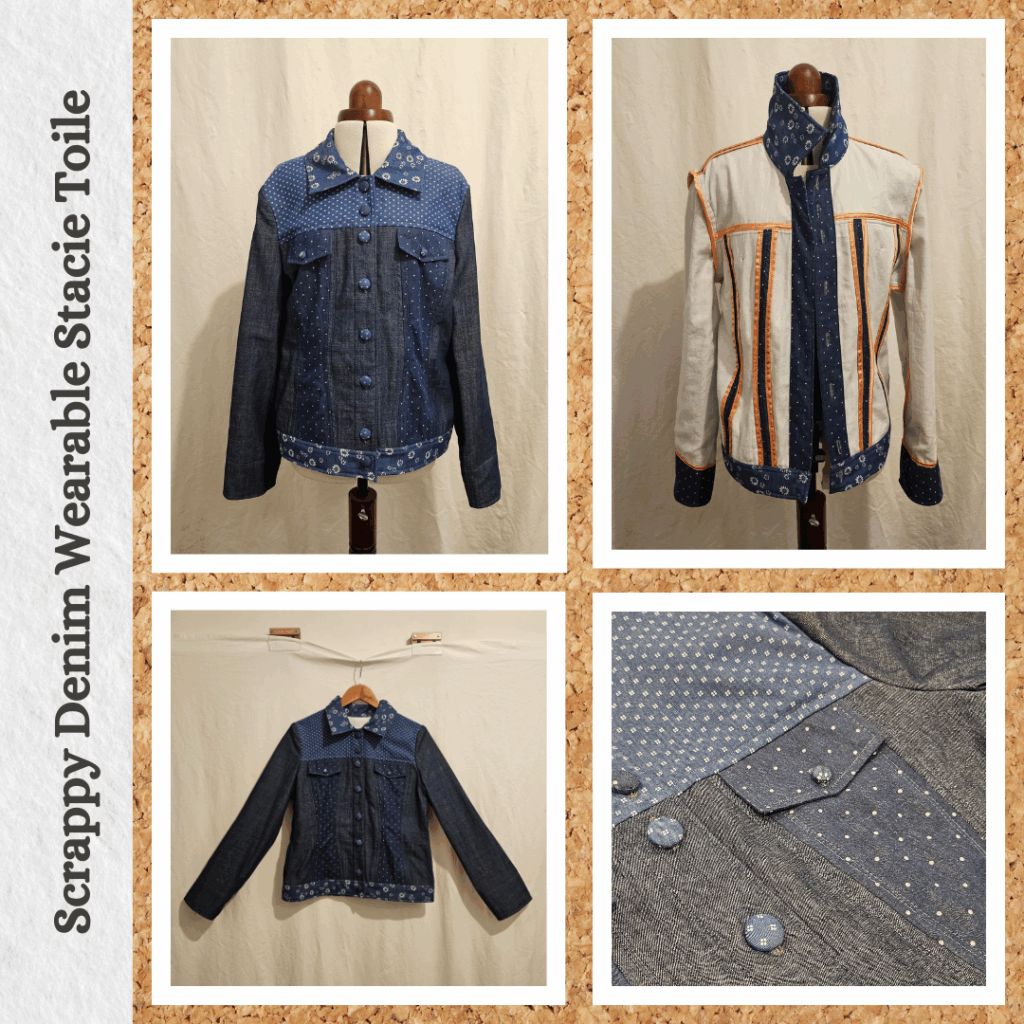
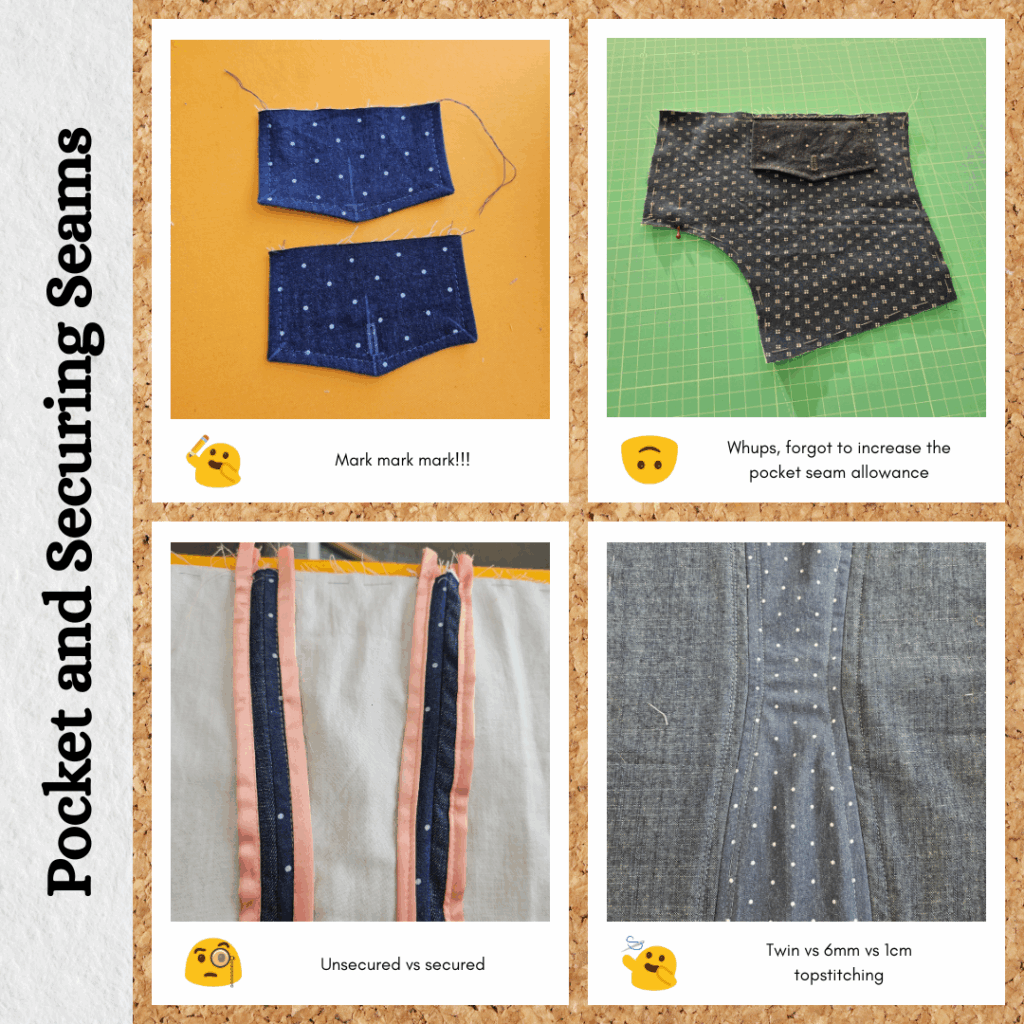
Collar and Pockets
Probably the simplest part of this garment haha. Especially since I used the tricks I learnt from the shirtmaking course on pointy-as corners and marking corners for topstitching 🤓 One thing I had to fudge though was the pocket placement since I forgot to increase the pocket top seam allowance to 1.5cm. Not a big deal though.
Body and Bias Binding
I played around a lot with the bias widths. My very first run I used 3cm with 6mm seam and after I topstitched down from the front, my bobbin stitching was perfectly on the bias binding 👍 Of course all subsequent bindings didn’t go as well lol. I also found that 3cm wasn’t long enough, my 6mm offset topstitching wasn’t catching the overhang. So I tried 1cm offset and that worked better. But looked worse since I think it was too wide for this slim fit style. I ended up doing a double topstitch as that looked much better and cos I had already cut out 3cm strips so was at the point of no return, I had to do at least the 1cm topstitch 😅 Also the binding was on the straight grain (so not bias at all) so it needed to be fully enclosed haha. Things you gotta work around when you’re using up scraps.
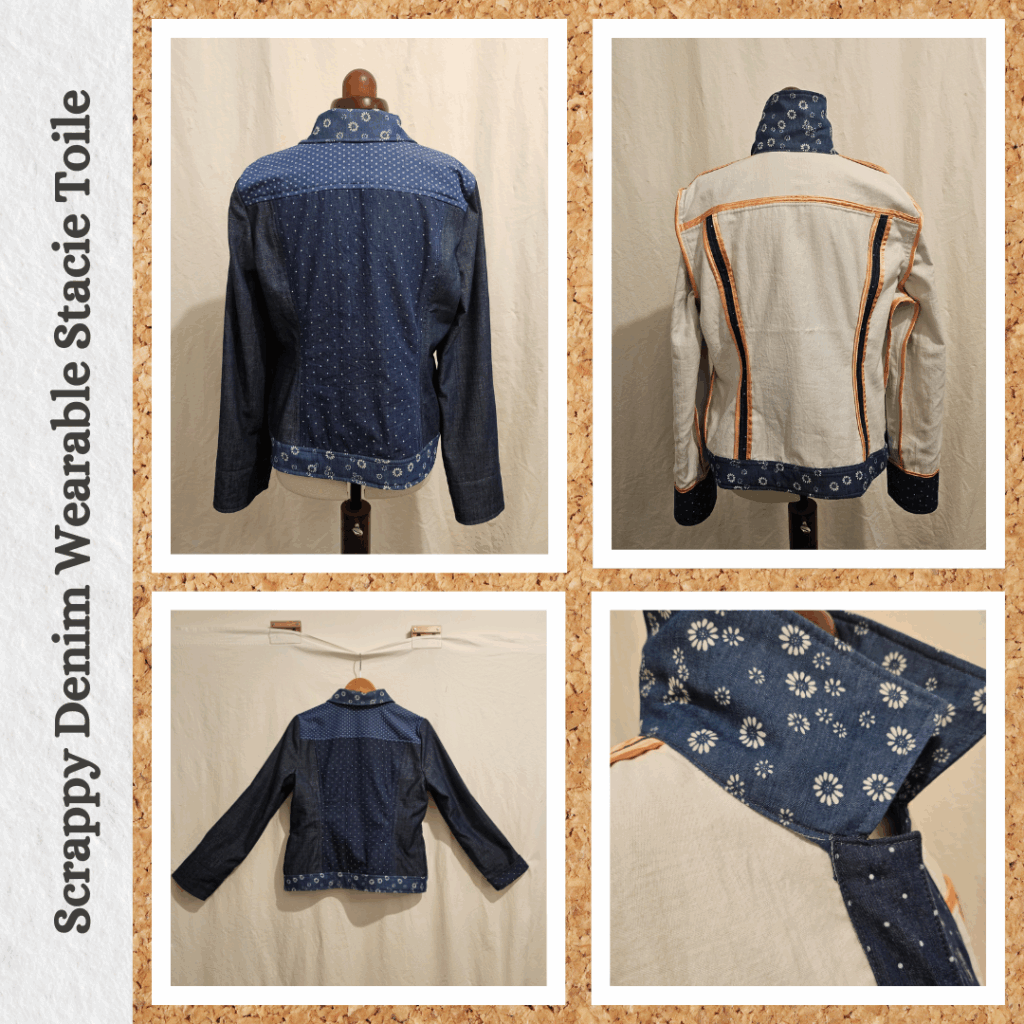
For the yoke seam I cut out 3.5cm wide bias. But I forgot that I wanted to make it a 1cm seam so that if I did a 6mm offset topstitch I would almost guarantee my bobbin stitching would fall on the binding. Am I getting too hung up on this detail? Maybe, but it sure feels nice when the threads match the fabric they are sewn on haha. Anyway, 3.5cm wasn’t enough so I topstitched the fold-over to ensure it would stay down. This binding was actually on the bias so it was okay that it wasn’t fully enclosed. And since it was pressed up, the loose edge of the binding wouldn’t be visible.
I finally got the ideal width on the shoulder seams at 4cm 😎
Attaching the Collar and Front Facing
This is where I got annoyed at the instructions 😅 Previously I was told to make the collar up and topstitch it. Now I’m told to sew just the undercollar to the neckline. How do, when both pieces are topstitched together? Also, the previous step instructs to attach the front facing and topstitch this too. I was feeling suspicious at this point so didn’t topstitch it down. Which meant I was able to fudge it all together since I didn’t want to unpick my topstitching on the collar. It felt like a very inelegant and messy way to assemble it all. I think for the real deal I’ll sew both upper and lower collar to the neckline, bias bind the whole neckline, add the facing over the top then when the facing is turned out (hence pushing the seam downwards) and topstitch the bias bound seam to the body.
I did use the corner turning method for one side which worked really well but undid my hard work when trying to figure out how it was all meant to come together lol. And on the otherside, I did worse than forgetting to reduce the stitch length near the corner…I forgot to reset it from 3.5…so the corner started fraying once I had topstitched the facing down lol. Whoops. I shoved dabbed on some anti-fray glue, let’s see how that holds up 🤣
Also the stay-stitching plus clipping for the neckline really helps for collar construction 👍
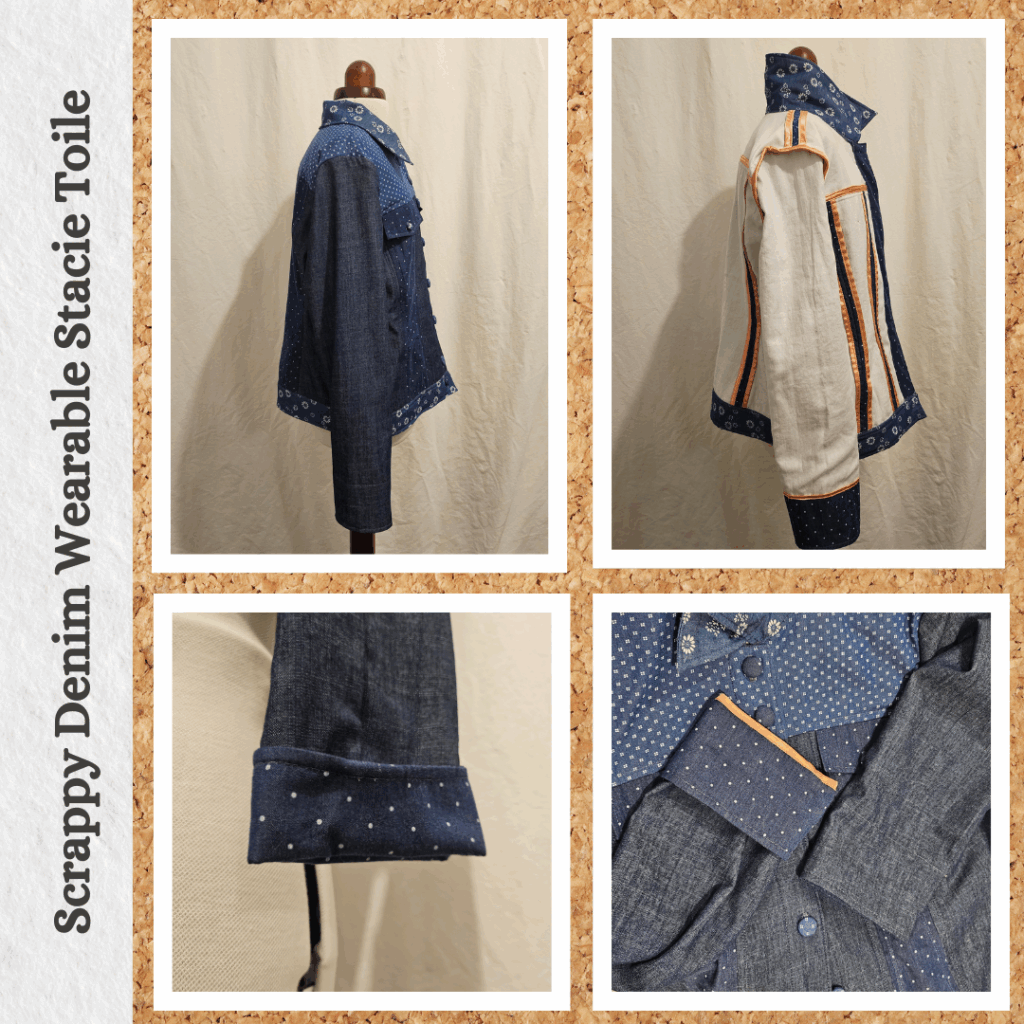
Sleeves and Side Seam
All the bias binding was starting to add up so I decided to use the double bias binding method for both the shoulder and side seams to avoid stitching more seams down. I used the usual By Annie’s 2 1/4 inch width with 1/4 inch seam (yeah…mixing metric with imperial 😫). For the real deal I will handbaste the foldover before topstitching. But I hate the thought of trying to handsew satin lol. So deliberately choosing to be lazy here…y’know since it’s just a toile and all 😝
I did something very similar for the side seams but did actually handbaste because unlike the shoulder seams which are pressed one way, the side seams are truly free lol. I tried offset stitching, in the ditch stitching and topstitching to see what would actually secure the binding 😅 For the real deal combining ditch and topstitching should do the trick.
I had made an adjustment to the pattern by splitting the sleeve and inner cuff. This was because I wanted to use a contrasting fabric for if/when the cuff gets turned outwards (like Style Arc suggests). I figured the sleeve length would be long enough to sacrifice 12mm in seam allowance (I was right, phew). I bound the inner cuff too (32cm of binding with 1cm seam) and handbasted it so I could try topstitch it from the inside. It worked really well even though my denim thread was in the bobbin and my Rasant in the top 😊 And then did a 6mm offset topstitch at the actual sleeve end for aesthetic purposes.
Waistband
I tried out two methods for finishing the waistband – the method from the shirtmaking course and my old method. I wasn’t happy with the results for either 😣 I also tried very hard to whipstitch the inner hem allowance over the seam line to ensure it would get caught but this method only works if it is topstitched near the edge. Not if it is ditch stitched. Next time I think I should ditch stitch pre-emptively in a matching thread colour to use as a guide for handbasting. Because atm I have no idea how much further I need it to overlap to get caught by the ditch stitching. This is important to me because I want to do 6mm offset topstitching around the waistband which means I need the edge to be secured in some other way, hence the ditch stitching. I was starting to rush a bit at this point cos the sun was going down and I forgot to mark my corners for nice even topstitching, oh well.
Buttons
It has been awhile since I made fabric covered buttons. Since I now understand how they work, I don’t bother tying off the gathering thread and just encase it with the shank part 😁
I also have gotten very used to doing a test buttonhole straight up. Just goes to show you can train yourself to not be lazy form new habits lol. Being able to measure the finished buttonhole length was handy as I had to do the second button from the other direction because of the fabric bulk at the yoke seam. Btw I’m loving the buttonhole chisel, it’s a very satisfying sound/sensation haha.

Reflections
Glad I did this toile, there was a lot of trial and error given it’s both a new pattern and bias bound seams are a new technique. I’m kinda excited to make the real deal because it should be easier (hope I’m not jinxing myself…). But really, knowing what I’m doing, what I want to change, using real bias binding that won’t fray and not having to juggle the different patterned fabrics should all add up to an easier experience. Plus I’ll have more tools at my disposal now I know what I want to invest in.
The fit of the jacket is nice too. Not too form fitting (because I sized up), which was what I was concerned about
Things I learnt:
- Buy water soluble thread
- Buy a sleeve board
- On the fence about an edge guide foot
- Don’t use Style Arc’s collar attachment method
Categories: Sewing
2 replies ›