Planning and Design
My mum’s church group are doing a white elephant sale so I pre-emptively cleared out my wardrobe of my unwanted clothes. Even thought I haven’t fully replaced them with handmade items yet 🙃 So I kinda need some shirts for work 🤣 Given the (kind of) urgency behind this, I decided to use patterns that I’m already familiar with.
Materials
- Pattern
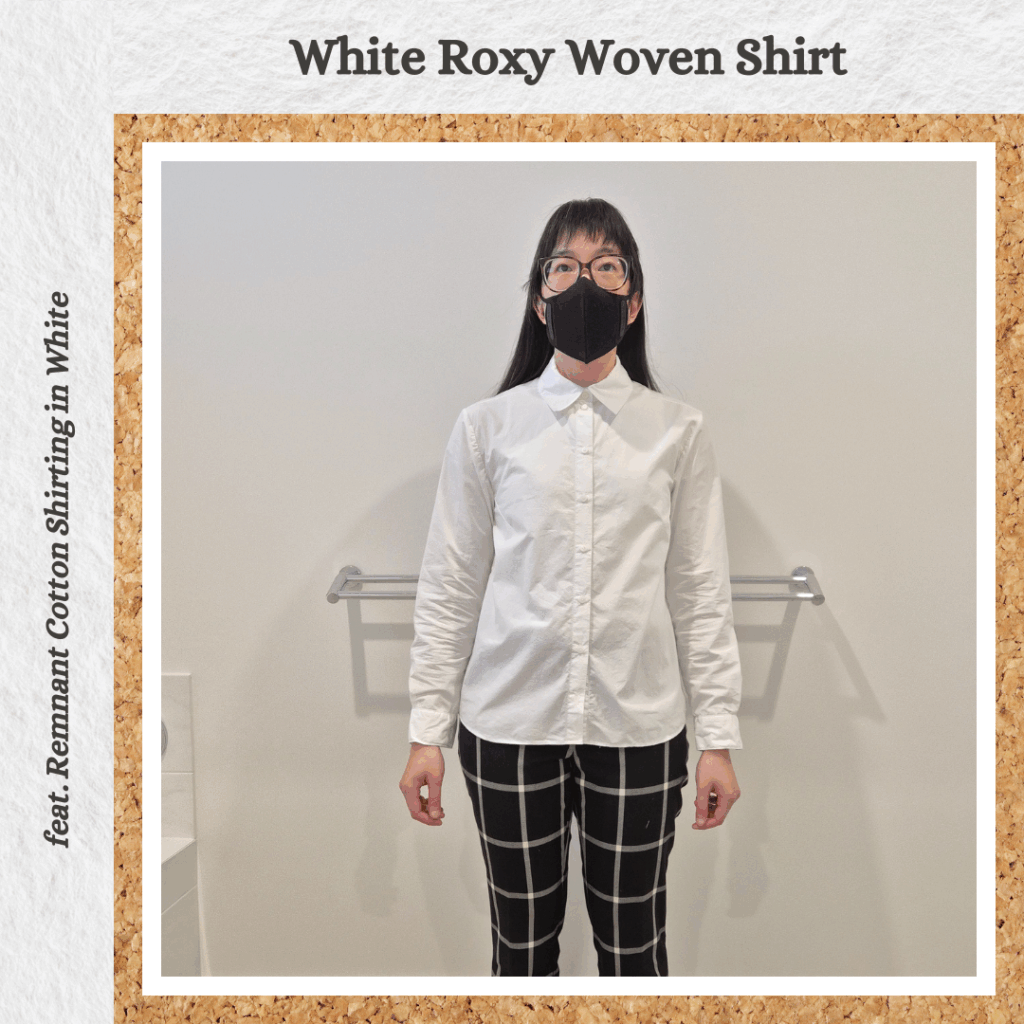
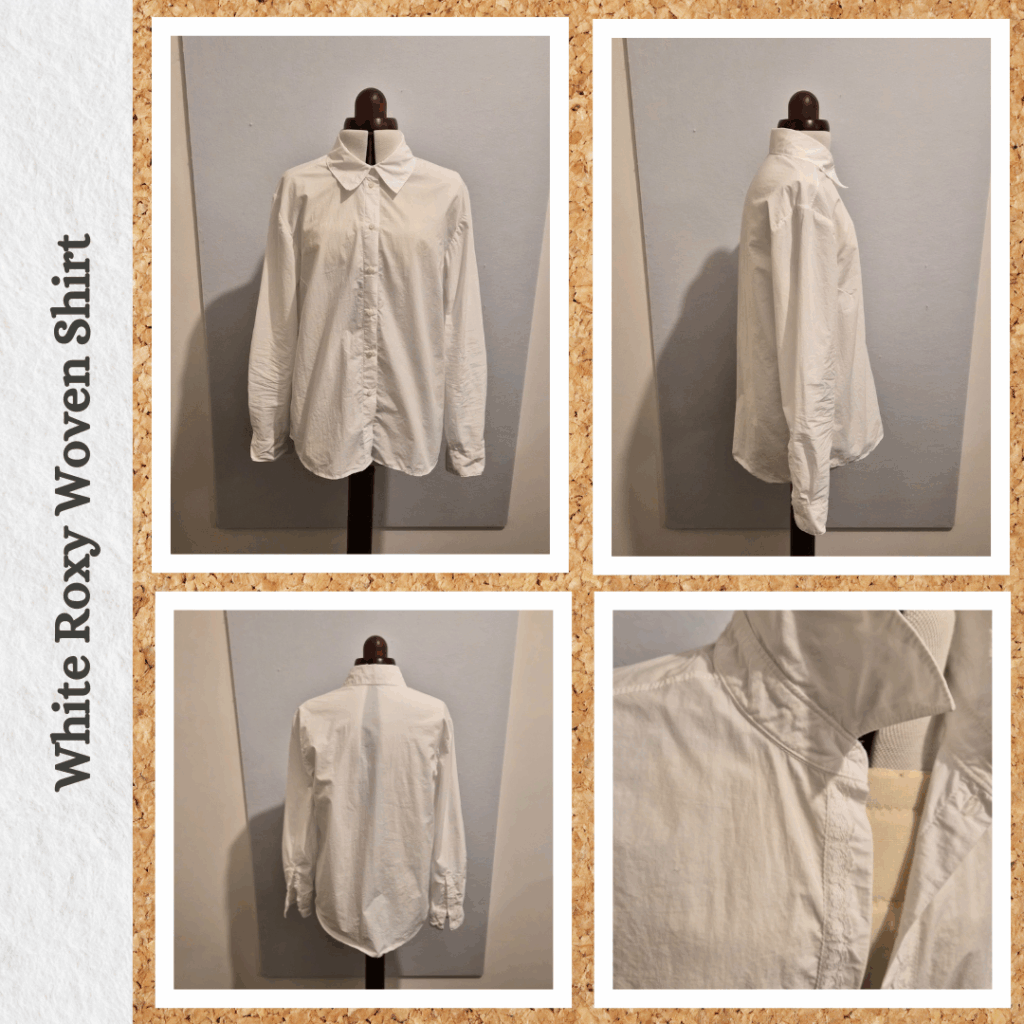
- Roxy Woven Shirt (Style Arc)
- Fabric
- Remnant White Cotton Shirting (The Maker Society)
- Buttons
- Shell Buttons 10mm – White (Miss Maude)
- Thread
- Rasant Col. X2000
- Notions
- G710 Woven and Fusible Interfacing – White
- Dove Lace 17mm – White (Remnant Warehouse)
- Pattern
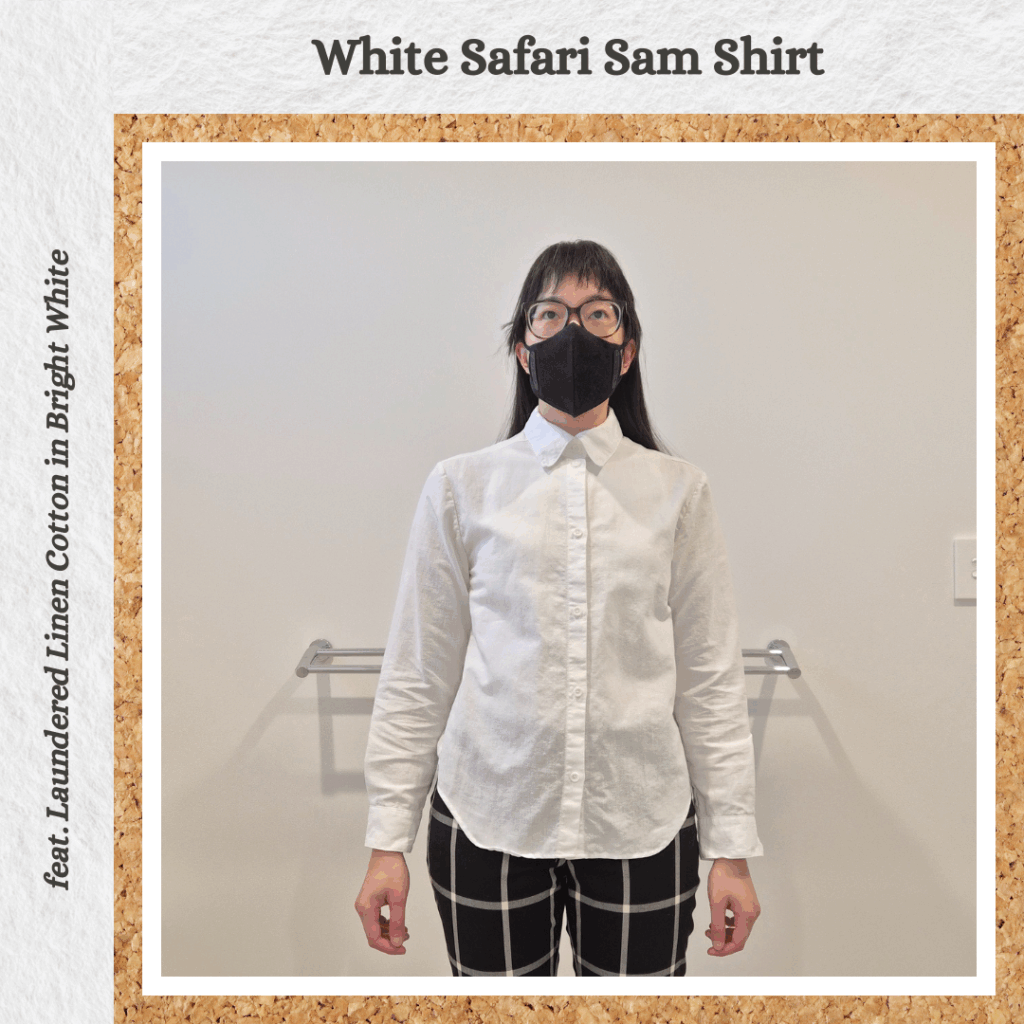
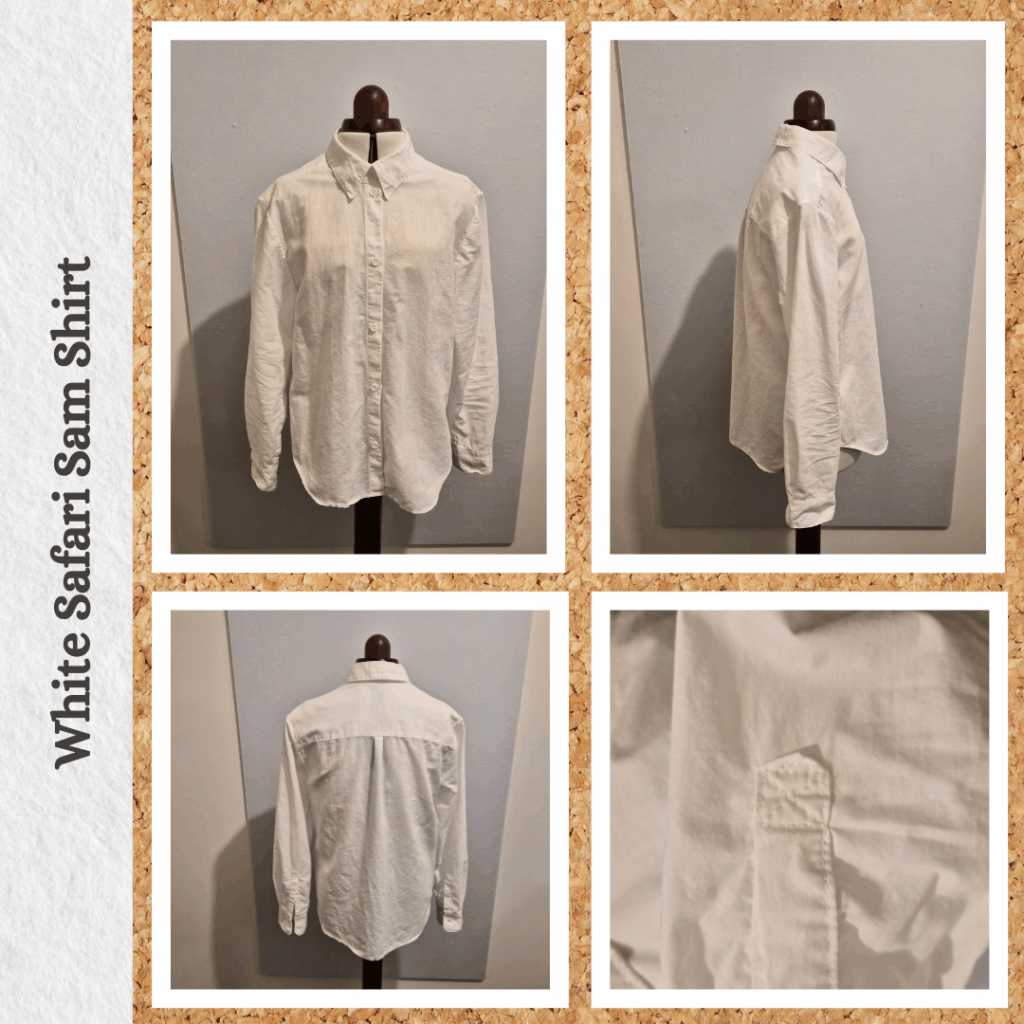
- Safari Sam Shirt (Style Arc)
- Fabric
- Laundered Linen Cotton – Bright White (Miss Maude)
- Buttons
- Corozo Nut Buttons 13mm – White (Core Fabrics)
- Thread
- Rasant Col. X2000
- Notions
- G710 Woven and Fusible Interfacing – White
Sustainability Check
Construction
Pattern Adjustments
Roxy – So I’ve decided while the back split is a cool detail, it’s not very practical. So I removed this as well as shortened the length based on the length of the Corduroy Kalle shirt. I also changed the seam allowances so that everything was 1cm unless it was a potential flat-fell/french seam (I missed one though…). I used the Jenerates Seam Circles, my tracing was super wonky to begin with but I started getting more consistent a lot faster than expected. I also learnt that I need to align my pencil to the outer edge of the inner circle for the 1cm circle and to the inner edge for the 1.5cm circle.
Safari Sam – Given how huge my cupro version of this turned out, I did a comparison of size 8 to size 10 shoulder and the difference was only 1/4 inch. To make sure, I tried on cupro shirt and assessed this would be a good reduction. I did the same shortening adjustment as the Roxy (to match the Kalle shirt) but also reduced the sleeve length by one cuff’s width (5.5cm). I wasn’t sure where to remove the length so did some research and found this guide.
Button Placket and Collar
It was my first time using a cotton woven interfacing. I’m not quite out of my polyester interfacing, but I figured I could save these for the fabrics I have that are part polyester and use the cotton one for the projects that are using biodegradable fabrics. I didn’t think about it when I was applying it, but it’s probably really important to match the grains since it’s a woven LOL. But it worked out because I was cutting rectangles of fabric out for block interfacing. Because I’m tired of guessing and getting it wrong, trying to match random bits of fabric to eyeballed sizes of interfacing. I was doing it that way because I wanted to reduce waste, but in the end, it’s more wasteful to get things completely wrong and have to redo it (in terms of both time and materials). So I was able to measure out the interfacing so that it wouldn’t overhang the fabric and also align it to the edges of the fabric (which corresponded to the grain).
I’ve made quite a few shirts this year so was feeling pretty confident on the process. But of course when you’re confident you tend to miss things 😅 For starters, I do quite like folding my button placket to the front for that little bit of detail, but went on autopilot and folded everything inwards. And for the Roxy, I realised that since it doesn’t have a yoke, the shoulder seams actually need to be 1.5cm wide not 1cm. So I did a very narrow flat-fell on this…
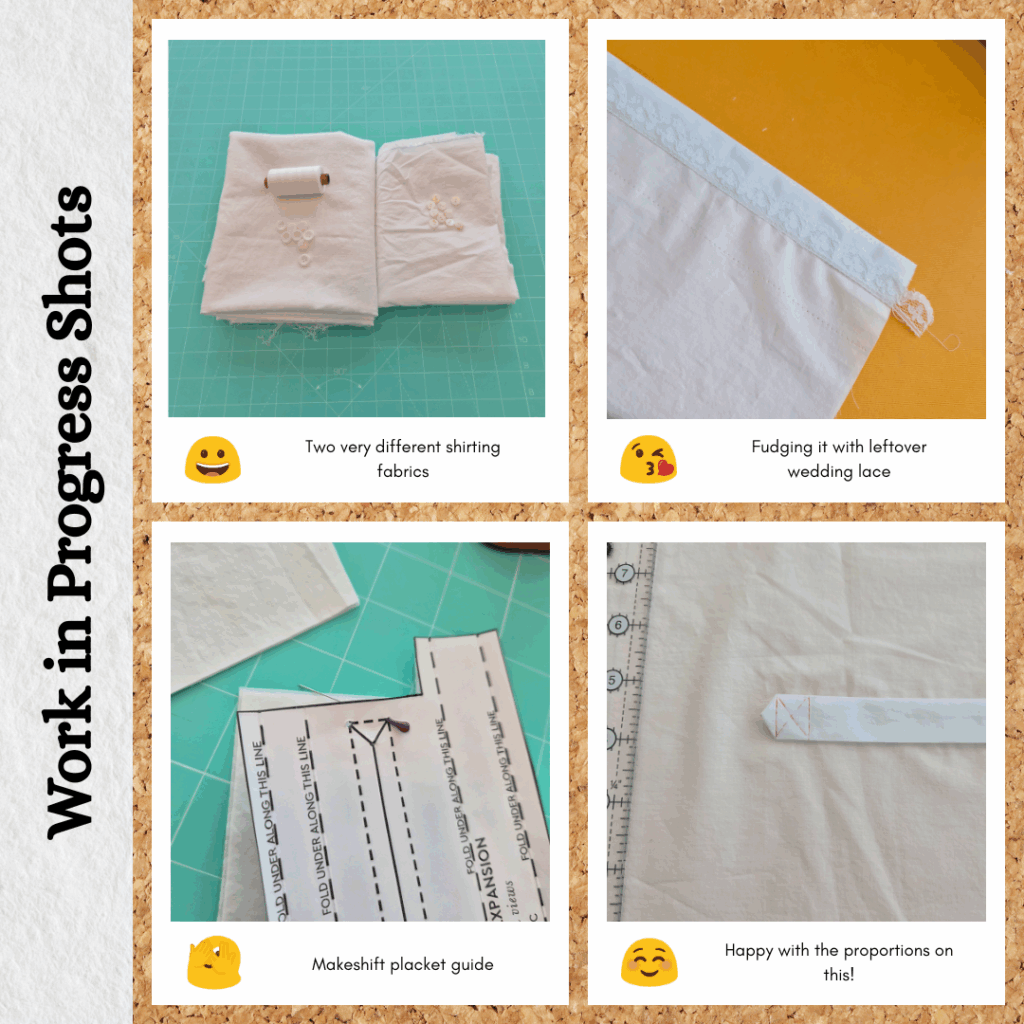
Then it came to the collar and I didn’t have to refer to any of the guides I previous used this time. I feel like the collar corners aren’t as pointy as previously? Wonder if it’s because it’s a different type of interfacing. And then onto the collar stand, which is where things went badly with the Roxy haha. The collar stand was waaaay longer than the neckline of the body. And I had noticed that the button placket didn’t quite line up at the top and put that down to me not tracing the pattern correctly. However, the actual issue was I had cut the front piece along the first fold line, not the actual pattern edge. BIG WHOOPS. So how to fix? Quickly. Because I was feeling lazy (I wanted to move onto the collar part). I wondered if I could quickly make bias. Or perhaps use twill tape (even though I know I don’t have white and it would be too bulky). But I opened the twill tape drawer anyway and saw it. Leftover lace from my wedding dress. Why not? 🙃 So I finished the inner edge with lace.
I think attaching the collar stand to the body went ok. But working with two very different fabrics taught me a couple of things. I did the Roxy first which is a much tighter weave fabric. And was running my point turner along the curve to push it out. So did the same with the Safari Sam which has a very loose weave. And poked straight through 😣 Luckily it wasn’t too hard to sew over that part again. With the linen cotton fabric, I am able to use my fingers to turn it right way out and even finger press it into shape quite easily. Whereas with the cotton shirting I really needed the tool. Definitely something to keep in mind for future projects. Also, I interfaced both collar stand pieces and I think this made the whole process easier. And it doesn’t even feel extra bulky so maybe I should do it this way from now on.
Sleeve Placket
So I was a bit lazy, I didn’t really feel like trying to interface parts of the sleeve placket because this new interfacing isn’t quite as structured/stiff so it just seemed like it would be a real pain in the ass LOL. I justified it with the thinking ‘do I really need the placket to be interfaced’? I feel like given all the seams it ends up being pretty structured already and it’s not like I want it to be as stiff as the collar or cuffs.
I wanted to use the Stitch Buzz sleeve placket template but realised that was for 1 inch wide placket and the Kalle placket isn’t this wide. So I kinda made my own template of sorts LOL. I decided to try and assemble the placket without referring to any guidance and it went fine, I guess I’ve finally made enough shirts that the method is ingrained haha. I also came up with a method for making my towers more consistent between sleeves – mark the point where I should secure the bottom of the placket, mark the halfway mark between this line and the top of the placket and then mark halfway on the top half as well as at the vertical centre. Then use the markings in the top quarter of the tower to create the fold. Then mark all the stitching lines out. The first one I did I somehow didn’t manage to catch the lower placket so did a fudge stitch job after the fact. Not sure how this happened because I checked it against the other 3 plackets and those all turned out fine.
I tried to do the burrito method on the cuffs again but I think I messed up somewhere so ended up just doing it the normal way. And I only trimmed the sleeve part of the seam allowance but I also realised that I need to grade it from the edges otherwise it makes it really hard to secure the inner cuff. Wonder tape really helped here, even more so than usual haha. I did guide stitching 6mm from the inner cuff edge and folded over just past the guide stitching so you can’t see it from the right side and I think this worked out well when it came to topstitching from the front. I also think I’ve finally mastered the hump jumper technique at the corners to help my sewing machine not get stuck at these points.
Shirt Assembly
No issues with french seams on either shirt. I ran into some trouble when it came to attaching the sleeves (Roxy Shirt). I really need to start using tailors tacks for the sleeve and armhole markings. I did mark them with the Frixion pen but some of them disappeared as I applied heat in the prior steps. So it was really annoying and awkward to start trying to pin the pieces together and realise I had to reapply the markings. And I missed one of the armhole markings and thought the centre top sleeve marking was meant to match up to shoulder seam which was not the case. Also I didn’t do gathering stitches as I forgot I had to and I had just recently watching the Modern Makers Sleeve Adjustments master class video where Louise said you shouldn’t need to use gathering stitches and that the big four tend to give their sleeves waaay too much ease, which for some reason put it in my head that since Style Arc is not big four, that they wouldn’t have excess ease, which was totally not the case. So I spent way too long on this process and ended up kinda fudging things a bit when I did the second step of the french seams. I really hate gathering sleeve heads, so I might try to remove the extra ease next time I make a Roxy Shirt.
Since I was forewarned by the Roxy Shirt, I made sure to check all the markings for the Safari Sam and also run a gather stitch before hand. The fabric for this one has more give so it was a much easier process.
Buttonholes and Buttons
I decided on small shell buttons for the Roxy and slightly larger paper buttons for the Safari Sam. I had 10 of the former and only 8 of the latter so had to do different button spacings for the two. I generally put one button 5mm below the collar stand and the last one around 10cm from the shirt bottom (unhemmed). For the Roxy it was easy enough to use the buttonhole spacer to mark out evenly between these two marks. For the Safari Sam, since I had less buttons, the spacing required was larger than the spacer could stretch so I ended up using just a normal measuring tape and testing different spacings until I got to one that was suitable (4.5″). I marked the position of the last button, then extended the spacer to 4.5″ and marked out based on the last button position. For both shirts I marked the collar stand button in line with the placket buttons in the middle of the collar stand, parallel to bottom of the collar stand, then marked 2mm towards the centre from the start of the buttonhole. Before sewing the buttonhole, I checked that this additional marking matched the centre side edge of the buttonholes first (one was more like 2.5mm haha). I’m hoping this will mean that my buttons will end up aligned.
For the Roxy cuff buttonhole, I marked 1cm from the short edge and halfway along the cuff width. And then I wondered if this would result in suitable placement of the button on the other side of the cuff. So for the Safari Sam which is using a larger button, I placed the button where I think it should go on the cuff (close to but not quite at the cuff edge) and marked the halfway point of this and measured. Then I used this measurement for where the buttonhole should start.
After sewing the buttonholes I added the fray stop glue. I think I’ve finally got the technique down such that I no longer need to dab away the excess glue. The Roxy buttonholes were actually too small for the chisel, but I used it anyway, cutting through it bit by bit. No such issues with the Safari Sam.
I somehow lost one button for the Roxy, hopefully it shows up again at some point. I also somehow messed up the hem? Easy fix but really don’t know how it happened in the first place. Actually I do, because I’m not used to the lace being there instead of the double fold, so was double folding the placket when pinning the hem even though there wasn’t enough fabric for that😅
After washing and iron-assist cycling the shirts, for some reason it was super hard to do up the buttons for the Safari Sam. I wonder if the paper buttons expand with moisture? Very confident I prewashed the fabric beforehand so shouldn’t be fabric shrinkage… (Note: I thought I was using recycled paper buttons this whole time but they are actually Corozo buttons so I don’t think expansion is the issue haha).
Reflections
I do like seeing how I am gradually becoming more confident with the finicky parts of shirt-making. I’m pretty confident with collars and so next time hoping I’ll feel the same way about the plackets and cuffs. Now to actually wear these shirts and see how I feel about the adjusted designs a well as fabrics. As much as I hated working with the deadstock shirting fabric, it was very nice on the skin 😅 Whereas the cotton linen was quite nice to sew but did really stiffen up after washing and felt a bit rough, but I know that one should become softer with time.
Both shirts are quite plain, which I guess is what I was going for, but I think it means it really should be paired with either a vest or cardigan. But we’re in November now, so I think I’ll have to wait until next year to pair it with something suitable haha.
Things I learnt:
- Woven interfacing does feel a bit different to work with
- After I had finished the shirts I watched a Seamwork video on types of cotton and realised that I probably should have used silk pins and a microtex needle on the Roxy Shirt fabric. I guess it was just called ‘shirting’ so I didn’t realise it was probably a poplin. And I didn’t know poplin required microtex needles anyway. But it probably would make the sewing process a lot nicer
- Pencil alignment when using the Jenerates seam circles (outer edge of the inner circle for the 1cm circle and to the inner edge for the 1.5cm circle)
- Be careful when turning out corners for loose weave fabrics
- Consider removing sleeve ease to remove requirement for gathering stitches on the sleeve head
- A methodology for making nice consistent tower placket topstitching 😊
I’m pretty happy with the Safari Sam adjustments (if you ignore the sleeve head ease). But if I want to make the Roxy Shirt again, I need to fix a couple of things:
- Add back second fold to front
- Increase shoulder seam alowance to 1.5cm
- Maybe remove shoulder head ease
Categories: Sewing
1 reply ›