Planning and Design
Learning the TDCO method made me super motivated to make some woven shorts. Because I have avoided these for many years now as they were too uncomfortable, opting to only wear sports shorts or knit ones.
I have been interested in the paperbag style for a long time. I bought a Paperbag Pants pattern from Rebecca Page but never made it after I realised it needed an invisible side zip (I have an irrational thing against side zip pants. Doesn’t feel right if there is no fly front lol). And I recently bought a cheap pattern from Etsy which I probably won’t use because I haven’t been all that impressed with the drafting and instructions from Etsy patterns (I know, I shouldn’t judge everyone on Etsy based on a few examples). So I’ll use a free pattern instead lol? Yes there is no logic here, other than I haven’t actually used a Mood Sewciety pattern before so this is a very low investment test. Besides, the photos on the website look super cute haha.
Materials
- Pattern
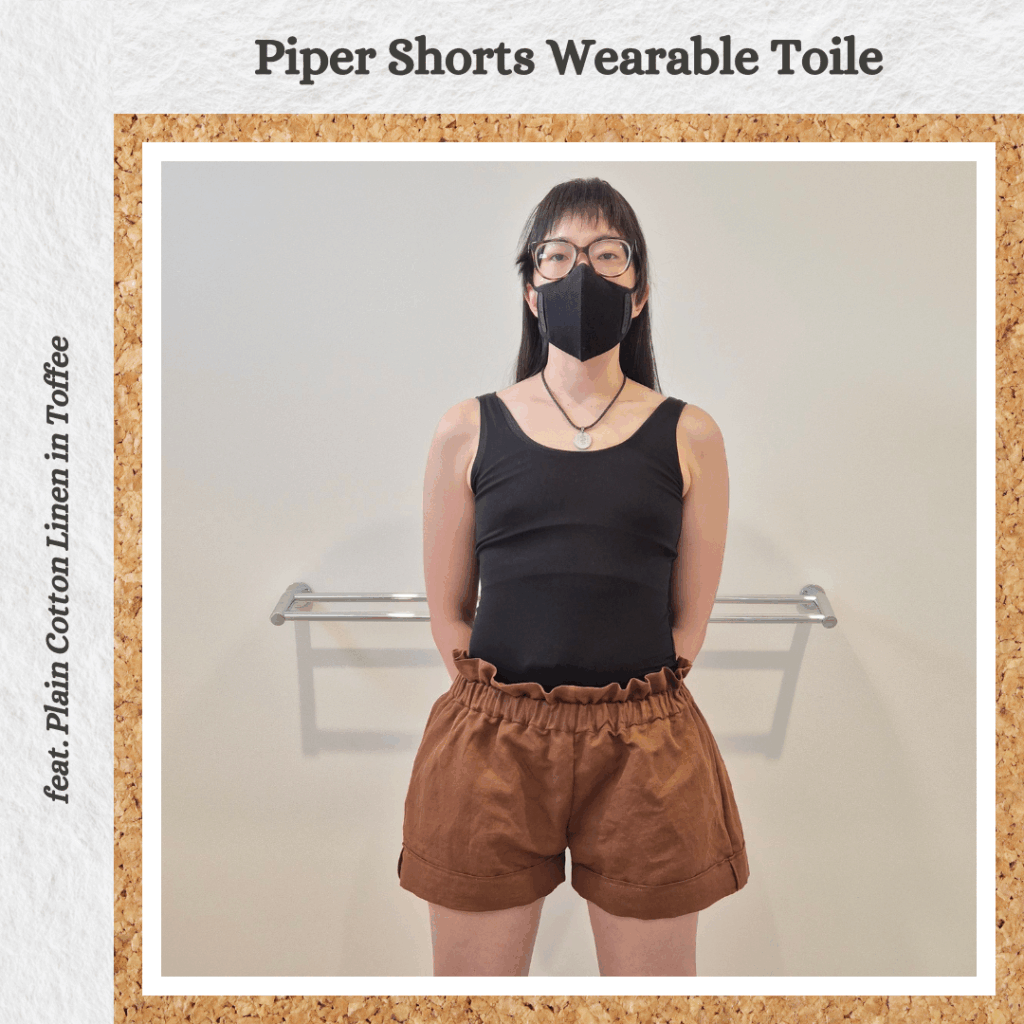
- Piper Shorts (Mood Sewciety)
- Fabric
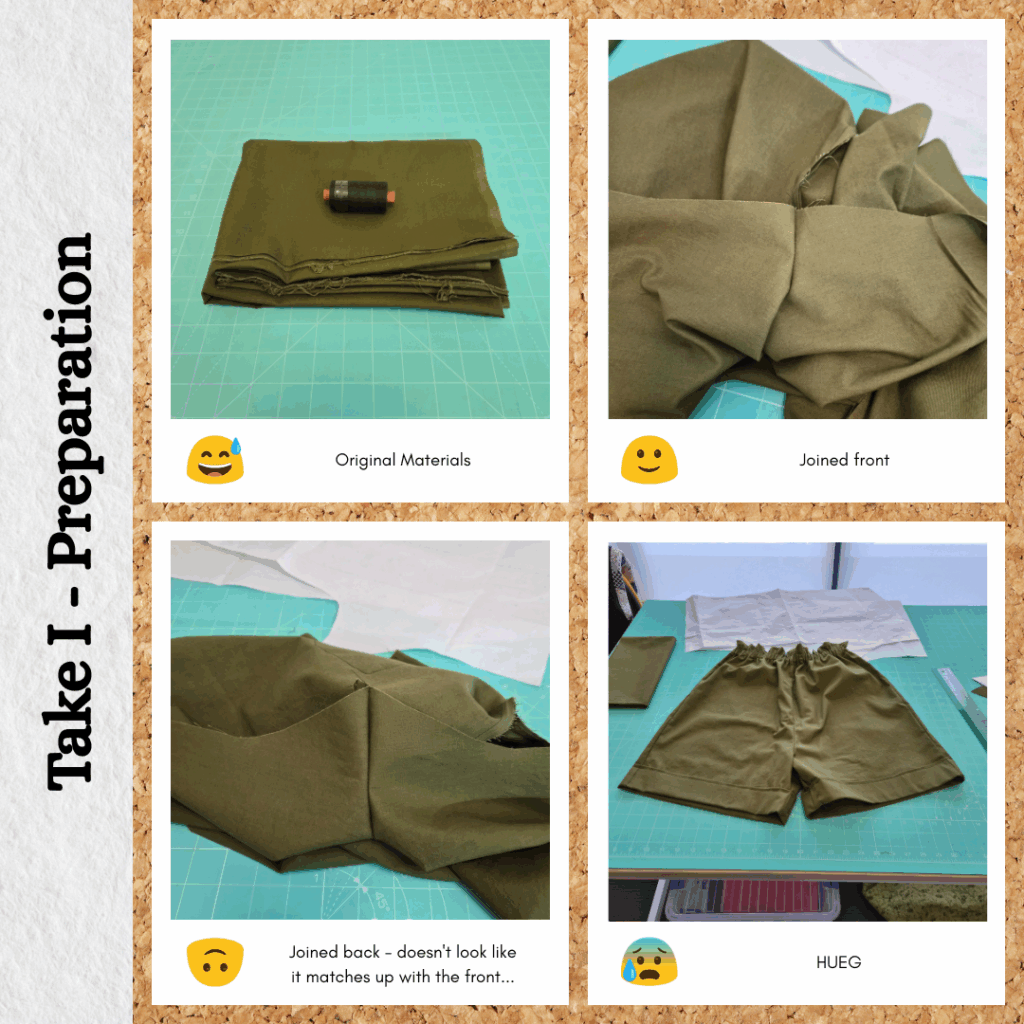
- Prima Homespun – Pesto (Spotlight)
- Plain Cotton Linen – Toffee (Spotlight)
- Thread
- Rasant col. 1623
- Rasant col. 0277
- Notions
- 2cm Elastic – White (Textile Traders)
- 4cm Elastic – White (Miss Maude)
Sustainability Check
👍 Both fabrics are natural fibres so biodegradable
🤏 Rasant is OEKO-TEX but not biodegradable
👎 Elastic is polyester. There doesn’t seem to be many sustainable options available yet, but in any case I need to use this big bulk roll I have up first…
Construction
Cheats TDCO
So I’ve been mulling over a ‘TDCO formula’ for elastic waisted pants/shorts. Because the thought of trying to half toile with an elastic waistband does NOT appeal to me (maybe the upcoming TDCO book with elaborate on how to deal with this). So based on my experience so far, the formula is as follows:
- Measure hip size (size 14)
- Size up one for crotch line (size 16)
- Use the hem line that matches the hip size (size 14)
- Choose the waistline size 2 up from hip size (size 18)
- Measured the width of hip size at hemline, then measure same distance back from chosen crotchline and use the closest size side seam line (size 12)
The final pattern piece looked huge to me. But I couldn’t tell if it was because there were multiple folds involved plus the gathering factor for the paper bag style…
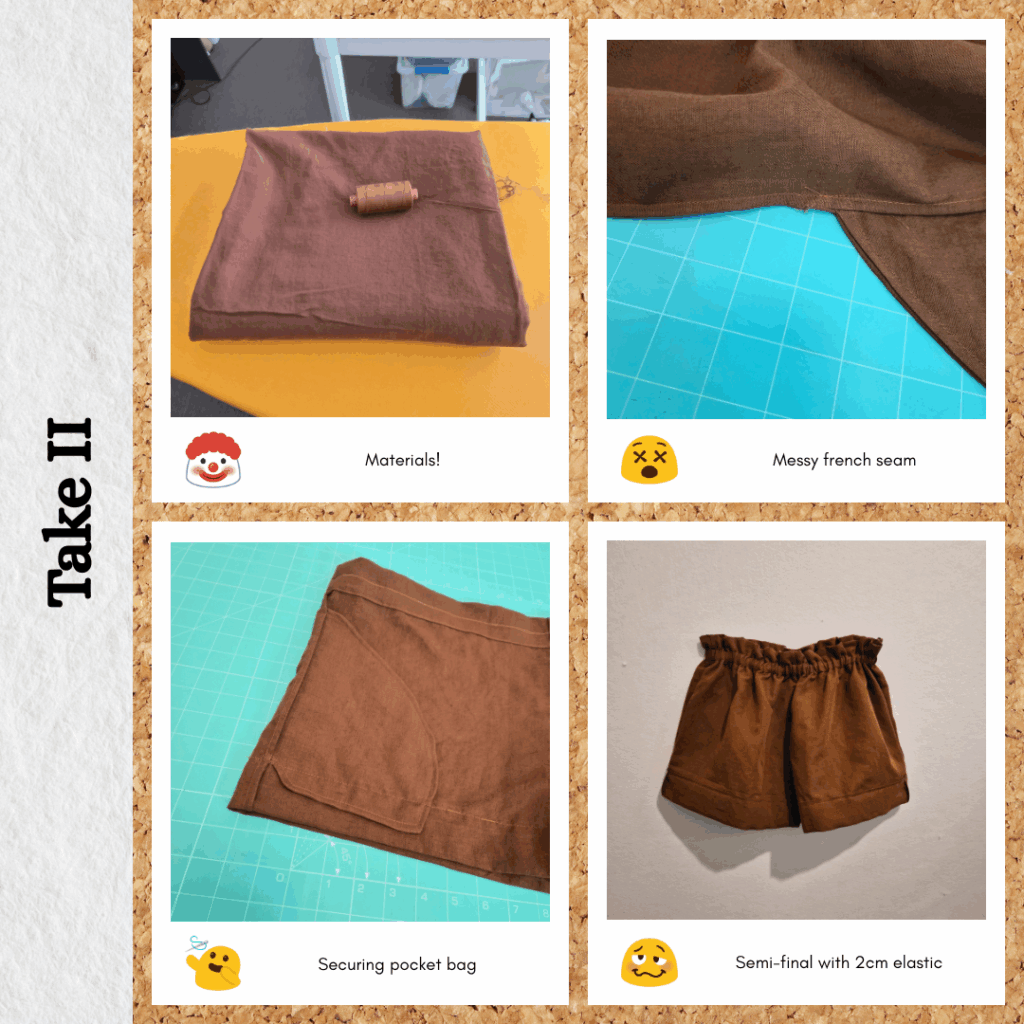
Take I
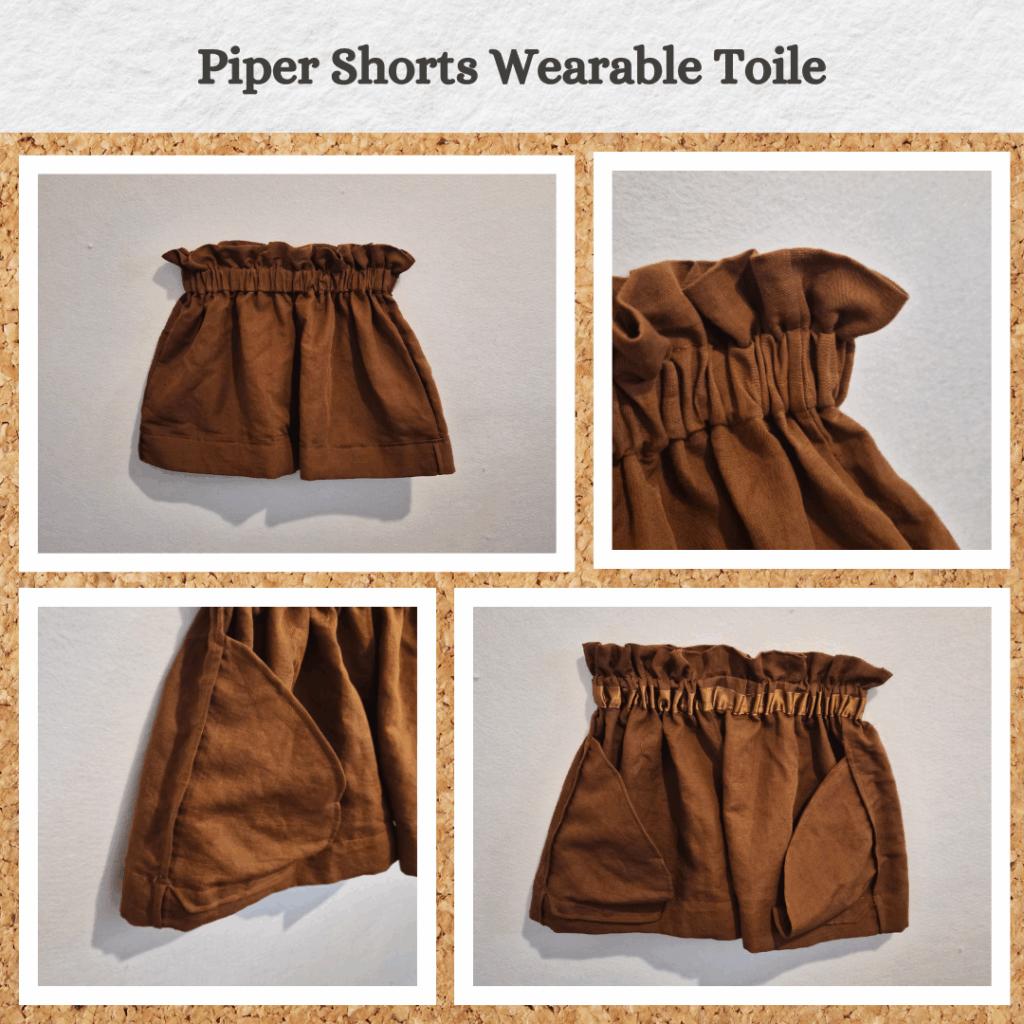
Since this is just a wearable toile, I considered omitting the back pockets, but testing placement is important so went ahead and included them. I also was planning on adding inseam pockets using the Tessuti free template, but realised I had no idea where to place them so left these out.
I followed the instructions and sewed the fronts together and backs together with french seams. I thought it was interesting a free pattern was recommending french seams.
Then I thought I did it wrong so unpicked. A common mistake I make when doing elastic waisted shorts/pants after not doing it awhile is to forget to sew the front to the backs on the inseam. But when I aligned the two pieces they didn’t match at all…
So I relooked at the instructions and I was correct the first time. I have never sewn pants in this manner. For that reason, I was not too hard on myself. Plus it doesn’t look like the two joined pieces will fit together but they do.
I decided at this point to give up on wearable and just be toile haha.
I very carefully followed the rest of the instructions (except for elastic width – I have a lot of 2cm to use up) and the end product didn’t look as expected. It was extremely long in the torso.
I then referred back to the original pattern piece and the markings doesn’t match the instructions. The pattern piece indicates folding over 3cm twice. Instructions say fold over once 1.5cm then again 5cm. The 5cm is kinda necessary in my opinion in order to get that paperbag scrunching…
I guess this is what happens when you use a free pattern haha…
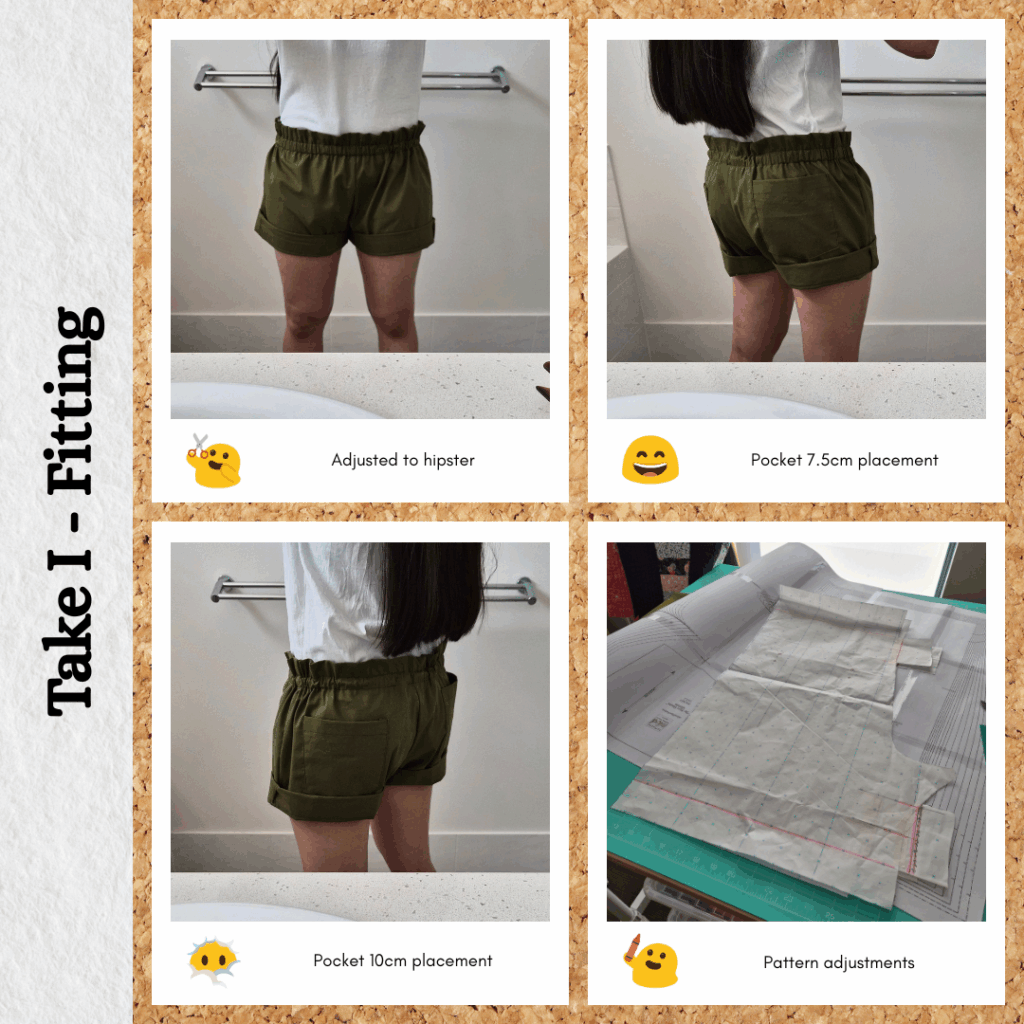
To adjust, I put on the toile and marked where I wanted it to stop from the front. then i worked backwards 10cm for a double fold waistband. I unpicked and trimmed it and redid the casing stitches. I marked 2cm from the first line of stitches and sewed 1 needle position offset from this marking, but think I can just sew directly on the line itself. I also removed and readded the pockets, one 7.5cm below waistband level and one 10cm below. Then I reinserted the elastic and tried it on again.
It felt much better but still didn’t look particularly cute… I had decided I wanted it shorter too so tried turning up the hemlines one more time and suddenly, the shape I was after started to take place. Turning up the hem also made a huge difference to the ideal pocket placement. Unturned up the 10cm was better but turned up, this caused the pocket to fall into the hem so 7.5cm is probably the go. I also felt maybe I went a bit too hard on removing from the top so should probably add 2.5cm or so back in.
Take II
Then I decided, ok let’s try make a wearable toile this time with the adjustments above. I made sure to straighten out the parts that were going to be folded over. I wasn’t sure if I should have straightened it more along the crotch line but I tested the double fold and it still seemed to work so left it as is.
This time, since I had the first toile to wear, I could check where I wanted the in-seam pockets to go. The Tessuti pocket template ended up being a bit big/long for the shortened shorts, so opted to just truncate it where I saw fit.
I used this tutorial to make the inseam pockets french seamed. And then realised, wait I used a different technique for the Stacie Garbadine Jacket. Then also remembered that method didn’t fully enclose the seam that joins the pocket sides to the garment sides. So this method is much better! Albeit more fiddly. It looks a bit messy because when I trimmed the side seam I didn’t clip to the seam line, but now I realise that’s what I nedded to do.
Did my other french seams with confidence this time lol. And realised that it’s actually easier to not use the hot hemmer when trying to hem in the round. So just used a ruler to mark the fold point at strategic points like I always used to. Sewed on the 2cm mark line. And sewed 6mm offset on the turned bottom hem to give secure it while giving it that cuff look. I also secured the pocket bags to the hem too cos I it when they flap about. Finally, also reduced the elastic length to 63cm (with 3cm overlap).
Interim Reflections
I’m much happier with a hipster version of these shorts. As I was making so many adjustments, I was wondering if this was actually a good test of my cheat TDCO method and I’m not sure… In the end, while I only changed the lengths from the top and bottom, by reducing the top length, I’m essentially choosing where I want the crotch to fall? So it fits well, but is that thanks to TDCO or not. Well the crotch seam probably is, but the crotch depth not so much. I do feel the ‘fall’ over my backside is good and looks tailored so happy with that. The gathered waistline would probably look a lot more paper-baggy if it was actually on my waitline, but it would have to be SUPER high rise to not interfere with my insulin pod, so hipster it is.
While test wearing these shorts, I kept having the sensation that it was riding up, but it never was. I wonder if that’s because I’m so used to wearing my Boody knit shorts which have a ribbed waistband, so I’m used to a tighter feeling along my hips? Or is it because of the paperbag aspect, which means there is unfitted fabric higher than my hip line, which gives the sensation that the shorts are moving upwards? I might try reducing the elastic length by 3cm increments til I find that just right amount by overstepping and making it too small haha.
I did realise as well during the test wear that I have this ingrained habit of pulling on the hem of my shorts before sitting down haha. Thanks to TDCO I now know this is because shorts that fit my waist and hips were too small for my crotch depth and length. Hence always adjusting my shorts to be as low as possible before sitting. I don’t need to do this anymore! But can I break the habit??!
Take II.V
So I did my test wear, wrote up my reflections, was almost ready to post this, when I had a realisation.
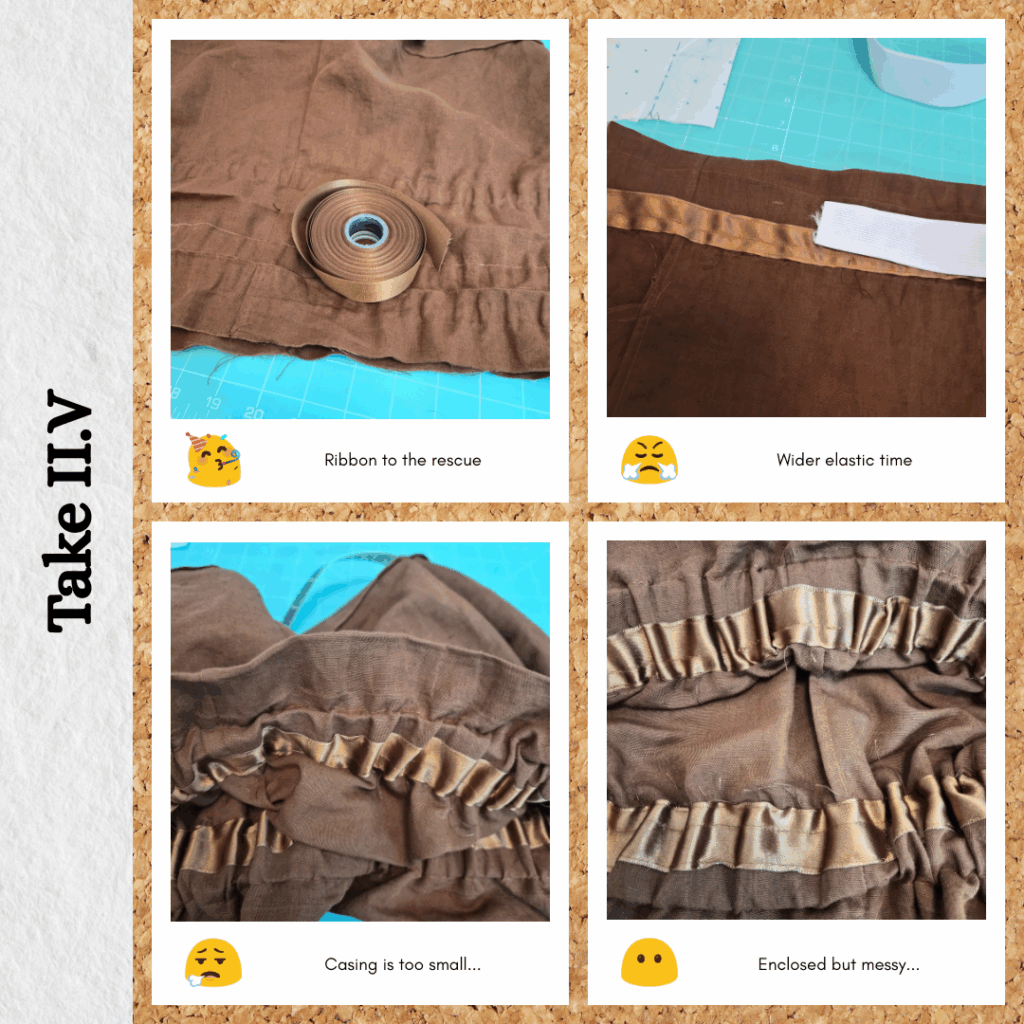
The reason it didn’t feel secure was because I’m used to a very wide elasticated band for pull-on hipster shorts. So the top of the elastic was correct, but my brain was expecting the feel of elastic about 4cm below this point too. And if I adjust the position of the shorts lower, the crotch feels better and the waistband position feels better, but you can see my underwear a bit LOL. So now I see the solution. The width of the paperbag gathers is fine imo, so what I need to do is lengthen the waistband to allow for 5cm elastic.
I considered redrafting the pattern and doing a take 3, but really all I wanted was to test my theory. So unpicked the waistband and did only a double fold to the adjusted waistband/casing heights and securing any ‘excess’ in the seam. For a proper version, I do want the triple fold as I think it gives the necessary structure to the gathers, but this will do for now.
I did my measurements and thought I had to fold it one and would have nothing left for seam allowance so got out so ribbon to cover the raw edge ever so slightly. Of course, I measured wrong and the top ruffle ended up 1.5cm wider. I thought that was ok cos then I could test the effect of different ruffle heights. I also sewed my casing 3.5cm from the edge rather than marking from my first row of stitching so the casing was slightly too small. But at this point was not very focused on quality haha.
Reflections
So a wider elastic does feel more secure. In fact I can probably make it a bit looser, although that’s probably because of the quality difference between the two elastics haha.
A 3.5cm ruffle is too wide. It looks fine until you wear it and then it spreads out a bit too much. So I’ll need to properly measure how much extra I need to add to the waistband portion of the pattern.
I’m not 100% sold on these. I think I need to test them on a non-WFH day where I’m moving around more, to see if they remain in place and are comfortable. I’ll also try making some properly drafted short patterns and see if there are any further adjustments ir improvements for me to make. But I’m glad I managed to turn this project around from an extremely disappointing outcome to one where I managed to troubleshoot and adjust closer to my preferences 😊
Things I learnt:
- Pants and shorts require a TDCO toile as well as a construction test run wearable toile
- Different method of sewing a crotch seam
- Elastic placement for hipster pants
- Don’t need to use the hot hemmer for straight hems in the round.
Categories: Sewing
1 reply ›