
Planning and Design
I’ve had the Tomigaya Shirt Dress pattern on my radar for a long time but didn’t bite the bullet because I knew a maxi dress wouldn’t look good on me. But I kept it on my wishlist because it was a nice shirt dress and I guess I was hoping something would change to make it more suitable on me…
Well once I had the revelation that I like short skirt dresses, it got me wondering if this would work well as a short dress. I wasn’t sure since shirt dresses tend to be on the longer side, but partway through the project I googled mini shirt dress and saw quite a few examples that looked fine to me (why not before, I guess I just never thought to consult the action fashion industry…).
I was planning to just use the black sheeting I used for the Wide Strap Mini Dress, but I had finally organised my fabrics and realised how much I had in the ‘unloved but still useful’ pile and decided I should use up what I have. I bought the fabric for this a very long time ago, before I had realised I only really like natural fabrics, but I’ve held onto it because the print is just too cute 😣
I also decided to use some cotton voile as a lining. I had bought this as backup for a future project (ended up assigning the more colourful voile) but have been reluctant to use it because the quality is so good, it felt like I had to ‘save’ it. Well I realise now I have to get over that. If I only try to match fabrics of the same quality, I’ll end up buying lower quality fabric to match those in my stash and I’ll never ‘get ahead’ haha.
I’m counting this as a November 2025 project since I started it in November, but really I finished it in the first week of December. But in my mind, I totally could have finished this in November if I didn’t organise/host my brother’s/sister-in-law’s birthdays lol. The things older siblings do for their youngest ones…
Materials
- Pattern
- Tomigaya Shirt Dress (Liesel and Co.)
- Fabric
- Linen Look Polyester Prints Design 2 – Brown (Homecraft Textiles)
- Fiji Cotton Voile – Cream (Fabulous Fabrics)
- Buttons
- Brown wood-look shank buttons (from stash)
- Thread
- Rasant col. 1453
- Madeira Aerolock Overlocker Thread – Super White
- Notions
- Woven elastic 1cm – white
- Non-Woven Interfacing Fusible/Iron on Fine Light – White
Sustainability Check
🤏 Rasant thread is OEKO-TEX but not biodegradable
👎 Fabric is 100% polyester
👎 Overlocker thread is 100% polyester
👎 Button is likely 100% plastic
👎 Interfacing is also 100% polyester
👎 Elastic is likely mostly polyester and not biodegradable
Wow what a terribly unsustainable project… I guess in my defence I’m trying not to waste by using up fabric in my stash?
Construction
Pattern Adjustments
My measurements were in between a size 8 and 10 and I decided to size down based on the finished measurements. I can’t say I’m a huge fan of patterns with a 1/2 inch seam allowance because this means that I have to adjust every seam to either 3/8 or 5/8 haha.
Since there is no dart I was wondering how I would do a small bust adjustment but the pattern said “suitable for multiple bust sizes” so I didn’t make any changes to the bust.
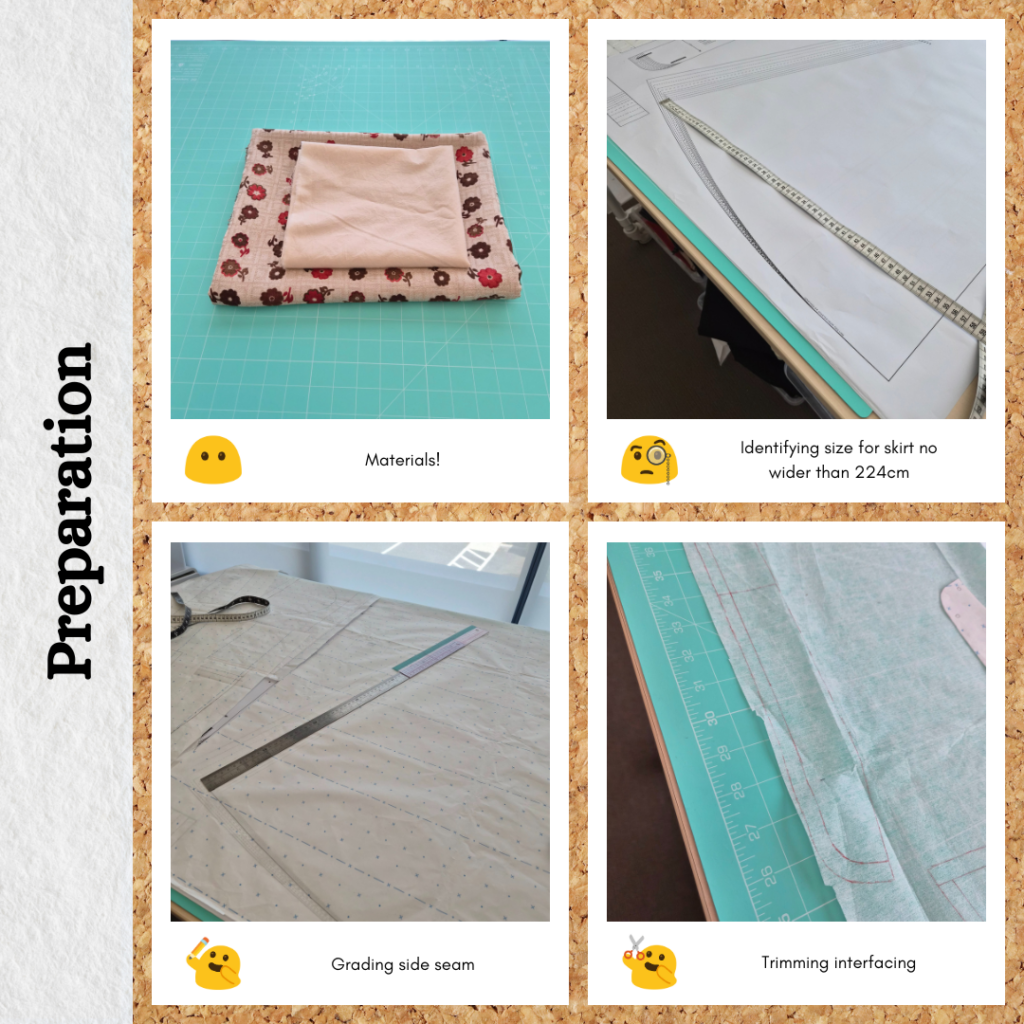
Since I wanted to try and fit the skirt pattern piece on the fold of 112cm wide fabric I graded the skirt side seam from a size 8 to a size 4 (which is the maximum size where the base of the skirt piece will fit with a 1.5cm seam allowance for french seams).
Cutting Fabric and Interfacing
So I quickly realised that I wouldn’t be able to make this full length because I didn’t have enough fabric 🤣 So cut out the bodice, sleeve and outer waistband/collar pieces first then shortened the skirt based on the remaining length of fabric. So basically the side seam grading was unnecessary lol. Luckily after this I still had enough fabric for the inner collar pieces but happily cut out the pockets from the voile instead. I had also pre-read the instructions and knew I wanted to cut out the inner yoke and waistbands in voile so that saved some fabric too.
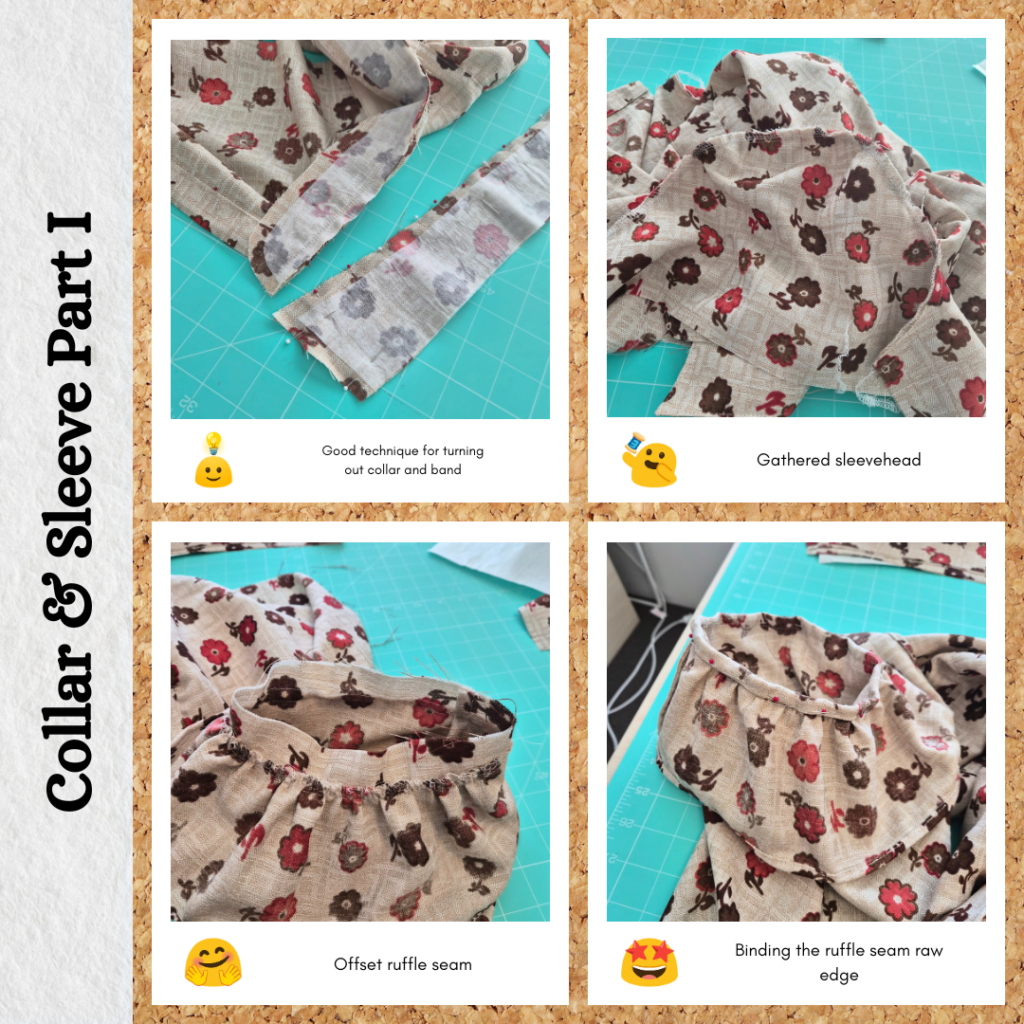
For the interfacing, the pattern called for trimming the collar interfacing down to exclude the seam allowance which was something I was thinking of trying anyway. I also did the same for the collarband even though that wasn’t specified, because I thought it might make it easier to sew a nice curve as well as a guide for when everything is turned right side out.
Bodice and Collar
I decided to use the burrito method instead of following the instructions since I really didn’t want to try to press the shoulder seam allowance down with this fabric… I think it’s a neater method anyway.
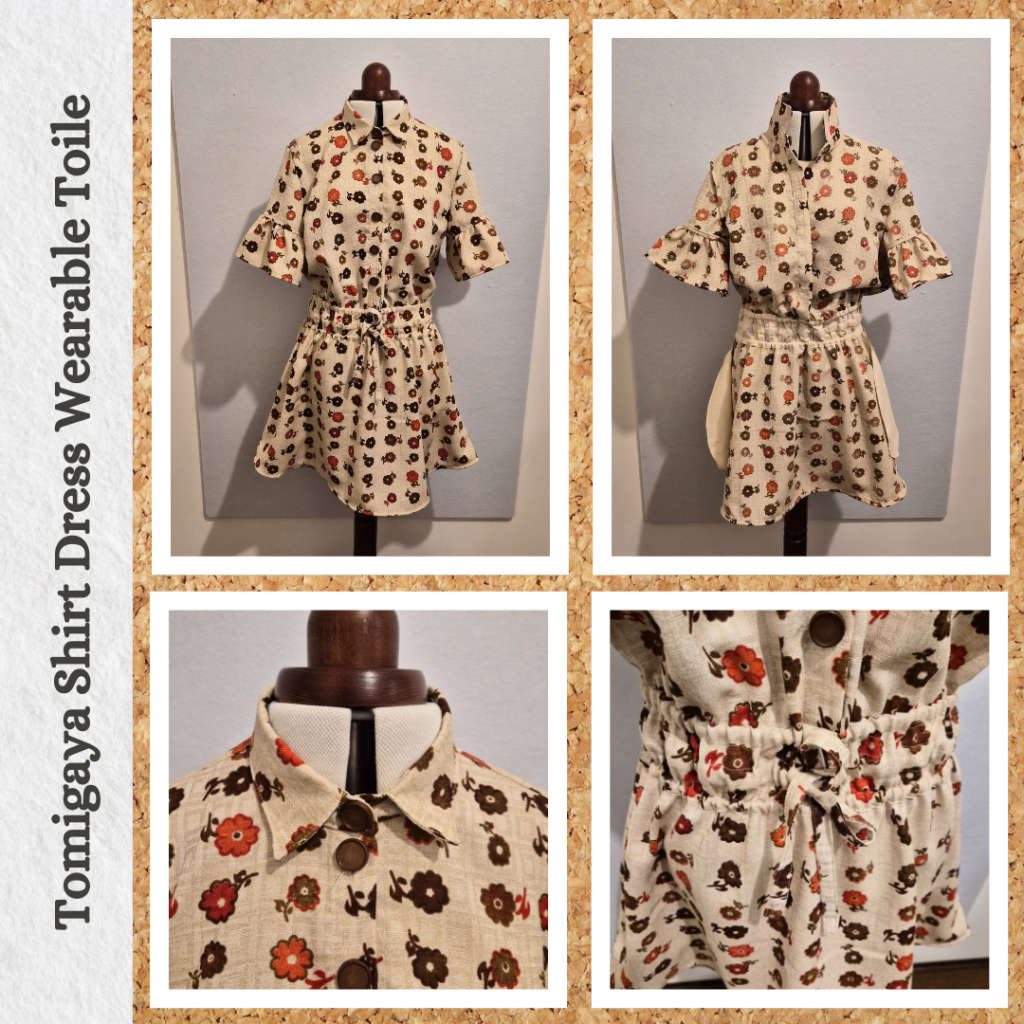
The trimmed down interfacing worked really well for both the collar and band. This fabric is not only hard to iron/press but also hard to mark with a fabric pen so having a guide line in the form of interfacing extent was really handy. And I do feel my collar band is more consistently curved than any of my previous attempts.
Sleeves
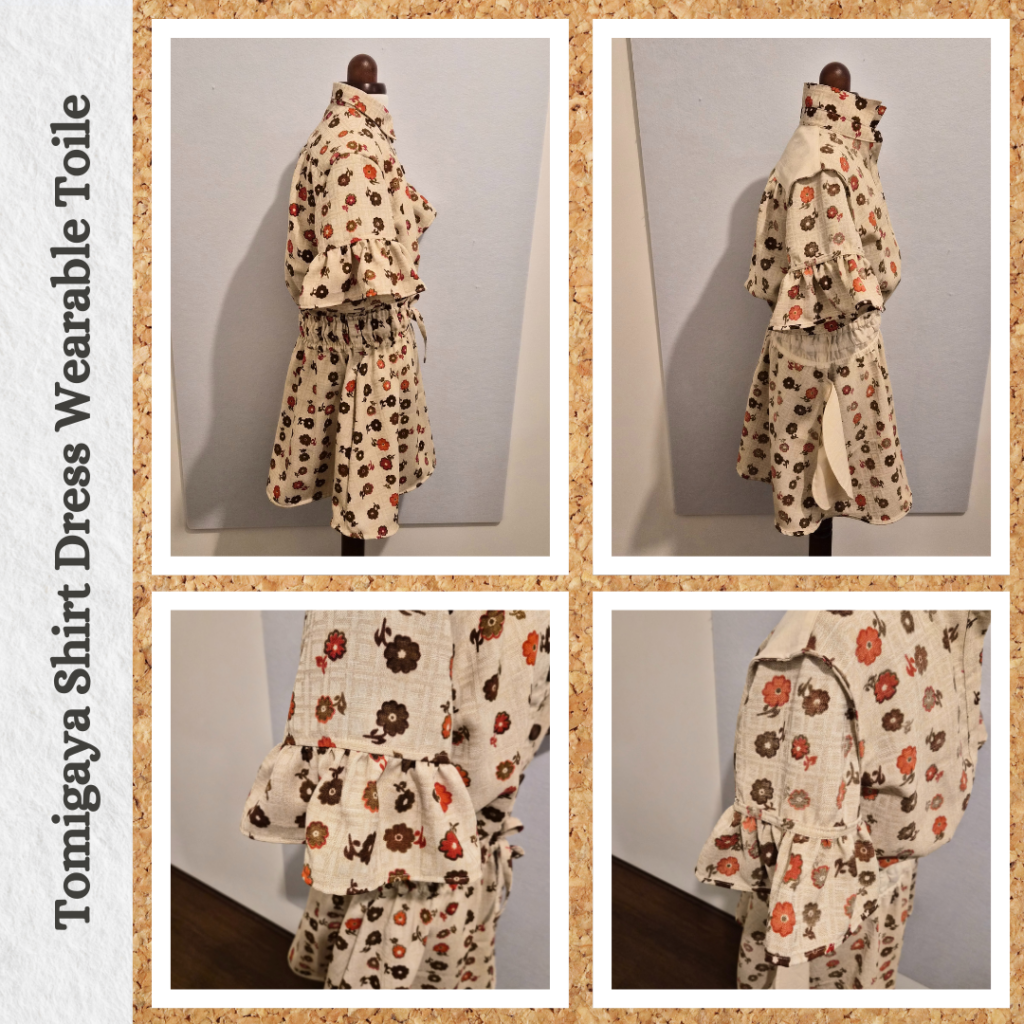
I did use my overlocker for the differential feed on the sleevehead. First I followed the instructions, increasing differential feed to 1.5 for the sleevehead, but this was unnecessary. Using 1 for the whole head (needle tension 6) was good enough.
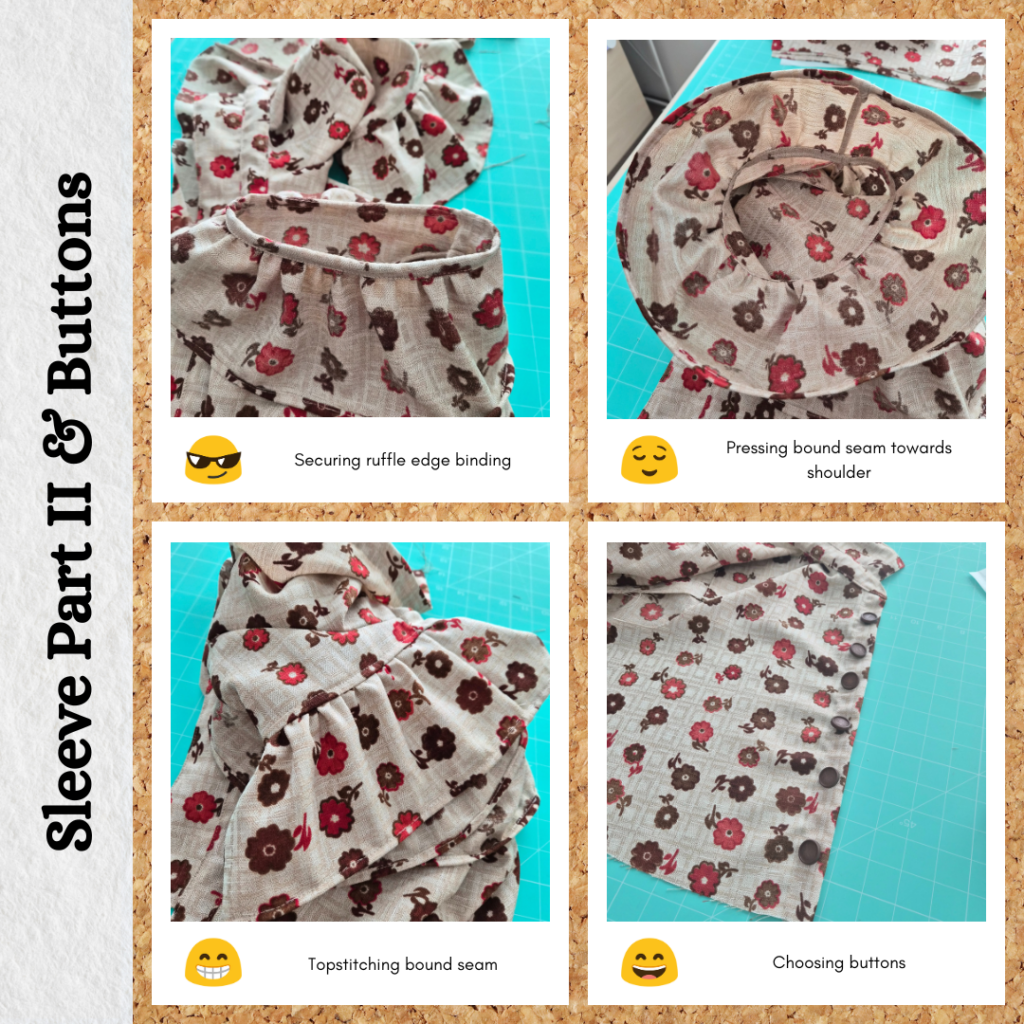
For the ruffles, I also used the overlocker to gather and also with a needle tension of 6. And I made sure to nest the french seams to reduce bulk. It was quite satisfying attaching the ruffle, it looks really good.
Buttons and Buttonholes
I checked my button stash and managed to find a really good colour match! I don’t recall where these buttons are from or why I decided to buy them (if I even bought them at all) so it’s good to use these up given I had absolutely no plans for them. I’m not sure if it matched the number of buttons required for this pattern, basically I pay zero attention to button placement guides nowadays haha. So did my usual 1 button 5mm below the collar band, marked the last button placement, then used my expanding button gauge to mark the rest of the button positions.
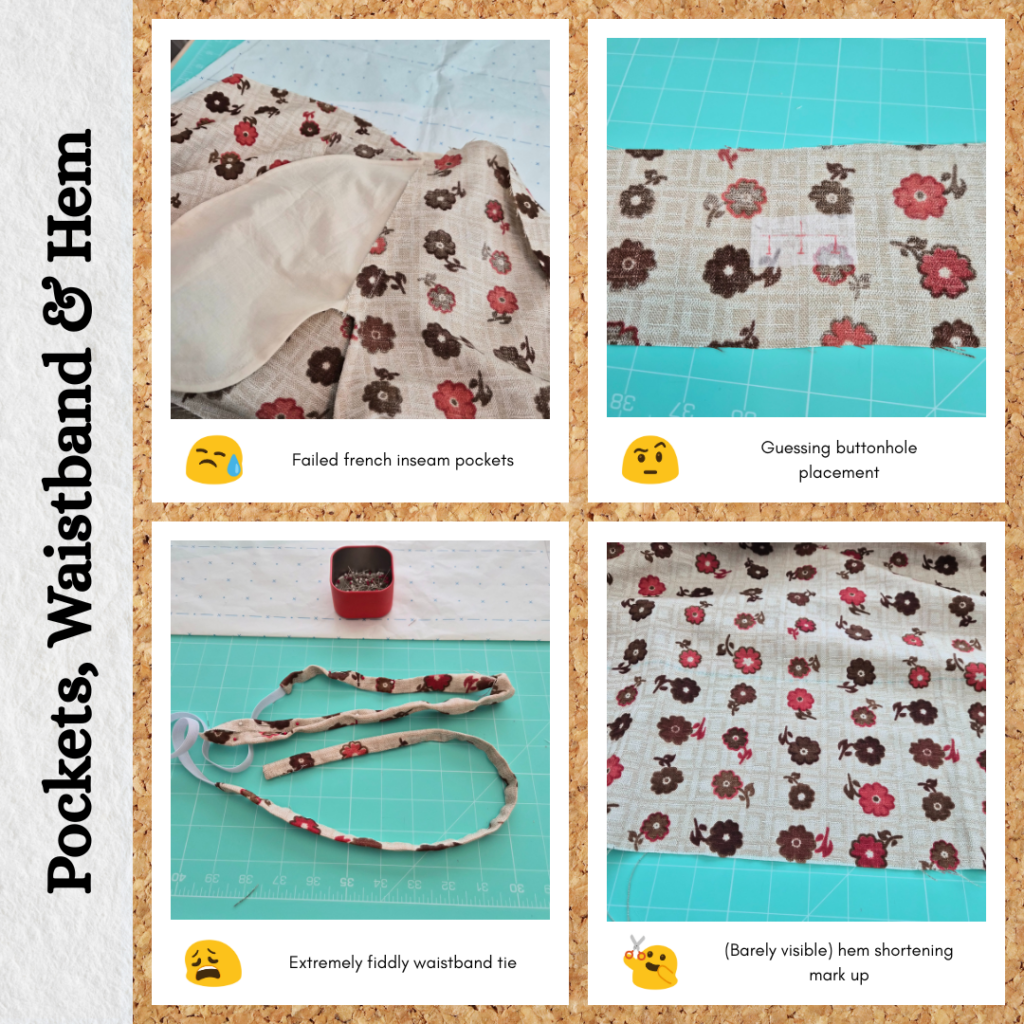
I also needed to do buttonholes on the waistband. I considered using eyelets instead but figured it was consistent with the construction of the rest of the garment. For this I made my automatic buttonhole gauge roughly the width of the elastic and made a test buttonhole. Ideally I would test that the drawstring would fit through but I hadn’t progressed this part yet.
Skirt Side Seams
I looked at the instructions and thought oh yeah I know how to french seam this but completely forgot about doing french seam on the pocket attachment to the skirt side, even though I had recently time this in the Piper shorts LOL. I considered unpicking the other side and doing it properly but decided that I don’t need to practice the technique, I just need to remember to apply it 😅
Waistband
Looking at the instructions, this step felt a bit overwhelming, but once I got started it was very straightforward. Well, it would have been even more straightforward if I could actually iron/press my fabric lol. And mark it more easily. I would like to draw out the casing lines to ensure I keep the casings even and wide enough. I did try to baste the lower seam for sewing from the front for when I stitched in the ditch to encase the skirt/waistband seam, but I still missed a lot of parts so just went back and did it from the back. The thread does camouflage quite well with the fabric and it will be all gathered anyway so unlikely to be very visible from the front.
I think my casing stitches were a bit wonky but also I used normal (not non-roll) elastic and it was kinda a pain in the ass. This and the Piper shorts are really making me lean towards investing in only non-roll elastic, since I pretty much only use it in casings. I think I did end up twisting the lower casing elastic but at this point I really didn’t care so just left it as is.
The waistband ties were another thing that would have been sooo simple to construct if I had used a natural fabric that could be pressed. So these took a lot longer than I’d like and did end up trying my patience a bit.
Skirt Hem
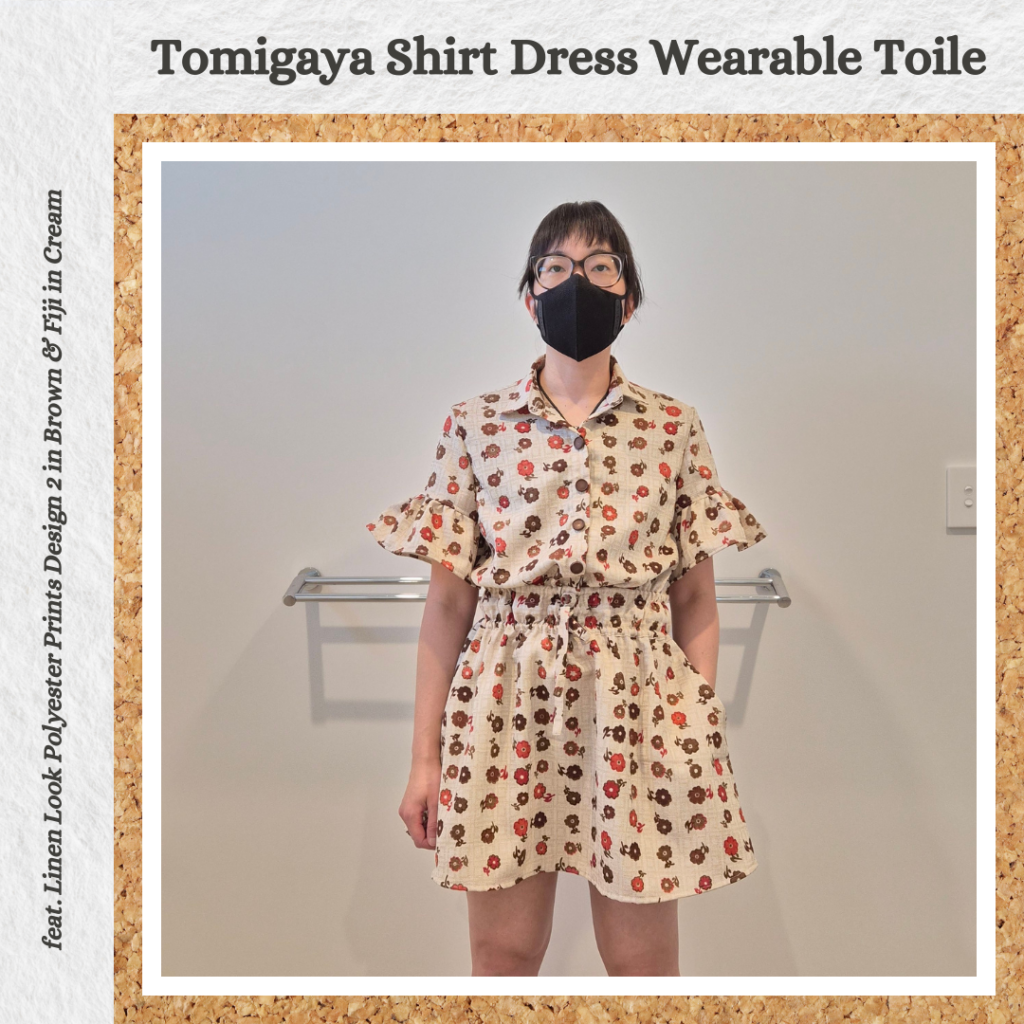
While sewing the rest of the dress, I started thinking I could probably shorten the skirt quite a lot. So when it came to putting it on I found that I was correct. I also noticed that there was way too much fabric in the bodice. Which also lines up with my uncertainty about not doing an SBA. Looks like I need to remove length from the bodice so that it doesn’t look like a deflated balloon LOL. Maybe it wouldn’t be so bad if I could pull the waistband lower, but my insulin pod gets in the way so that’s not an option. But in any case, in order to keep flattering proportions, I should reduce the bodice length, probably by the distance between two buttons. I think this will make the waistband also sit a bit higher, but that’s fine, it also will help make the overall skirt length shorter haha. I thought I could probably take another 20cm off the bottom of the hem but decided to try 15cm first since it’s easier to cut more off but impossible to add it back.
After shortening and hemming the dress I’m pretty happy with the length as well as am satisfied that the ruffled short sleeves and button up front still look good with a short skirt.
Reflections
So the immediate takeaway was that everything took way longer because the fabric was hard to press and hold in place. This on it own already made this a frustrating make, but the fact that the pattern is so well designed and the construction so logical just made it even more frustrating since if I was using the right fabric, it would have been such a joy to make…I guess I can just be excited to make the real deal.
The fabric is very scratchy, even though I tried to use voile in the inner parts that would come in contact with my skin. This plus the long bodice means I probably won’t wear it. I think I’ve still done a good enough job that I can donate it though.
Things I learnt:
- Set seams by ironing flat first then press open – I already sort of knew this but the pattern instructions specifically call it out and reminded me of it, not that I could apply it to this project LOL
- Using the overlocker for rufflers and sleeve heads is definitely the way to go
- Invest in some non-roll elastic to save sanity. I already don’t particularly enjoy the process of inserting elastic into casings so I need to make it easier for myself
- For the same reason as above, I should topstitch down the waistband side seams so the elastic won’t get caught in it when it’s time for inserting it into the casing.
- I should purge (donate) all then synthetic fabrics in my wearable toile fabric stash. It’s not worth the effort since it’s meant to be a relaxing hobby and synthetic fabrics make it stressful instead.
So I need to shorten the bodice pattern and recut the skirt piece without any grading as well as removing a total of 31cm (I’ll just round down to 30cm) from the skirt length. I think I can also reduce the casing elastic length. It was 79cm but my waist is 73 so I can probably cut 73cm to make it a little tighter. But other than that the shoulders fit well and the collar fully buttoned up isn’t constrictive.
Categories: Sewing
2 replies ›