Planning and Design
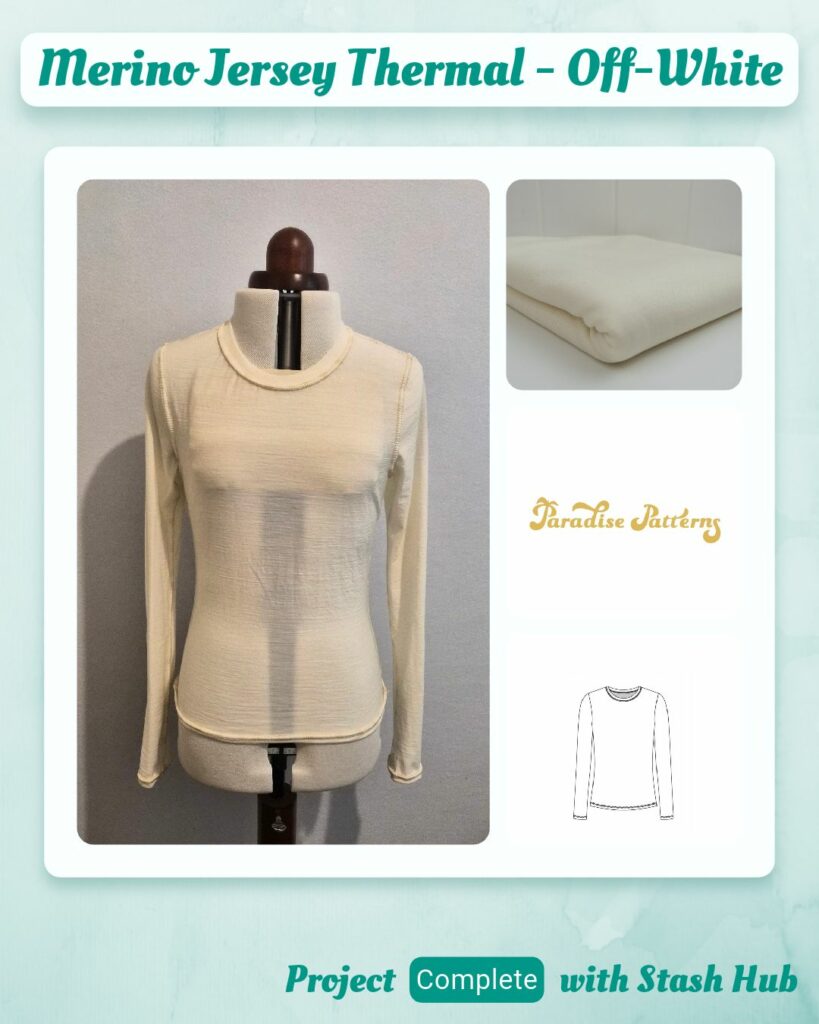
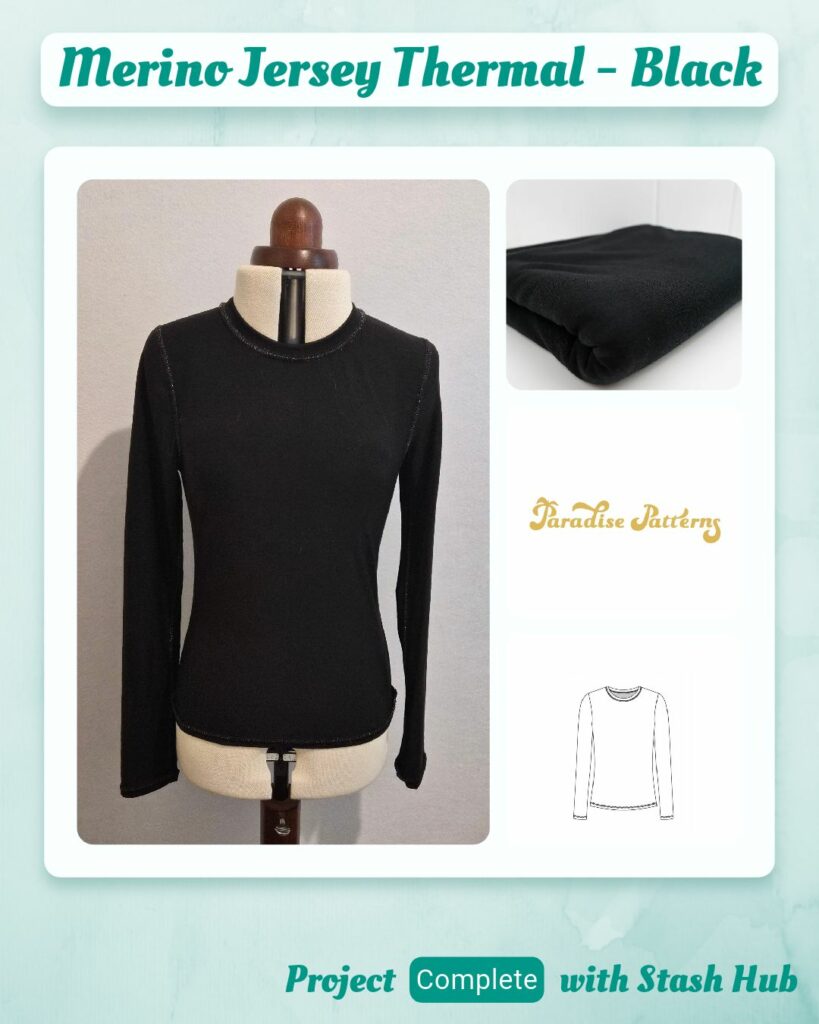
This project had two aims. The first was to practice changing the set-up for the various stitches I want to do. The second was to sew some long sleeve tees to replace my very old Heat-Tech thermals. The wool fabric was bought with this in mind – currently I have to walk 15 minutes from the bus station to my work and this isn’t very pleasant while wearing Heat-Tech (which is necessary for making through the rest of the day at the office without freezing). I figured if I had wool thermals instead there would be better thermoregulation for those small portions where I’m actually trying to offload heat instead of store it.
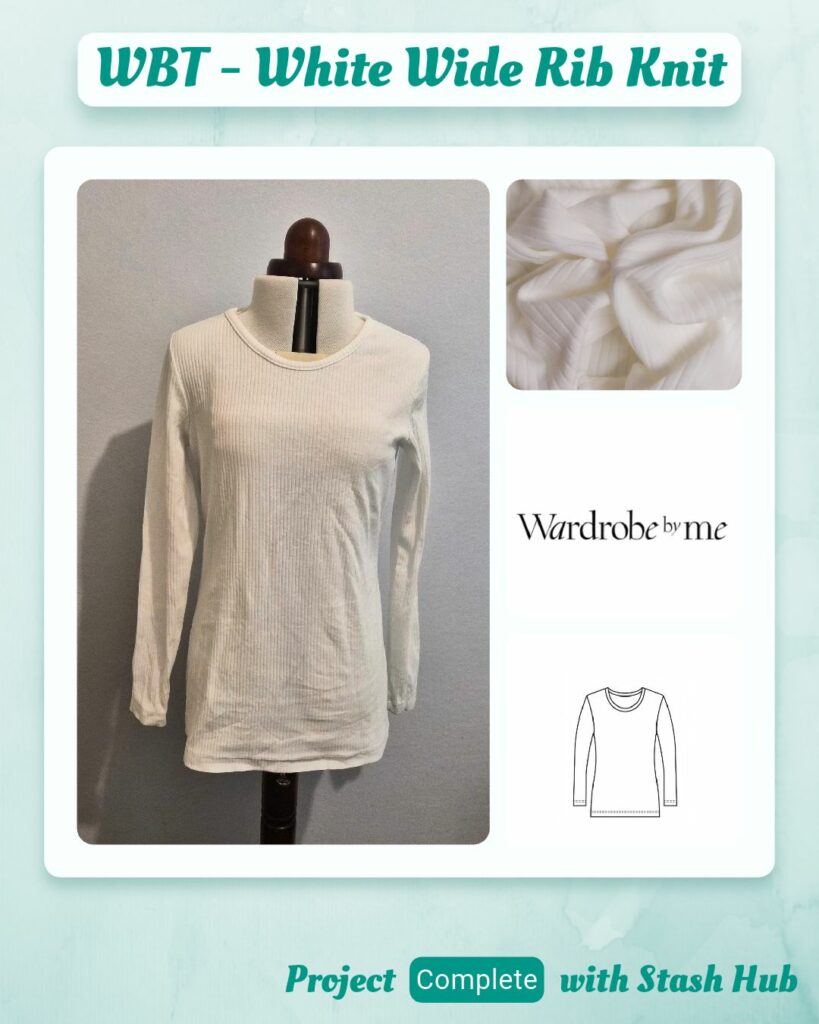
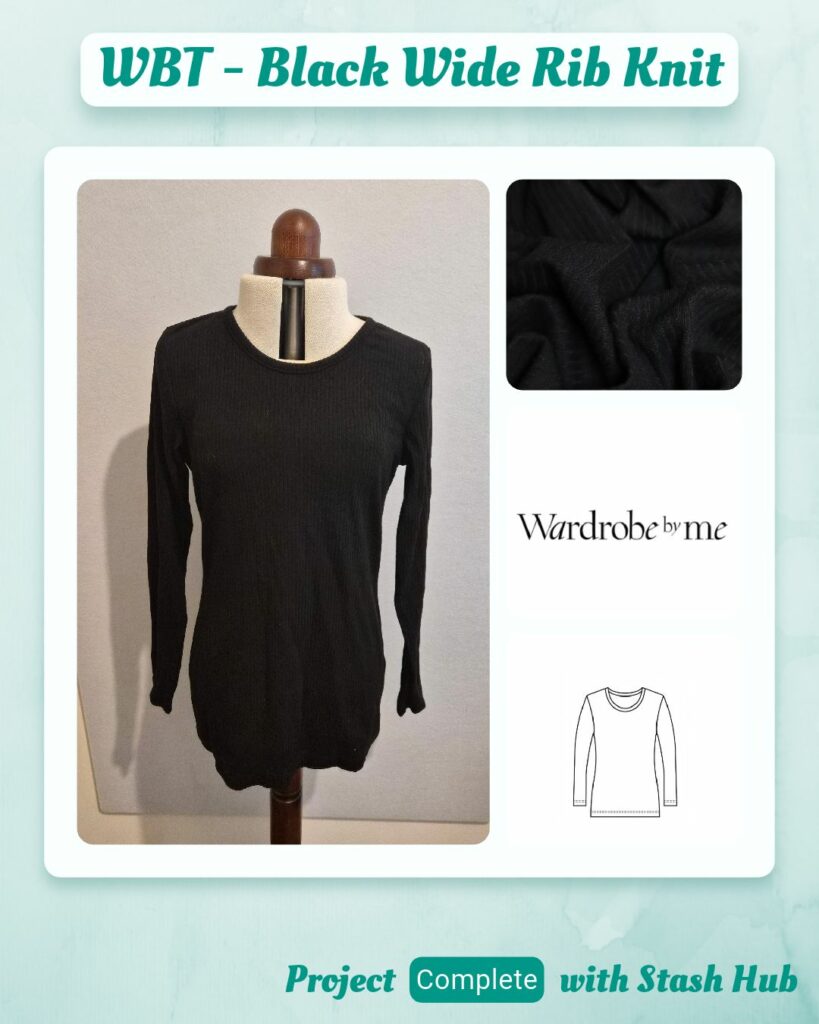
The ribbed fabric I ended up buying when I was wearing my Stacie Jacket to the office on a Friday and was thinking how I didn’t really want to wear a button-up shirt with a collared jacket, but I didn’t really have any suitable plain long sleeve tees to wear as the underlayer instead. I guess the thing was in case I did get warm enough to take off my jacket, I didn’t want to be walking around in what is obviously a base/under layer LOL.
Originally I was going to try and make these with just the Gloria and send my Skyline off for servicing. But the logistics of that is more than I want to think about right now, so that plan was scrapped. But I did want to try flat-locking the seams for the wool version.
I also was going to make all of them in the WBT pattern (long sleeve, O-neck, straight hem) but then had the thought that maybe the Honeygirl Tee would be more suitable for the wool, since it was designed for pointelle and both of these fabrics only have mechanical stretch (no spandex). So it will be two of each.
Since these are underlayers I kept the seam allowance at 6mm instead of increasing to 10mm. I made this decision after checking out the inside of my Heat-Tech thermals and I think it makes sense since it’s so close to the body.
Materials
- Pattern
- Wardrobe Builder T (long sleeve, O-neck, straight hem) (Wardrobe By Me)
- Honeygirl Tee (long sleeve, crew neck, long length) (Paradise Patterns)
- Fabric
- Wide Rib Knit – Black (Fabric Box)
- Wide Rib Knit – White (Fabric Box)
- Australian Merino Jersey – Black (MaaiDesign)
- Australian Merino Jersey – Off-White (MaaiDesign)
- Thread
- Madeira Aerolock Overlocker Thread – Black, Super White
- SoftLoc™ Tex 35 Wooly Poly Thread – Black, SLM02
- Tutti col. TU38
- Metallic Wooly Nylon col.300
Sustainability Check
👍 Merino wool is biodegradable
👍 Wide rib knit is 96% cotton, 4% elastane so technically biodegradable
👎 Tutti is cottonised polyester but I don’t think Wonderfil are OEKO-TEX certified like Rasant
👎 Aerolock threads are 100% Polyester and wooly nylon threads are 100% Nylon
Construction
Threading set-up 1: 4 thread overlock in black Aerolock and wooly nylon
The order that I thread things makes a difference, I air-threaded the wooly nylon before I raised the upper looper to UP so of course it didn’t thread… I wonder if there’s a rule of thumb for the order to make changes. Probably safest to do all the mechanical parts before any threading.
I started with the ribbed fabric in black. I belatedly realised that I don’t have to air-thread the thread cradle then loop through the wooly nylon, I can cradle it and press the button as long as I like instead of trying to only air-thread enough of the thread cradle to pull it from the other side while still have a loop to thread the wooly nylon through haha…
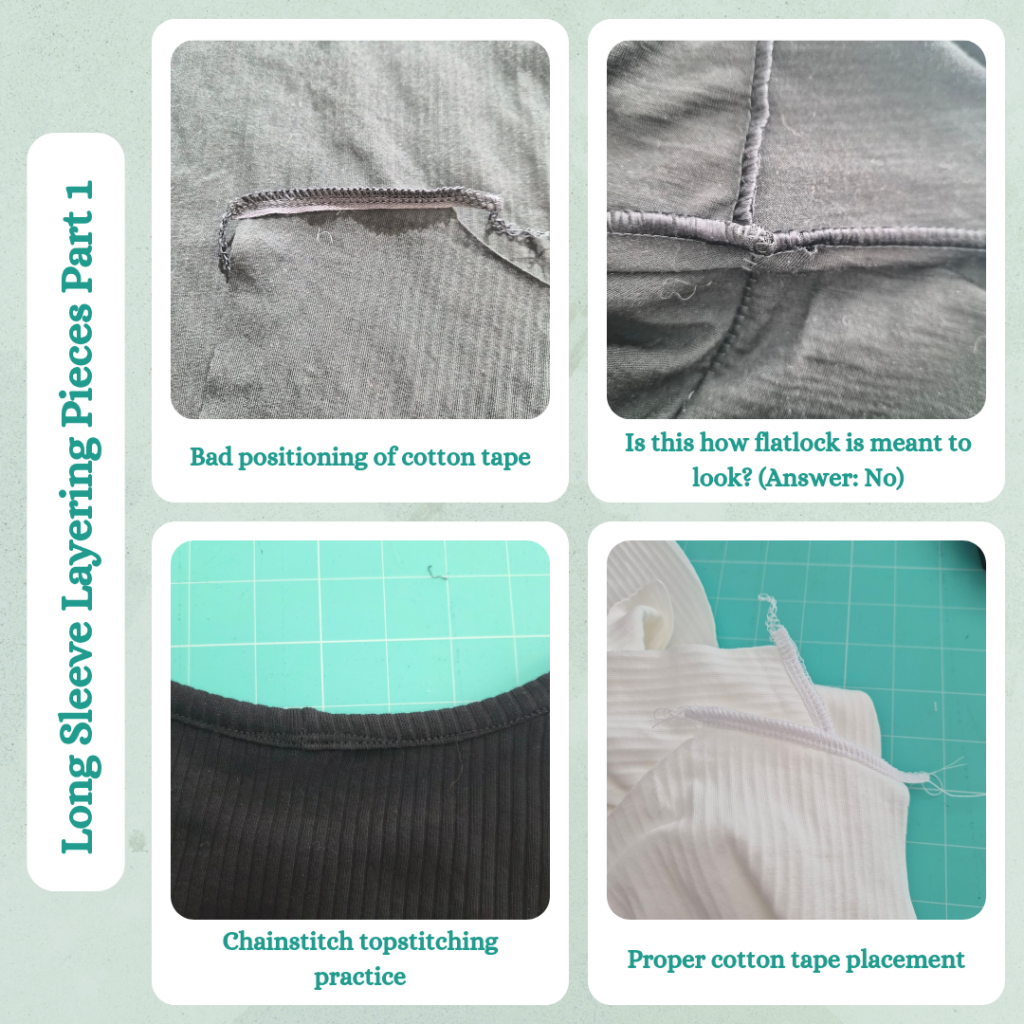
I overlocked the shoulder seams, including 6mm cotton tape on the seam line. I realised that I probably should encase the tape in the overlocking stitches since it’s only a 6mm wide seam allowance, so the seam doesn’t really sit flat. I’ll fix that for the white version.
Sewing the sleeve to the body wasn’t too bad, I was worried I’d struggle with the curve. The side seams were straight forward. Then I put this aside to work on the black wool Honeygirl Tee, because I mistakenly thought I would use coverstitch on the neckband for this one and wanted to batch sew them.
Threading set-up 2: 4 thread overlock in black Aerolock
Since I had some black fabric I wanted to prewash, I swapped out the wooly nylon for Aerolock (woohoo less wasting wooly nylon just because I’m lazy to rethread things). I learnt that I need to give sufficient slack on the looper threads in order for them to airthread all the way through. This wasn’t an issue prior since I was always using wooly nylon so the thread cradle always had plenty of slack
Threading set-up 3: 2 thread flatlock in black Aerolock and wooly nylon
I did a bunch of pre-reading beforehand, mostly referring to this post.
The flatlock stitch didn’t sit as flat as I thought it would…but I also don’t really know how flat it’s meant to be. As a test I also did it on some calico and it seemed comparable. I also realised this whole time (since I did the blanket stitch probably), I’ve had the width set at M (afterwards I realised because supposedly this ensures accurate seam allowances when cutting). So I changed it to 7 but I don’t think it made much of a difference because I’m not using the knife? I decided to go ahead with the flatlock stitch as is because the wool is a thermal so won’t be visible to anyone and the more important thing is that the inside seam is nice and flat with no bulk.
The direction and which pattern piece is on top makes a difference to the direction the flatlock seam folds towards. But for me it was more important the any adjoining seams were pushed in the right direction so didn’t get too hung up on the direction the seam allowance folded. I also find this stitch a bit stressful since you have to get it all right in one pass, no patching up parts of the seam allowance if something stuffs up. The first unpicking was due to me sewing in the opposite direction to the shoulder seam and it not catching properly in the sleeve/body seam which annoyed me. The second time I missed the bottom fabric once at one of the ends so had to unpick. The third time wasn’t my fault, I saw that there was a fault in the Aerolock as it was getting fed through and true enough it failed to form the stitch with the wooly nylon so there was a gap of about 4 stitches so unpicked that too 😣
After this I went to the Skyline to sew the neckband ends together. I attached the wool neckband first and remembered to attach the wool neckband to the inside so I could turn it to the outside….or so I thought. The flatlock stitch being on the outside confused me so I had to unpick and do again. Which was just as well, I was having troubles getting the neckband to attach flat. At which point I started to think maybe I was incorrect about the whole mechanical stretch thing…but I persevered since I felt like I could get it to work 😅 I did a test wear at this point too since I was like ‘is this actually going to go over my head???’ and it only just did lol.
So attaching the neckband using the Skyline actually ended up taking a lot longer than flatlocking the edge down, which worked pretty well imo. And then I did the same on the sleeve and body hems. There were some parts I slightly missed but I figured just leave it since it’s an undergarment. To secure I just tied the two ends in a knot three times and clipped the excess. Although I think I need to be careful about how I chain off so that they don’t get sewn over each other, which means I can’t get the knot to sit flush with the fabric.
Threading set-up 4: narrow 5 thread coverstitch in Aerolock black and wooly nylon
I then switched to coverstitch to hem the black WBT. I did ok with the sleeve hems but I realised that I need to secure the body hem with more than pins, because I pretty much missed the entire edge the whole way around 😅 So I not only used wondertape but I also shifted my guide tape to 23mm instead of 25mm and this did a much better job. Once again, I did miss small sections of the hem but I figured I’ll let it unravel on it’s own and redo it at that point LOL. Narrow hem really does mean a lot less room for error.
Threading set-up 5: chainstitch in Aerolock black
I was kinda surprised at how easy it was to switch from coverstitch to chainstitch, it was basically just removing a thread. I decided to use left needle chainstitch due to the way the neckband was sitting. But I realised I should probably have changed to middle needle so I could use the left needle marking for the neckband edge. I figured out the placement as I went though and I think the effect is quite nice! Well, it looks exactly the same as if I’d just topstitched with Maraflex (which I was so tempted to do but would have gone against one of the points of this exercise), but it does have the advantage of much more stretch.
Threading set-up 6: 4 thread overlock in Aerolock white and wooly nylon
The two black shirts took me quite a long time to complete, but that really did come down to learning the best way to do things. So I was hoping the next two would be a bit more streamlined.
Threading set-up 7: narrow 5 thread coverstitch in Aerolock white and wooly nylon
Threading set-up 8: chain stitch in Aerolock white
I decided to time myself and I managed to complete the white WBT in 1.5 hours. That’s pretty fast considering it included 3 thread changes!
Threading set-up 9: 3 thread overlock in Aerolock white
Another intermission to edge new fabrics, saving even more thread by not bothering with the 4th thread 😝
Threading set-up 10: 2 thread flatlock in Tutti and variegated wooly nylon
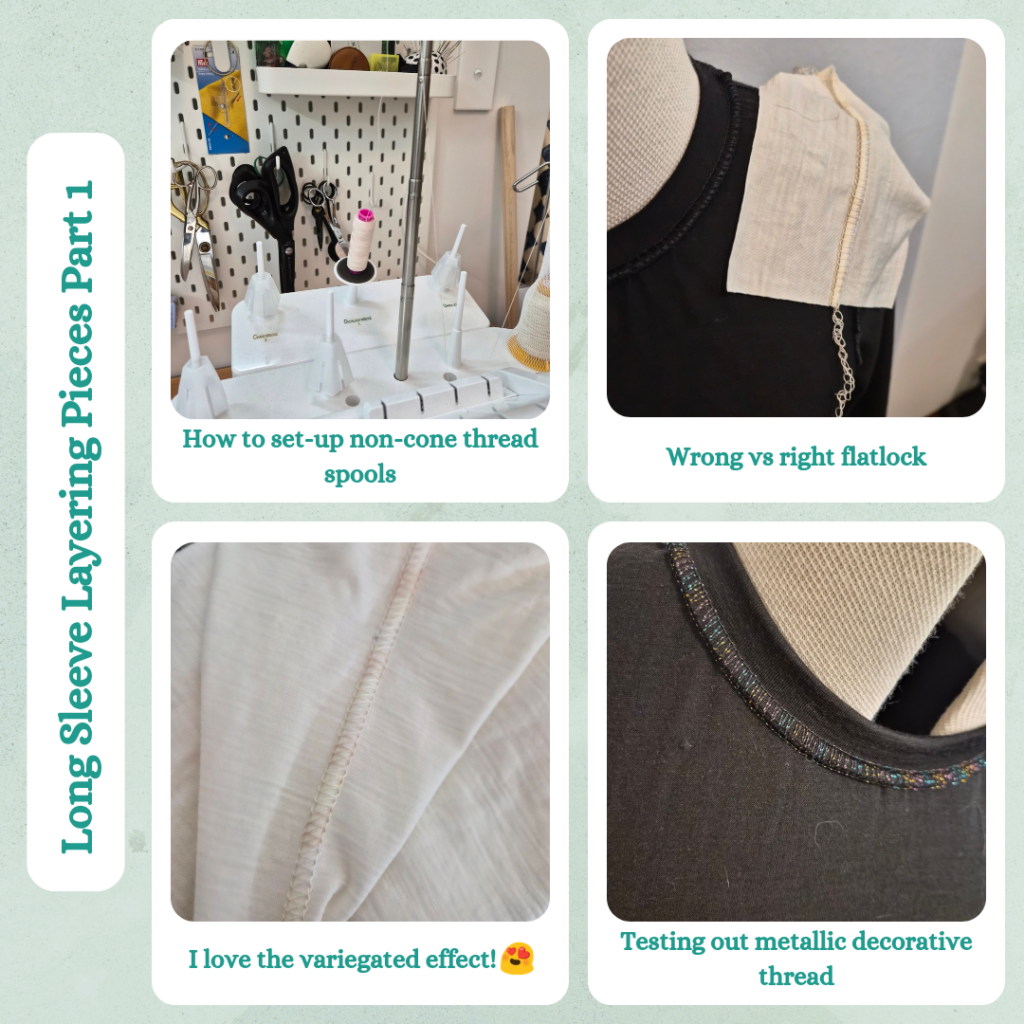
I saved this one for last (well at least second last after I realised I needed to redo the black version) because the thread I’m using is slightly contrast so it’s a bit more decorative. My first hurdle was figuring out how to put a standard thread spool on LOL. For starters, the cone holders are very snug, so I was worried about trying to remove them. Secondly, I did get out the cushioned spool holder like the manual instructs, but I couldn’t figure out how to put a spool cap on top because the thread spool was taller than the spool stick. I tried googling and couldn’t find any instructions. In the end I figured out it doesn’t need a spool cap from this YouTube video. I guess I was thrown by how unstable the set up looks haha.
Then I was trying to remember which flatlock stitch I used (I remembered by recalling that I didn’t want to change the stitch selector haha) and as I was threading the two threads I had the suspicion that I didn’t do it this way the first time… And sure enough when I did a test on some scrap the flatlock actually lay flat this time 😅 So I guess I should unpick the first Honeygirl Tee and completely redo it. Definitely a learning experience! In hindsight it makes sense I was wondering why the ‘wide’ flatlock was so skinny lol.
Based on my difficulties with the neckband on the first Honeygirl Tee, I recut neckband with 2.5cm more length. Then I timed myself and it took 1 hour 5 minutes to assemble the tee 😊 I did hit one snag and that was somehow I got a pin stuck in the feed-dogs but I managed to extract it… It was something that was bound to happen at some stage, now I know I have to be even more careful with pins.
Threading set-up 10: 2 thread flatlock in black Aerolock and decorative metallic thread
The variegated thread was so fun on the cream Honeygirl Tee, I decided when I redid the black one I would use the free decorative metallic black thread I got when I bought the Gloria. It was also a good opportunity to recut the neckband 2.5cm longer as well.
The seams didn’t sit as flat as with the white probably because they were slightly pre-creased from being sewn once already. But still much better!
Threading set-up 11: chainstitch in black Aerolock
I had a thought based on the chainstitching topstiching on the WBT that maybe the neckband would have more stretch if I chainstitched the seam instead of using Maraflex. So I added another thread change. To be honest I don’t think I can tell the difference? It’s more important that the topstitching is done via chain as the Maraflex would be more limiting in this circumstance.
Threading set-up 12: 2 thread flatlock in black Aerolock and decorative metallic thread
And then switching back to hem everything in flatlock.
Reflections
I’m surprised how upbeat I felt throughout this process haha. There was definitely a lot of screw-ups because I don’t know what I’m doing, but I think because I know it’s my fault and not because my machine has limited functionality/is testing my patience, it felt rewarding?
As is typical, I completed these just as the weather changed and so now I’m not too sure if I’ll have much chance to use the thermals. Although! Since they are merino wool I should have a bigger window to wear them than my Heat-Tech thermals. It will be interesting to see how I fare with the wool. It did already feel a little scratchy when I test wore them…actually nevermind! A second test wear showed that the wool tops are too tight! And not long enough to tuck in!
Also typical, I’ve become very enthused over making more under layers in a variety of fabrics and so have a ordered a bunch for sewing up next year. So there will be a Part 2.
Things I learnt:
- Pointelle and wool jersey absolutely don’t have the same amount of mechanical stretch LOL
- How to sew a garment entirely in flatlock
- I’m in love with variegated wooly nylon
- How to set-up non-cone threads
- Courage to change thread setups multiple times in a project
- Need to lengthen Honeygirl long sleeve pattern and use a stretchy knit next time
Categories: Sewing

Leave a Reply