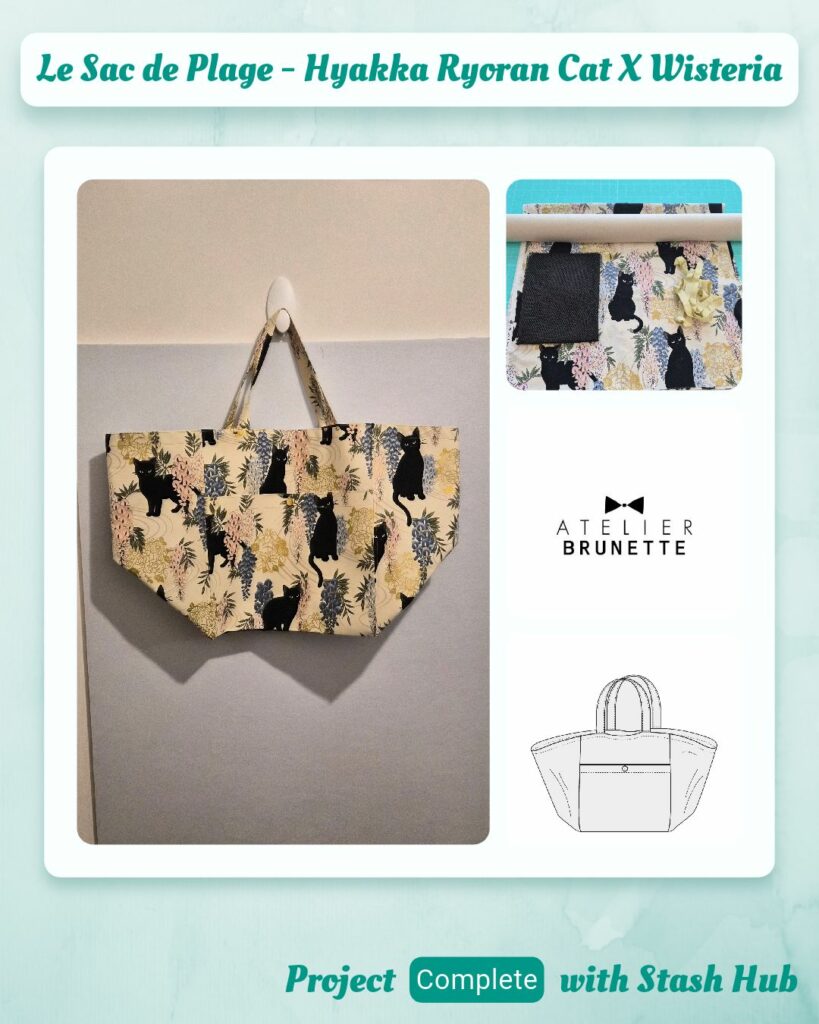
Main Fabric: Hyakka Ryoran Cat X Wisteria – Cream (gifted)
Lining Fabric: Waterproof Polyester- Black (Remnant Warehouse)
Interfacing: Decovil Light (Jackstock Haberdashery)
Notions: 17mm Strong Snap Buttons – Brass Gold (Dreamy Bag Hardware), 4mm Rivets – Gold (Studio Mio), Gutermann Denim Topstitch Thread col. 1310 (Weft and Warp)
I’ve made this pattern twice and now have made it a third time as my SIL saw the previous two versions and requested one for her birthday. She is another cat lover and the fabric is actually a gift from when she went to Japan with my brother and nieces a couple of years back. It’s a very pretty fabric but I haven’t really known what to do with it until now because the print is very large and so it’s unsuitable for a lot of other projects that use quilting cotton (or cotton sheeting, it does feel a little thinner than usual quilting cotton).
The first time I made this bag I followed the instructions and didn’t feel like it was structured enough for my liking. The second time I adjusted it to have a lining and facing as well as used heavyweight interfacing to give the quilting cotton fabric more structure. It was better but I felt like the structure still wasn’t quite right… I did some research after that and decided to try Decovil as it supposedly gives the fabric a ‘leather-like’ feel. I wasn’t sure whether Decovil or Decovil Light would be suitable so bought both and decided on the Decovil Light. I mostly referred to this blog post on using Decovil for guidance.
I did feel a bit anxious going into this project, probably because of the unknown factor of the Decovil. It doesn’t help that I cut the base piece out of Decovil four times instead of the body pieces…I repurposed one for outer pocket lining but I guess the rest I’ll just hang onto and hope I can use it for something else. I’m pretty sure I’ve done something similar before (cut the base out instead of the front/sides) so I need to go and mark the base piece in lots of highlighter or something.
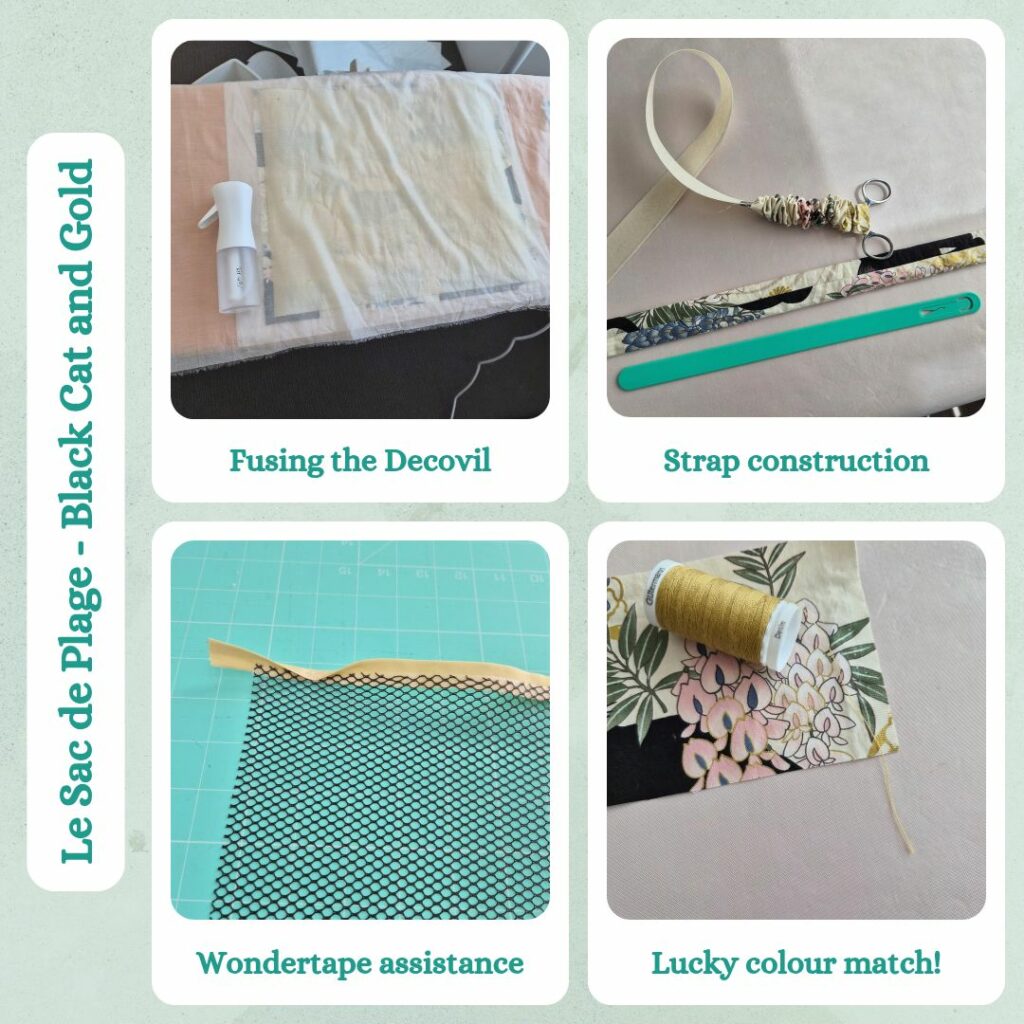
Fusing the Decovil wasn’t too bad, I followed the instructions from the guidance blog post covered the Decovil with my pressing cloth, sprayed it lightly with water and then pressed for 6 seconds. I feel like the bond is a lot better than the heavyweight interfacing from last time, I felt like that one separated after all the handling required to construct the bag. I also decided to make outer base also out of the waterproof fabric and adhering the Decovil to this worked fine as well.
I followed the same steps as last time for the outer pocket but a difference this time was I now have Steam-A-Seam in my notions kit and this actually does adhere to the waterproof lining pretty well, unlike the other options which were utter failures. I also used a Strong Snap since it’s bigger. I didn’t need to interface the button section since both the pocket and front piece were Decovil fused. I also realised that some of the Denim Thread I bought for making jeans is a pretty good match to the gold of the fabric design and used this for the topstitching. This did mean I had to do quite a few needle and thread changes, but it wasn’t as big a hassle as I thought it would be (I was dreading it a bit).
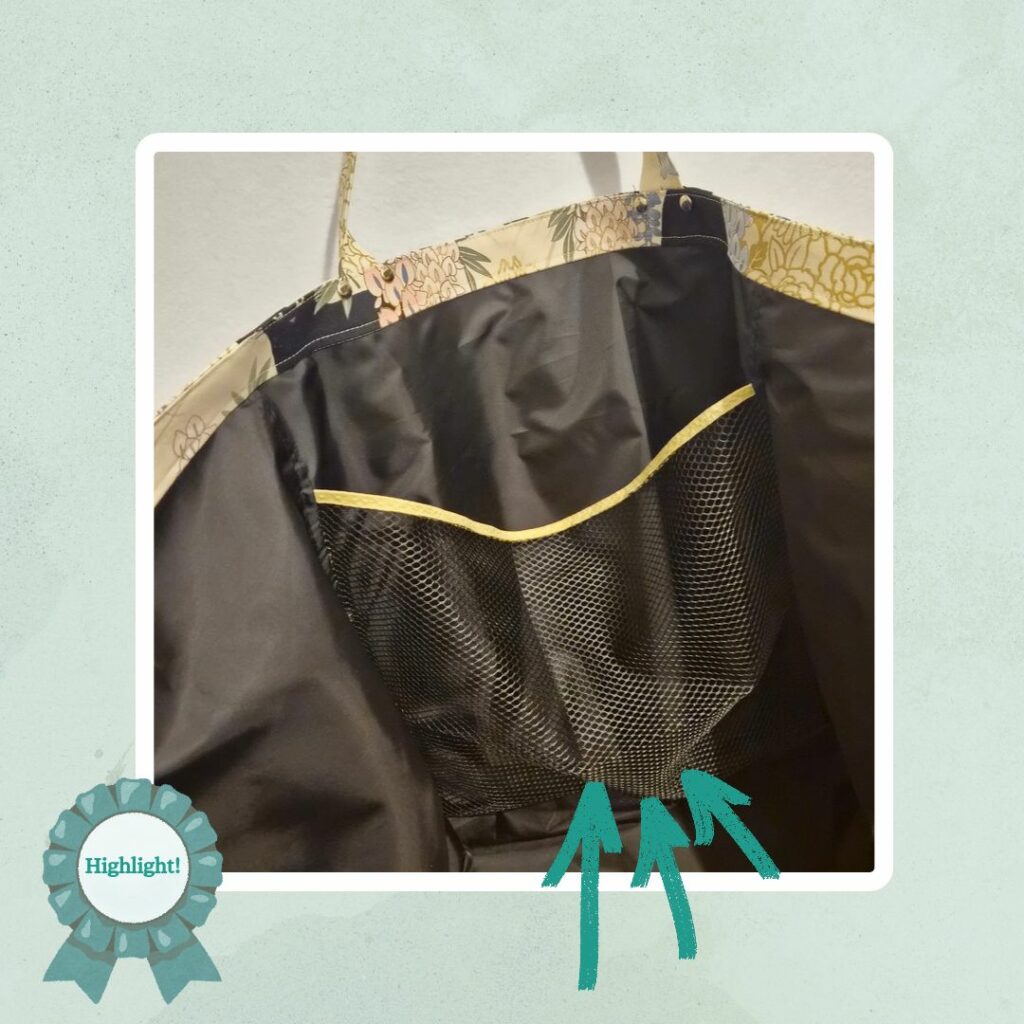
Feedback from SIL on the previous bags was to include inner pockets. I’ve been mulling over it for over a month. I was going to copy the inner pockets from the Makers Tote using the waterproof lining fabric. But I was concerned the pleated ones would get in the way and the flat ones would be too tight. The night before starting the project I remembered I have By Annie’s mesh (can’t remember what I bought it for…) in black and that I also have foldover elastic. The gold is a pretty close colour match, I considered using the black instead but thought it would be useful to be able to see where the pocket is lol.
So now that was decided the next thing to ponder was how to design the pocket (half the height of the bag?) then was like but I have a pocket piece already (for the outer pocket) haha. So used it as is so it will be a bit taller than the outer pocket (cos no need to fold-over the hem). I cut out the mesh then realised the stretch went the other way. Maybe this is ok since the stable grain means it won’t stretch out so easily? I figured might as well try it as is. I think it’s ok, the mesh itself has a bit of give. which became a bit of a problem when I tried to baste it to the corresponding lining panel, I accidentally stretched it as I sewed so had to trim the bottom edge. Next time I should sew with the netting on the underside instead.
Then that was all the new things out of the way and the construction of the bag was pretty straightforward. The only part where I was like ugh I should have done that differently was with the facing. Firstly, surprising no-one, I messed up the measurements for the Decovil and it ended up a bit too short for the facing pieces, but I still used it as is. I also didn’t remove the Decovil from the facing hem seam allowance because my plan was the trim the lining piece and sew to the facing and then topstitch the lining down. But as I put the bag together, I remembered why I kept the lining the same size as the main bag body, it’s just too painful to try and turn such a big structured bag inside out, that’s why the lining gets basted to the top of the main bag body and the facing gets topstitched down on top. So I did some guide stitching to help with folding the hem/seam allowance down but next time I should not Decovil it to reduce the bulk.
After topstitching the facing down I also added rivets. I thought about adding a snap button in the middle but I realised that both my strong snaps and spring snaps only have the round button on one side and that bothered me so I omit it.
SIL seemed happy with it! Luckily she had forgotten she requested it so it was still a surprise 😆 She was listing off all the ways she plans to use it which is feels nice, I always worry about presents being useless. She did ask about machine washing, which isn’t something I’ve researched yet…
Categories: Sewing

Leave a Reply