Planning and Design
So my current sewing chair is one of our old office chairs (we upgraded to more ergonomic ones when we started WFH more often). It’s a nice sturdy chair with a comfortable seat, but the gas lift had started malfunctioning. I decided to replace it with a drafting chair so I could sit at my work table too, but it actually doesn’t go quite low enough to comfortably sit at my sewing machine 😅 whoops…
My husband said I should just have two chairs and replace the gas lift on the old one and I was like ‘you can do that??!’ I’m such a cynic, I had just assumed that the chair would be designed such that you can’t repair it and have to throw it away and get a new one (right to repair doesn’t feel like it’s really a thing atm…). I am happy to be proven wrong 😝
So we looked up the model and turns out Pago is pretty good about replacements. The stand wasn’t in bad shape but it was hard to figure out if the generic gaslift sold at Officeworks would fit our chair or not so decided to err on the safe side and get the Pago full base replacement. Still some plastic to landfill but only half the chair now. The instructions were a bit tricky to follow but my husband managed (bless him).
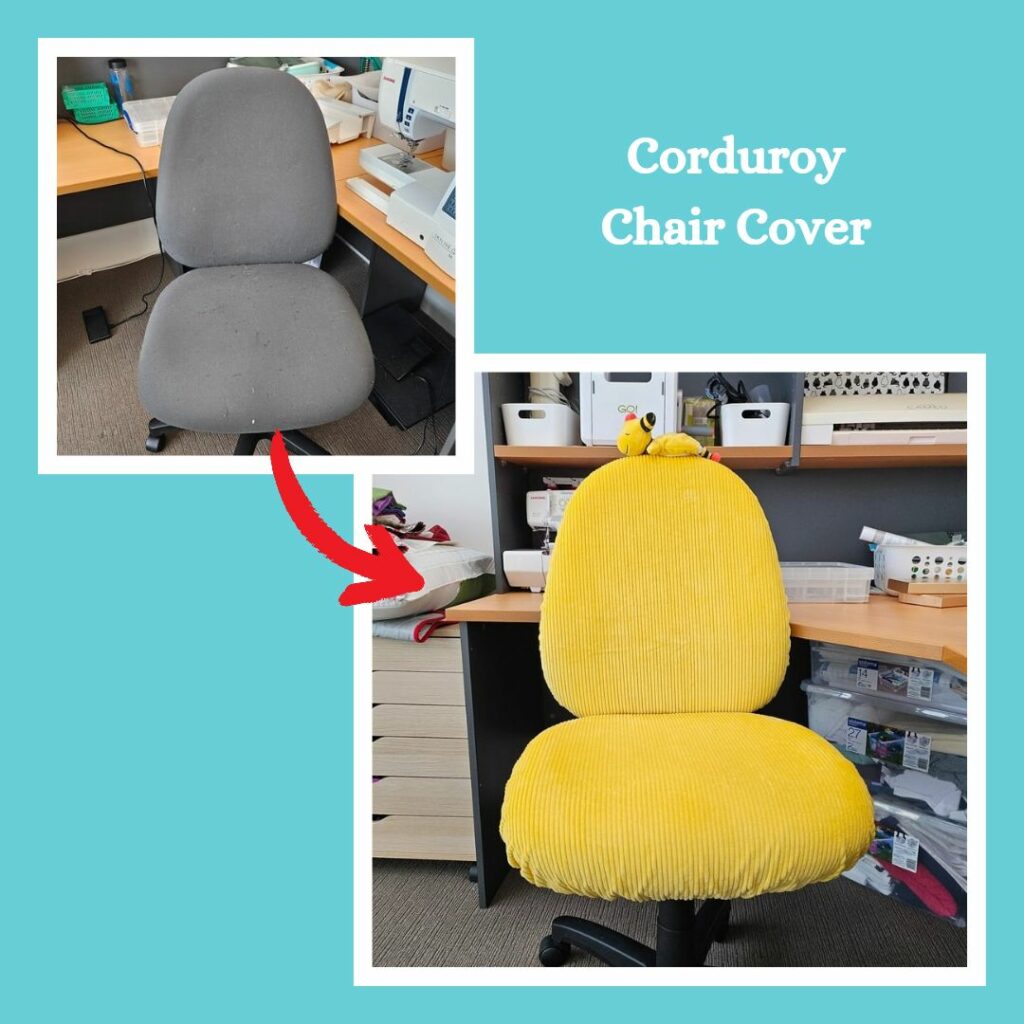
So now my chair feels as good as new! Except for the part where the seat fabric has been mutilated by the cats LOL And it is a bit hard trying to remove allll the cat hair. I usually place a blanket over it to protect it while I’m not using it but it’s a bit of a hassle because it’s kinda just draped over.
Plus the grey doesn’t match my nice new yellow ironing board cover or drafting chair 😋 Figured it would be a good idea to make some chair covers. Then I could at least remove them to wash and maybe they would be easier to spot clean (with a fur removing implement). And in all honesty…I’ve been looking for an excuse to buy the yellow corduroy from Homecraft Textiles 🤣
Materials
- Pattern:
- Self drafted using tutorial from Pamela Quilts
- Fabric:
- Cotton Corduroy Yellow (Homecraft Textiles)
- Notions:
- 6mm Elastic
Construction
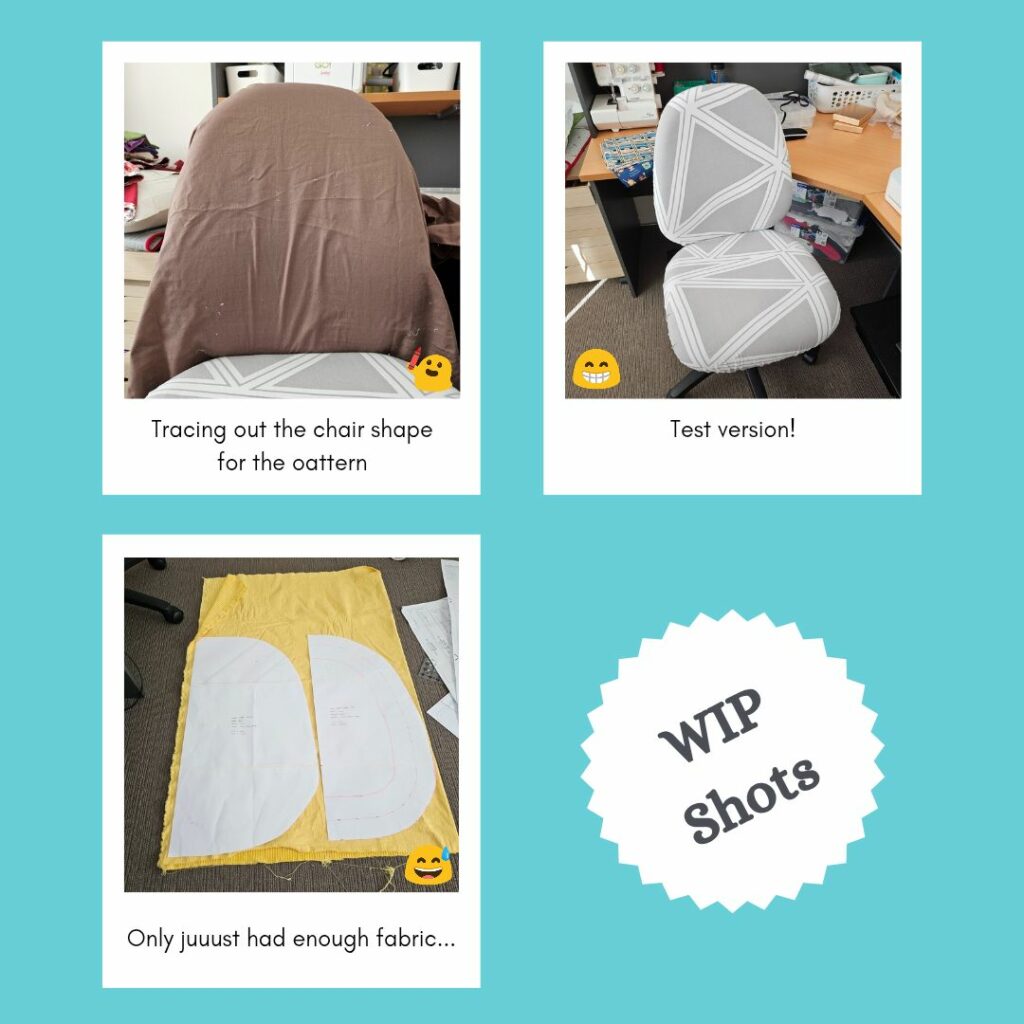
It took less time than I thought it would. I guess since it’s elasticised it’s quite forgiving. I draped some old sheets over my chair to trace the general shape, folded it in half and then took the larger side whenever it didn’t match up. This formed my pattern.
To be safe, I did a mock-up with an old quilt cover. It came out so good I was like damn coulda just gone straight to the real deal 😝 (yes yes it is always good to test first). My mum actually requested I give her the mock-up for her chair so it definitely wasn’t for naught in two ways 😁
I ended up having just enough fabric, especially given I needed it to go in a particular direction due to the texture. Because I had confidence in what I was doing it was smooth sailing for the actual chair cover.
Reflections
It was actually good I used a directional fabric because after threading through the elastic I couldn’t tell which side was top versus bottom 🤣
Also I have not seen either of my cats sit on my chair since I installed these. I wonder if they don’t like the texture of corduroy? Extra bonus if that’s the case! (Note: the day after writing this Pretzel decided, actually yes I very much like this seat cover 🙄)
Plus, even though I chose corduroy because of the appearance, it is super duper nice and soft to sit on 😍
Overall a very satisfying project with a useful output 😊
Things I learnt:
- Maybe investing in pinking shears would make the curve clipping part faster and less tiring?
Categories: Sewing
Leave a Reply