Planning and Design
This fabric has been in my stash since the Splatoon 1 bootleg days, when I wanted to make the Pearl Tee. But I kept putting it off because I didn’t want to waste HTV but also couldn’t think of a way to make sure each pearl motif was aligned correctly.
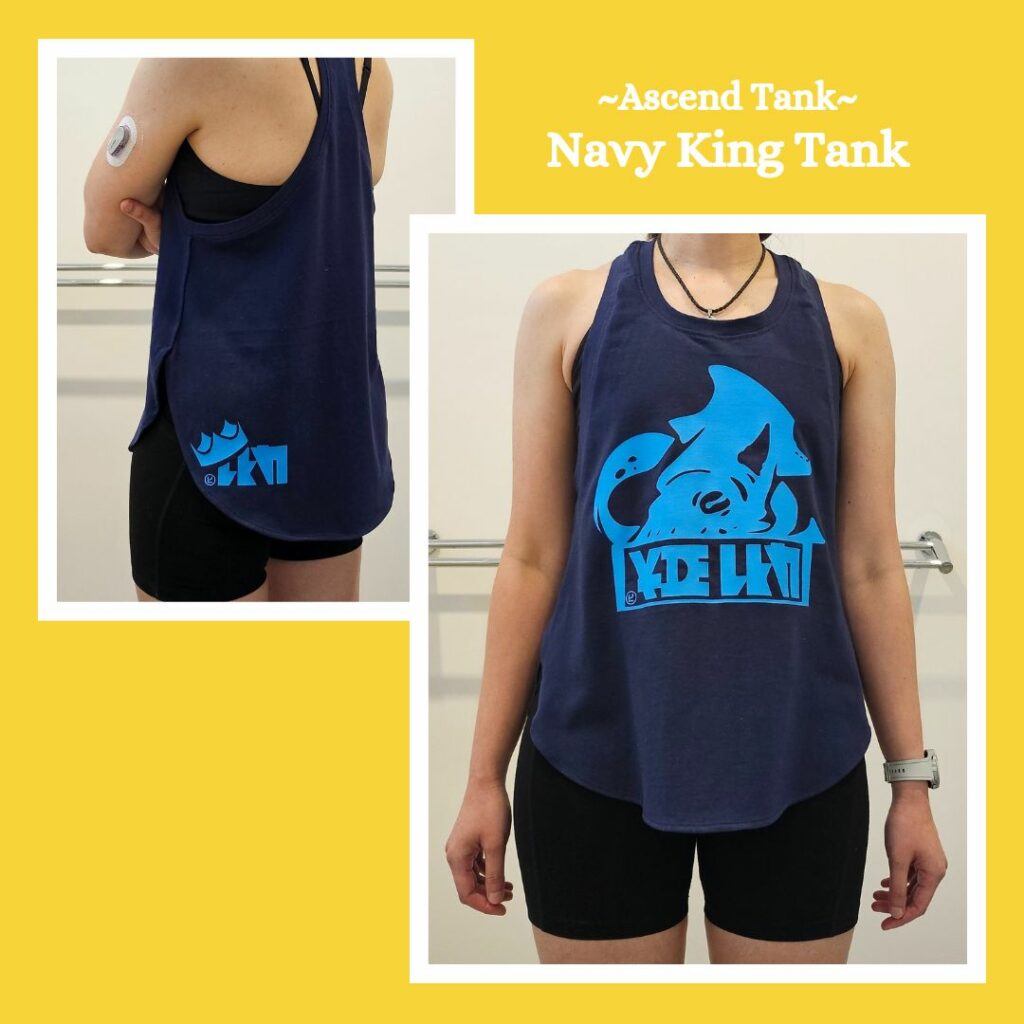
I now no longer want that Tee (it’s cute but I would never wear it IRL). But what I do want is to test the Ascend Tank pattern before I start cutting up my L-sized Sanrio T-shirts 😝 Since I used the Navy King Tank in Splatoon 3, and I already had the Enperry designs from the white Uniqlo t-shirt I decorated, seemed like a nice simple project. Plus I wanted to test out Maraflex thread before using it on other higher value projects. I guess this makes this a wearable toile 🤣
Materials
- Pattern:
- Ascend Tank (Greenstyles)
- Fabric:
- Midnight combed cotton jersey (Spotlight)
- Thread:
- Gutermann Maraflex Navy Blue 310
Construction
First Pass
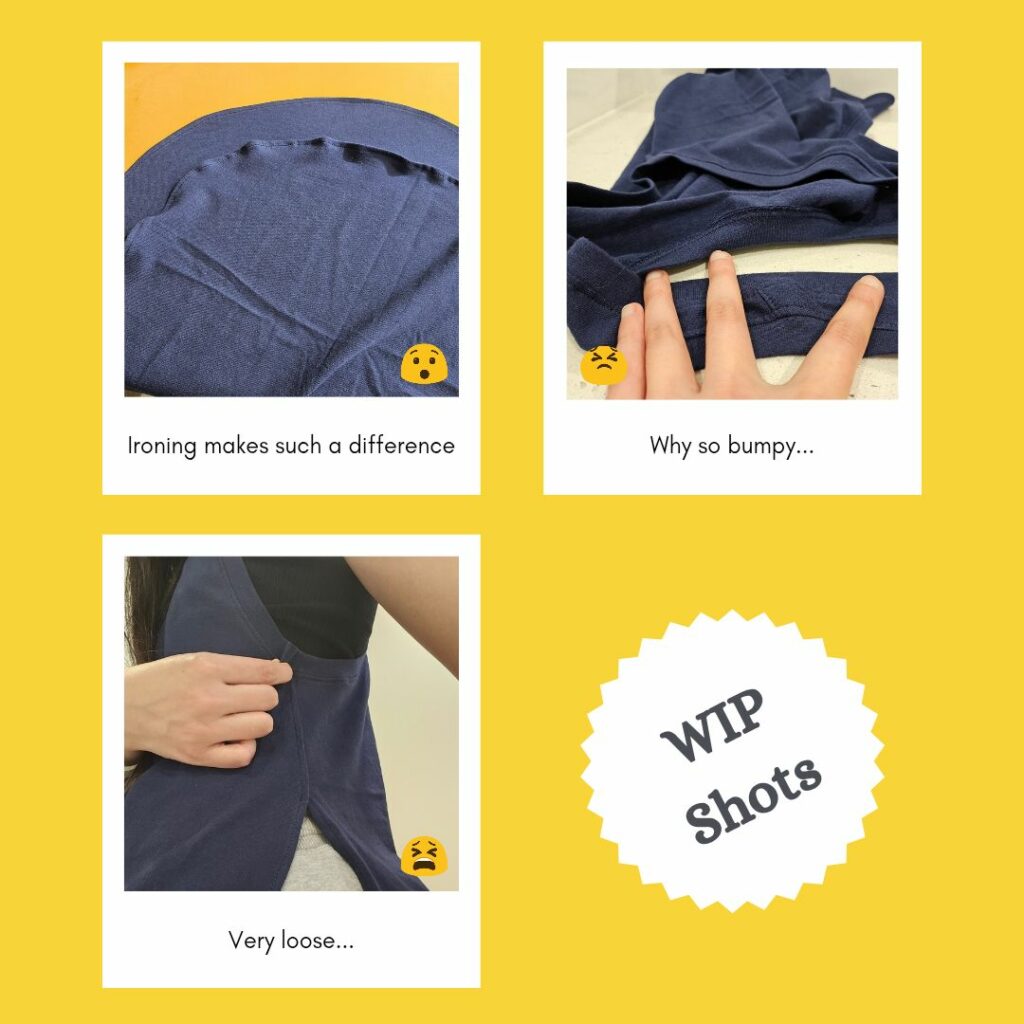
This was such a nice simple project to put together. I guess all that experience adding ribbed collars to my Splatoon 1 bootlegs is paying off. I did try using an overcast stitch with the Maraflex and was not impressed or unimpressed. It was kinda whatever. Although I read later, when I was looking up how to use the overcast foot, that you’re not meant to change the stitch width. Whoops! I did start to wonder if I should just not edge knits since they don’t really need it…
Then I tried it on and it really did not sit right 🤣 The shoulder straps were kinda bunched up and sitting raised above my shoulder and the sides were gaping. I assumed that since this was a loose fitting singlet top it wouldn’t need much/any adjustment but I was very very wrong.
But this is what a toile is for right? So I made the following adjustments in order, trying it on as I went (like you’re meant to LOL):
- Removed 2 cm on the sides from the front only
- 1.5cm seam on the shoulders to reduce strap length
- After the above, the collar band was fine when left as is, but the arm band was gaping still. So reduced this by 1cm (2cm total) on one side only
- This still looked too gaping so reduced by 1.5cm on the otherside. This looked much better.
- Redid the original side to 1.5cm as well. Still looked more gapey than the other side but I put this down to me overworking the ribbing and permanently stretching it a little bit.
Overall it looks much better. I felt like the band at the side join could be a bit flatter, but I think this might be because it looks a bit v-shaped at the join.
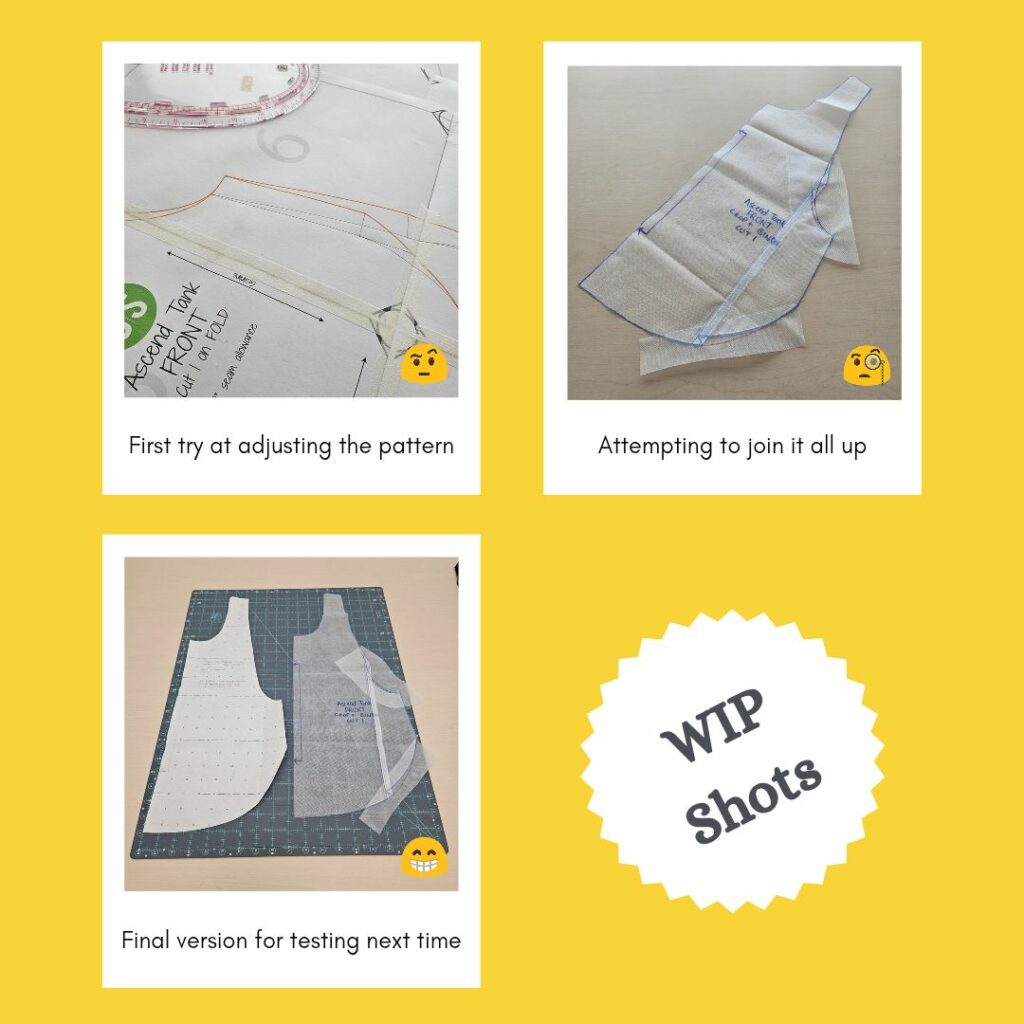
Adjusting the Pattern
So once I went to modify my front pattern piece I realised why the side seam was v-shaped. By removing width directly from the side, I removed the curve of the arm that would have made the join straighter. I recently bought a book on tailoring so looked to see what the suggestions were for removing width but because I was just doing it from the front there didn’t seem to be any guidance. Plus a singlet top probably isn’t bespoke enough to be covered in these kinds of books haha. The pattern itself did come with some instructions for modifications but it was more related to length.
So I had to make it up myself. I marked out where the rought mid-point between the top and bottom of the armscye was (conveniently matched up with the grain line marking) then measured 1cm either side of this and folded over on itself to remove this portion. Then I puzzled over how to match up the armscye curves. I ended up using my pattern master to mark a new curve halfway, starting from the bottom, then marking a ‘straighter’ curve to match up with the long part of the armscye. It looks right to me 🙃 Joining up the bottom hem was much easier.
Since I’ve changed the armscye length, the band adjustments I made probably don’t apply anymore. This just means a wearable toile #2. Which I already have ideas for 😆 I will try the cropped view with U-shaped back next time.
HTV
Luckily I had the right shade of blue from the Siser sample pack I bought oh so long ago. Siser is amazing, it really should be past it’s shelf life by now. It did lift a little after I heat pressed it and tried to remove the carrier sheet, but I was able to manoeuvre my lifting to keep it in place and a second press helped keep it adhered. As to be expected for a product so old and I’m impressed it’s still totally usable with a tiny bit of extra work.
Reflections
So when I took the photo the shoulders still look bunch up…Maybe needs a bit of an iron. And maybe I should have put the back logo lower down, I was trying to make it to the side enough that it didn’t look weirdly off-centre but in hindsight maybe I should have rotated it to follow the hem curve.
I don’t really like this pattern in this fabric. I think it needs to be made out of a heavier or more structured knit (maybe spandex?) The curved hem is the highlight but this fabric doesn’t do it justice.
Things I learnt:
- Try on as you go. Although the band/binding does need to be applied for the test wear to be useful (i.e just don’t topstitch the seam down until certain all is good)
- Maraflex on an overcast stitch isn’t nice enough to be worth the effort.
- Don’t change the width of the overcast stitch.
- Remember to increase sewing stitch length to 3.0 and topstitching to 5.0 when using Maraflex.
- I might need to start recording knit stretch percentages against band/binding lengths for patterns like these. Something I will start doing on the next project. I’ll need to look up the best way to measure stretch (as in I don’t want to over or understretch and make all my recordings kinda useless. Surely there will be some sort of standard methodology…)*
- Always lint roll my ironing board before using after an extended break (eg between weekends). Cos one of my cats likes to sit on it and then I get cat hair over everything 😩
*after writing this draft I found a free stretch guide from Notch Patterns while browsing their site 😁
Categories: Sewing
Leave a Reply