Planning and Design
Modern Makers third challenge was for the Top Down Centre Out method of fitting pants. Pants are something I’ve always struggled with. I even once did a course to make my own pant sloper but the sloper was soooo huge I just completely gave up on sewing pants that weren’t pajama pants LOL. I’d say my failure at sewing pants was a big factor in me giving up on fashion sewing around 10 years ago… Making pants was something far far down on my list, I had looked up fitting guides for pants and honestly was pretty overwhelmed. I had never heard of the TDCO method, but I was willing to try something different and this challenge brought the whole pant-making plans forward a lot.
The fabric I chose for the wearable toile was fabric I bought when I started thinking about sewing clothes again around 4 years ago. It is the kind of fabric where if the garment turned out well I would be more than happy to wear it, but if it didn’t, I wouldn’t be too sad 🤣
Materials
- Pattern
- Philippa Pant (Anna Allen)
- Fabric
- Herringbone Stripe Cotton – Black (Remnant Warehouse)
- Candy Store Stripe Shot Lining (Remnant Warehouse)
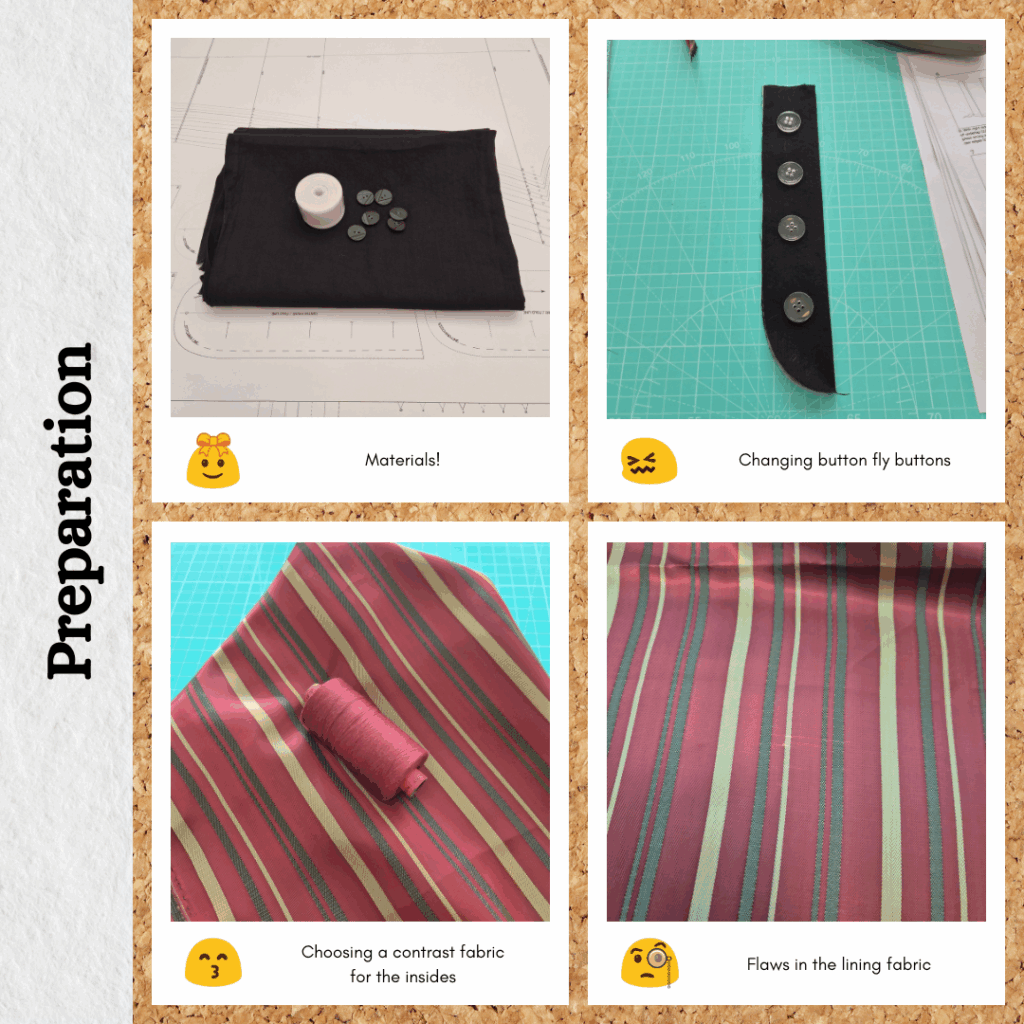
- Buttons
- Black stash button
- Clear stash buttons
- Thread
- Rasant col. 000
- Notions
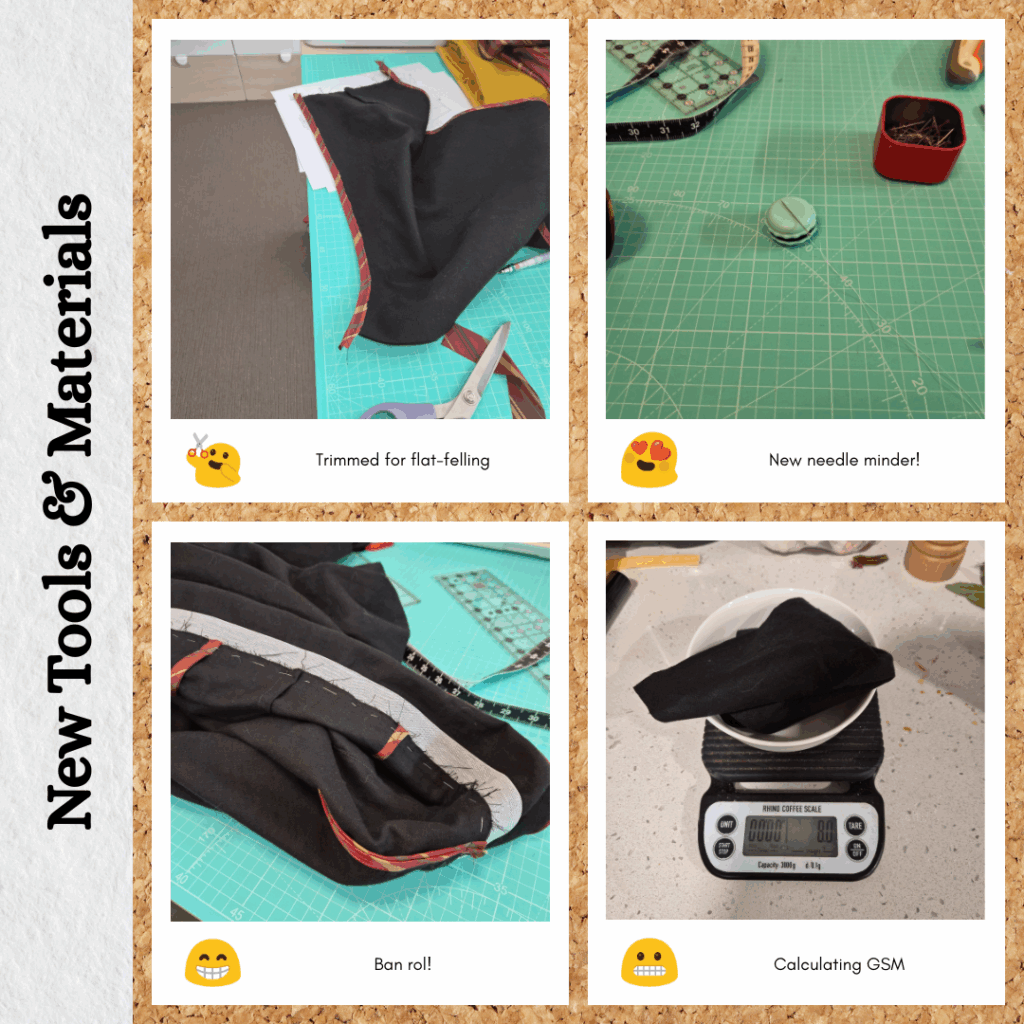
- Ban rol
Sustainability Check
👍 The main fabric is 100% cotton (I think, I don’t have the composition information since I bought it quite a long time ago, but it doesn’t have the word ‘blend’ in it’s name)
🤏 Rasant is OEKO-TEX but not biodegradable
🤏 The black button is likely plastic and the clear ones are definitely plastic. But all have been salvaged from previous projects so yay for reuse!
👎 The lining fabric is likely polyester, I also don’t have the composition information for this since this was a remnant buy before Stash Hub days, but it feels synthetic
👎 Ban rol is polyester
Top Down Centre Out
Pre-Reading and Research
I started off by watching the recommended Crooked Hem videos. I was planning to space out the watching, but she does such a great job explaining it that I ended up watching it all. Plus, the method itself sounded so logical. It made me really excited to try it.
I then gradually made my way through the Closet Core Trouser course. I thought since I’m going to make pants, I might as well figure out how to make them well.
While I was doing the above, I was able to learn a lot from the other people in the Modern Maker’s group as well as watch the video where Ruth addressed questions from the group. I love Ruth’s way of explaining things and the visuals she uses. It feels so grounded in science. And she is very careful to impress that this is not an empirical method, you need to use it as a framework for making the changes that are specific to *you*. So I can see why this method wouldn’t appeal to people who would prefer a checklist. Apparently she’s writing a book on TDCO. I am definitely going to buy it.
I also watched an interview with Ruth by Threads. I don’t think I learnt anything new, but it confirmed that Ruth’s way of teaching appeals to me.
Waistband
I cut out a size 10 waistband and interfaced one side with medium interfacing. I made it quite a lot longer (corresponding with the length of my interfacing haha). I applied some scrap interfaced flannelette to the centre back, but it wasn’t as noticeable as I thought it would be, even after I folded it over to make it thicker. Maybe it doesn’t matter too much where centre back is for the ‘wearing the waistband’ part of the process since this is a straight waistband?
When I went to put it on, I was surprised at how far off the centre front was, but that’s probably because I chose the size 10 based on my hip size, my waist is closer to size 8. But it probably doesn’t matter too much (because it’s a straight waistband). I wasn’t really sure of this step, as the only high-waist pants I own are stretch denim, but I suppose I want this at my natural waist, so however it ends up sitting is my natural waist? I feel like it was riding up but that could just be because I’m not very used to having a (free and floating haha) waistband this high when I’m at home.
Choosing a Size
So I’m bang on a size 10 in terms of hip size, but after re-reviewing the Crooked Hem’s video and looking at my body from side on in the mirror, I realise I actually have prominent quads 😳 So I guess I should go with size 12 then.
Half Toile Preparation
Somehow, I made this easy mode for once thanks to my pattern choice?! Only one dart to transfer and the side seam is the same for all sizes so I just added 2″ to that line. When sewing the half toile together, I decided to sew 1/2″ from the adjusted side seam, since I figured it would be easier to bring it in than let it out.
Fitting
So I got a half size mirror from Kmart in order to do the fitting, but I think using this in conjunction with my bathroom mirror (which is waist up) wasn’t ideal. I think if I were to hang the mirror from the top of a door (like intended) and pair that with a full-length mirror that would work better. As in the issue isn’t so much that it’s a half height mirror, but the fact that I was using two half height mirrors starting from different point (waist down and waist up).
One thing that worked out was the half toile side happened to match up with the side my insulin pod is on. Which meant I was able to fit taking this extra bulk into account too. I suppose this means I will never be able to make pants that fit perfectly on both sides, since I will always have a device on me somewhere, but at least I can make sure that the pants I have will fit me and my artificial pancreas. So also probably another good reason to go up a size, the pod probably fits into the category of ‘protruding stomach’ 😋
I wasn’t too sure where to start, so decided to align the marking of the original pattern to the seamline on the waistband. This seemed pretty good so left it as is. There is probably quite a bit of ease at the crotch, but given I will be using thick woven fabrics, more is probably better than less? Also because I will be mostly making pants for work, so will probably be sitting a lot of the time too.
The inseam seemed to fall properly, so I decided to just move onto the side seams and see if adjusting any of this would make me see any flaws with the crotch (so I could go back a step to make more ‘centre’ adjustments). I felt like pinning along the original pattern edge worked pretty well. The main adjustments were along the hip towards the waistband, which makes sense given I traced a size 12 but my waist is a size 8. I had troubles trying to ‘pinch and pin’ so just folded it all down flat and pinned down, I figured the fold would indicate where I should sew the seam line.
I found it very awkward trying to make fit adjustments to the back dart. In the end, I did the same thing where I just folded it down and pinned it. There were some crease lines, but I’m putting this down this being a half toile and my makeshift securing of the side seam.
Given I matched up the original pattern top line to the waistband, I didn’t feel like I needed to mark this point, so just carefully removed the pant leg from the waistband. Then I used a highlighter to mark the fold on the side seam. I actually didn’t need to make any adjustments to the dart since it wasn’t any larger than what I’d originally sewn. I did wonder if I could take it in more along the straight part of the side seam, but I was wary that the actual pants fabric will be a much heavier weight and didn’t want to make it too constricting. So I thought I’d go with this for starters.
Basted Half Toile
Luckily I took a break after the previous step and so had a lot of time to think about how curving the pant side to match up with my waistband was against the ‘intent of the design’, since this was specifically designed for a straight side seam. And then when I came back to my toile, I was able to look at it with fresh eyes and realise that the width of the pant leg wasn’t tapered like the line drawing/sample photos, and that tapered look was exactly why I chose this pattern. So I went and grabbed some chinos that I knew weren’t very baggy and measured the width of the pant leg near the bottom and marked out something similar on my half toile. When I extended this line straight up, it ended up smaller than the adjusted waist. So I decided to mark a straight line from the adjusted waist point downwards and redid the side seam based on this. When I went to try it on, I was seriously surprised at how well it fit. There were no weird drag lines or baggy bits, it was like a glove. The only thing though was when I went to machine baste the pant leg to my waistband, I started matching centre back and the centre front of the pant leg didn’t match up with my marked centre front on the waistband. It was about 2cm off. I decided to adjust the waistband instead of the pant leg, because the pant leg was already quite fitted (and this was using a bedsheet, not the actual fabric I intend to use). I did fit the waistband to be extra tight, so letting it out a little bit shouldn’t be too big a deal (I hope).
Wearing the Basted Half Toile
I ended up only really wearing this for about 2 hours, but I think it was a good enough amount of time. Because it is a fitted pant, I didn’t wear bike shorts underneath so I did feel a bit silly haha. But it got a good workout, I was wearing it while I was making the Melange Light Ochre Cleaveland Sweater so moved around a lot, including sitting, crouching, climbing underneath desks and walking up and down stairs. The only time I really noticed it was when I had to bend my knee, but that’s to be expected. I actually noticed more that my left leg felt cold than anything with the pant itself.
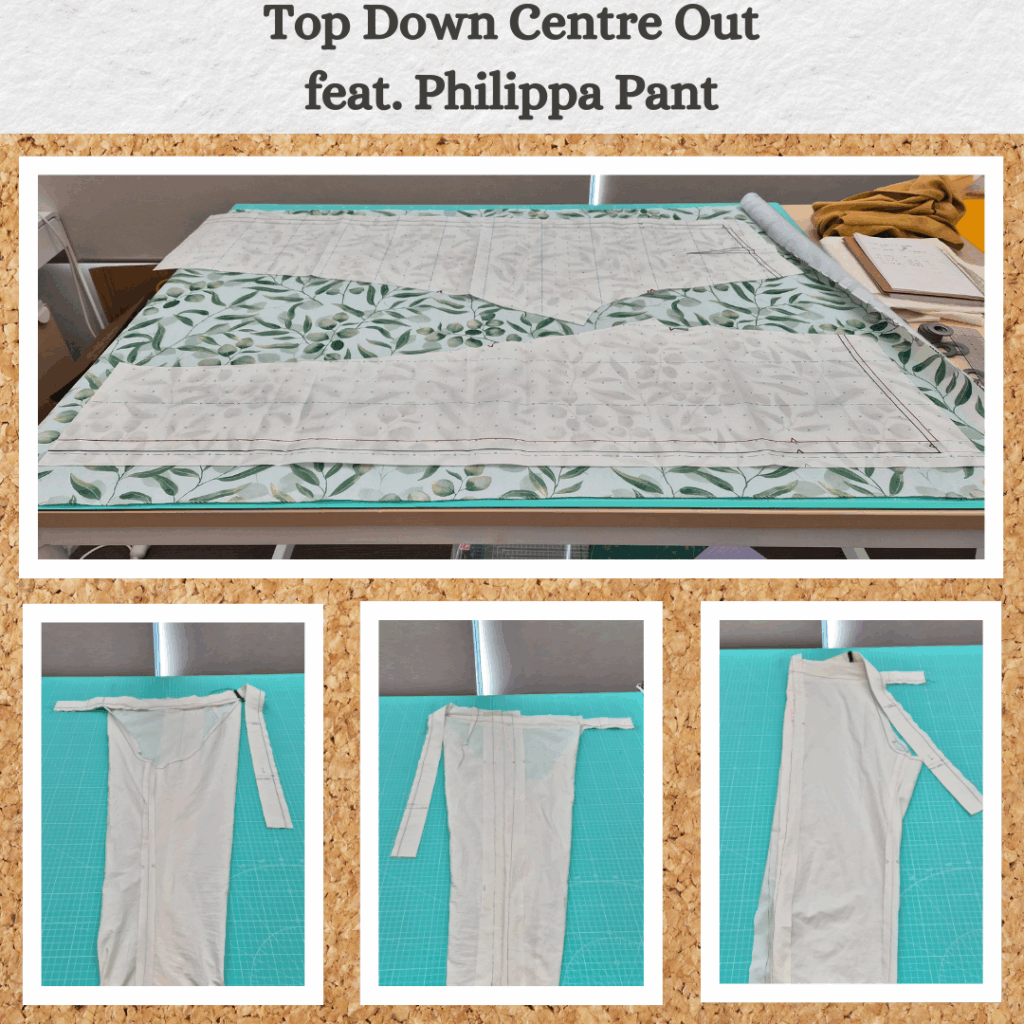
Transferring the Adjustments
All my adjustments were quite uniform so I didn’t have to unpick my toile and trace it. Pretty much just redrawing the outer side edge and extending the top by 1cm. I was more worried about trying to figure out how to re-draft the waistband, but then remembered that I had compared my adjusted pant leg widths to the original pattern to see what size it corresponded with (size 6), so did a comparison of the centre back to centre front on my toiled waistband against the size 6 waistband pattern piece and it was a match. So phew! Could just transfer the size 6 as is.
For my own interest:
- Crotch size = 12
- Crotch length = in between 14 and 16, to 16
- Waistband = 6 (*actually 9)
- Pant Leg Length = 12 (I could probably shorten it to a 8 or 10, but I think I like it being a bit long and pooling slightly on the ankle. Either that or that’s just want I’m used to LOL)
- Pant Leg Width = 6
That’s….a real mishmash of sizes 😳
Sewing the Wearable Toile
Finishing the Edges
I decided to go all out with this and bias bind all the edges. Partially because my overlocker was set up for my yellow sweaters but also I figured I should go all out and figure out where I can tone it back for future projects. I chose to use lining fabric from Remnant Warehouse where they gave me like double what I ordered because it had ‘flaws throughout’. I checked both sides and could only find one flaw. It also wasn’t that far from one of the edges of the cut fabric piece, so cut my bias from here. I cut it 3cm wide and ironed it in half to create my bias binding. I had issues catching the underside with the first edge I bound so tried to use fabric glue for the second edge and the results were worse LOL. So I handstitched it down using watersoluble thread. But surely bias binding shouldn’t be this time consuming…I then remembered I had bias tape making tools and pulled that out. But 3cm doesn’t match up to any of the recommended widths. So I tried to cut out a 34mm wide piece but the fabric is slippery and it wasn’t 34mm throughout the whole strip…I also was looking up the Simplicity bias maker machine at the same time since I knew this was a thing but I had dismissed it prior because I only really used bias for quilt binding and I haven’t been making many quilts recently. But maybe something to consider now that I’ve become a fan of Hong Kong seams. Btw, I found an interesting article about why they are called Hong Kong seams. Anyway back to my bias making attempts, I was looking up reviews on the Simplicity machine and found a Reddit post where people were saying you need to pin the tool down to get good results. But I couldn’t find any tutorials on doing this. So I tried pinning down the end of the bias strip instead and this worked ok for a bit then terribly haha. So I think I’m just one of those people who just can’t comprehend how to make good bias tape. At this point I just gave up (I had a minor cold too so wasn’t in the best frame of mind to begin with) and just went back to my hand stitching method. But I’ve got some research to do for future projects – should I buy a bias maker, how to make continuous strips of bias and how to stabilise slippery fabrics with starch….
Oh yes and I found a very handy bias width reference which I should probably print out and pin up in my sewing room LOL.
I also printed out the instructions and made some notes about which pattern pieces I need to finish before assembling the pants and which ones I don’t need to finish at all, need to finish with double fold after sewing the seam together and which side to finish from (for the fly area).
Assembly
So when it came to actually putting things together, I realised that I actually shouldn’t finish any of the fly pieces until they are assembled. So made handwritten notes on my printed out instructions. Some parts I unpicked and redid and some I just left as is. I have to think about how I want to do the front crotch seam, maybe I should extend the seam and do a proper flat fell? But if I don’t mess up the bias binding, maybe it would be easier to sew this part (less bulk). Maybe double bias would be fine at this point… This is the hardest part of the whole process, so I wasn’t too harsh on myself as it will be case of practice makes perfect.
I forgot that after the fly is assembled the rest of the garment uses 1/2″ seams. So I ended up having to do a lot of unpicking 😣I’m not super sold on bias binding the side seams and pressing them open. My trusty chinos serge the edges together. Also the instructions for this say to push both seam allowances to the back for about 15 cm and then press open from that point onwards? I wonder why. I guess it’s a bulk management approach except where there is a high possibility of the seams getting pushed the wrong way? More things to test. If I do keep binding the sides, I need to remember to not extend it into the cuff hem.
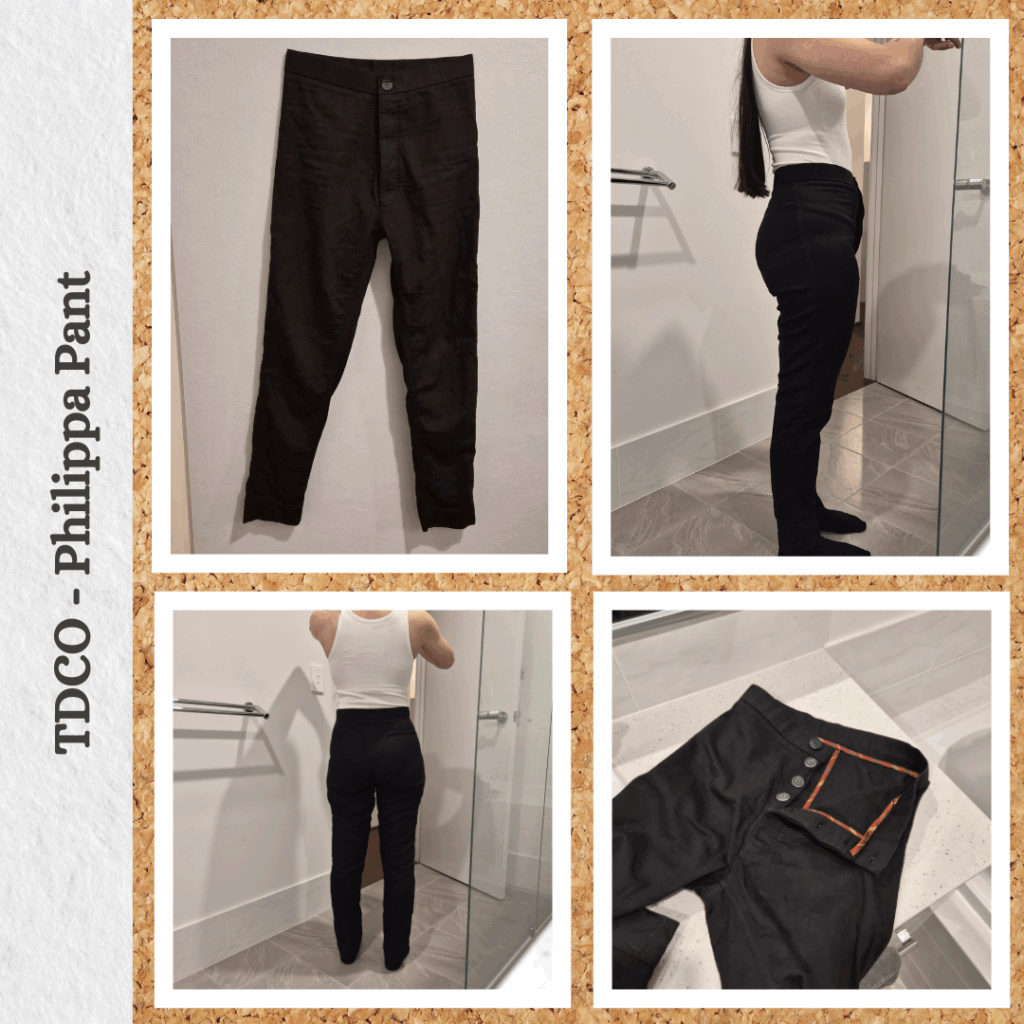
For the waistband, I decided it would be best to double fold bind the inner edge. I made do with the bias I had created (that was slightly too narrow) and dodgily secured it with iron on tape, but then realised that I had calculated my waistband incorrectly since I based it on the size seam (size 6) but didn’t take into account the size 12 crotch. I used a tape measure to check the actual length (it corresponds to a Size 9-ish) but figured I didn’t really need the markings, so just added extra 1″ for seam allowances. I measured 33 inch but the waistband ended up a little wavy so I think I could decrease it to 32.5″ so I have a smoother looking waistband. I cut some new bias binding at the correct width this time for round 2 and after applying this, sewed it to the top of the pants. At this point I really should have ironed the seam up, but as I was testing out additional lighting in my sewing room (for night time sewing), the power point I usually use for my iron was occupied, so just pressed it with my fingers. Then I applied wonder tape along the inner edge just above the seam line and put my Ban Rol. Since it was only attached (poorly, since I removed the wonder tape from the old waistband and added it to this one haha, didn’t want to waste it) on one end, I pinned it in place and basted it down with washable thread, through the turned up seam allowance, Ban Rol and actual waistband itself. This helped to secure it while I folded the waistband over the Ban Rol for a really nice straight waistband top, pinned in place and then hand basted the waistband together. Making sure to turn the inner edge at the centre front like how the Closet Core trousers course recommended. Then I used my edge stitch foot to help topstitch all the way around. Pretty happy with how it all came together.
Luckily the button I wanted to use for the waistband was pretty much the same size as the buttons on the fly so I didn’t have to adjust the buttonhole foot. Since I didn’t trim the waistband seam this time around (I was lazy), the bulk did get a bit in the way of the buttonhole foot, so the buttonhole ended up ever so slightly higher than the middle of the waistband. Not a big deal.

Reflections
So I was really hoping I would like the button fly because it is much easier to buy sustainable buttons than sustainable zips. And easier to repurpose the buttons if I decide to trash the garment, a lot harder with a zip especially it the tape has been trimmed. I think it seems pretty comfortable and secure! 😊
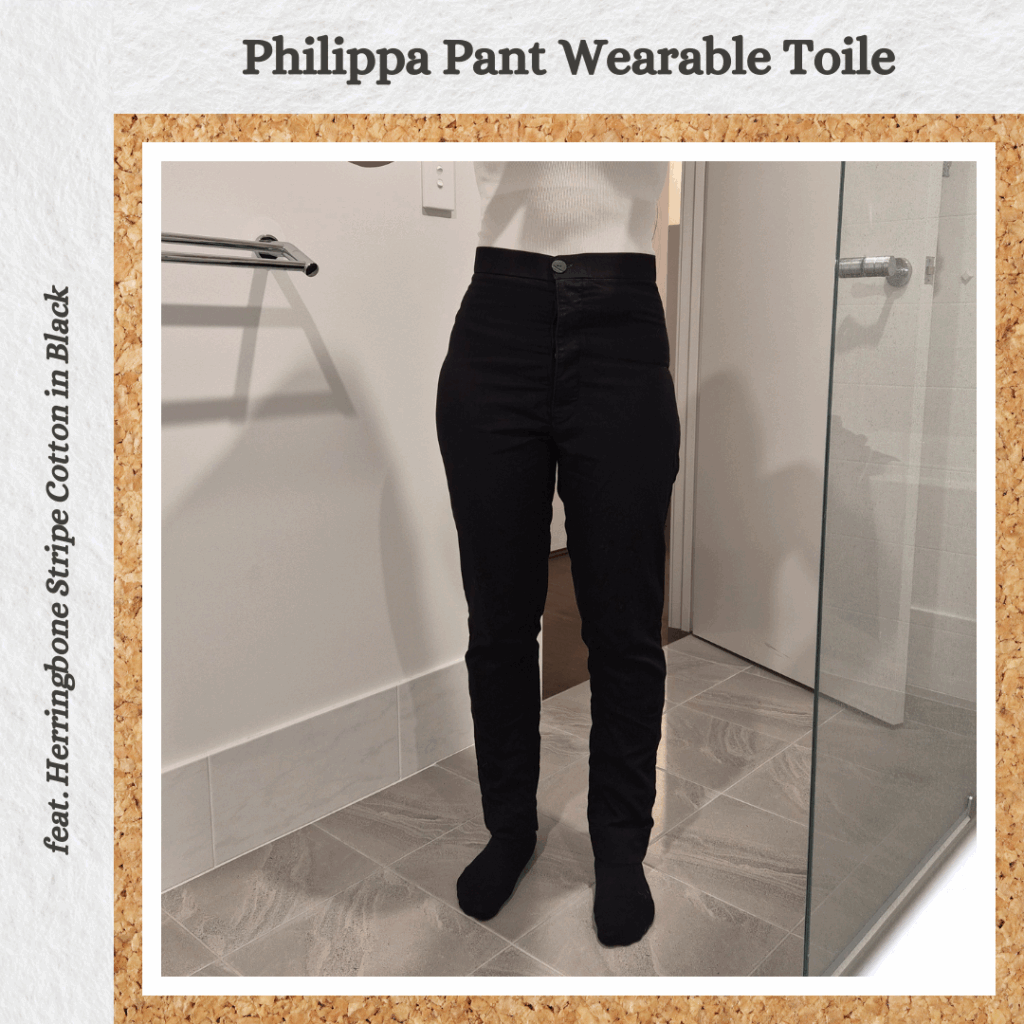
In terms of the fit, I think it’s really good! ….Except that I definitely did not use a canvas or denim weight fabric so you can really see my panty line LOL. So I probably need to test if the fit is still good with thicker weight fabric… I may also be able to lower the waist by 1cm (the extra I added might have been unnecessary). But at least I know the TDCO method works for me!
I’m not so sure how useful the Closet Core trouser course was for this. I think the look I’m going for (chinoes) is half trousers half denim. So maybe I need to also do the jeans course too???
Things I learnt:
- Top Down Centre Out method!
- It’s important to use the correct weight fabric for toiles
- How to do a buttonhole flap
- Bias binding pant seams
- I really dislike dealing with bias binding made from silky/slippery fabrics
- I looked into starching (to make bias binding) and I really don’t want to go with anything that comes in a plastic or aerosol can (because of waste) but reading about the home made ones, it sounds like it can attract bugs and that sounds SO UNPLEASANT so I think I’m going to give up on starching things
- The origin of the term Hong Kong seams
So pants are a lot easier to construct than I remember 🤔 But now that I’ve made a toile, I realise why the pattern doesn’t have front pockets or welt back pockets, the pocket bags would show up too much against the silhouette of the pant. I think this pattern isn’t suitable for what I wanted it for – a bunch of work pants. Partly because of the lack of pockets but also because the high waist band is probably not the most comfortable to be sitting in all day. I think next time I wouldn’t use ban rol for the waistband and would use either stretch interfacing or no interfacing (given the fabric itself would be quite bulky). All good, I’ve found another pattern that could be suitable for my purposes. I might do another toile with 8oz fabric to see if I can get away with that weight of fabric, but otherwise I will probably wait until I find the perfect fabric for a pair of high-waisted, flattering slim fit pants 😁
Categories: Sewing
Leave a Reply