Planning and Design
Well…this kinda ended up a bit out of control LOL. So over two years ago, I decided that maybe it’s time to replace my Uniqlo sports shirts. I ordered some from Under Armour instead, since my dad seemed to be a big fan, and honestly hated almost everything about them. The style wasn’t flattering (it was like a tunic length on me) and the fabric was waaaay too sheer. It made me think that I should just make my own. But I stalled on actioning this thought because I had no idea what t-shirt pattern to use. I don’t even know what kinds of t-shirts I like or what suits me. And I have this hang up about making a bunch of t-shirts using a certain pattern and then finding a better one later and feeling like I wasted time and fabric haha. So at the end of last year, I decided the only way I was going to move forward is to just make all the t-shirt patterns I own. A comprehensive investigation that will leave me with confidence and no regrets. As a side perk, it was a way for me to use up a bunch of knit fabrics in my stash too (although in the end I replaced it plus probably more with technical fabrics for the eventual sports shirts…).
Materials
- Patterns
- Easy Tee (Wardrobe By Me)
- Wardrobe Builder T (Wardrobe By Me)
- Jesse Tee – Cropped (True Bias)
- Jesse Tee – Long (True Bias)
- The Stellan Tee (French Navy)
- Classic T (Wardrobe By Me)
- Core T-Shirt – Cropped (Closet Core)
- Core T-Shirt – Long (Closet Core)
- Cachet Relaxed Knit Tee (Sinclair)
- Plantain Tee (Deer and Doe)
- Sparrow Tee (The Common Stitch)
- Ellis Knit Tee (Style Arc)
- Le T-Shirt (Atelier Brunette)
- Hayden Knit Tee (Style Arc)
- Honeygirl Tee (Paradise Patterns)
- Fabric – see details in each accordian block lol
- Thread
- Maraflex cols. 000, 800, 5396
- Madeira Aerolock Overlocker Thread – Black, Super White
- SoftLoc™ Tex 35 Wooly Poly Thread – Black, White
- Notions – see details in each accordian block lol
Sustainability Check
👍 Most of the fabrics are biodegradable with the exception of Soft Touch Jersey Knit/Plain Knit which is 65% Polyester/35% Cotton
👍Maraflex is 100% polybutylene terephthalate and compostable (as long as it’s not in marine or fresh water)
👎Both overlocking threads are polyester
👎Most of the notions except the cotton tape are at least part polyester
Construction
I did quite a bit of reading prior to starting this project and identified that I should probably:
- Stabilise the shoulder seams. There are various methods for which I have the materials for all of them – clear elastic, cotton tape, stretch mesh, stretch interfacing, bias fusible tape
- Use bias fusible tape for the hems. With past t-shirts I have sewn, I always have an issue with the hems curling after washing, which is annoying because I’m too lazy to iron a t-shirt, imo it should be a super low effort garment.
Also just before this project, I made the t-shirt dresses for my niece which brought to the front of my mind my dissatisfaction with the finishings on my knit wear. And then while I was tracing out the patterns, I did skim through the instructions of some of the patterns and the Stellan T-shirt had a step for binding the back seam. Which made me think of how RTW t-shirts tend to have binding not just over the back, but also the shoulder seams. So I decided to look up how to make it look ‘professional’ on the inside and found a tutorial by HandmadePhD (behind a paywall, which I paid because I’ve used their shirt collar & band tutorial and just kinda like their blog posts anyway. Very detailed).
I also now know the difference between single jersey and interlock thanks to Shift Fashion YouTube videos haha.
The rest of this post is like a diary of the entire process lol. Very tl;dr but interesting for me to look at my thought process haha…
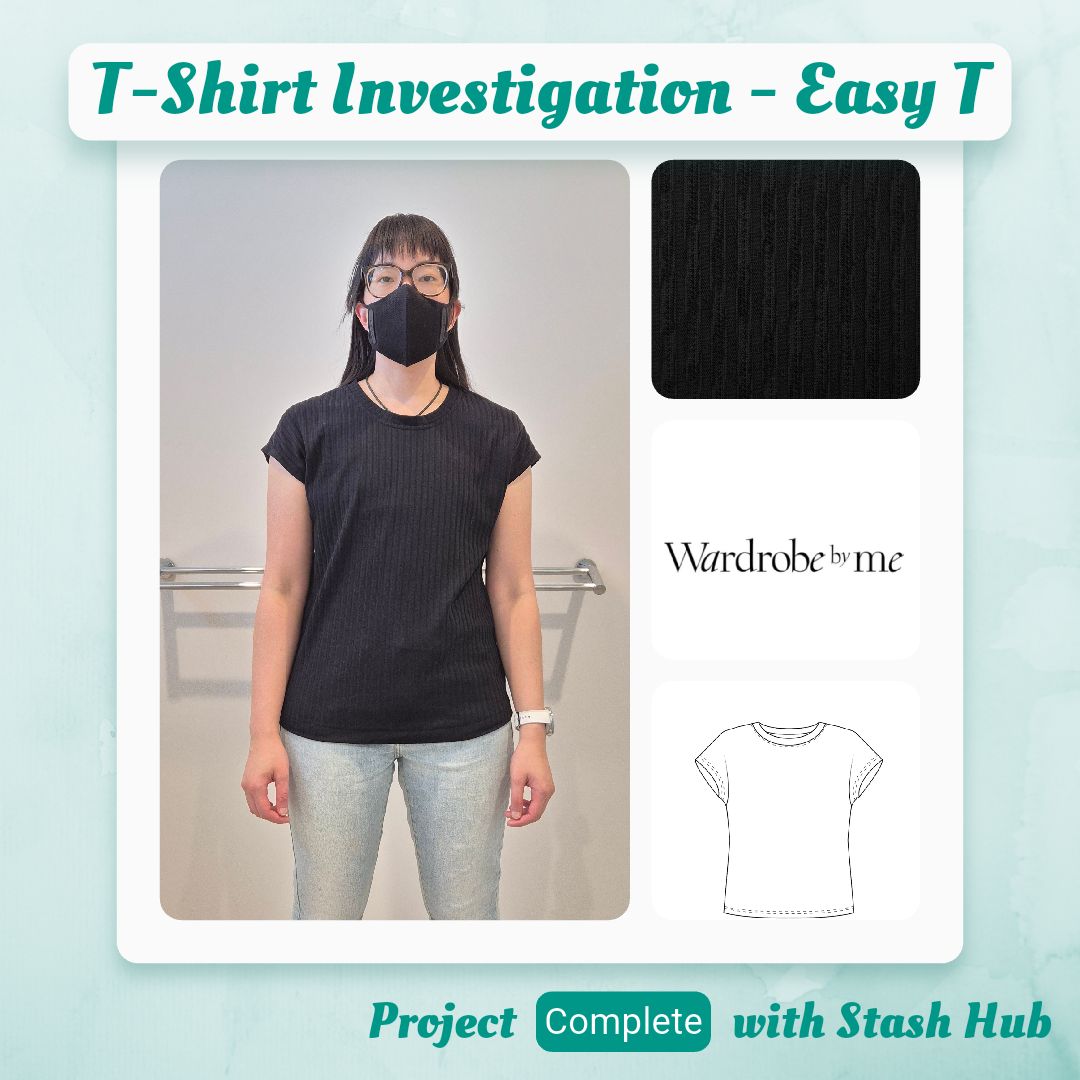
- Pattern Details
- Pattern Company – Wardrobe By Me
- Size – S
- Neck – Scoop
- Fit – Curved & Loose
- Hem – Curved
- Sleeves – Dolman
- Fabric Details
- Main Fabric – European Cotton Jersey Ribbed Pointelle – Black (Wattle Hill Fabrics)
- Ribbing Fabric – same as main
- GSM – 200
- Finishing Details
- Shoulder and neckline – main fabric binding
- Hems – bias stay tape with single fold overlocked edges
Preparation
Interesting that they tell you to size down if you are using jersey fabric. I guess that’s what happens when you combine a knit and woven option into your pattern. So M goes down to S I guess. Suggested fabric was jersey, elastane not essential but also ok to have.
Sewing
Because I wanted to finish the hems with the fusible bias stay tape, I applied this first, then overlocked the raw edges since the hems were a bit curved and I thought it would be easier to do it at this stage. For the sleeve hem I eyeballed the placement based on the hem allowance. For the body hem I drew in 2.5cm with the Clover iron-off pen and aligned the tape to this.
So I changed to my walking foot and then just totally forgot that the edge of the walking foot is 1/2 inch, not 3/8 inch so did all the seams at 1/2 inch whoops. It kind of worked out though since my double-sided fusible tape is 3/8 not 1/4 inch. I cut my bias at 1.5 inch but in future I would definitely follow the guide properly and have 3/8 inch seams so 1 inch binding. I managed to sew the bias at one shoulder-to-back crossover fine but the other got bunched up so I had to unpick and redo. I’m not sure exactly what I did wrong, this is probably going to be one of those things I gradually get the hang of over time. I also had gone on auto-pilot so had sewn the side seams already, which made the binding part not impossible but a little harder. Going to have to retrain myself there haha.
I went on auto-pilot and overlocked the shoulder seams, but this is unnecessary because they just get covered by the binding. And I also forgot to topstitch the side seams down…
The fuse tape made it easy to press a nice clean hem fold and I sewed the hem down from the inside so that I could catch the overlocked edges right at the edge, I hate it when there are loose parts of the hem allowance which end up rolling after getting washed.
Interim Findings
I was wondering how obvious the narrower stay tape in the wide hem allowance would be but I think it’s acceptable. You can see it if you look for it. However I don’t like the feel of the hem. It’s probably not something that will be noticed when worn, but when you put it on, it definitely has less give due to the stay tape doing it’s job LOL. And it’s just a weird feeling that I’ll probably get hung up on. So no using bias tape for knit hems.
- Pattern Details
- Pattern Company – Wardrobe By Me
- Size – 38
- Neck – Scoop
- Fit – Curved & Fitted
- Hem – Curved
- Sleeves – Cap
- Fabric Details
- Main Fabric – European Cotton Jersey Ribbed Pointelle – Black (Wattle Hill Fabrics)
- Ribbing Fabric – same as main
- GSM – 200
- Finishing Details
- Shoulder and neckline – cotton tape
- Hems – double fold with double-sided fusible tape
Preparation
This was a negative ease pattern with suggestions to choose a size based on bust and hip. So I decided to go with the larger of the two which was my hip measurement. The recommended fabric was a light to mid-weight jersey with 5% elastane. I actually had assigned the right type of fabric for once haha (5% elastane and 200gsm). It only had 1/4 inch seam allowance so I changed this to 1cm for consistency across patterns.
Sewing
This time I applied the double-sided fusible before sewing together the shoulder seams. The paper backing meant I couldn’t quite bend it around the large curves on the hem so just omitted it in these sections. Then I added the neckband and applied 12mm cotton tape over the side and back neckband seams. This was a little bit fiddly, I think I prefer the bias binding method. Also the topstitching also ends up very offset. If I were to use cotton tape in future, I would probably want to trim the seams and use the 6mm tape instead. But then that means fiddly trimming or adjusting a pattern so I’m thinking it’s easier to just not use this method… The cotton tape itself feels quite nice and soft though.
I topstitched the front 6mm from the edge but I think I can do 10mm. For the sleeves I pushed the seam to the front (so it can nest with the body seam later on) and double folded the hem, the fusible makes this quite a straightforward process since the first fold is secured. And after I sewed the side seam I topstitched this towards the back. I used 6mm offset on one side and then tried 10mm on the other and that worked fine so definitely should use 10mm offset for all topstitching. Then I did the same double folding for the body hem.
I realised afterwards this wasn’t a set-in sleeve pattern. But I feel like since it’s quite close fitting set-in sleeves are more appropriate?
Interim Findings
So I’m ruling out the cotton tape binding method. And even though I said 10mm is better for securing all seams/topstitching, the 6mm looks better so will probably go with that from now on.
I noticed after trying the top on that the neckband gapes a little bit, it might need to be shortened 1/2 inch or so, so it sits flat. Also the shoulder point is very pointy. I think this is due to the extra bulk to pushing and topstitching the sleeve seam to the body. I wonder if pushing it towards the sleeve would rectify this. The waist and hems are quite nice though. And the double fold hemming didn’t seem too bulky.
- Pattern Details
- Pattern Company – True Bias
- Size – 6
- Neck – Crew
- Fit – Oversized
- Hem – Cropped
- Sleeves – Standard
- Fabric Details
- Luxe Organic Cotton Jersey Knit – Black (Core Fabrics)
- Ribbing Fabric – same as main
- GSM – 305
- Finishing Details
- Shoulder and neckline – main fabric binding
- Hems – overlocked single fold knit interfacing
Preparation
For the cropped version I decided to follow my waist measurement as the bust is larger for the size 6 than my own measurements so that should be fine. Since interlock knit supposedly is both reversible and (usually) has no nap I cut the sleeve on a vertically folded piece of fabric in order to prevent wastage and be lazy by only having to cut once.
Sewing
At first I was going to cut the interfacing to match the curve of the front hem, but after I traced it and went to cut it out it pretty much looked straight so decided to save my self the effort and just cut 1 inch wide stripes of the interfacing. This was applied and the edges of the sleeves and hem overlocked. I realised that it’s easier to do it at this stage then do it in the round once everything is sewn together. And I paid attention to the side that was ‘on top’ so that I could have the ‘nice’ side showing (on the inside) after the hems were folded up.
I accidentally finished the sleeves for the long version so had to redo the cropped version pieces and decided to try ‘piecing’ some of the leftover interfacing. Seeing if I can reuse scraps, I think it’s probably going to work since the knit interfacing is so soft you shouldn’t be able to tell where there are two pieces of interfacing butting against each other.
For the shoulder seam and back neck binding, I sewed it from the front (previously I followed the HandmadePhD tutorial and did it from the wrong side so I could see the overlocking stitches as a guide) and I found it easier at the crossover point. Although I still stuffed up a bit on the second crossover and had to unpick. I think I need to make sure to ‘pivot’ the front neckline further away from the shoulder seam to prevent it getting bunched and caught when the binding is attached. Since I don’t have 1/4 inch fusible tape I used 1/4 inch wonder tape. It won’t provide that little extra bit of stability since it will wash out but it will at least let me practice the technique. I found that after topstitching the visible stitch line still seems ‘far away’ from the neckband seam. I think if I did a double stitch it would make it look more proportionate. Or, if I were to actually use fusible tape then maybe I could topstitch further away from the binding edge since it would still be safely secured due to the tape. Two things to test in next iterations.
I also stumbled across my preferred topstitch offset – 6mm with an addition 1.0 needle offset (so either 3.5 or 5.5 depending on which direction the topstitching is going). I applied this to all of the seams. For the shoulder seam I pressed this towards the shoulder to prevent extra bulk at the shoulder point.
Interim Findings
The weightier fabric definitely makes the binding method not look ideal. I need to think of a better way to use the cotton tape instead.
- Pattern Details
- Pattern Company – True Bias
- Size – 10
- Neck – Crew
- Fit – Oversized
- Hem – Slightly Curved
- Sleeves – Standard
- Fabric Details
- Luxe Organic Cotton Jersey Knit – Black (Core Fabrics)
- Ribbing Fabric – Good Earth Cotton Ribbing – Black (MaaiDesign)
- GSM – 305
- Finishing Details
- Shoulder and neckline – bound with 1cm cotton tape
- Hems – overlocked single fold knit interfacing
Preparation
For the long version I decided to follow my hip measurement since it will need to fit over them. Sleeves were also cut on a vertically folded piece of fabric. I also decided to try using the Good Earth Cotton ribbing instead of main fabric for the neckband.
Sewing
For this one I decided to try a technique I came up with based on the supplies I had on hand. I fused the 10mm double-sided fusible tape to one side of the cotton tape. I then sewed the cotton tape to the seam allowance of the shoulders/back neckband, as close to the seam stitching. Then I trimmed the seam allowance to 5mm and folded the cotton tape around the seam allowance and fused it down. Then I topstitched everything down. I was surprised at how well this worked. It reduced the bulk and brought the topstitching closer to the neckband. Because the bulk was reduced I was able to push the sleeve seam to the body which I think helps the t-shirt sit better.
Two screw ups on this one (minor ones). Firstly I forgot that I often have issues sewing ribbing and didn’t realised that my seam joining the neckband at centre back had skipped stitches. By the time I noticed it was too late. So this is definitely a weak point in the garment which hopefully won’t get too much worse. The other was I totally didn’t pay attention and sewed the front and back incorrectly so that the front interfaced hem was on the outside. Luckily I was able to unpick the overlocking and rip the fusible interfacing off without warping the fabric too much. There are some glue dots still present on the folded up hem band but I’m hoping these will go away with washing.
Interim Findings
The neckband sits really nicely and the length of the top and sleeves is perfect for that oversized look. The fusible + cotton tape method worked quite nicely. But I had also though of another method to test which I might try for the next t-shirt as it involves using double needle and finishing seams via topstitching instead of using the overlocker. Both the main fabric and ribbing are very nice and soft.
- Pattern Details
- Pattern Company – French Navy
- Size – D
- Neck – Crew
- Fit – Boxy
- Hem – Slightly Curved
- Sleeves – Standard
- Fabric Details
- Luxe Organic Cotton Jersey Knit – Black (Core Fabrics)
- Ribbing Fabric – European Smooth Ribbing – Black (Wattle Hill Fabrics)
- GSM – 305
- Finishing Details
- Shoulder and neckline – 6mm cotton tape on trimmed seam
- Hems – single fold knit interfacing finished with double twin needle
Preparation
Oh wow, my waist and hip measurements fall into the same size for once 😂 Another pattern with 6mm seams that I needed to extend to 1cm. I cut this one out of the leftover fabric from the two Core T-Shirts so the pieces were cut every which way. Also remembered I have smooth ribbing from Wattle Hill Fabrics so since this is the last black shirt decided to try it out.
Sewing
So I tried the other shoulder/neck binding technique I thought up and it was very fiddly 😣 It involved sewing the seams at 1cm, then topstitching the 6mm cotton tape as close to the seam line as possible, then trimming the seam to 5mm, then topstitching the other side of the cotton tape down, encasing the remaining seam allowance. But it did look good at the end. The topstitching was a suitable distance away from the neckline. Actually, a little closer than the other methods I used. So I probably could have topstitched everything else 6mm instead of 6mm + 1.0 needle placement.
The curve of the hem on this shirt was probably enough that I should have cut it from the interfacing instead of trying to curve a straight piece of interfacing. And since it was so curved, I did follow the instructions and did a handbasted stitch to use as a guide when pressing the hem up. Because even though it’s interfaced, the plushness of the fabric and softness of the interfacing meant it was hard to use the interfacing edge itself as a pressing guide. Then I decided to also do basting stitches as a twin needle guide. For the hem I did this with normal thread and then remembered I could probably just use water soluble thread, so did that for the neckline and sleeve hems.
Since I was playing thread chicken I decided to not topstitch the side seams down and to also finish the hems and front neckband with a twin needle. I did some tests and there was definite channelling so I looked up how to avoid this. And realised that I have never changed the top thread tension for anything LOL. I actually completely ignore that dial to the point I forgot it existed. I have always only adjusted the foot pressure. So after a bunch of tests, for this fabric I needed the presser foot tension at 4 and the top thread tension at 1. I also tested how I needed to align my fabric because I didn’t want it to sew too much ‘off’ the folded hem because the difference in thickness also created channelling. And turns out I can align the edge right in the middle of my basting/guide stitches and the zig-zag will fall nicely just within the hem. Plus, normal thread is probably better because it’s easy enough to remove the thread from the right side since the twin stitching doesn’t interact with it at all.
Interim Findings
This shirt is…quite odd. It’s meant to be a ‘boxy’ fit but the only boxy bit is the shoulders, but in a bad way. There are weird drag lines going down to my armpits. The high/low front/back hem would be nice, but not on something this roomy? I hate the sleeve length too. I was expecting the ‘boxy’ fit t-shirts to not really have fit issues. This is the first French Navy pattern I have made. I hope the others I have bought fit/suit me better.
So from the first five t-shirts I have identified a couple of things which resulted in me buying a lot of things LOL:
- Adding 1/8 inch to patterns is painful on curves so I bought the Stitch Buzz seam allowance rulers in both imperial and metric. After I had bought them I realised I could have made do with just the imperial one since it has 1/8 markings up to 5/8, but then immediately decided that nah, it’s totally fine to have both, because if I know I want to add 5mm to a 10mm seam allowance (e.g. for flat-fell or french seams) then I want to think in metric and not 2/8s 😅
- 1 inch wide fusible tape would be handy for the hems and I also want to try HandmadePhD’s method of getting really nice, crisp hem folds. Seems like the only place I can get this is by importing it from Amazon US
- I would like 1/4 inch fusible tape for the shoulder/neck bindings so bought the Steam-A-Seam version
- I also bought 1 inch fusible knit interfacing tape. I have been cutting it myself but that means I end up with not very useful offcuts. So by having a roll of the stuff this means I’ll be able to reduce waste.
- I realised I should have wonder tape of various lengths on hand. I currently have 6mm so I bought 10mm as well. And at some point I’ll get 3mm too (will probably be good for applying bias binding for pants and maybe jackets).
- Pattern Details
- Pattern Company – Wardrobe By Me
- Size – 38
- Neck – Crew
- Fit – Straight
- Hem – Straight
- Sleeves – Standard
- Fabric Details
- Combed Cotton Jersey – White (Homecraft Fabrics)
- Ribbing Fabric – same as main
- GSM – 180
- Finishing Details
- Shoulder and neckline – 6mm cotton tape on trimmed seam
- Hems – SewkeysE tape and twin needle topstitching
Preparation
I found it interesting that they recommending blending from your bust size to the waist/hips, when the final garment measurements are the same for all three measurements. Wouldn’t blending change the intended style??? Suggested fabric was traditional t-shirt jersey (so without elastane, also it would also work fine with it). Do not use heavy jersey they say 😝 I cut this one out of the jersey from Homecraft Textiles which I assumed was a single jersey but is supposedly an interlock, based on the product description. I feel like it’s a lie though because I can tell the difference between the front and back (something I’m usually terrible at) and it looks very similar to the single jersey Good Earth Cotton.
Sewing
I pre-cut this pattern out when I was cutting the previous 5 black shirts and put it aside since I didn’t want to switch thread colour. Which means I misplaced the offcuts (if there even were any, I don’t remember), so I couldn’t cut binding for the shoulder/neckline. I decided to use the 6mm cotton tape but put the seam to the sleeve, to see if it worked better than the Wardrobe Builder T, which I pushed towards the body and ended up having a bit of a bump on the shoulder. I find it quite difficult to topstitch the tape close to the seam stitches, I keep catching the front when I get to the cross-over from the shoulder to the back neckline. Hopefully something that will just come with practice. Maybe it will be better if I pin the front away so that I have an idea of how much or little I should be angling the two seams in relation to each other. I know it can’t be completely straight because that will cause bunching.
Regarding the 6mm cotton tape method, I’ve figured out the best needle offset for topstitching it (0.5 needle positions). And trimming the seam allowance down isn’t as fiddly as I thought, I guess I got used to it quickly. I was thinking this would be the perfect use case for 3mm wonder tape (By Annie’s), which was something I planned to buy but is still on the list since the other item I wanted from that online store is out of stock. But it is actually very easy to keep the tape in position, I guess because it’s so narrow, I don’t even need pins. So saving myself some materials there.
Since I used the 6mm cotton tape binding method, I used 6mm offset for all topstitching and I think it looks nice and uniform. And this time I joined up the front neckband topstitching to the cotton tape stitches and I think it looks better this way.
I followed HandmadePhD’s tutorial with the SewkeysE fusible tape. But one thing I should have done is overlocked the hem edges – after I had sewn the side side but before applying the tape. So I figured I might as well test out another one of my twin needles since I needed to finish the raw edge. I used my 6mm wide twin needle, but I realised when writing down the details that this is probably for jeans material or similar because it’s 6,0/100, with 100 being the needle size I believe. So yeah, it made pretty big holes in the fabric LOL. I wonder if it’s even possible to get 6,0/75? Looking at the Schmetz website, looks like you can’t even get 6,0/100 anymore 😅 Which really puts me off using a twin needle, because I prefer the wider 6mm to the 4mm.
Anyway, settings for Schmetz System 130/705 HZWIBR 6,0/100
- Presser foot tension 4
- Thread tension 1
- Needle offset 3.0
- Line up edge of hem with left 6mm marking
Interim Findings
I really like the SewkeysE tape. So I measured how much I used so that I can calculate how many t-shirts I should be able to get from one roll. So for this shirt (which is quite loose), I used almost 185cm.
- Pattern Details
- Pattern Company – Closet Core
- Size – 10
- Neck – Crew
- Fit – Boxy
- Hem – Straight
- Sleeves – Standard
- Fabric Details
- Good Earth Cotton Jersey
- Ribbing Fabric – Good Earth Cotton Ribbing
- GSM – 190
- Finishing Details
- Shoulder and neckline – folded main fabric binding
- Hems – SewkeysE tape and single topstitching
Preparation
My high bust and waist both fall in a size 10 but my hips in a size 12. Looking at the finished measurements, I should go with a size 10. Seam allowances are already 1cm so all good there! The hems are only 1.5cm thought so had to increase these to 2.5cm. The instructions and pattern pieces actually include a shoulder/neck binding, but it’s different to HandmadePhD’s. The latter is less bulky imo. But it’s another method to try, and given this shirt is going to be made of the GEC single jersey, this is the right fabric to test with, since it is quite light.
Also used the pattern notcher for the first time, it’s a very satisfying tool 😁
Sewing
I can definitely tell the difference in quality between the GEC jersey and Homecraft one. The Homecraft one make scratching noises when I pinned the fabric. Nothing of the sort with the GEC jersey, it went through smoothly. I followed the Closet Core instructions on binding which meant I had to trim the seam allowance. I did this by eye for the shoulders (getting pretty good at estimating 1/8 inch based on all the pattern adjustments I’ve been doing haha). But for the neckline, I followed the ‘middle’ stitch line of the overlocking which was probably a mistake, it was probably more like 3/16 removed which made a difference for the next step. I sewed the binding to the shoulder and neckline, with the binding on the ‘bottom’, so I could see the seam line and stitch right next to it. But because of my over clipping I didn’t end up stitching 1/4 inch on the binding, so that part is a bit fatter than intended. I also found it a bit tricky to topstitch the binding down because of the bulk on one side of the presser foot and had to redo a bit right in the middle… I think for main fabric binding, the Handmade PhD method is much better, but I can see this being useful perhaps for activewear, which might not be compatible with fusible tapes. I’m thinking maybe using Powernet as the binding. Another thing to test!
I also forgot that the hem was a bit curved, so applying the SewkeysE tape was a bit fiddly. I actually suspect the curved hem is because it’s drafted for a B cup, with the intent that the hem will look straight after taking into account the bust curve. Which obviously is not a consideration relevant to me. I made this according to the pattern, but may adjust the front and back hems to be straight if I don’t think the curve looks good.
Interim Findings
My husband made the comment that the length is odd because it feels like it doesn’t know it wants to be cropped or full length. But after wearing it for a day I think I really like the length. I guess I would never wear anything as cropped as the Jesse Tee (cropped) but this is just short enough that I would show some skin if I raised my arms but otherwise it would provide full coverage. I guess that’s the compromise I like.
- Pattern Details
- Pattern Company – Closet Core
- Size – 10
- Neck – Crew
- Fit – Boxy
- Hem – Straight
- Sleeves – Standard
- Fabric Details
- Luxe Organic Cotton Jersey Knit – White (Core Fabrics)
- Ribbing Fabric – European Smooth Ribbing
- GSM – 305
- Finishing Details
- Shoulder and neckline – folded powernet binding
- Hems – Knit-N-Stable tape and single topstitching
Preparation
I traced this one out at the same time as the cropped version so same modifications as previous.
Sewing
The main difference this time was attempting to use PowerNet as the binding instead of main fabric. But also, I prefer to sew the binding, matching raw edges, then trimming to 6mm, rather than trimming to 6mm and attaching the binding. I have no confidence that I can trim to a consistent 6mm 😅 So this meant I needed to change the width of my binding strip. And I messed up the calculation and cut 2″ wide, taking into account the 1cm seam. Except that the only addition I needed was on the trimmed side, not the binding side, so I think I only needed to add 1/4″ (2x 1/8″ to take the 1cm seam allowance to 6mm). So for this particular shirt I folded the binding around the raw edge, which eliminates any attempt to reduce bulk LOL. The PowerNet is quite slippery and hard to deal with. To attach it, I did attached it 1/4 from the raw edges, with the PowerNet on top. Then turned it around and stitched just within the seam, because I didn’t think I would have very good results having the PowerNet on the bottom. I think next time to make it even easier, I will long basting stitch the PowerNet raw edges together too. This basting stitching would end up being trimmed off, which works well. Also, for this particular version (because I had to wrap the binding around the seam allowance), I did use Wonder Tape, because it was hard to keep the PowerNet in place. Shouldn’t be an issue if I get the widths right.
For the hems I decided to use the Knit-N-Stable tape because of the slight curve to the hem and my issues trying to apply the very straight/rigid (because of the paper backing) SewkeysE fusible tape. I applied the tape then overlocked the edges. This is the better way to do it (previously I was attaching it before sewing the side seams together) because then I can attempt to have the beginning and end edges of the tape match so I can get a nice straight hem fold. Luckily it seems I can apply this tape with my iron without needing a pressing cloth, I was worried since it’s probably synthetic that it might not be able to handle the heat.
Interim Findings
This one doesn’t feel like it sits quite right. It might be because of the side seam curve so the t-shirt doesn’t ‘hang’ but instead wants to cling to my hips. So probably isn’t what I’m after in terms of a oversize/loose fit t-shirt.
- Pattern Details
- Pattern Company – Sinclair
- Size – S/6
- Neck – Wide
- Fit – Curved & Loose
- Hem – Curved
- Sleeves – Dolman
- Fabric Details
- Luxe Organic Cotton Jersey Knit – White (Core Fabrics)
- Ribbing Fabric – European Smooth Ribbing
- GSM – 305
- Finishing Details
- Shoulder and neckline – folded powernet binding (Take II)
- Hems – non-stabilised double fold hem, topstitched
Preparation
Between a S and M so sized down given it has heaps of ease in the waist and 5cm ease in the hips. They have quite detailed instructions on how to grade between sizes, but I really don’t want it to look like a tent given my bust is so small. I’d rather it look baggy at the top. Especially since I have wide shoulders and this is a dolman sleeve pattern. Seam allowances needed to be increased to 10mm and the hem to 25mm.
Sewing
So I messed up my pattern tracing and had traced the wide neckline for the back piece… I had already cut out my fabric by the time I realised this. It wasn’t too big a deal, testing the wide neck option is fine, but man is it confusing trying to adjust the pattern piece after I’ve added 1/8″ and marked out 3/8″ seam allowances 😅 And I didn’t help myself by noting the size on the pattern piece as Size 40 (my size for the Plantain Tee). Once I managed to get things matching, I proceeded to sew the shoulder seams together and started pinning the neck binding…and realised that of course I need to change this now that I’m using the wide neckband view. I think the learning here is to check the pattern pieces at the shoulder line right after tracing a pattern with multiple views.
Once I’d sorted out the above I was able to get started on Take II of my powernet binding idea. Basting the powernet raw edges together really did help a lot. Then was the first row of stitching 1/4″ from the edge, just to hold the powernet in place. I caught the t-shirt in one of the crossovers so unpicked that, but figured it wasn’t necessary to restitch it since it was being held in place by the remainder of the seam stitching. Then I flipped it so I could see the actual shoulder seam lines and re-stitched close to this original stitching. Then I trimmed the whole seam down, I tried to make it around 1/4″ but the end result shows that I wasn’t very successful. Before trimming, I should probably turn the binding over and confirm that the width is uniform, otherwise I should unpick, reposition and restitch so that the binding foldover is nice and even the entire way across the shoulder/neckline. And while over-trimming isn’t probably that big a deal, not trimming enough makes it look messy, so I should also test the foldover before topstitching down.
Since I was super behind schedule due to all the fixes I had to make, I decided not to topstitch the side seams down. Since I’m testing if the hems will survive the washing machine, I figured might as well test if the side seam will also survive on the same shirt. What I’m aiming for is the hem remaining straight and not getting ‘pressed’ out of alignment. Because I do not want to iron t-shirts LOL. What I didn’t take into account was that stabilising the hems had a secondary purpose, which was ensuring the hem doesn’t stretch when it gets topstitched. So my hem ended up looking pretty wavy. I also forgot to not bind all the way into the sleeve hem. Although I actually didn’t estimate how much binding I needed so one side was ok haha. The other ended up quite bulky due to the double fold 🙁
Pretty disappointed with the process of making this. Hopefully I’ll forget about all the mishaps over time.
Interim Findings
Unintentionally ending up with a wide neck made me realise that dolman sleeves probably work better with this style of neckline. But I also think maybe dolman sleeves aren’t very flattering on me, maybe because my shoulders are on the broad side? I think I need that seam line on my shoulder to define the point where the sleeve starts. Other than that though I think the fit on the body is nicer than the WBM Easy Tee.
- Pattern Details
- Pattern Company – Deer & Doe
- Size – 40
- Neck – Scoop
- Fit – Curved and fitted
- Hem – Slightly curved
- Sleeves – Short
- Fabric Details
- Luxe Organic Cotton Jersey Knit – White (Core Fabrics)
- Ribbing Fabric – European Smooth Ribbing
- GSM – 305
- Finishing Details
- Shoulder and neckline – 10mm cotton tape bound
- Hems – Knit-N-Stable tape cut to half width, double fold and topstitched
Preparation
In terms of waist and hip I’m in between a 40 and 42, so decided to size down because I was a bit worried about fit on the bust (which I think might be the issue with The Stellan Tee). Seam allowances are already 1cm but the hems are 2cm so needed to extend and extra 5mm.
Sewing
I decided to try the 10mm cotton tape bound method again since from memory it was pretty easy. I’m glad I did because as I did it, it made me realise that there’s not point to this method if I’m trying to reduce bulk, because then I should be using the 6mm cotton tape method. Also, I tried to not over trim the neckband this time, but I didn’t trim it enough, so the tape didn’t really wrap around neatly… I also ended up doing a lot of the topstitching, since it did it from the wrong side, but wasn’t happy with it, especially near the crossovers, so unpicked and did it from the top, but then I didn’t catch all of the not-very-well-folded-over cotton tape, so ended up doing another row of stitching just for the neckband. So very messy finishing, I blame it being a very hot day so I wasn’t as patient as I should have been.
When I attached the sleeves, I was surprised that I had to ease the sleeve cap in. Because of this, I kinda though maybe topstitching it down wouldn’t be such a great idea, it would cause the sleeve cap to stretch. So skipped it for the sleeves and then also for the side seam, in order to keep things consistent.
Since I was very unhappy with the wavy hem of the Cachet, I decided to use the Knit-N-Stable tape, but halved the width so I could do the double fold like I did on the Cachet, for comparison. And it did end up a lot better. The only thing though is I think 1/2″ is a bit wide for a double fold hem, I would prefer 3’8″/1cm. But I don’t think there’s a tape in this width that I could use for curved hems. Maybe I should try the bias tape again, since last time I was kinda making do with what I had on hand and it wasn’t really to purpose.
Interim Findings
Definitely too scooped for my body shape haha. I also think I used too stiff/structured a fabric, something more drapey would show the silhouette better.
- Pattern Details
- Pattern Company – Common Stitch
- Size – 12
- Neck – Scoop
- Fit – Curve
- Hem – Straight
- Sleeves – Long
- Fabric Details
- Soft Touch Jersey Knit
- Binding Fabric – same as main
- GSM –
- Finishing Details
- Shoulder and neckline – clear elastic
- Sleeve Hem – fusible tape, double fold and topstitched
- Body Hem – Knit-N-Stable tape, finished with decorative stitching
Preparation
This is from an Australian company who say they use Australian standard sizing (which I take to mean similar to RTW) which makes it interesting because I would say I’m a 8 or 10 standard Australian sizing but my measurements put me in Size 12. Perhaps since this is a free pattern, it doesn’t have finished garment measurements so I can’t check the ease. So I decided to go with the Size 12. I really hate their neck binding method so just ignored it and did it the ‘usual’ way. Also they didn’t include a pattern piece for the neck binding, which is ok, fair enough, but they also don’t give you the lengths of the rectangle they want you to cut. “The length of your neckline” is the instruction, but since they made the pattern surely they could provide these instead of asking the maker to measure it? I can’t tell if I’m being too demanding 😅 But also, I had to scour the instructions for the hem width (which is also fine on it’s own even though not super convenient) but the instructions (2.5cm) don’t match the pattern piece (3cm)… Lastly, the instructions feel kind of odd to me. Some parts of it are too vague (the binding attachment instructions call for “make sure you stretch the binding as you go” which isn’t particularly helpful unless you have sewn for so long you can do it by feel) and other parts just read a bit weird? “Using your straight sewer stitch the overlocking down to the binding” – what does this mean? Straight stitch right? And is this some sewing specific term that I don’t know because I live under a rock, because it can’t be an Australian-ism since I’m Australian, unless it’s some east-coast thing – “This is so you don’t crack your stitch with the stretch of your fabric”. I know what it means since it’s referring to the stitch you use on the hem. But I don’t think I’ve ever read it described that way? I don’t know if it’s fair to judge a pattern company on a free pattern, but I definitely feel biased against buying anything from this pattern company now…
Sewing
This was the first coloured fabric and of course I didn’t have matching overlocker thread. My original plan was to use the blue overlocked thread I do have, even if it’s not the right shade, but I seriously had no motivation to swap out my overlocker threads when I knew I would have to change it back again for the next project… Since I don’t like the fabric (it’s 35% polyester) and wasn’t super enthused about the pattern, I thought, hell, let’s just do random stuff.
Random stuff #1 – try clear elastic. I bought some in preparation for another project, before I learnt that you could stabilise shoulder seams using more natural components. But it is a common method so might as well try it instead of discounting it based on my biases. Ok, so trying clear elastic wasn’t that random. But I decided to try ‘finish’ (I know you don’t need to finish knits but I don’t like the look of raw edges) it with a decorative stitch. So I went and had a good look at all the decorative stitches on my machine and found one I had previously overlooked, a cute wonky looking flower stitch. So used that. And I don’t think it’s a good idea HAHA. It’s not terrible but the shoulder seam probably isn’t the most appropriate place for decorative stitching. However! it did a nice job on the inside as securing the raw edges of the seam allowance. But it did make me rethink my idea of decorative ‘topstitching’ the sleeve and side seams down… The shoulder seam feels very stiff, partially because of the clear elastic, but also because of the density of the thread. Side note, I went through a lot of tutorials trying to find satisfactory instructions on how to install clear elastic and the winner ended up being Seamwork’s. I know it probably seems really self-explanatory, but when you’ve never done it before, clear instructions so you know you’re not just winging it are helpful.
Random stuff #2 – so I’m glad I slept on how to deal with the sleeve and side seams. Because it made me realise maybe I can use the decorative stitching as an alternative to overlocking the edges. I have used the overcast stitch before and hated it. And I realised what I hate is having a straight edge, on either the right or left side. Because the wonky flower didn’t have any straight edges, it turned out quite nice in my eyes. So I tried 3 different loopy style stitches and one herringbone style stitch since I had 4 seams to finish. The first was the best. The second was fine but didn’t look as nice as the first since the loops alternated in lengths. The third took too long to stitch and the loops also alternated in lengths. The last one had a nice enough look but I didn’t think it really matched the garment style. The first also had the advantage of being Mode 1 like my normal straight stitch and using the normal presser foot A, so I wouldn’t need to have to change modes or feet (yes I’m lazy). This experiment made me feel a lot more upbeat about this shirt LOL.
Random stuff #3 – Given the break between preparing the pattern and actually cutting fabric, I updated my niece’s t-shirt dress with binding and it actually looked pretty nice (from the right side. The inside had a raw edge so I didn’t like that). So I thought I would actually try binding, but not following their methodology. Also probably not that random, but I did end up going down a big rabbit hole trying to find the neck binding finish I was after. Because the normal method turned out to be the way I did it for my niece’s dress and I knew I didn’t like that. I found one tutorial that called it a wrapped binding but I couldn’t see any measurements (am I meant to reduce the length by 85% like a normal ribbed binding? What width do I use to get a 1cm binding look?). And I eventually found this tutorial from Megan Nielsen. Yay, that’s exactly what I wanted! Although the binding looked rather large in the photos so I cut a width of 2.5″ instead of 3″. And I measured the neckline and removed 1″ and didn’t add anything back for seam allowance (3/8″) to join the short edges to make a round. And I sewed it to the shirt with 3/8″ instead of 1/4″, because that was my seam allowance for the pattern. And then I trimmed the seam allowance to 1/4″ and folded the binding to the front and topstitched. I like the final width 😊
Random stuff #4 – so I sewed the sleeve hems as intended but decided since I had used the decorative stitch on the shoulder seam, to use it on the hem so it wouldn’t be so random. I stabilised it with the Knit-N-Stable tape since the hem was slightly curved and pressed the hem allowance up. Then since the decorative stitch looks the same on both sides, I sewed with the wrong side up so I could align the edge of the stitch with the raw edge. I was playing bobbin thread chicken and lost, it ended up running out on the front piece, but whatever haha. It was a little tricky going over the side seams, because the fabric goes backwards and forwards to make the flower I had to be very careful with the hump jumper. The end result had some drag marks, probably from the feed dogs? Hoping it will go away after giving it a wash.
Interim Findings
I’m happy with the all the things I tried 😁 But I think this style is too scoop for me and also there are armhole wrinkles. And I’m not sure if it’s because of the fabric but the collar looks a bit too stretched/gathered… Maybe I should have added the seam allowance back in or maybe I just needed to press it haha. But pressing this fabric is annoying because it’s part polyester 🙃 But yeah, very happy to confirm a new finishing method for knits and also that one spool of Maraflex is more than enough for a t-shirt.
So another break, this time because I need to get the last couple of patterns printed. Which…are all additions from my previous list, I figured since I’m doing this, might as well try everything I was interested in. And I have a couple more things I would like to try. Two of them are different fabric types – modal cotton french terry and heavy bamboo jersey. The other is trying twin needle again but with wooly nylon bobbin instead (which I also need to purchase).
- Pattern Details
- Pattern Company – Style Arc
- Size – 8
- Neck – Round
- Fit – Curve
- Hem – Straight
- Sleeves – Cap
- Fabric Details
- Luxe Organic Cotton Jersey Knit – White (Core Fabrics)
- Ribbing Fabric – European Smooth Ribbing
- GSM – 305
- Finishing Details
- Shoulder and neckline – 6mm cotton tape on trimmed seam
- Hems – topstitched double fold knit interfacing
Preparation
Usually I’m a size 10 for Style Arc, but looking at the finished measurements, it looked like I could size down one. Style Arc uses 1cm allowances, except on the collar, so only had to add additional 1/8″ in this area.
Then I reviewed my notes on Powernet binding and decided that it’s too fiddly. Better to just use the cotton tape if I need to reduce bulk, which I do for this particular fabric.
Sewing
I messed up a bit attaching the cotton tape to the neck seam, and during unpicking accidentally unpicked the shoulder seam itself… I’m still having problems getting the crossover from the shoulder to neckline nice and smooth. Other than that it was pretty straightforward construction as I remembered to add the interfacing before doing any sewing, and even remembered to not interface/bind the seam allowances.
Interim Findings
The fit is similar to the Wardrobe Builder Tee, but different enough that I think this would be more suitable for active wear. The curve in the body is pronounced enough that I think it needs the cap sleeve (as opposed to the straight short sleeve, which I was also considering trying). I also think it needs to be shortened a bit. But it is very comfortable to wear and slim enough to wear underneath other layers.
- Pattern Details
- Pattern Company – Style Arc
- Size – 40
- Neck – Crew
- Fit – Loose but feminine
- Hem – Straight
- Sleeves – Cap
- Fabric Details
- Main Fabric –
- Ribbing Fabric –
- GSM –
- Finishing Details
- Shoulder and neckline – self binding
- Hems – knit interfacing stabilised double fold narrow hem
Preparation
In terms of size I was in between a 40 and 42, but after looking at the finished measurements (which confused me a bit because they only report length and ‘width’ which looks to be the waist measurement, which isn’t one of the measurements you use for choosing a size) I decided I could safely go with 40 (because the ‘width’ was larger than my hip measurement and the style of the garment means that the base of the t-shirt will therefore be even larger than my hips).
Again, 1cm seams so yay, less adjustments to be made to the pattern. Since this style is fairly different from all the other t-shirts I’ve made so far I reviewed the instructions in full. Interesting that the neckband has a V-shaped seam.
Sewing
The tencel cotton jersey was on the slinky side and quite thin so was a little tricky to sew with. I used the main fabric for binding the shoulders and neckline and decided to try topstitching from the front. I think it looks a lot nicer when I follow the seamline, but it does mean that the binding at the crossover point doesn’t get fully secured down. But it’s enough that I think it should hold fine.
Interim Findings
This is like no other t-shirt I’ve ever worn before. The style is so different. But I was very impressed at how comfortable the collar is despite it being quite high, usually I find it too constrictive. And the armholes are also very roomy. Although I did compare it to the model photo and it looks a lot looser on them as well as the sleeves hanging much lower. Part of this is probably because I sized down (I did want a more fitted look) but also maybe because I have broad shoulders. If I were to use a thicker fabric I would probably want to size up 1 or 2 sizes. I don’t know if this style really suits me, but the fabric is nice so I’ll probably wear it anyway.
- Pattern Details
- Pattern Company – Style Arc
- Size – 10
- Neck – Crew
- Fit – Boxy
- Hem – High/Low
- Sleeves – Long
- Fabric Details
- Main Fabric – Heavy Bamboo Jersey
- Ribbing Fabric – NA
- GSM – 265
- Finishing Details
- Shoulder and neckline – 1cm cotton tape (separated)
- Hems – Knit-N-Stable tape, 6mm twin needle with SoftLoc bobbin thread
Preparation
Style Arc so just went with Size 10 and extended the neckline seam allowances to 1cm and the hems to 2.5cm. I think the jersey had a nap, but maybe it was just my imagination haha.
Also put SoftLoc on the two loopers for my overlocker. I changed the tension to 4 (from 3), but I’m thinking maybe I was actually meant to drop it to 2? Since I thought it was a bit tight, not sure why I went the other way…actually quite a few things this t-shirt were a bit brain-farty. Lack of concentration? Needing to get back in the groove after spending 3 days doing chores? Not sure, but hope it’s just temporary…
Sewing
I decided to try a bunch of new things again haha. But it also meant I had to try to not go on autopilot LOL. I used the Knit-N-Stable tape on the hems but didn’t overlock them. I also decided to use the knit interfacing on half of the collar band so see if it would give it a bit more structure.
After sewing the shoulder seams I stabilised these with 1cm cotton tape. Then attached the sleeves and topstitched these to the body. Then added the neck band and covered the back of the seam with cotton tape. It was tricky keeping the tape flat against the fabric so topstitched it from the front. But was unhappy with the finish of this on the inside so redid it from the inside and removed the original stitching. I feel like splitting the shoulder and back neck bindings is more annoying to do so won’t be doing this in future.
Then I overlocked all the sides of the front and back since there is a side split so I knew I wanted to press the side seam open, which I did and topstitched this down. Then I pressed the hems and used the twin needle to topstitch from the right side. I used the same settings as previous but further reduced the presser foot pressure to 3. I probably should also do a bartack on the side split, but I couldn’t be bothered… I also topstitched the front of the neckband down with the twin needle as well.
Interim Findings
I wonder if the side split should be higher up or if I need to shorten the body, because it feels like the shirt needs to stretch over my hips. Or I need to grade the sizes, although I feel like doing this would ruin the boxy look, as the top fits totally fine.
The knit interfacing on the collar stretched fine, but I feel like what it actually needs is the fold to be stabilised, so instead of just interfacing half the band I need to interface the whole thing. Now will that stretch enough to go over my head?
I also have decided to give up on the twin needle. I don’t like the finish, I’d much rather have an overlocked edge and then topstitched (double if need be) over that. Even the SoftLoc doesn’t make it look any better in my opinion. Maybe one day I’ll get a coverstitch machine.
- Pattern Details
- Pattern Company – Paradise Patterns
- Size – D
- Neck – Crew
- Fit – Cropped
- Hem – Straight
- Sleeves – Short
- Fabric Details
- Main Fabric – Cotton Pointelle
- Ribbing Fabric – NA
- GSM – 152
- Finishing Details
- Shoulder and neckline – clear elastic, no binding
- Hems – Zig zag stitch
Preparation
Pretty much all my measurements fall within size D except for full bust which makes sense because it’s for a B cup. But the final garment has negative ease so I think that’s not an issue? The pattern already had 1cm seam allowances so no changes there. I did think about extending the hem allowance to 2cm to allow for a double folded hem, but given the different neckband construction I decided to leave it as is to keep the finishes more consistent. Also, since this is quite a fitted top I thought maybe it would be better to keep the hems as flat as possible.
Sewing
Because of the unique neckband construction, I decided to forego binding the shoulder and back neck seams. And for stabilising the shoulder seams I used clear elastic. I tried overlock over it but it was too grippy so tried encasing it in the seam allowance. I didn’t realise until later that the stitches ended up all messed up on the other side (the Maraflex I used to topstitch also did the same, so I removed that, but left the overlocked stitches as is).
I found that when I tried to overlock a single layer it gathered the fabric up too much. So I ended up removing it for the neckband and all the hems and used a zigzag topstitch instead. I could probably play around with the settings next time to figure out how to get it to overlock flat.
Interim Findings
I think I could probably raise the hem a little if I wanted to show my belly button. It’s kinda nice not having a bump where the shirt goes over my insulin pump haha. I don’t think I would wear this kind of style as is but I think it would be a good option to have to wear under overalls. The fit itself was comfortable and the pointelle was very soft. No issues with wrinkles this time, probably because of the negative ease. But the zig zag stitching wasn’t secure enough to last a single wash haha…
Reflections
I’m glad I did this project. Making so many in a row helped me identify my preferences for knits (I already know my woven preferences) and allowed me to practice different techniques. There are still a couple of things I would like to test:
- I’ve finally accepted that double folding knit hems is probably not a great idea, so I have 1.5cm knit tape to test instead for narrow hems. At least any patterns I cut out with 2cm hems can easily be adjusted.
- I haven’t cracked the code for getting nice necklines with main fabric (i.e. not ribbing). I wonder if knit interfacing the whole neckband (not just half of it) and maybe reducing the length might help a bit.
- There are a couple of knit fabric types I didn’t try and am curious about – modal, light french terry, ponte.
Things I learnt:
- Preferred topstitch offset – 6mm with an addition 1.0 needle offset
- I don’t care about double lines of topstitching on hems, even if it’s considered more professional looking. Related, time to give up on using the twin needles, I don’t like the finish of the underside at all.
- How to professionally bind the neck and shoulder seams
- How to get nice knit hems (stabiliser, overlocked edges with Softloc in the loopers, 1 row of topstitching in Maraflex)
- Neck binding that leaves no raw edges
- Preferred decorative stitch for finishing raw edges when I don’t have matching overlocker threads
- Difference between single jersey and interlock
Final thoughts per t-shirt:
Definitely will crop the length on this one. Then I’ll wear the cropped version and see if it is worth adding to the casual t-shirts list 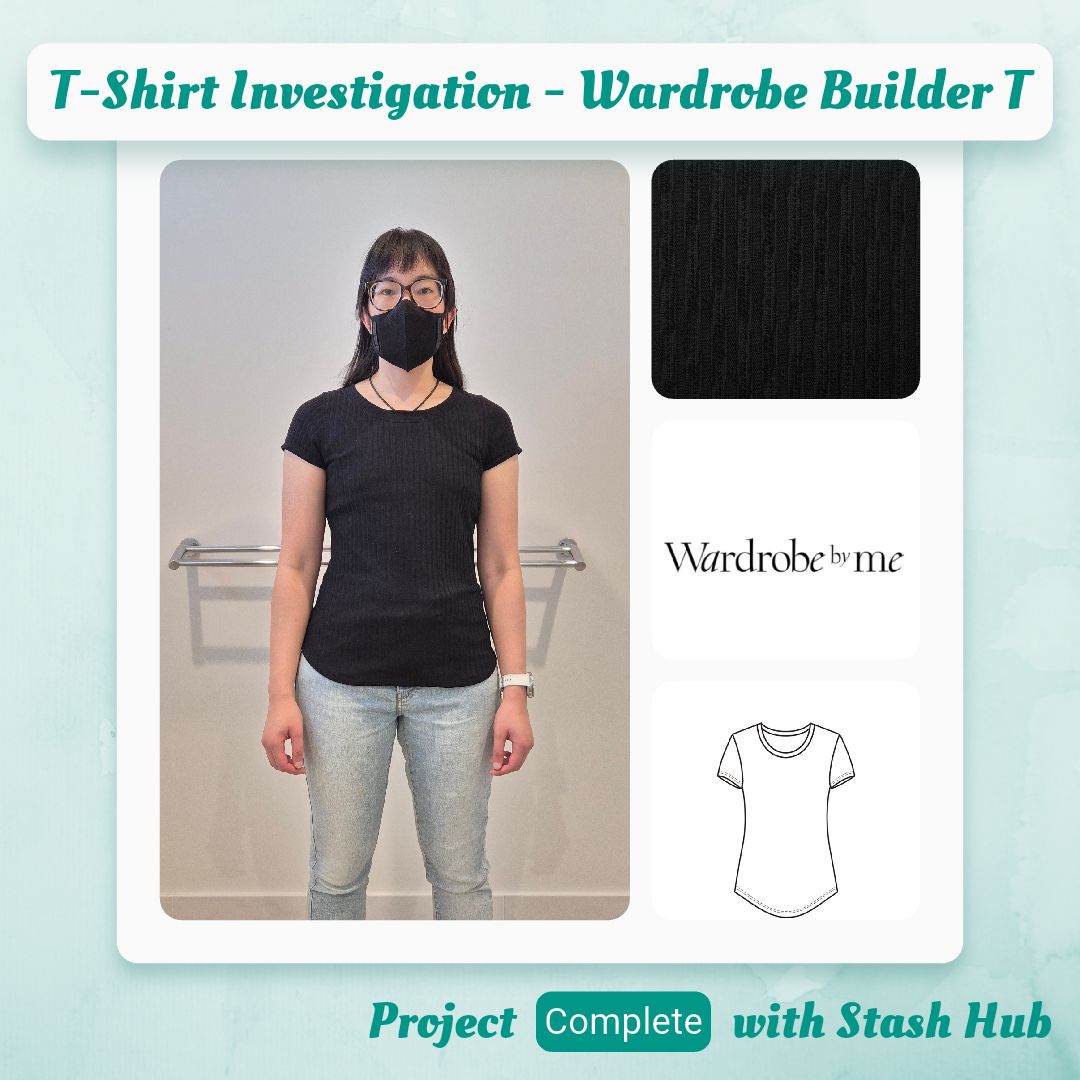
I like this as is, but probably wouldn’t make it in a plain colour/texture. Definitely will look at the long sleeve version for thermals. 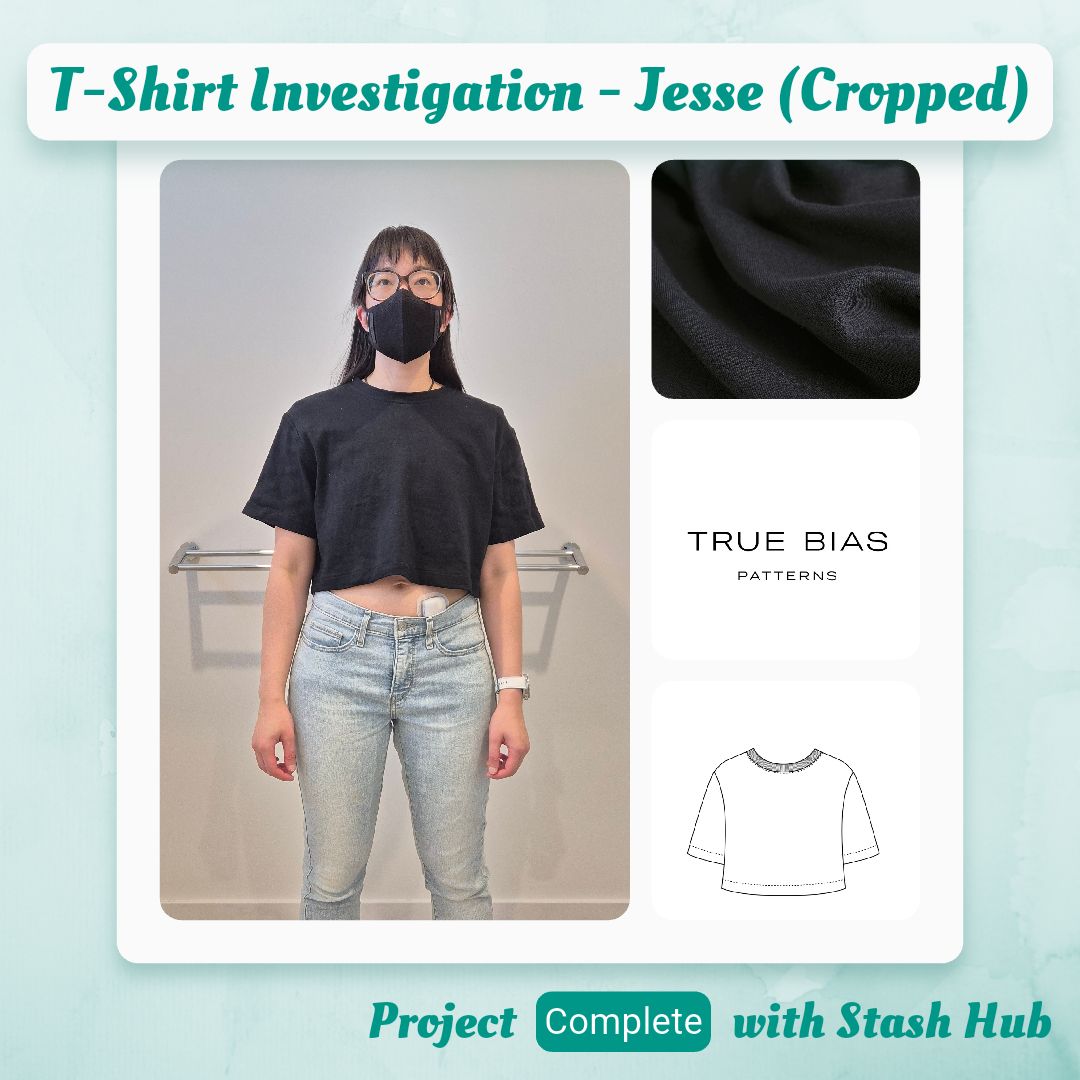
I’ll hold onto this one because it does pair perfectly with high-waisted leggings, but not sure if it will actually get much use 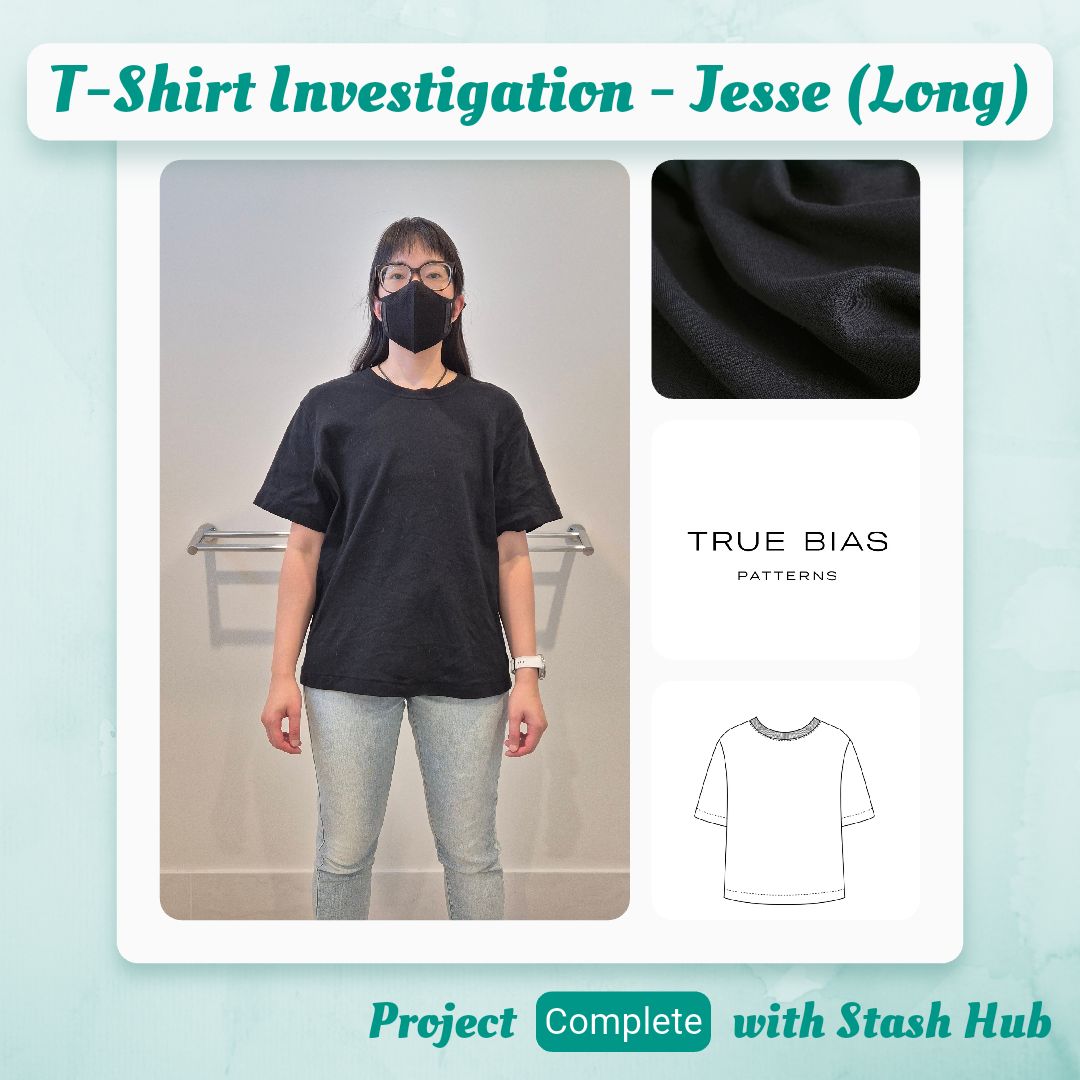
Definitely my go-to for an oversized tee. Might crop the length slightly to make it more square shaped. 
I hated this one. Never touching again. 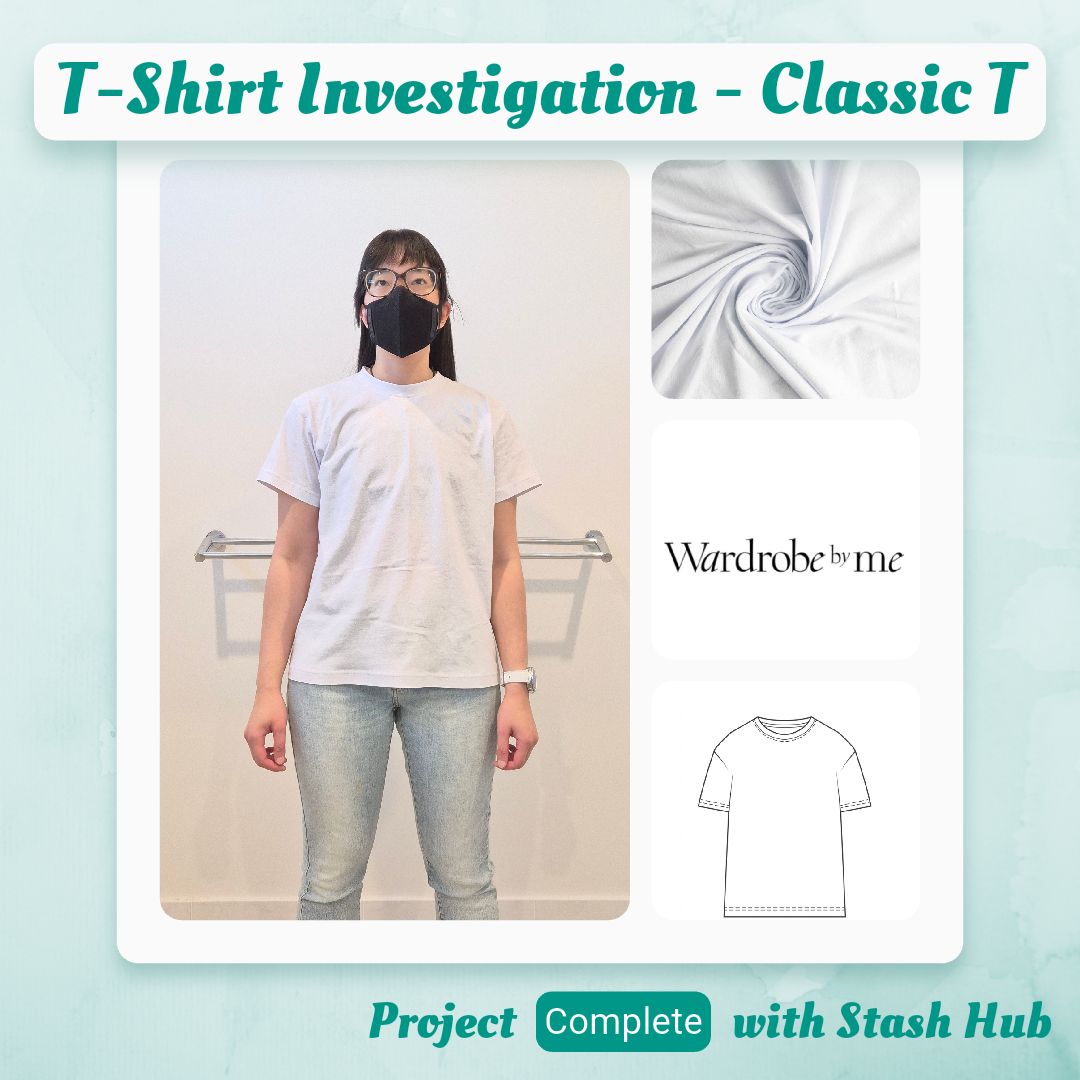
I will probably make a Splatoon IKA tee using this pattern. Will keep it on the list, but unlikely to make anymore of these. 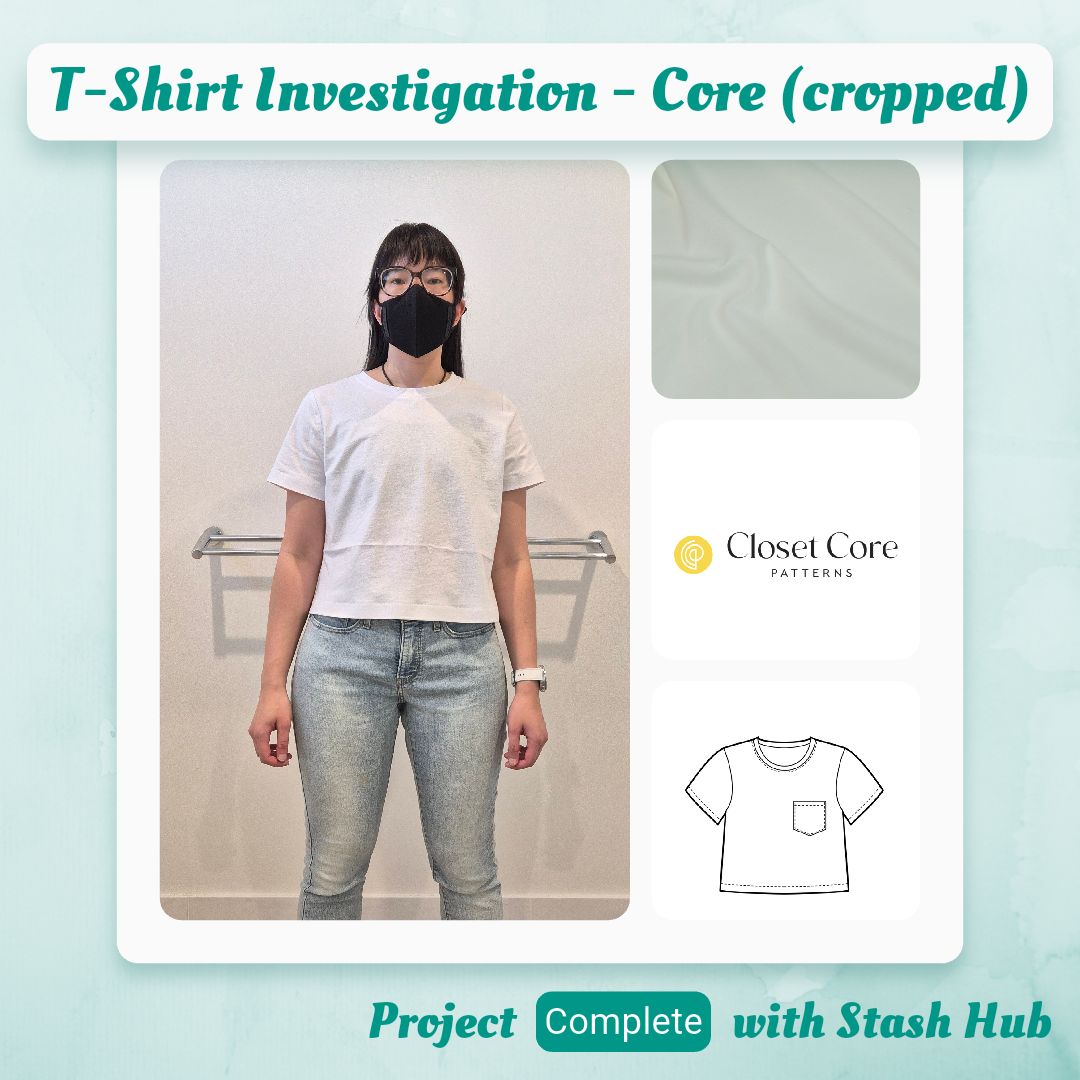
My fave! Will make it in lots of fabrics! 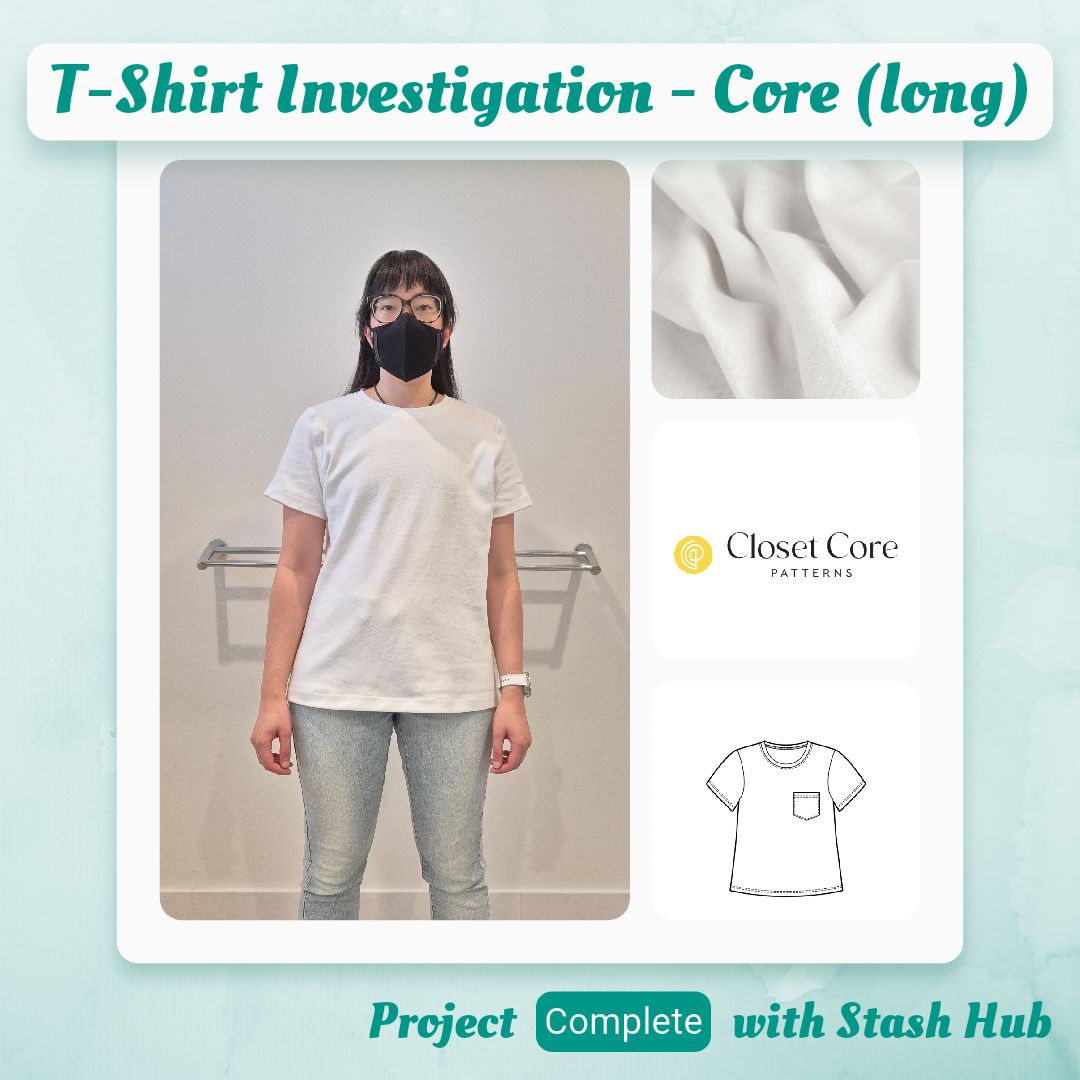
Will probably convert this into the cropped length. Good thing I used different fabrics for the two views! 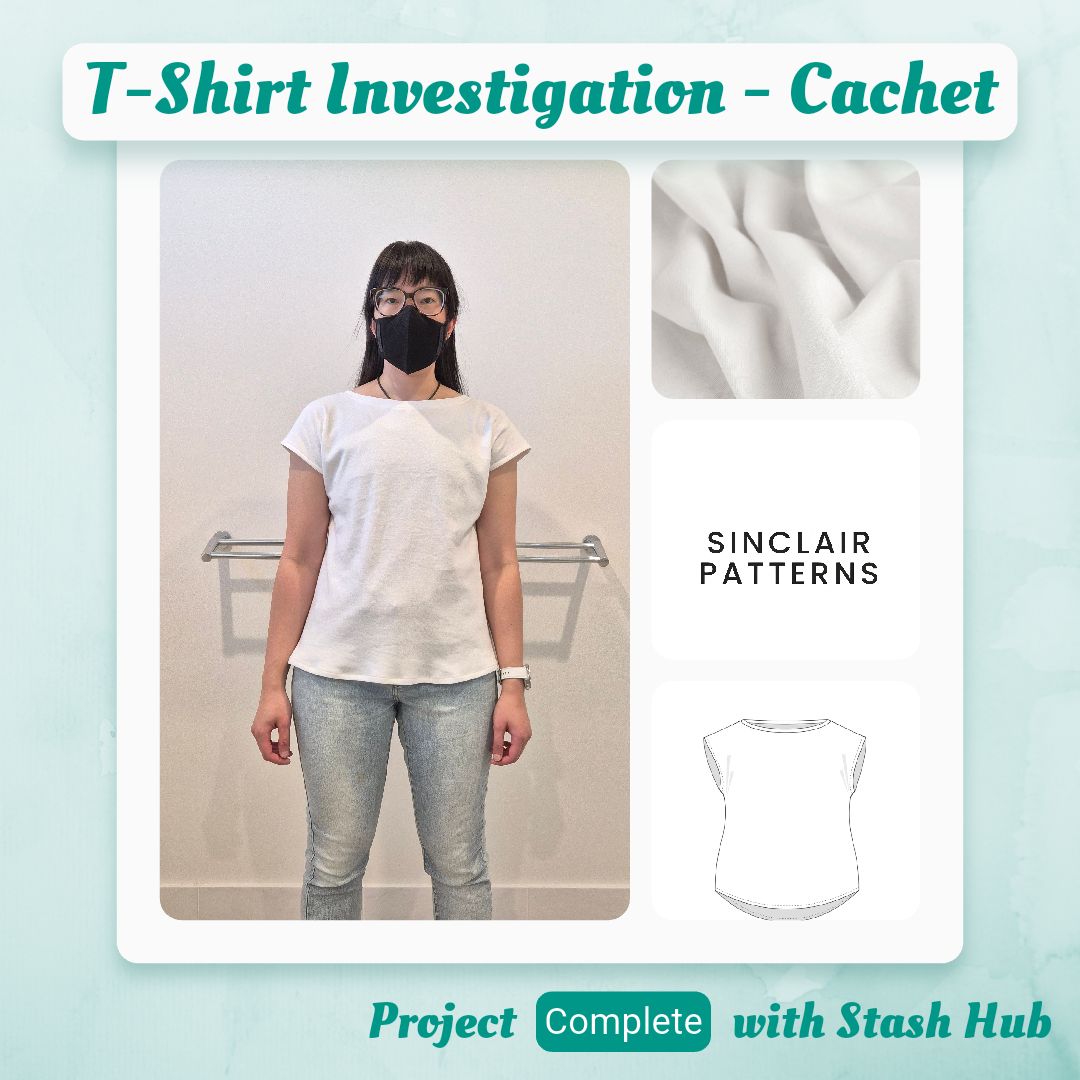
I want to make the crew neck version and maybe out of modal or a light french terry instead of a jersey/interlock. I think the extra structure will suit it better. 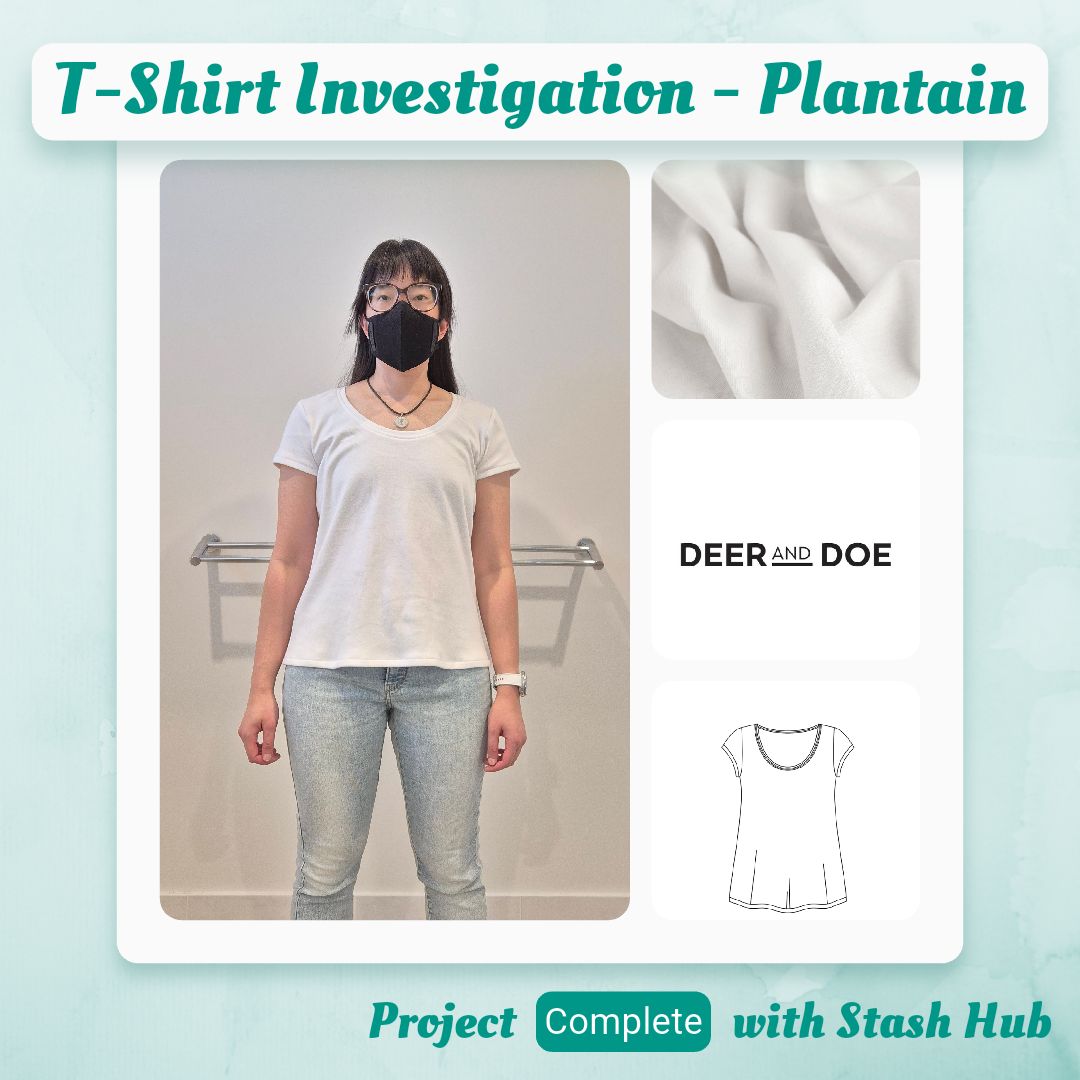
I maaaay revisit this if I ever come across a super pretty drapey knit fabric. But I would still need to raise the neckline… 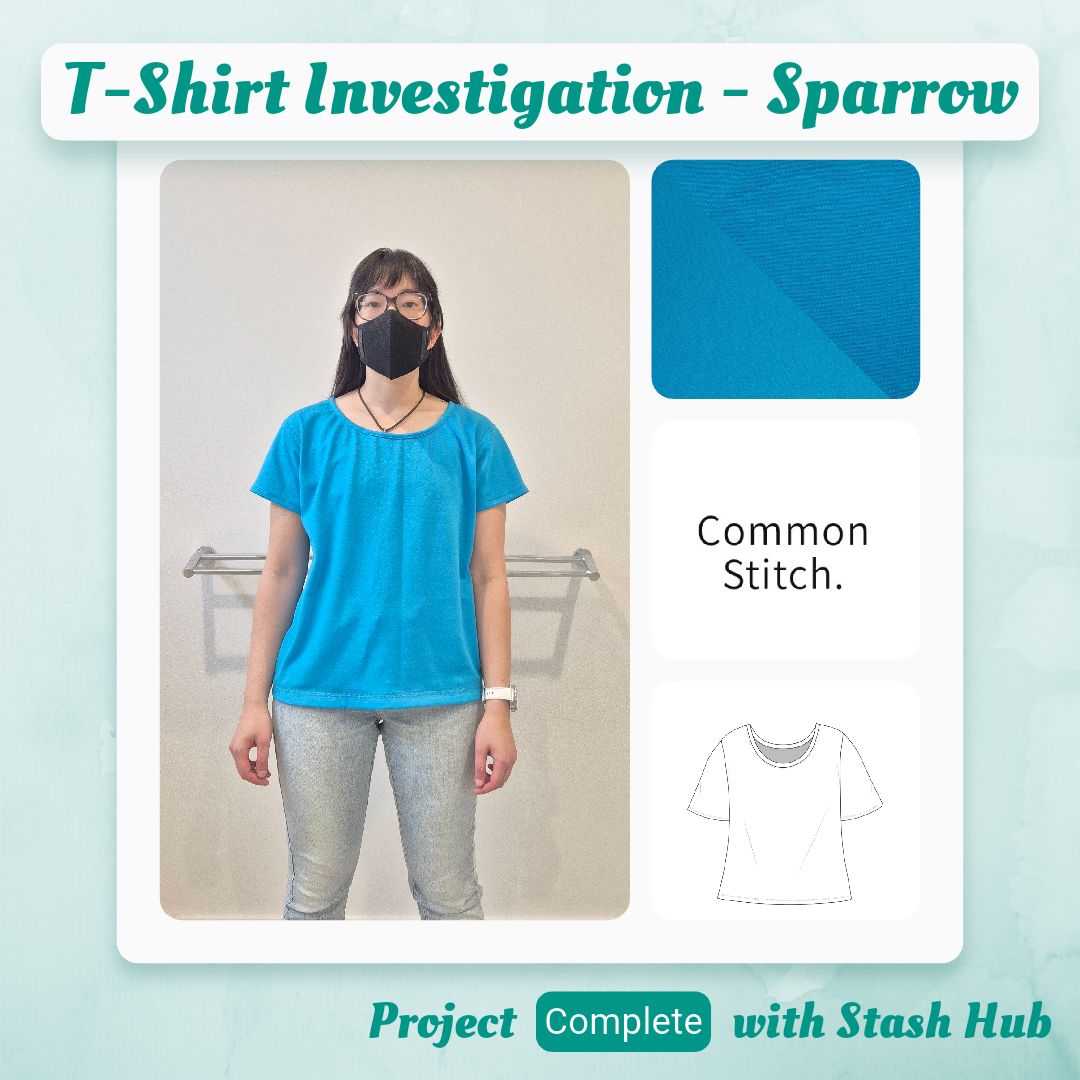
I want to try this again but a size smaller. Thinking it might be a good loungewear or pajama t-shirt option. 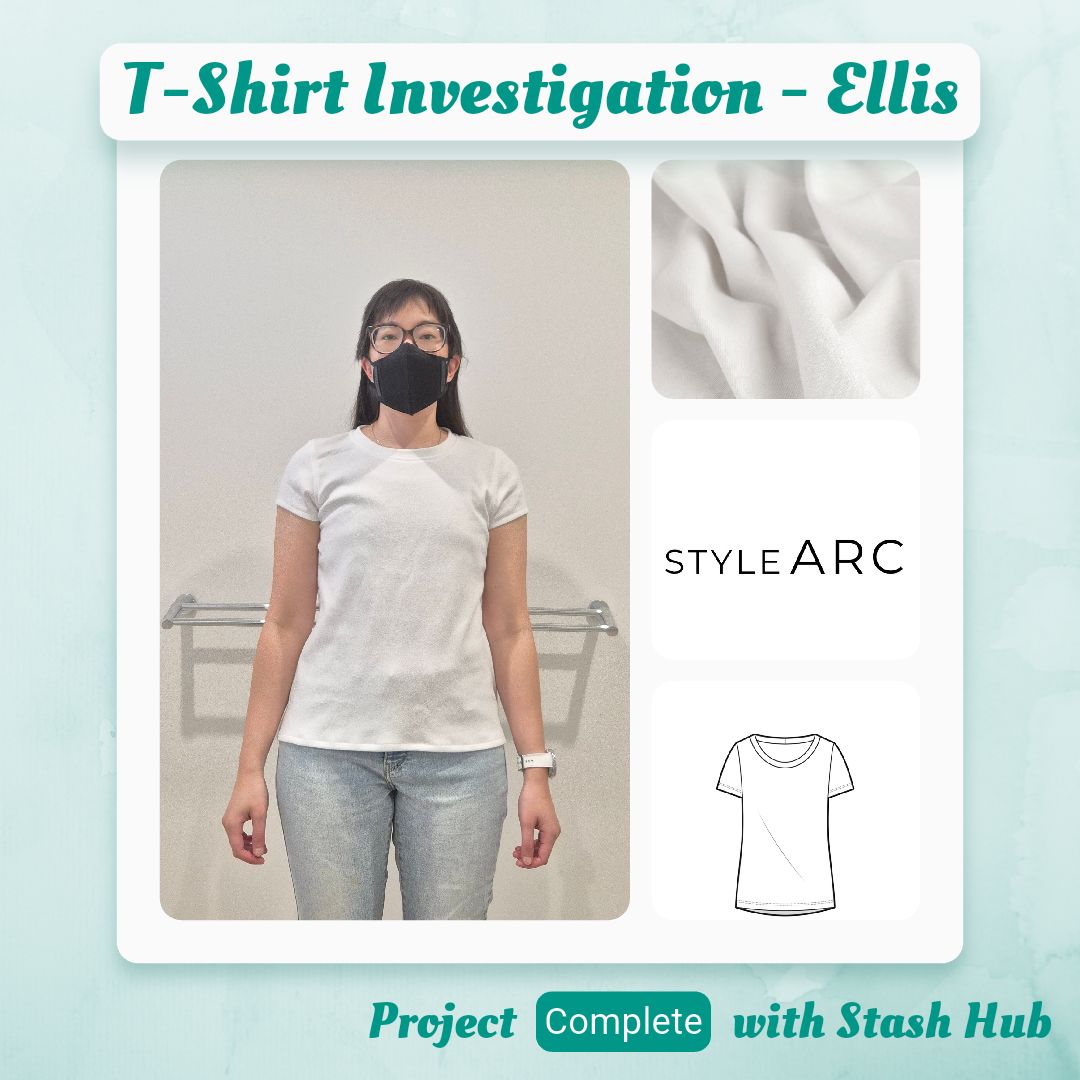
I think this is the go-to for activewear t-shirts. But I need to crop it so it looks better on me. 
I want to try this again but probably two sizes larger and in a more structured fabric. 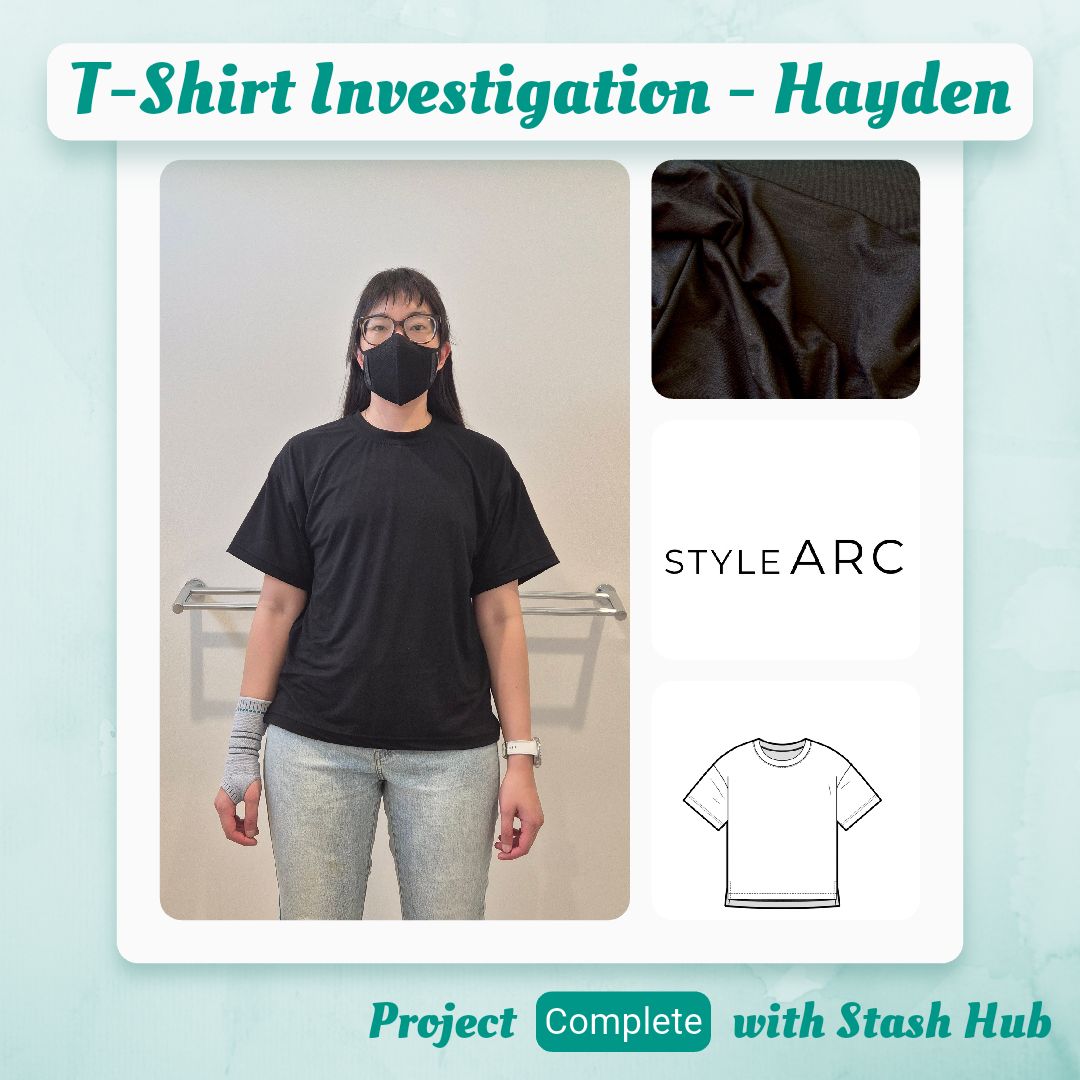
Not sold on the high-low hem. Jesse Tee is better as an oversized option. Potentially a pajama t-shirt option, if the Sparrow doesn’t fit the bill. 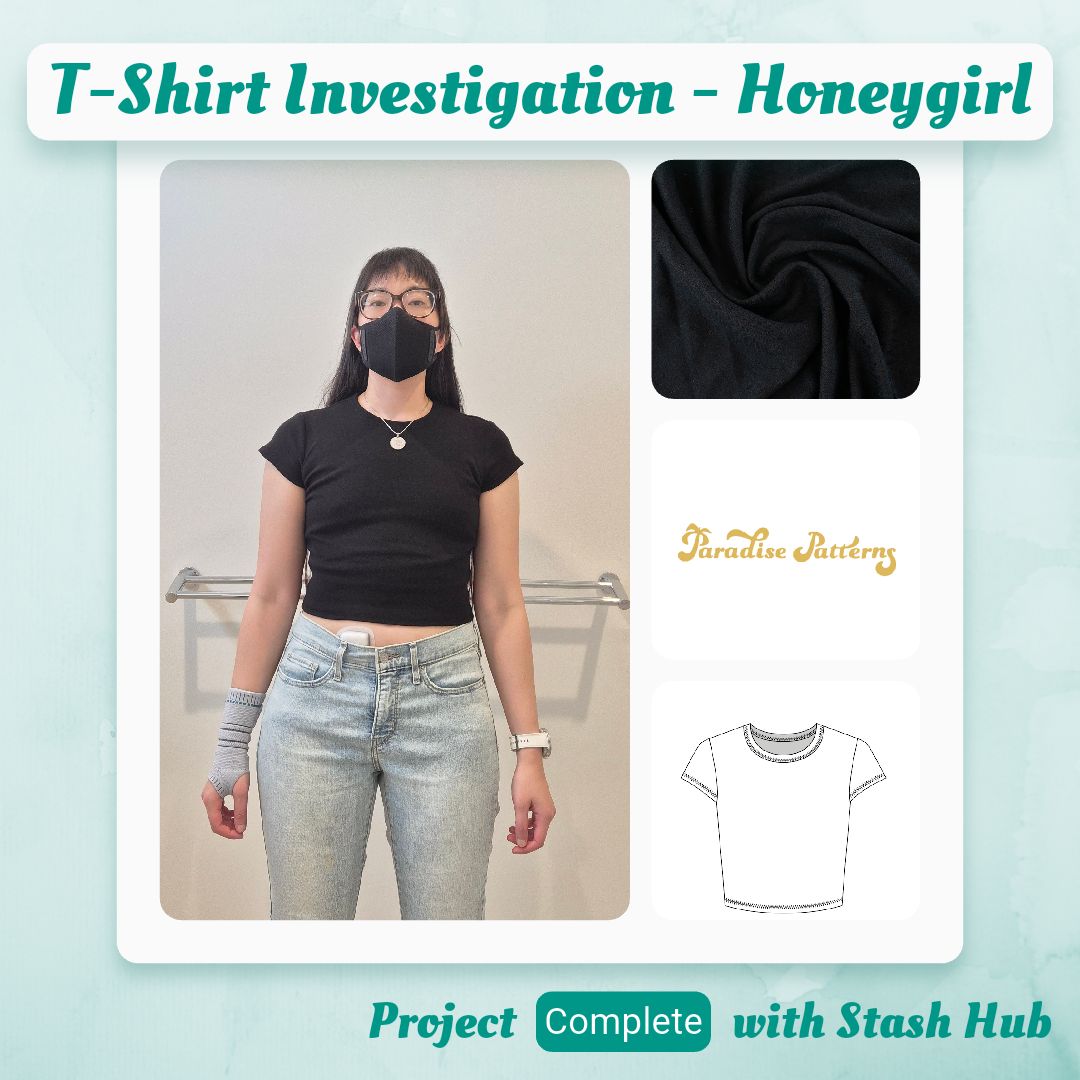
I’ll keep this one on hand because I think it would go well with overalls, but I don’t currently have any overalls to test the theory lol
Categories: Sewing
Leave a Reply