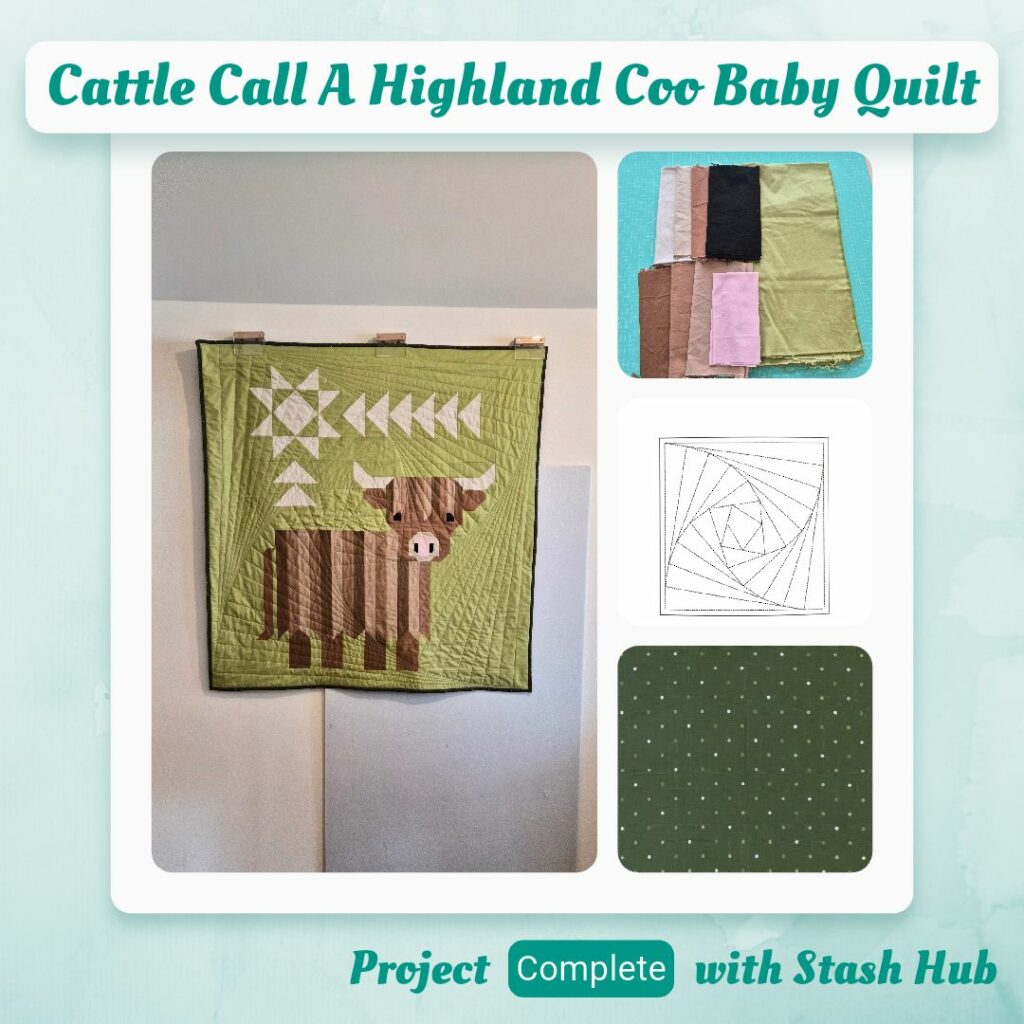
Planning and Design
My sister-in-law on my husband’s side is having a baby and so of course I want to make a baby quilt. The original plan was to make a cat themed one but then I saw this quilt pattern in the OzQuilts newsletter and thought it was perfect haha. My sister-in-law likes cows and you can even choose to make a bull or cow version 😝 Since she’s expecting a boy horns it was. And the background colour and backing fabric were chosen based on the name she is planning to give him.
Materials
- Pattern
- Cattle Call A Highland Coo Quilt Pattern
- Fabric
- Devonstone Solids (Cozy Corner Quilts)
- Stone Fossil
- Uggie
- Mocha
- Snag
- Light Green
- Mud Pie
- Akubra
- Deep Black
- Blobfish
- Magic Dot Backing – Forest (Widebacks Australia)
- Devonstone Solids (Cozy Corner Quilts)
- Thread
- Rasant col. 1623
- DecoBob™ – 80wt Cottonized Polyester Thread – White
- InvisaFil™ – 100wt Cottonized Polyester Thread – Grey, Hunter Green
- Notions
- Sew Easy 100% Bamboo Natural Batting
- Lite Steam-a-Seam 2
- Quilting Design
- Geometric Curves (WALK by Jacquie Gering)
I love the names of Devonstone Solids 😝
Sustainability Check
👍 Quilting cotton and backing fabric are both 100% cotton
👍 Batting is 100% bamboo
🤏 Rasant is OEKO-TEX but not biodegradable
👎 Decobob is cottonised polyester and Wonderfil doesn’t seem to have OEKO-TEX certification?
👎 Invisafil is cottonised polyester and Wonderfil doesn’t seem to have OEKO-TEX certification?
❓ Unsure on the composition of Steam-a-Seam
Construction
Cutting The Blocks
I remember looking at the cutting chart when I first got the pattern and feeling really overwhelmed lol. But once you start actually cutting the strips it’s not that bad! I did split it up into two sessions though, because I didn’t buy extra fabric so needed to make sure I was concentrating enough to cut the right dimensions lol. Two minor stuff-ups: first was with the backing fabric so I actually had quite a bit extra of that to compensate. I thought I would be efficient and double fold my strip to cut the blocks. What I didn’t realise was that I needed one extra block that I could have done if I hadn’t chopped off the halfway fold. Whoops. The second was I trying to make sure I remembered which colour was which part of the cow and got into the habit of thinking dark, medium, light fur in that order. But the cutting guide is for dark, light, medium and so I started cutting the light fur blocks out of the medium fur colour 😫 Luckily the blocks were fairly similar and I had started with the larger sized ones so I could trim them to the correct colour. And then it got a bit confusing because I was cutting things out of order (luckily they were the last two colours) so I had a hard time making sure I was referring to the correct table for dimensions.
I have zero confidence that I’ll remember which colour is which and which piece is which so I marked most of them (except black and pink which don’t have similar colours or many pieces) with the frixion pen. And I made sure to use different colour pens for the fur pieces vs the rest, so that I don’t get those browns ones mixed up.
I bought Decobob thread to do the piecing as I found out about it recently and thought having a lighter/more flexible quilt would be nice. I did a test on sheeting fabric with a size 80 universal needle and it seemed fine with normal tension. I did decide to switch to a 70 quilting needle though. I felt the 80 punched quite large holes in the fabric (although that may have been exagerrated since sheeting fabric is quite tight weave).
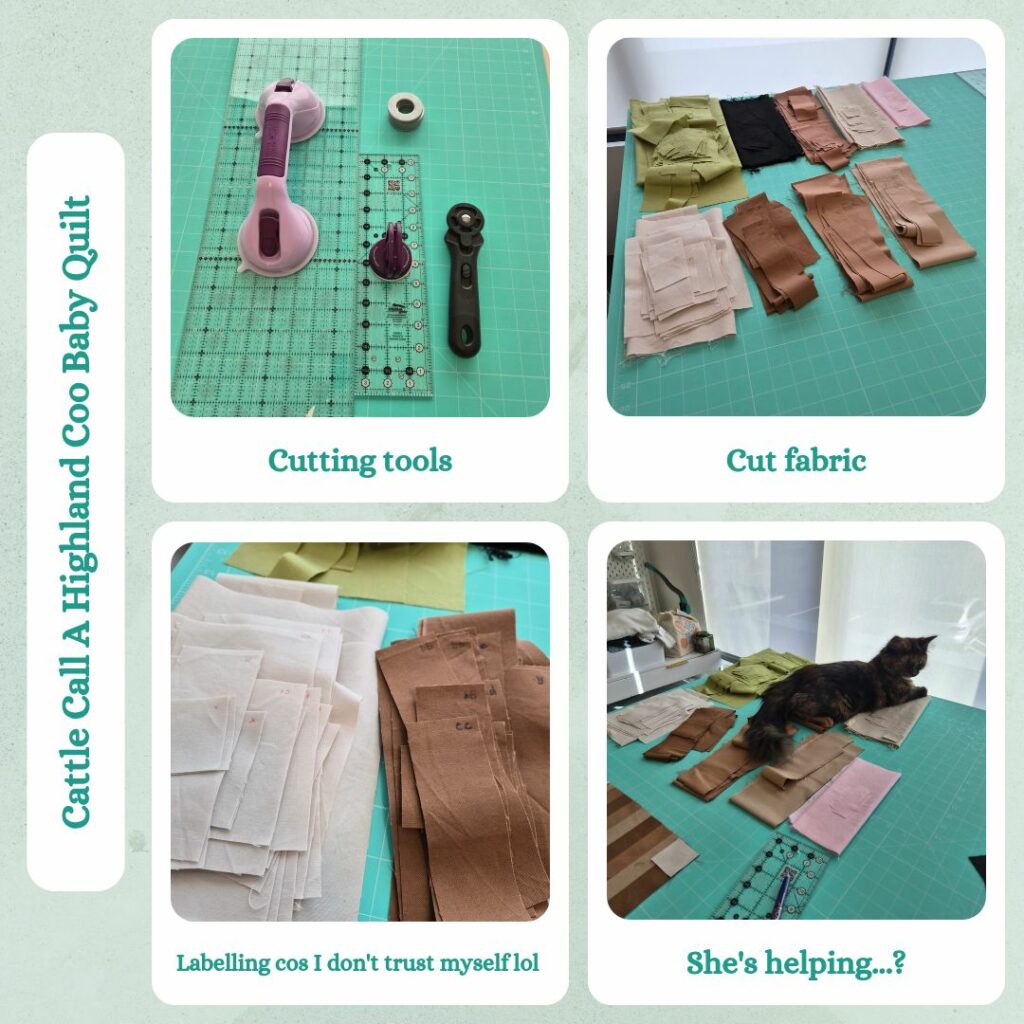
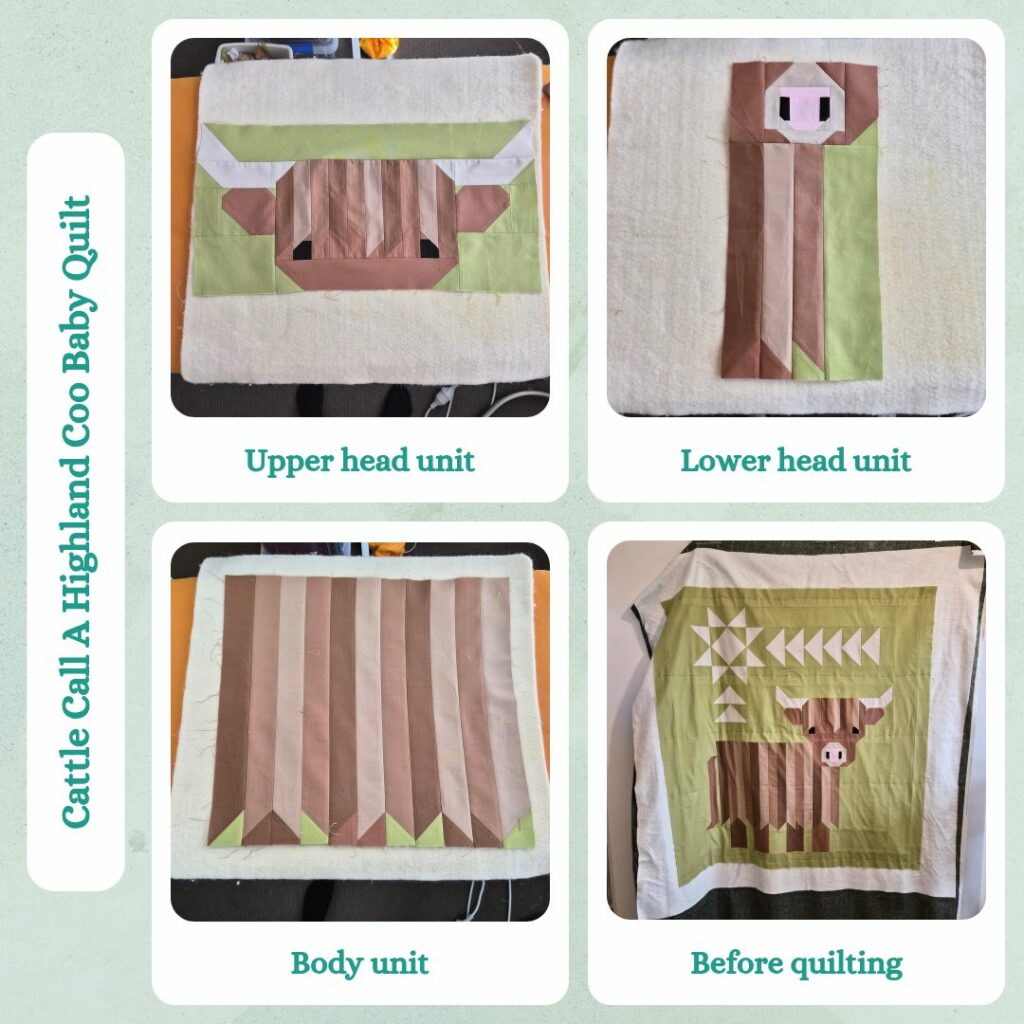
Piecing
As expected I cut some of the pieces the wrong size so had to recut. I also didn’t pay enough attention to orientation so screwed up a bunch of sub blocks and had to recut and resew those. I did feel like while I was making this that it honestly wasn’t that enjoyable…I realised it was because when I make the same block I can learn the most efficient way to do it and then get into a flow state. But since this is one huge block, I had to be super switched on the whole time so it’s not exactly relaxing.
Another thing I realised was I don’t need to do a scant 1/4 inch seam if using Decobob since it’s so fine. So the first component is a bit skewed cos I had to ease blocks into each other. And in terms of construction techniques, I made sure to press the stitching before pressing the seam allowances open and then further pressing using my clapper. I feel like it helped a lot.
But despite having to redo a bunch the individual units came together pretty quickly. Then of course I put everything together and realised the second join didn’t connect the right sides… I *always* do this when the blocks get large. I was debating whether I should make the quilt larger since the width was under 112 which seems too small to me, but my sister-in-law (on the other side of the family) and my mum said it was big enough for a baby. But I did extend the width to match the height, that was bothering me a bit. And of course once again I had to piece the strip for it to be long enough and went ahead and sewed the first one the wrong way around AGAIN. I just never learn.
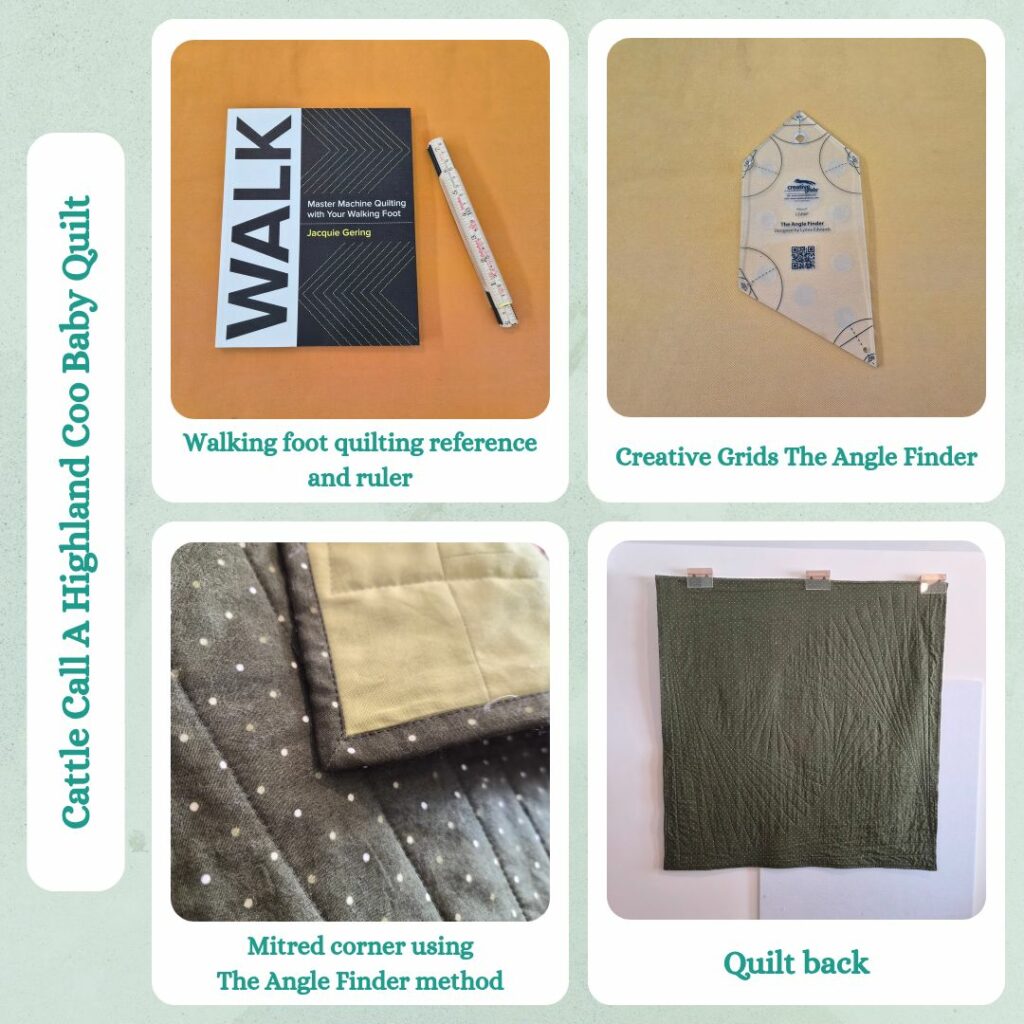
Walking Foot Quilting
I was originally going to test creating baking paper stencils for free-motion quilting, but I was feeling pretty demoralised by all the unpicking I had to do, so decided to do something simpler. I have both WALK quilting books so flipped through to find something that would suit the quilt design. I decided to go with Geometric curves because I didn’t want anything that was too straight (because the design itself is already full of straight blocks).
The book recommended only marking out a few rows at a time because it could get confusing, but I thought how hard could it really be to follow a spiraling square? And surprisingly I managed just fine lol, apparently I can follow a spiral but not tell top/bottom or left/right 🙃 During the marking stage I figured that I could use my extendable wooden ruler, but that wasn’t quite long enough for the first couple of rows so I did the usual line-up with my quilting ruler. I did figure out some tricks to make things clearer – basically just be accurate near where the line hits the previous line. And i did have the thought that maybe I should mark the quilting lines before putting together the quilt sandwich because the extra handling kinda shifted things and I had to smooth it out again before going to the sewing stage.
Then for the quilting I used Invisafil (grey on top, hunter green on the bottom). Yay for the knee lifter! Made this a really easy process. I was a bit worried that working from the outside would mean bunching of the quilt top the further in the quilting got, but I guess I managed to make the top flat enough that it wasn’t really an issue.
Binding
So once again I was planning on trying the Sew Precise Sew Fast Machine Binding method. But I also had bought the Creative Grids Angle Finder Binding Tool and really I shouldn’t try to combine the two methods when I haven’t tried either… So went with the Creative Grids Angle Finder Binding Tool for this project. I had bought the tool after seeing this video but the instructions it came with were slightly different. I decided to go with the written instructions and at first I was skeptical that there would be enough overlap of the binding, but then realised that their method meant rolling a little bit of the batting at the fold which gives it a nice soft/rounded edge. I need to trust the experts more 🤣
I think I did an ok job with this new method. I think I may have to sew on the inside of my marking because it felt like the corners were a little loose. But otherwise this is a cool method that eliminates the requirement to have really long strips of binding (starting to wonder if buying the Simplicity Bias Tape Maker was worth it lol). It was a little awkward aligning the bias tape edge since didn’t actually true the edges of the quilt top (I trued the batting extension instead) and it made me wonder if instead I should make the bias strip wider so I can just align it with batting edge instead and sew 1/2 inch instead…things to think about. And I do this if I can combine it with the Sew Precise Sew Fast Machine Binding, I could get really nice and neat binding. This time thought I used Steam-A-Seam as a crutch to hold the binding in place while I topstitched it from the right side. I had a bit of a scare where the Invisafil kept skipping stitches and I couldn’t tell if it was my bobbin (it was wound a bit dodgily) or the top thread getting stuck (it did that a couple of times during the walking foot quilting) or my machine playing up… I did try some troubleshooting but couldn’t get it to work 😣 Luckily I had some Rasant in a pretty similar colour and the machine behaved with that. I was mostly confused because the Invisafil did about 1.25 edges perfectly fine before playing up. But afterwards I tested with a normal quilt sandwich and it was happy. So I guess Invisafil just can’t handle all the extra layers, fair enough it’s not really designed for that kind of sewing, I just wanted to try and keep the thread colours matching.
Reflections
I’m very happy with how this turned out! Despite it being a bit demoralising to begin with, I feel like I had a couple of wins and lessons learnt which makes it an overall good experience. And the Invisafil gave me the result I was after – a nice and soft quilt that actually drapes. I also feel like the geometric curves complements the quilt top pattern quite well. And is much more interesting than my usual combination of straight lines.
Things I learnt:
- When using DecoBob don’t need to use scant 1/4 inch seams
- Use the clapper to help press seams open
- PAY ATTENTION TO BLOCK DIRECTIONS
- If possible mark walking foot quilting lines before assembling the quilt sandwich
- Invisafil should only be used for the quilting portion of sewing
- How to use the Creative Grids Angle Finder Binding Tool

Leave a Reply