Planning and Design
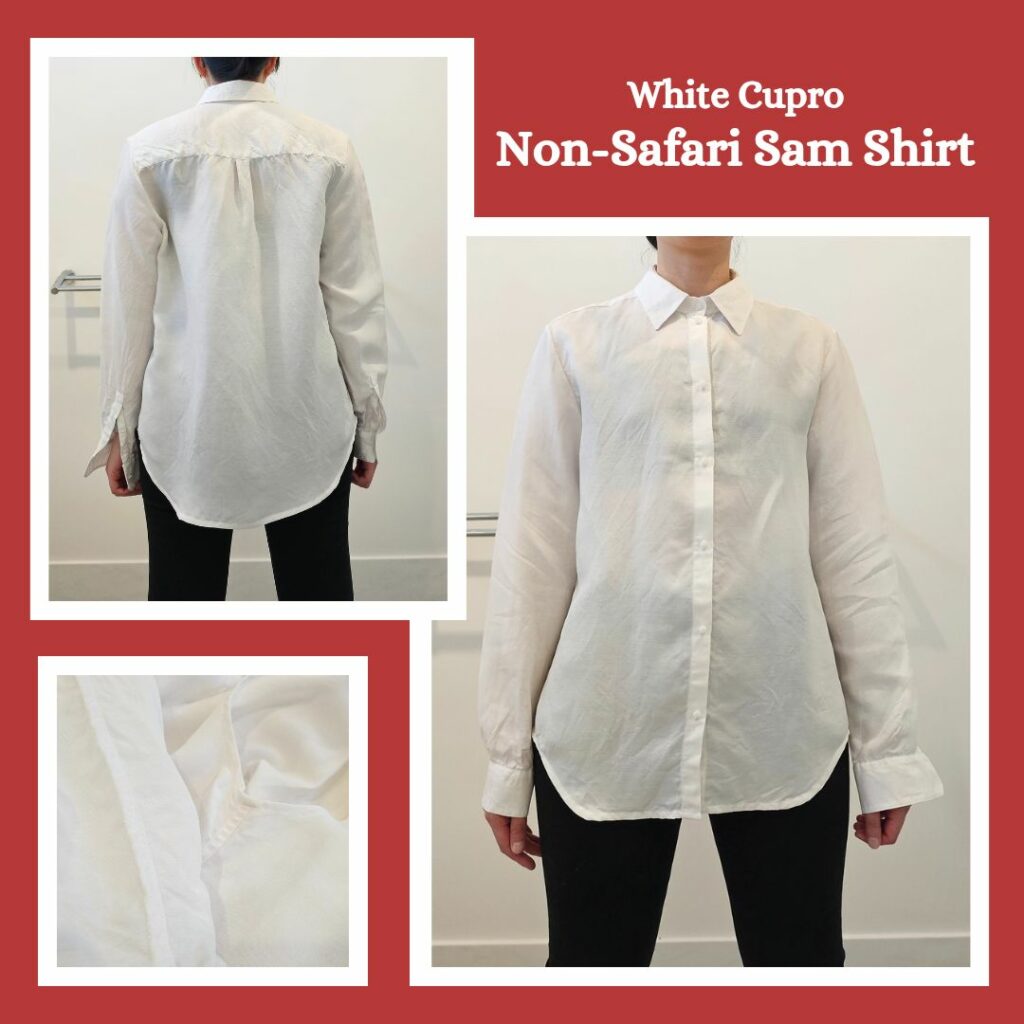
I made a pretty fail-version of the Safari Sam shirt, which I’m unlikely to keep, but in making it I realised that the pattern has quite a nice fit (it goes in at the waist a bit more than the Roxy Shirt). So I decided it would make a good plain white shirt for layering purposes, if I removed all the safari bits LOL.
I had already purchased some white cupro fabric from Maai Designs because I had never heard of cupro before and was intrigued and thought it would fit this project quite well. I also decided that I would use this project to practice some more fancy shirt-making techniques in preparation for the technical fabric shirt I planned to make for my husband’s birthday.
Materials
- Pattern:
- Simplified Safari Sam Shirt with 1.5 cm seam allowance (Style Arc)
- Fabric:
- Cupro Linen Tencel – White (Maai Designs) 47% Cupro, 31% Linen & 22% Tencel
- Buttons:
- Salvaged white plastic buttons from a previous project
Construction
I started by adding 0.5 cm to the seam allowances of the base pattern. I even did this for the yoke, which I should remove because it doesn’t require it and adds bulk. I also forgot how to bag out the yoke so had to refer to a tutorial 😅
Very glad I have silk Clover pins, made pinning this light fabric a lot easier. In hindsight, I should have stuck to french seams due to the light weight of the cupro, but I suppose I did want to practice flat-felled seams.
I used the awesome sleeve placket tutorial again (by the end of the year I will hopefully be a whiz at this given how many shirts I plan to make haha) but this time I also looked up if there was a way to do the collar more nicely and found this also awesome tutorial to get a nice collar stand.
Finally, one thing I screwed up on the failed Safari Sam Shirt – how to align top buttonhole/buttons. I found a very good Youtube video by Closet Core which was handy in multiple ways. Firstly, I was on the right track on where to put the collar stand button and I used their mock-up as a double-check that where I planned to start the collar stand button was correct (it was). Then their suggestion to put a button directly under the collar stand worked a treat. I feel like I always end up with a ‘gape’ and while I have seen that particular button placement on my husband’s shirts, I never considered putting it on my own shirts since the patterns I have used never included anything like it. I also liked their suggestion to start button placement with the widest part of the bust, but since I was using buttons I had on hand, I wasn’t able to place them how I wanted and ended up spacing them 10 cm apart from the first button in order to get sufficient coverage with the number of buttons I had. Maybe next time. Lastly, given I plan to make quite a few shirts this year, the video introduced me to a bunch of tools that would probably be worthwhile investing in (buttonhole gauge anti-fray glue, buttonhole chisel).
Reflections
I’m very happy with how this turned out! One thing I didn’t take into account though is how the style is rather loose and by using a very light fabric without much body, makes it look oversized. However this is not a big issue because due to how sheer the fabric is, I will always be wearing a layer on top.
Lots of things I would do differently next time, but not because I am dissatisfied with how I did it this time around, but more because it would be more suitable. I think it might be a bit on the long side for office wear (especially since I plan to use it for layering), but we’ll see, I might change my mind after I wear it properly a couple of times.
Things I learnt:
- Only seams that will be flat-felled or french seamed need to be increased to 1.5 cm
- Increase collar stand seam allowances to 1.5 cm as well to make it easier to work with
- An alternate way to attach collar stands
- It’s normal to mix and match flat-felled seams and french seams. But if flat-felling a sleeve armhole seam, the felled side is on the inside.
- How to place buttonholes and align associated buttons
- Use tear-away-interfacing when sewing buttonholes on light fabrics
- Buy a buttonhole gauge! Then I can place buttons at non 5 mm increments lol
- Maybe invest in anti-fray glue and a buttonhole chisel?
Categories: Sewing
Leave a Reply