Planning and Design
I had been umm-ing and ahh-ing about whether I should make the Emberz button-up shirts from Splatoon 3. They are all ‘pretty out there’ in terms of design so wasn’t sure if I’d get a chance to wear them out 🤣 But after I made the Short Knit Layers, I decided I could probably wear the shirts as the underlayer which would help ‘hide’ some of the more flamboyant aspects 😝
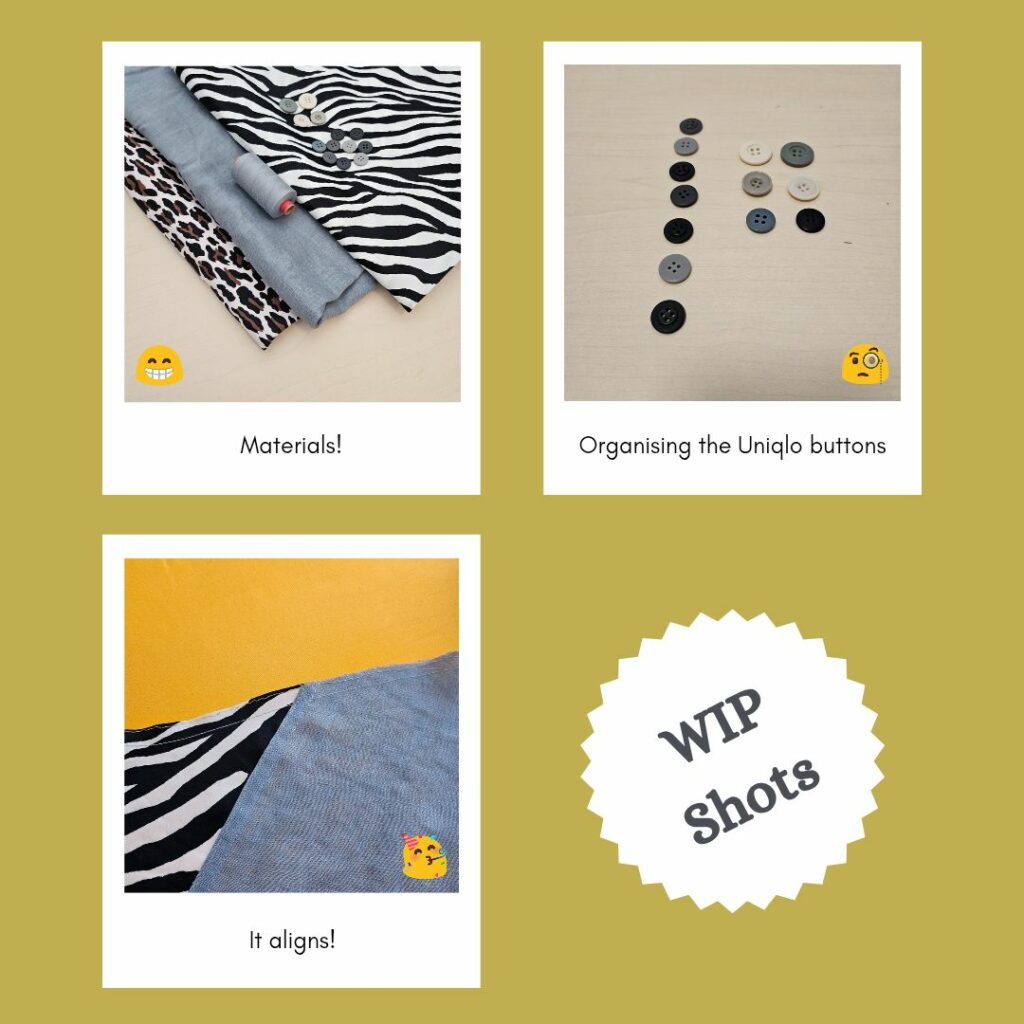
It probably helped that when I was looking up animal print fabrics, Super Cheap Fabrics were having a sale 🙃 Plus they had a leopard and a zebra print, I was expecting it to be hard to find both prints from the same supplier (I wanted the fabric type/feel to match) so went for it.
I then tried to find cotton sateen to match the animal print fabric (as much as possible anyway). But for some reason I couldn’t find any grey cotton sateen? Maybe it’s not that common a fabric type? Since that wasn’t an option I decided to get some hemp instead because I was curious about the feel and what it would be like to sew hemp.
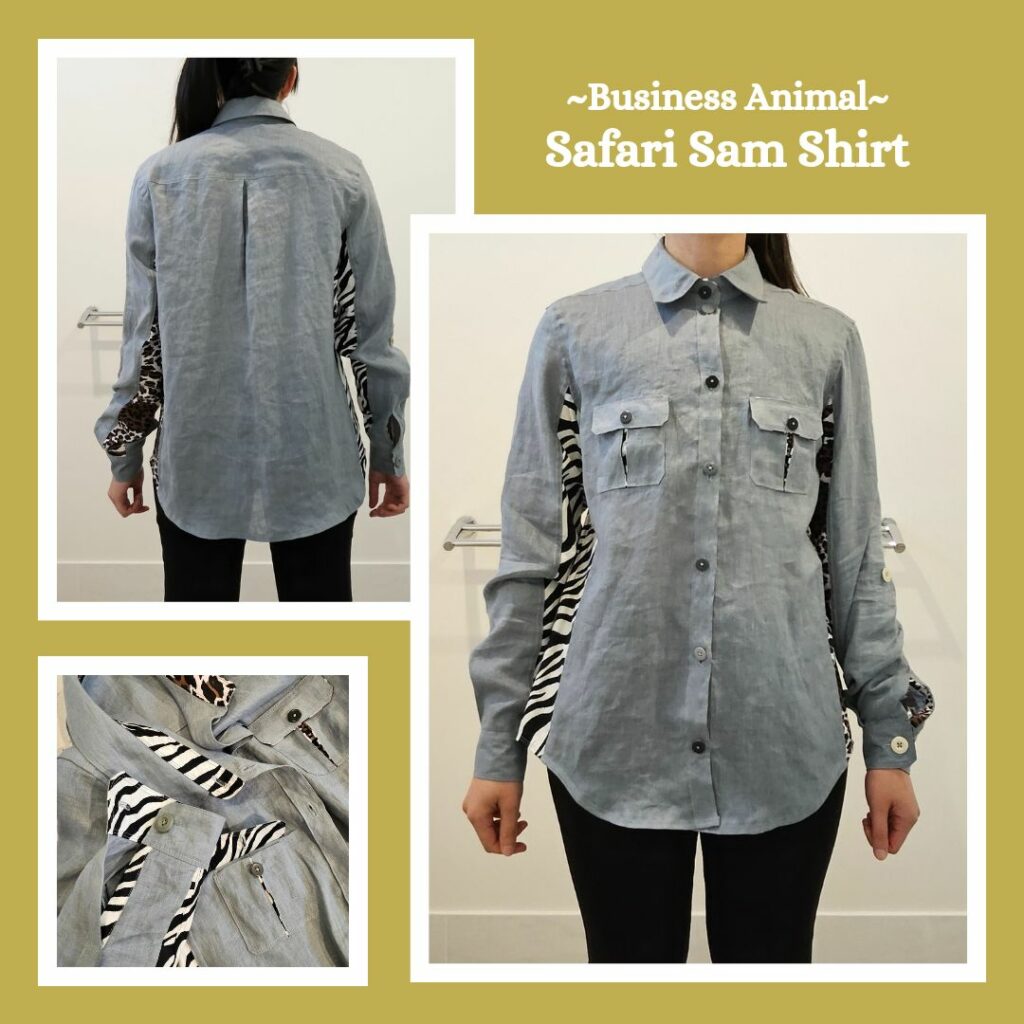
For the pattern, the Safari Sam Shirt from Style Arc felt like the perfect match given the animal prints 😁 Plus there were a lot of design aspects that I felt could lean into the two-print theme.
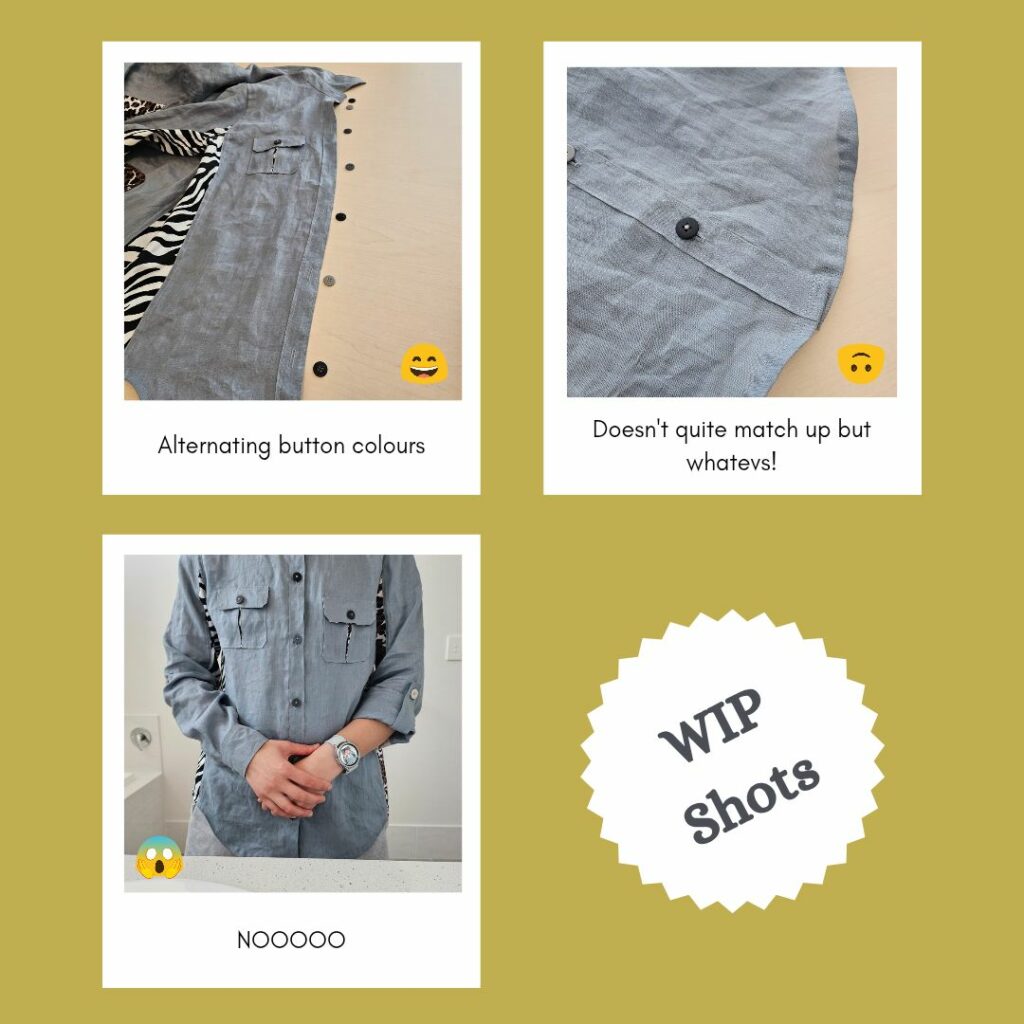
At the time I was planning this project, I happened to be sorting out my button collection and found sooo many spare Uniqlo buttons in the ‘random buttons’ bag. I don’t even remember buying that many Uniqlo clothes LOL. Since they were mostly the same size and in complementary colours I figured this would be a good project to use up the buttons as well as save a tiny bit of money 😋
The main aspects from the Splatoon Business Animal Shirt that I took was the main colour scheme and use of animal prints. The (many) things I changed:
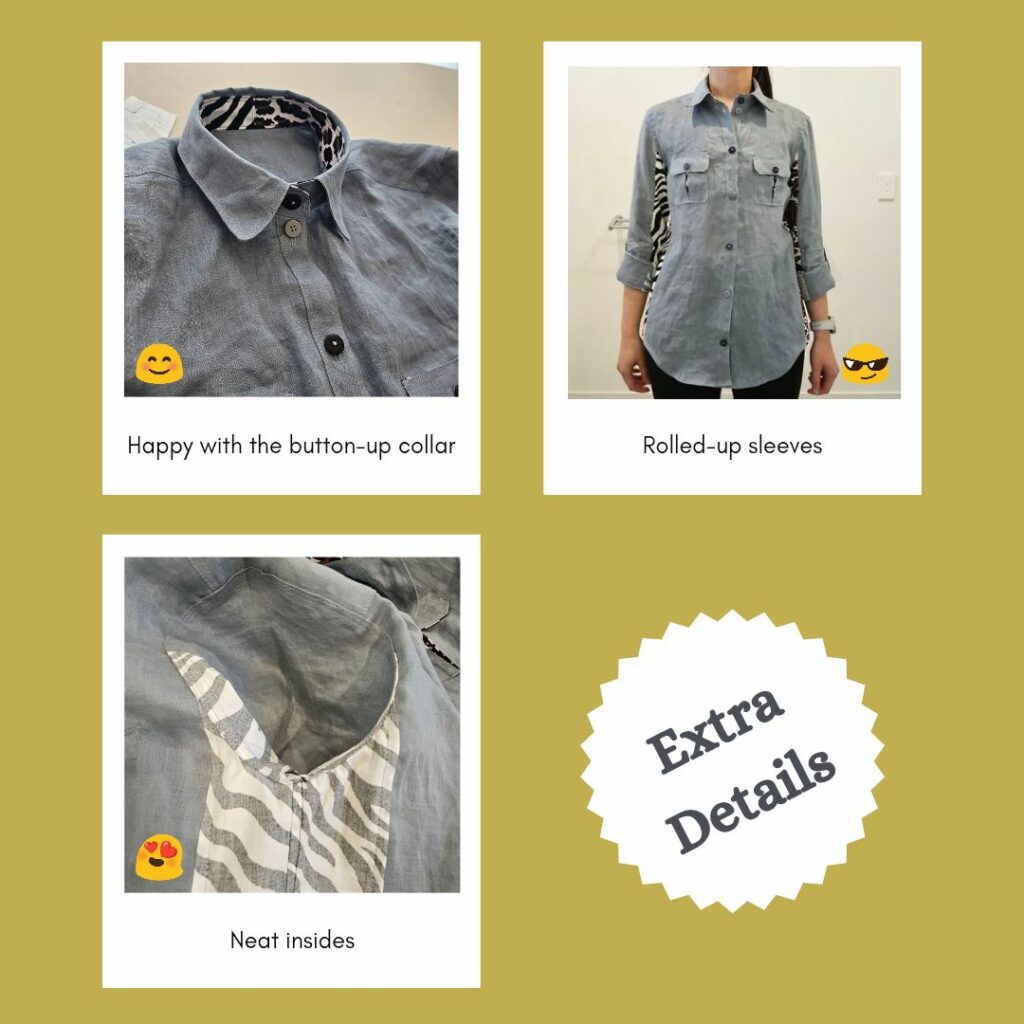
- Changed the sleeves from short to long but with the option of rolling them up and securing with a tab
- More symmetry with the animal prints
- Outside of the side panels, made the animal prints a bit more subtle
- print on the inside of the pocket reverse pleat
- added pocket flaps with the print on the underside
- put the print on the inner collarband and under collar and made symmetrical
- put the print on the under cuff and bottom placket
- Didn’t use the checked fabric for the yoke
From the Safari Sam Shirt design, I omitted the shoulder epaulettes. Simply because I don’t like epaulettes lol.
Materials
- Pattern:
- Modified Safari Sam Shirt (Style Arc)
- Fabric:
- Cotton Sateen Striped Leopard (Super Cheap Fabrics)
- Cotton Sateen Zebray (Super Cheap Fabrics)
- Devonstone 100% Hemp Solid Fabric Grey DV2662 (The Oz Material Girls)
- Buttons:
- Spare Uniqlo buttons in assorted colours (11x 12mm, 2x 15mm, 2x 20mm)
Construction
Modifying the Pattern
I had planned out the splits for the front/back/sleeves based on the original pattern markings for sleeve placement, but ended up wearing the first Safari Sam Shirt I made and marking out the best positions for fabric change based on screenshots from the gear in-game.
Also ended up adjusting the collar and collar band to be two toned.
Thank goodness for pattern paper. Very glad I had it for this project. Being able to create a new pattern piece from the guidelines I had marked on the original was so handy.
I did plan to test my modified pattern pieces using old sheets first, but lately I have been so starved of a proper engaging sewing project I was raring to just get started 😅
Another change I made was to reduce the pocket size 70%, based on my previous version of the shirt. And split the pocket along the reverse pleats for the contrast.
Plus what will now be my usual adjustments of:
- seams to 1.5cm for flat-felling
- 2cm allowance on sleeves to allow self-flat-felling
- 1.5cm seam on collarband for ease of sewing
Assembling the Panels
When I designed the split pattern pieces, my intent was to fold the main fabric over the animal prints. Of course I had a change of heart and wondered if doing the other way would be better so that there was more of the contrast. The choice was kinda taken outta my hands though due to the way I drafted the pattern pieces 🤣 but in the end I think this way was best.
I was super paranoid about getting the prints mixed up. So I settled on Left = Leopard and Right = ZebRa haha… Figured it was more important to get the prints matching than to match the original Splatoon design (it ended up matching anyway, maybe they were thinking the same thing lol).
I don’t know if I over- or under-thought it, but I ended up cutting the animal print sleeve parts wrong 😅 I was so intent on getting the front and back pieces correct that I applied the same approach to the sleeves when really it should have been full right side zebra, full left side leopard, instead of both back sleeve leopard and both front sleeve zebra lol. No matter, I had heaps of spare fabric. I managed to cut the bottom pocket flaps from the miscut pieces and saved the rest as scrap.
Ended up being pretty happy with how well the panels lined up!
Pockets
So I completely forgot about this guide I wanted to use…maybe next time.
I was going to turn the pocket edges over twice to secure but realised this wasn’t going to be possible for the pleated parts 😣 So I considered overlock/overcasting instead but ended up doing a double topstitch instead. I thought it looked pretty good so decided to include this design detail for the whole project. For future reference it was the usual 1.0 offset, then 2.0 offset but using the first topstitch line as the middle point.
I had to redo the buttonhole on the pocket flap a couple of times. I stupidly sewed it without testing and it was totally not proportionate to the flap size. So I did a bunch of belated test buttonholes to see how small I could get-away with haha.
Sleeve Tabs
I really hate sewing the long edges and point and having to awkwardly turn it inside out so decided to see if there was a guide on ‘perfect sleeve tabs’ like there are for ‘perfect collar points’ but apparently not 😝 But I did get some ideas and decided to leave an opening on one long side and turn out from there. It worked really well! But I do think I either need to reinforce the point or not cut so close to the stitching with fabric like this that easily frays.
After double top-stitching I tried sewing the buttonhole but had lots of trouble getting it centred. Then I had another idea. Instead of sewing from the point inwards, because this time I had done a test buttonhole, I knew how long it was and could sew it from the inside outwards instead. So simple why have I never considered this before 😅 So that worked out well too.
Next I attached it to the sleeve. I knew from the first Safari Sam Shirt that I should put a cross through the box and decided to mark out the exact stitching lines which was a good idea. The cross also made it very clear where to sew the button on as well which made it doubly handy.
Body
Nothing interesting or challenging here 😋 Although maybe I could have put one layer of interfacing on the front band fold…this fabric really slips and slides around a lot, it could probably benefit from a bit more stability.
Collar
I’m getting pretty confident at doing this now! Still had the guide open for reference though. One thing I did add this time was drawing out the curved stitching line since marking out the stitch line worked so well for the sleeve tabs 👍
Sleeves and Hem
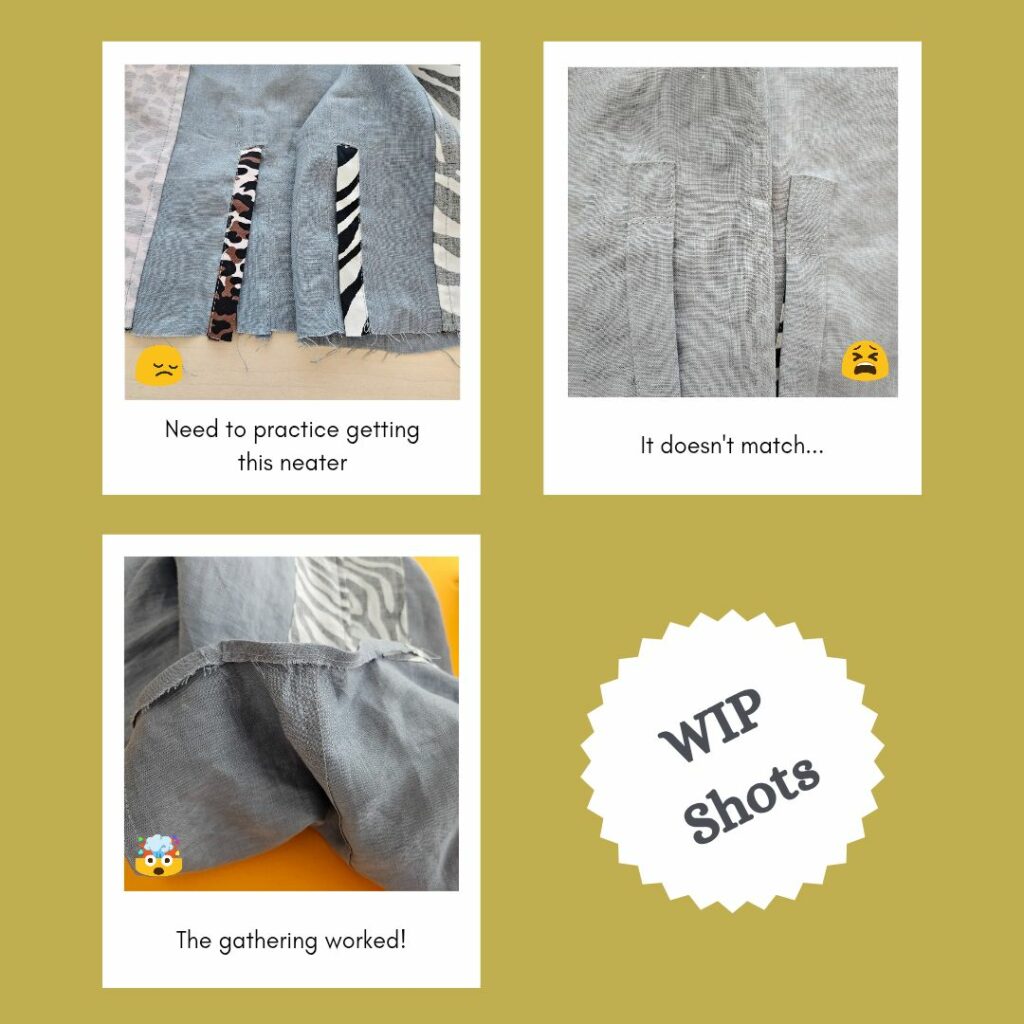
Last time I recalled have problems double-folding the curved part of the flat-felled seam so did an extra gather stitch on the edge. After confusing myself on how to put the body and sleeve together (usually it’s wrong sides together but for the sleeve the flat-fell is on the inside so it’s right sides together) I got to give my technique a go and was amazed that it actually worked LOL how am I so good with new ideas (or is that more how could I have gone so long without critically thinking through the methodology 😅).
I did the hem at this point because I wanted to just have to do the sleeves and buttonholes/buttons in my next sewing session. Maybe I should try the gather technique for the curves on the hem too? But just stitching on the curves because I don’t want it to interfere with the concave parts of the hem
Buttons and Buttonholes
So I wanted to double-check buttonhole/button placement on collar bands and ended up watching all these other videos from the same person:
- Placing Buttonholes on Front Band
- Placing Buttons on Front Band
- Buttonhole Placement (Cuff)
- Placing Button on Cuff
- Sewing on the Button
I really liked the explanation of the measurements behind placement, it makes so much sense now that it’s been spelt out slowly for me. And using pins to identify the top of the buttonhole, I have always put my buttons in the middle which is apparently wrong? Plus sewing each button on the front band one by one so you make sure that the placement is all correct (this also makes sense but I’ve always been lazy/hate sewing buttons so have always just tried to speedrun this part LOL). Which also means you know how much you need to turn up the hems so that they match at the bottom (whoops, already sewed my hems, oh well next time). And unrelated to the actual content of the videos, but I really appreciated how bite-sized and short each video was. And twisting the button so that all your stitches go the same way. And folding the band/cuff over your finger to make it easier to sew the button while also giving a bit of space to create a shank, which I have done for coats but never considered doing for a button-up shirt.
I got so focussed on following the instructions, I probably put my sleeve buttonhole too far from the edge. Because the instructions were for standard cuff buttons and I was using an oversized one because that was what was in my stash. But by placing the button as close to the cuff edge, I ensured that the cuffs were still button-able and didn’t look too off.
It ended up being a bit of learning-overwhelm to be honest…and was very demoralising in how I have been doing pretty much EVERYTHING wrong. Better to learn late than never, but I also ended up trying not to perfect all the new things I was learning. If I had tried to get everything right this would end up a work in progress forever 😅 Sometimes it is important to know when it is ‘good enough’ and just finish the project.
I thought I was done, but I was not…
So after making my way slowly through all the buttons and buttonholes I thought I was done…and then I tried on the shirt and my pockets were TOTALLY out of whack 😭 That’s partially my fault for not marking the pockets from the very beginning, but I think even if I had done that, it would have probably been misaligned anyway because this fabric shifts very easily. So lesson for next time – if doing pockets on both sides, only put on one then mark out the second once the whole shirt has been assembled. I ended up putting this off to the next weekend, because I didn’t trust myself to get super frustrated with the whole project and accidentally mess it up beyond repair because my tolerance levels were so low.
I picked the project up again the next weekend and was glad I took the break. I was very calm and ended up also adjusting the top three front band buttons for a bit more overlap. I was too lazy to rejig every button but figured this was good enough.
Reflections
In terms of wearability, I am very happy with my adjusted sleeve tab lengths. The fabric itself is a little on the rough side, but I expect that it will be similar to linen and soften with consecutive washes. I probably should have interfaced the front band, it doesn’t sit nice and flat and moving my arms definitely pulls it noticeably out of whack. I’m not too concerned since I do think that I will mostly be wearing this underneath a sweater-type layer and I could probably hack the positioning a bit by removing the button and re-sewing it so there is more overlap of the front band if it really bothers me.
Things I learnt:
- Get future digital patterns printed onto A0 and keep this original for future modifications/projects 😊
- Despite buying the fabric from the same store and having the same fabric descriptor, the two animal prints feel completely different. This is probably a combination of not getting a sample first and buying from a ‘cheap’ fabric store (I know it’s literally their name. I feel like they are probably on par with Spotlight and Homecraft, i.e. middling in quality. To back this opinion up, I received a free sample from Maai Designs for a cotton sateen they stock, and it feels much smoother than either of the ones I used in this project).
- Mark out everything before removing the pattern piece, especially with this kind of fabric that ‘shifts’ a lot 😣
- Due to the same reason above, maybe add the second pocket after the shirt has been fully assembled so the positioning is symmetrical
- Should have stuck to using the grey thread for all topstitching, it’s a bit of a mishmash of grey/black because I intended to use black for the prints but then realised this meant for some seams I would need to switch thread partway and yeah, not doing that 😅
- I have been doing buttonholes and button sewing wrong for YEARS and had no idea
- I need a mnemonic to remember which side is for buttonholes/buttons for women’s shirts…I always need to look it up
I also learnt I really need to retrain my brain on how long this kind of project will take. Once upon a time, a button-up shirt would have taken me a day max to complete. This project (which to be fair, does have a lot of extra design elements) took me five over three weekends:
- Design and trace pattern pieces, cut fabric
- Apply interfacing, sew panels together, sew pockets/sleeve tabs/body/collar
- Sleeves and hem
- Buttonholes and buttons
- Fixing pocket and button placement
Since I feel like I really need to start from basics on shirt-making, my next shirt will be the Kalle long-sleeve shirt using the Shirt Making Course from Closet Core Patterns. I need to build my confidence up again 😣 Especially because I have lots of really nice fabric I want to make really nice shirts out of.
😅 Emoticon Count (very reflective of my feelings on this project LOL): 6
Categories: Sewing
Leave a Reply