Planning and Design
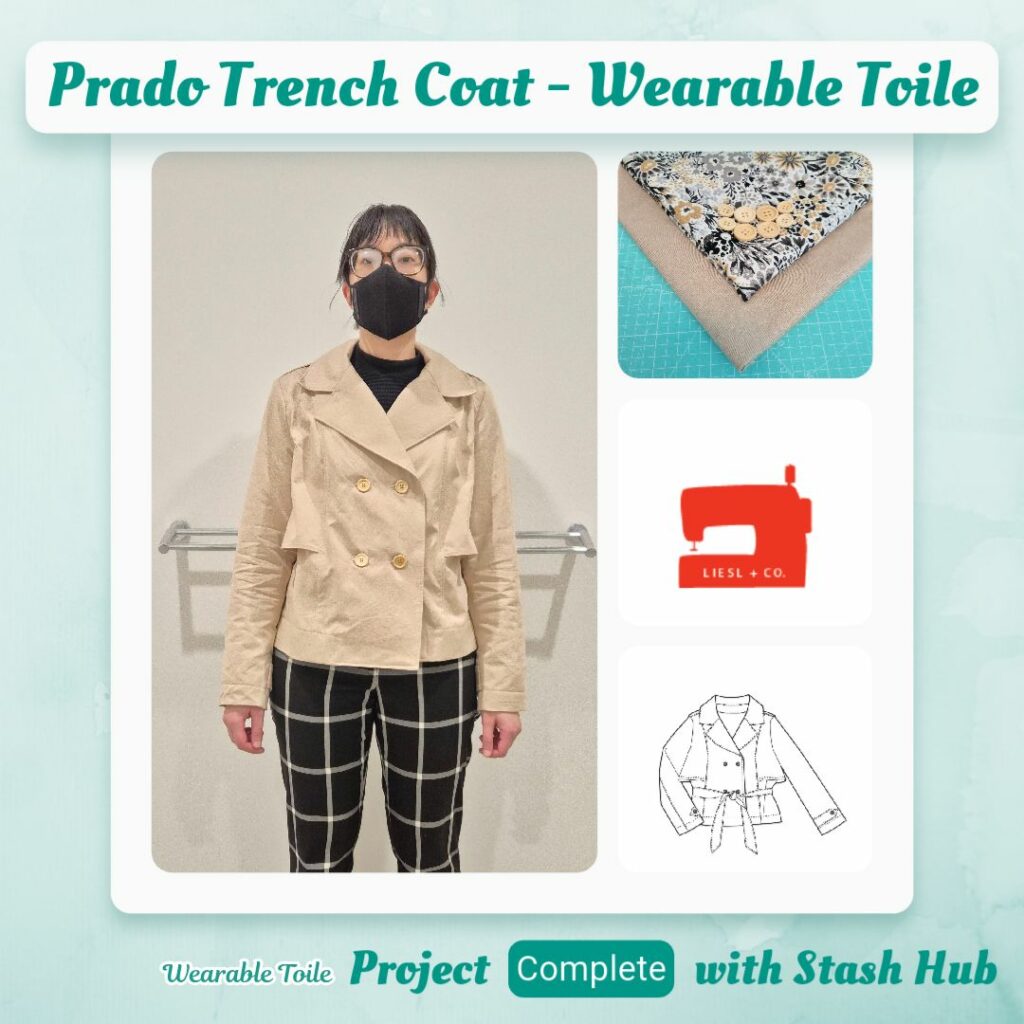
I think my introduction to Liesel and Co patterns was the Classic Shirt, but the one pattern I really fell in love with was the Prado Trench Coat. Most trench coats (RTW and sewing patterns) are very long and I know that style doesn’t suit me. But the Prado Trench Coat comes with a cropped option and it just looked so stylish on Liesel 🤩 So I knew I wanted to make one. I bought some rust coloured fabric to make this in (to go with my colour coordinated work wardrobe), but my only coat making experience (in recent years) is the Beatrice Peacoat, which didn’t exactly go as planned, so I figured I should do a wearable toile first.
Materials
- Pattern
- Prado Trench Coat – Cropped (Liesel and Co)
- Fabric
- Cotton Lyocell Drill – Sand (MaaiDesign)
- Posh-Chantilly Quilting Cotton – Ivory (Cozy Corner Quilts)
- Buttons
- 4-Hole Classic Rimmed Wooden Button 22mm – Birch (Homecraft Textiles)
- 4-Hole Classic Rimmed Wooden Button 18mm – Birch (Homecraft Textiles)
- Thread
- Rasant col. X1222
- Notions
- 100% Cotton Lightweight Fusible Shirting – White
- Lite Steam-a-Seam 2
Sustainability Check
👍 Twill and quilting cotton are both 100% cotton
👍 Buttons are wooden so biodegradable
🤏 Rasant is OEKO-TEX but not biodegradable
🤏 Woven interfacing is 100% Cotton although the glue isn’t biodegradable. However currently the best Australian option at the moment
❓ Unsure on the composition of Steam-a-Seam
Construction
Pattern Preparation
I thought I would be good and look up reviews of other people making this coat, but I could only find a preview of a Pattern Review one. At least it mentioned that it’s a boxy fit with lots of ease, that was the main thing I was wondering – do I size up one since I plan to wear it over sweater layers? So I decided to go with my size (10).
As I was tracing out the pattern pieces and adjusting the seam allowances from the standard Liesel and Co. 1/2 inch to either 3/8 inch or 5/8 inch depending on if it was a enclosed seam or not, I decided that from now on any coats will just have a 5/8 inch seam allowance lol. The extra might be useful for areas that are bulky and it’s just kind of hard trying to guess which ones will be enclosed or not. Better to just make it the larger seam allowance and trim it back after the fact if it does actually make it hard to sew with a larger allowance. I guess for things like sleeve tabs and belts though it should be fine to make these 3/8 inch seam allowance from the start.
Cutting the Fabric
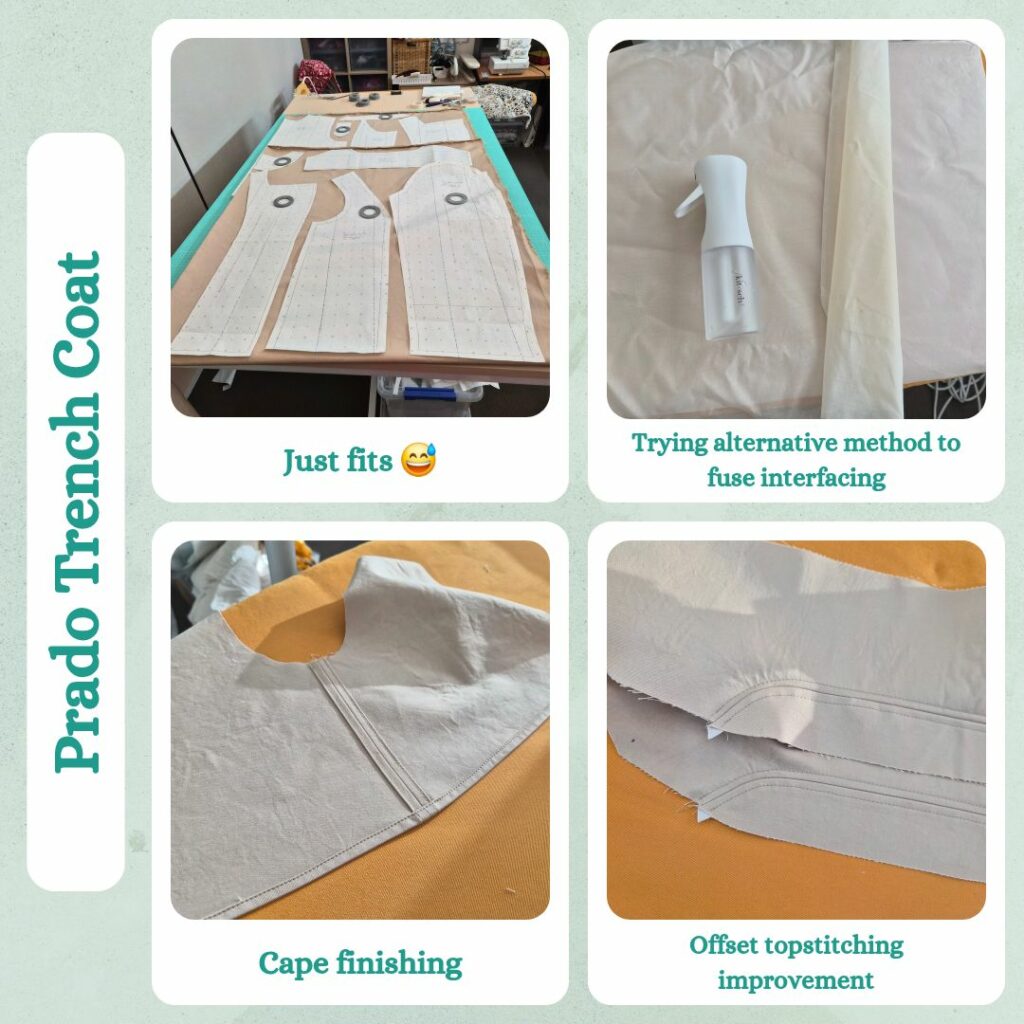
The fabric I was using for this wearable toile was originally for a ‘good’ pair of Philippa Pants, but after two unsuccessful toiles, I gave up on that pattern completely and decided to repurpose it for this, since it’s that classic beige trench coat colour (as well as being a twill). Part of me was wondering if it’s a ‘waste’ to use such a nice fabric for a toile, but I guess another part of me is confident that since this is outwear that doesn’t need to be fitted, even if I don’t like the final result, the construction will be good enough to donate to someone. But because it was bought for a much different project, I anticipated that I would have to omit the belt due to lack of fabric. And I was right, I was very careful and organised and managed to just fit all the pattern pieces I needed onto the fabric length. And I decided I would use my woven interfacing this time, and then use weft interfacing for the ‘real deal’ and see how different it is. Had to do strategic tetris with my pre-washed amount of interfacing as well.
Applying Interfacing
As for applying the interfacing, I recently watched an Oliso talk on giving your iron a day spa and the presenter mentioned that some people never put water in their iron, they prefer spraying it on themselves. And so I thought I would give that a shot next time (ie this time) I had to attach interfacing. I have a Kitsch continouous mist spray bottle that I bought for sewing purposes but have never really used yet. So combined this with a teflon underlayer (to prevent glue from getting onto my ironing board) and my cotton organdy pressing cloth, and referred to the Vlieseline website instructions again, and realised that they specify a ‘damp cloth’, which I suppose this is much closer to than me just using the steam from my iron LOL. I guess before I was trying the least-effort method, but perhaps unsurprisingly they failed to deliver results haha. To be honest, the hardest part about applying interfacing is remembering to not use pressure 😅
I also remembered to leave the interfaced pieces to cool.
Sewing – Part 1
My goal for the first lot of sewing was to sew as much as possible without requiring any bias binding 🤣 One reason was because I had my little brother over sewing as well so it wasn’t convenient to cut my bias binding strips, but also because I was thinking about the best way to create the bias strips. I used the Simplicity Bias Maker recently when I made the Stacie Jacket and my thinking then was that it probably wasn’t convenient to use the machine because I didn’t need a huge long continuous strip of fabric. So I was putting off thinking about/making the bias.
This meant I sewed up the following:
- Cape – I thought it might be a bit weird to have the bias binding on the seams of the cape (I feel like it’s a inner garment detail only) so just turned the seam allowance in and topstitched it down. I did feel like maybe it’s time to buy the 3mm fusible tape because the 6mm only juuust fit on the double-turned hem of the cape.
- Body Side and Sleeve Seams – then set aside to be bias bound
- Epaulette and Sleeve Tabs – I was happy at how easy I found it to make these and put a buttonhole in. In the past I used to dread making these pieces because they were small and fiddly and required me to sew a buttonhole, but buttonholes are just part of the sewing process to me now 😊
- Collar – I think this was the first time I needed to use the circle marks properly and they really helped to align everything. I tried to get away with as few clips to the stay-stitching as possible, I tried 3 first but it wasn’t enough, 5 did the trick though. I also ended up clipping the collar stand curves so that I could press the seam flat and then topstitch. I figured out how to keep the topstitching even around curves which is a win.
Preparing Bias Binding
So in the end I decided that continouous bias binding is useful, but only when I want to bind a quilt. Otherwise I might as well just press the bias required per seam. This way I can also get away with cutting a rectangle instead of a square out of my fabric, which leaves a weird shaped remnant. I counted and measured how many seams would require bias binding and the longest was around 70cm (the sleeve). I used an online calculator (brother was probably silently judging me avoiding using Pythagoras to calculate it myself, but I know my track record with math when I’m crafting, better to leave it to the computers LOL) and figured I could probably get away with cutting 50cm from my fabric, which is half of what I bought. This would make the diagonal length 70cm (but slightly less because of the angled ends) which should be fine since I can fall a bit short on sleeve seam because the hem will get turned up. I calculated I would need 18 strips.
Sewing – Part 2
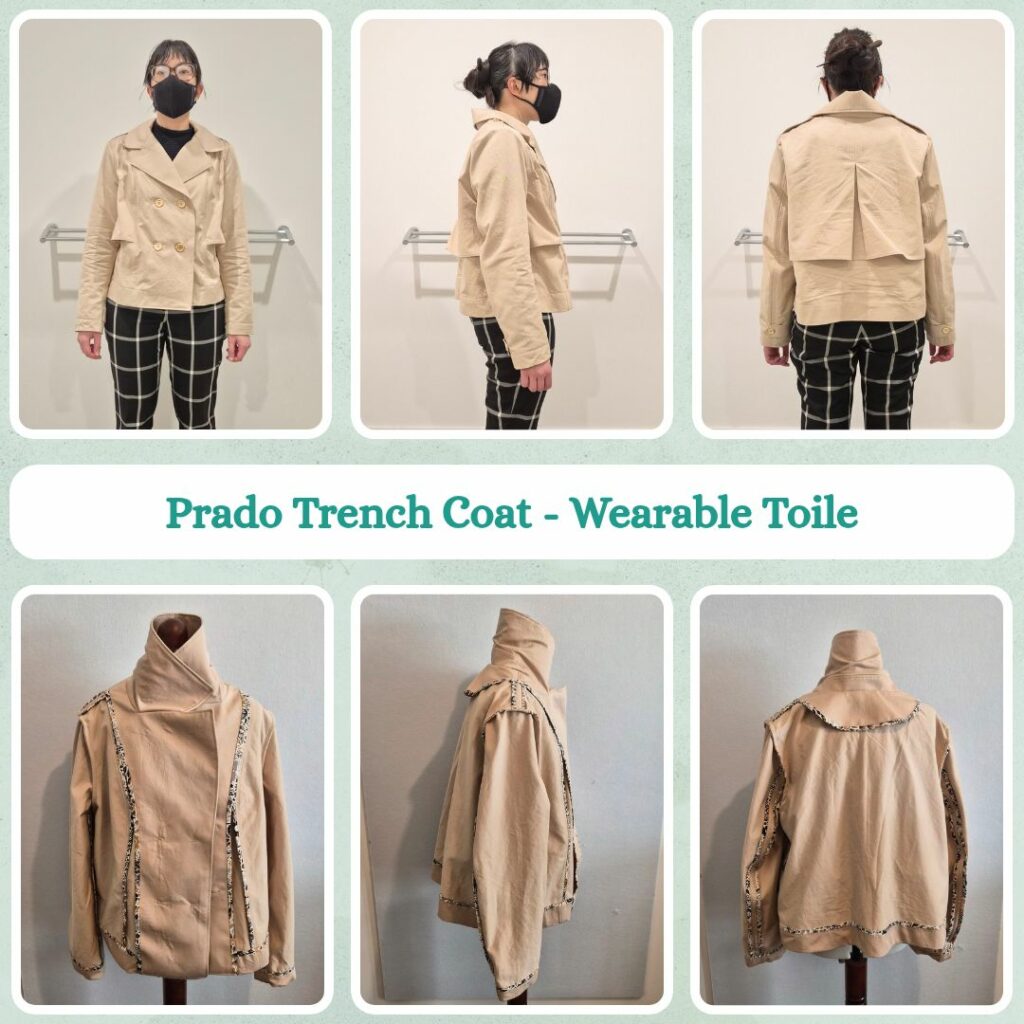
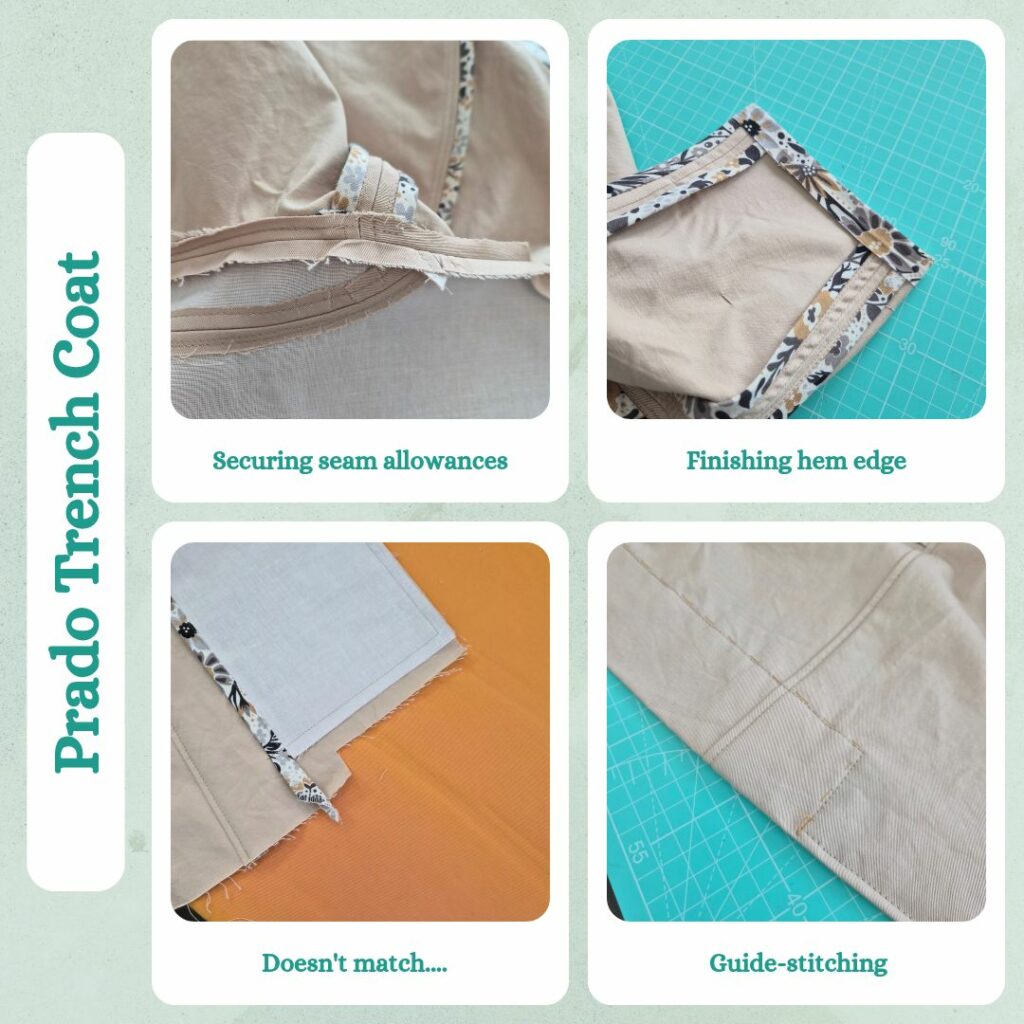
Bias binding every seam sure is time consuming, but it’s a process I enjoy. I made sure to use Steam-A-Seam on each one as well as stitching in the ditch (actually using the ditch stitch foot haha) and then topstitching from the front. Since I’m actually cutting on the bias and using the Steam-A-Seam, I can probably do Hong Kong seams instead to reduce bulk. And because I didn’t take into account hemming of the sleeve or body, I decided to also bind the raw edges for these too (Hong Kong seam style this time).
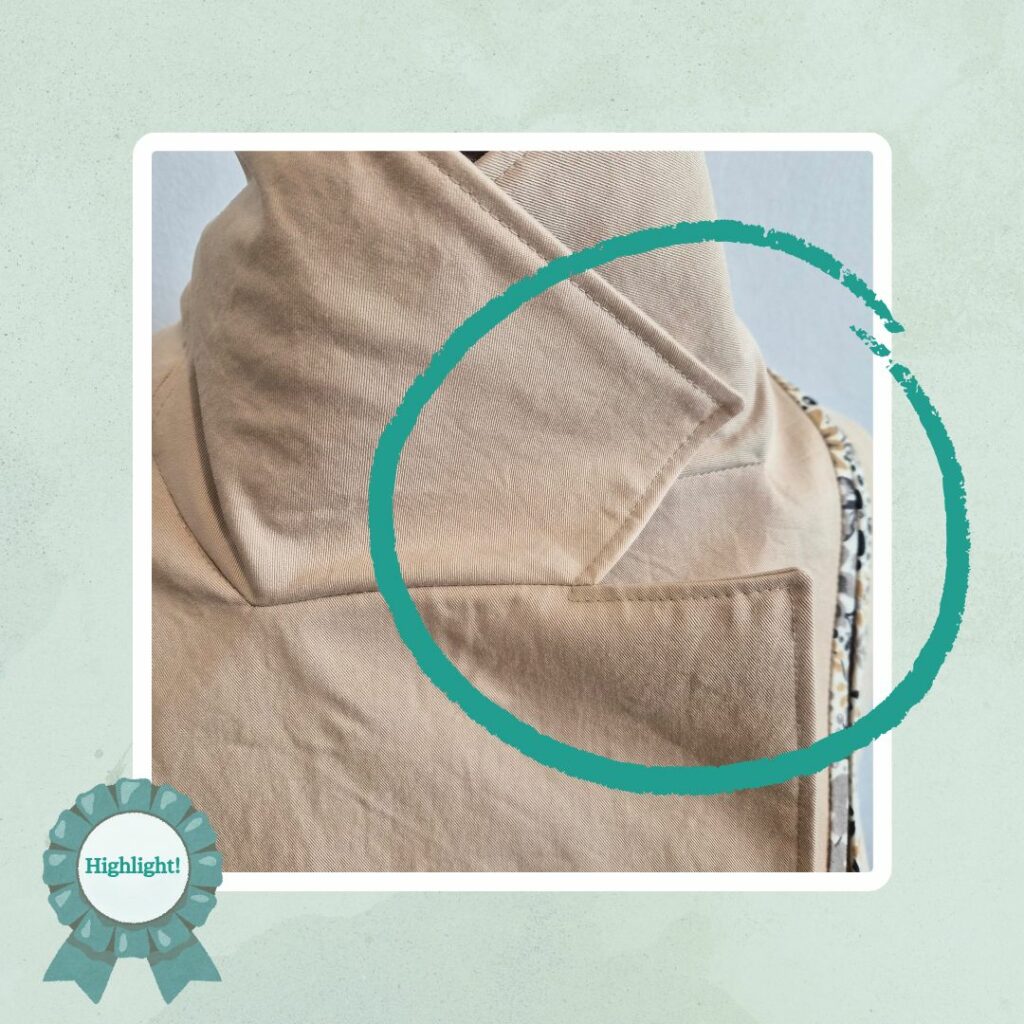
I was a bit apprehensive about attaching the collar and then the facing to the collar/body, but at the same time looking forward to it because it seemed like the same method for the Phoebe Coat which I had watching the Coat Making course on and is on the list for this winter. The instructions were very clear though and I started to understand it more as I actually did it. I think the main part I need to get better at is the corner where the facing turns into the collar, otherwise I think I did a pretty good job. In addition to handstitching the collar band seam allowances to each other, I also handstitched down the bulky seam allowance attaching the collar band to the main body (due to the bias bound seams).
For the sleeves, I decided to only do one row of basting stitches for the gathering and it worked well enough except that I probably should split the gathering stitch to avoid the bias bound seams because there’s no way any of those are going to gather. I realised that I don’t need to worry too much about the first row of stitching being nice and smooth because I’m doing french seams so I can fudge things on the second row of stitching so that it looks pretty flat on the right side.
Reflections
My mum commented that the sleeves look really long and at first I agreed but then I wore it and it’s perfect 😝 I also wondered if it was too loose but it fits nicely over my other lighter sweaters so perfect there too.
The main thing I’m sad about is the slightly bubbly interfacing. But other than that I think I did a decent job.
I also really love the fabric. Tencel is so great. I’m finding myself thinking of excuses to buy more of it in a different colour…
Things I learnt:
- How to sew a coat collar
- 50cm of quilting cotton is probably sufficient to bias bind all seams in a short jacket
- Woven cotton interfacing seems to shrink regardless of what I do, probably best to block fuse then cut out pieces next time…
- If I want to fold under the hem edges instead of binding it, need to be much more strategic about stopping the bias binding of seams at the hem fold line.
- Steam-A-Seam seems (no pun intended) to gum up my sewing machine needle…maybe I need to leave it to set before sewing through it? Or maybe avoid applying heat in the first place.
Categories: Sewing

Leave a Reply