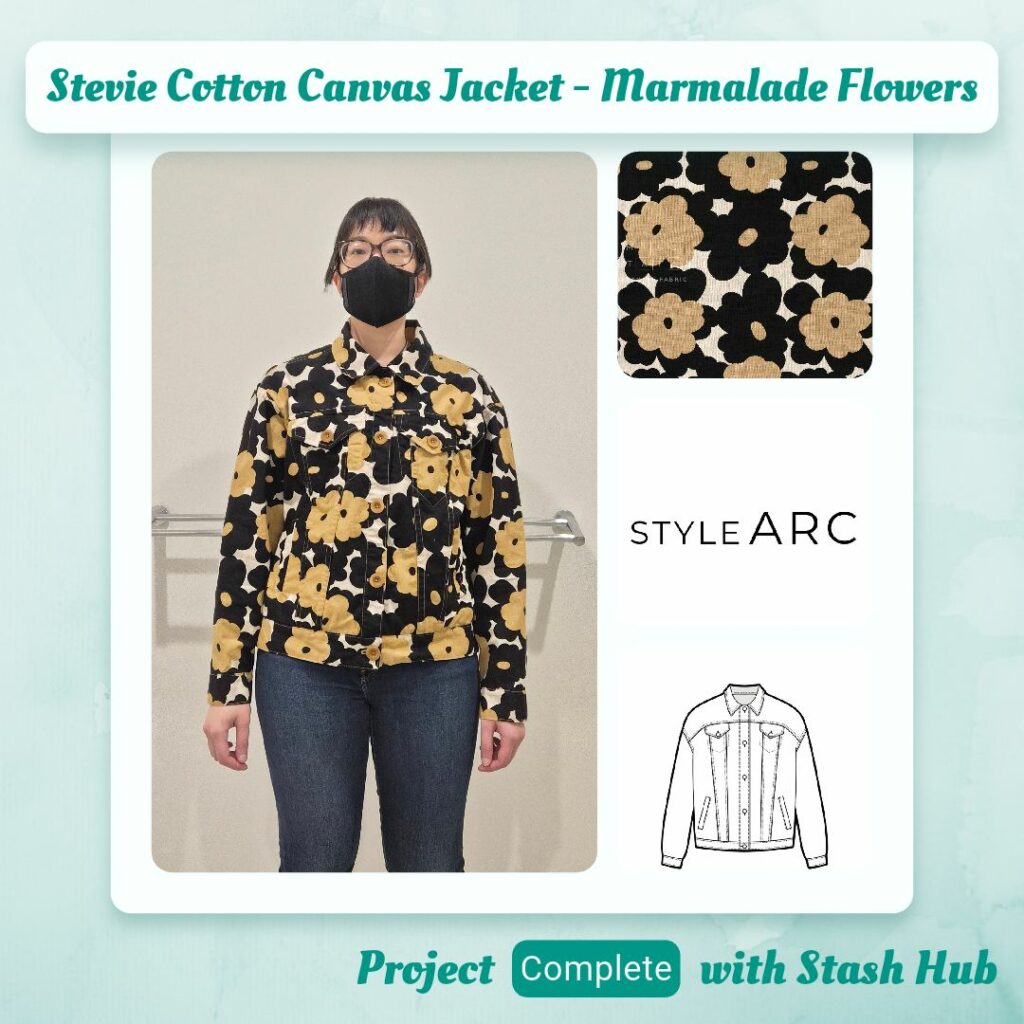
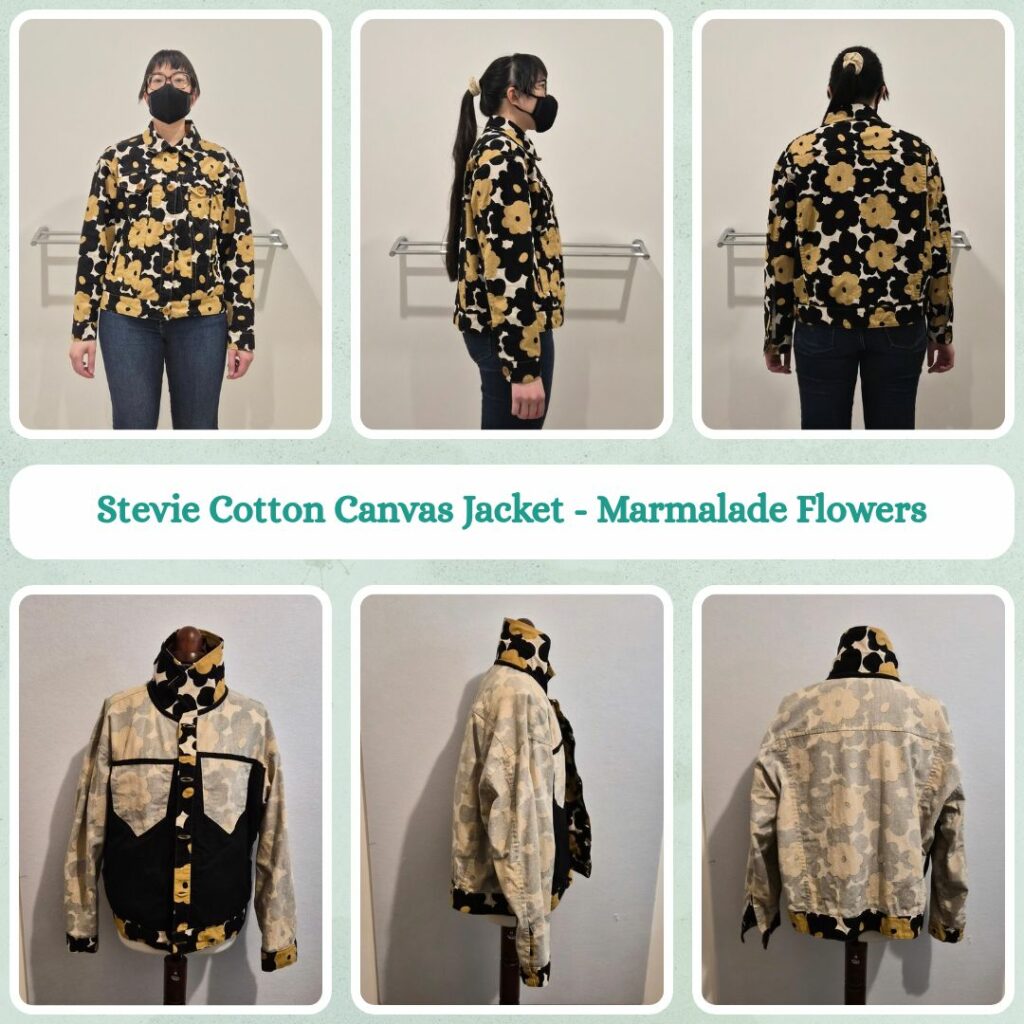
Planning and Design
I was meant to be working on my Ginger Jeans for the Modern Makers jeans challenge but caught a cold and figured I should do something familiar instead. This has been near the top of my list of things I want to make, but very low on the list of things that would be most useful to me right now, so I’ve been putting it off. But being sick and also straight after the Cattle Call Baby Quilt I feel like I needed to make something known and in a stable woven.
Materials
- Pattern
- Stevie Jacket (Style Arc)
- Fabric
- Marmalade Flowers A Cotton Linen Canvas (Miss Matatabi)
- Fiji Cotton Voile – Black (Fabulous Fabrics)
- Buttons
- Merchant & Mills Corozo Button 22mm – Gold (Pattern Scissors Frock)
- Thread
- Rasant col. 1504
- Notions
- Cotton Tape 10mm – Black
- Steam-a-Seam 2
Sustainability Check
👍 Canvas is 85% cotton are 15% linen so fully biodegradable
👍 Cotton voile is 100% cotton so fully biodegradable
👍 Cotton tape is 100% cotton so fully biodegradable
👍 Buttons are corozo so biodegradable
🤏 Rasant is OEKO-TEX but not biodegradable
❓ Unsure on the composition of Steam-a-Seam
Construction
I confused myself a bit since I kept all the pattern pieces for both versions I’ve previously done (original and 2cm seam allowance). And I also split the waistband and had to try and recall why (it’s because I thought this was a more elegant way to attach the waistband tabs). And then I further confused myself, or rather Style Arc did, because I glanced at the instructions and it talked about attaching the front (for ‘font’ as they wrote it) facing and I was like ‘I didn’t see that piece’ but turns out it’s part of the front pieces and their diagram is just outright wrong (you don’t need a seam allowance along the long side of the front because it’s all the same piece, you just have to fold it over…). Frickin’ Style Arc instructions, I hate them (more on that later…)
The main changes I wanted to make this time around was to forgo flat-felling the yoke seams and finish with cotton tape instead (just like the collar) and also to not bother french-seaming the front welt pocket bags and instead encase them in lining (I got the idea from the Pogonip Pullover).
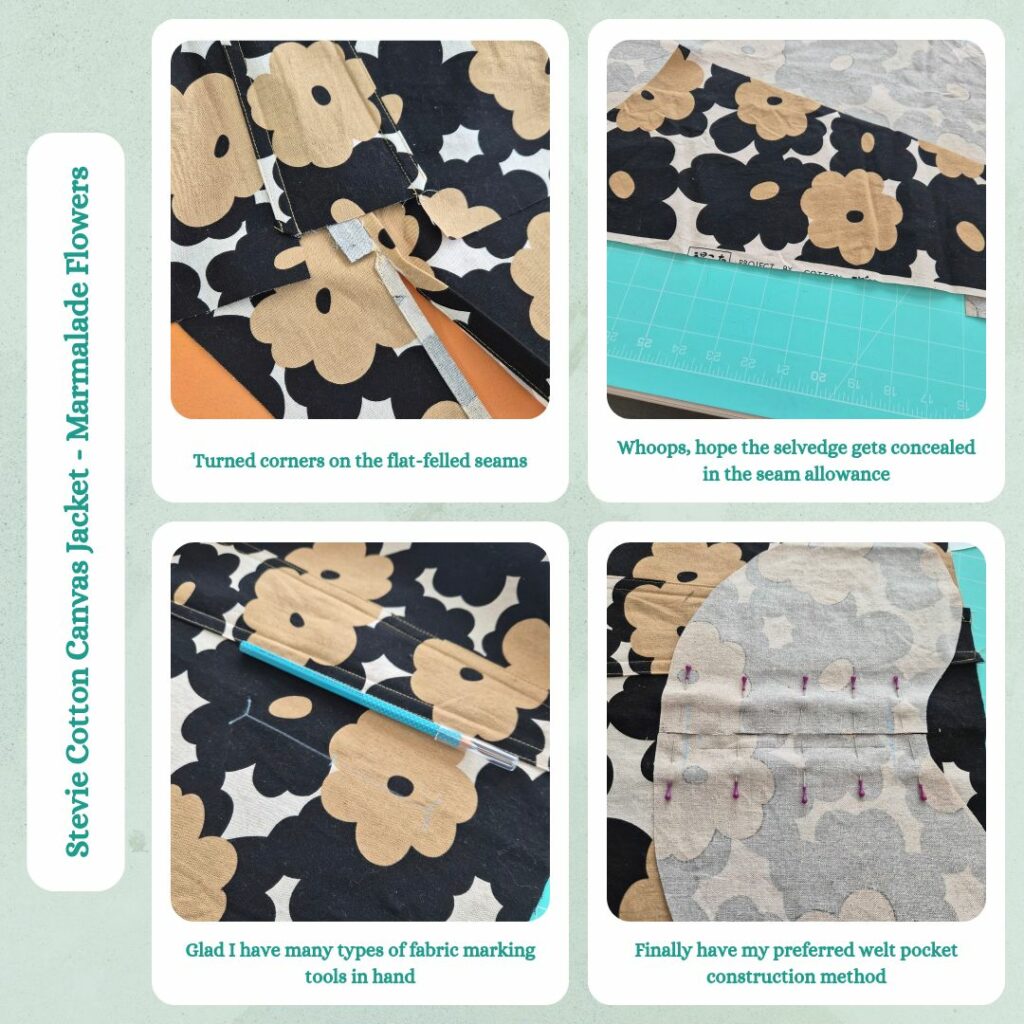
Since I had already made this twice already, I was familiar with the construction. I even got the flat-felled seam for the split sleeve right without having to refer to the Closet Core tutorial. The flat-fell seams in general were made a lot easier with the Steam-A-Seam tape. And I confess, up to now I haven’t done ‘real’ flat-fell seams because I didn’t encase the trimmed seam allowance in the folded one, but since I adjusted this pattern to have 2cm seam allowances, I figured it would be as good a time as ever to try and do it properly. The trick is getting the trimmed seam allowance the right width…too wide and it won’t fit inside the fold, too short and it’s really hard to keep it in the fold. I also made sure not to iron the Steam-A-Seam to see if it would help reduce gumming up of my needle. It did reduce the amount of gumming but didn’t eliminate it. But I think I can live this amount. And another thing I did was make sure to turn the edges of my flat-felled seams into a little triangle so that I wouldn’t have any raw edges showing when I joined other pieces to the flat-felled piece.
I remembered to use the thread turning out method for the collar points but since the fabric was quite stiff I ended up pulling it too jerkily and it created a hole instead. Oh well, I’m not that fussed haha, I just resewed it and turned it out with the point turner instead. So the corners are not equally defined but they probably would never be symmetrical anyway.
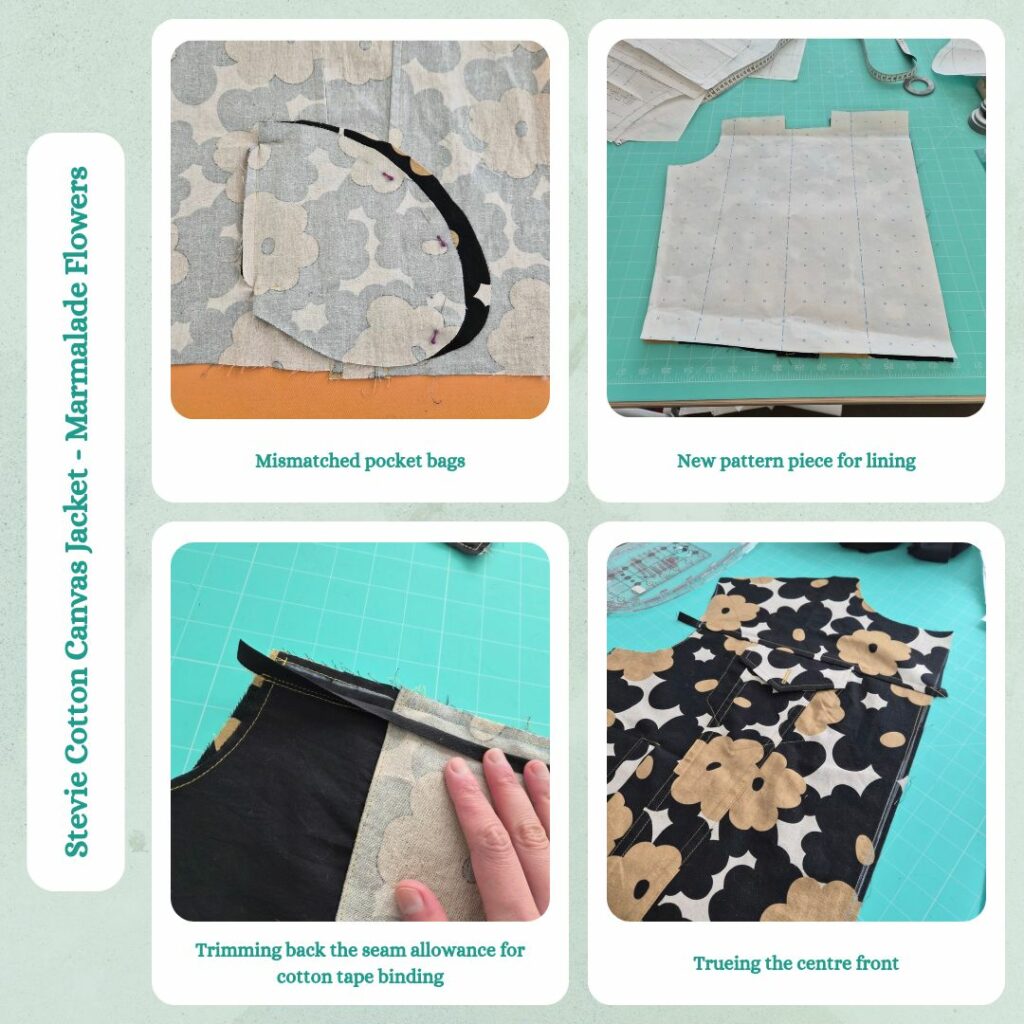
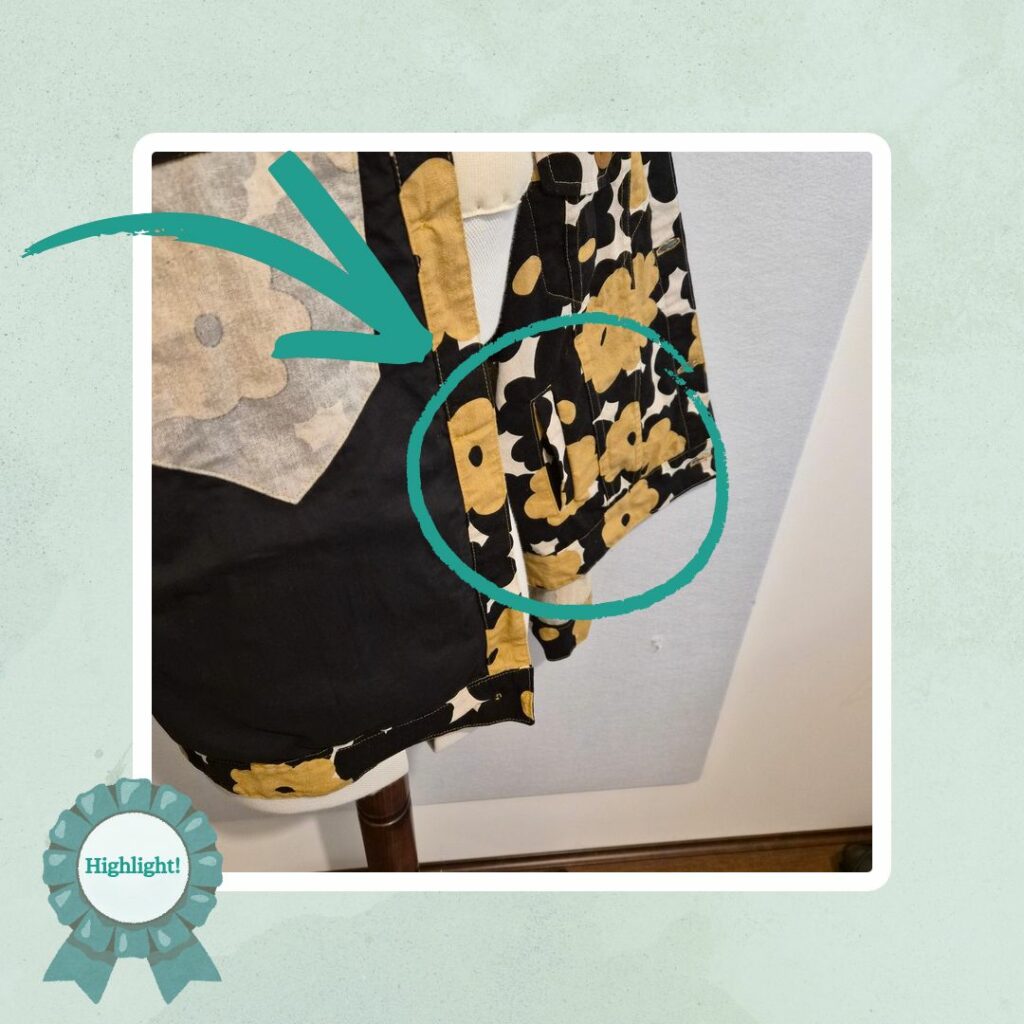
My issues came when I went to sew the welt pockets. I’ve done them for a couple of garments now but each pattern company has different instructions/pattern pieces. I think I understand the process now though, so thought up my own simplified methodology. But to be sure, I did refer to the Style Arc instructions. And I swear they tell you to put the welt piece facing the wrong way. I checked the diagram and the written instructions multiple times and even sewed it that way and was like this is totally wrong. So is it me or is it the instructions or is it the specific combination of me and Style Arc instructions lol. I really feel like I don’t have this issue with other pattern company instructions… Anyway, I do prefer sewing a box for my welt pockets and I used 1.5 stitch length the whole way around. I feel like the welt turned out decently, but it does feel a little offset from the pocket opening? Maybe I didn’t put the pocket bags close enough to the cut line? I also think I may have adjusted the pocket bearer pattern piece for when I was doing french-seamed welt pockets so I had to trim the edges of the pocket bag/bearer to match. Not a big deal having a slightly smaller pocket.
Then I had to make a new pattern piece for the lining by lining up all the front pieces and tracing. I machine basted the lining to the main piece but made sure to work from top down. But my cutting was quite accurate so everything luckily matched up. I then attached the top pockets and thought hard about if it was possible for me to enclose this behind the lining too but figured it probably would have been too fiddly. I also thought about how I probably could have omitted the pocket facing piece and used the lining instead, but then also discounted that because I feel like the lining would not have had enough structure for my liking. Also I forgot the top pockets had 2cm allowance so the topstitching doesn’t match up properly with the pocket flap but whatever haha.
For the yokes, I did a normal flat-felled seam on the back but the cotton tape method for the front. I trimmed the 2cm allowance to around 1cm and even more for the bulky pocket areas. I then topstitched from the front and surprisingly it managed to catch the tape the entire length haha. Then before attaching the front and back together, I straightened the centre front and clipped the overhanging parts of the sleeve curve. I’m not too surprised that I didn’t manage to line up all the pieces correct haha… Then it was flat-fell seams for both the shoulder and side seams. I realised too that I sew the first line of stitching with 2.4 length stitches but then change to 3.0 for the flat-fell part. You can’t really tell the difference so I might leave it as is, using 3.0 length for the main seam stitching doesn’t feel right but I also feel like it would be harder to sew through all the bulk of a flat-fell with 2.4 length stitches.
Then I attached the collar to the body and covered this seam with the cotton tape. The rest was pretty standard for a lot of the jackets I make. I was a bit apprehensive about flat-felling the sleeve seams but I looked up some guidance which I didn’t really need to use. I did use water soluble thread to handbaste it down first. I should have done the guide-stitchng at 6mm instead of 10mm since I wasn’t really able to fold it under and out of sight very well. But it turned out as good as I could hope for.
The waistband was also simple to put together since I had remembered the intent behind splitting it. And the cuffs were also standard construction-wise. I did think about if I should match the topstitching to the collar/pocket flaps/waistband tabs but thought it would be better to do it just offset from the edge, so that I wouldn’t have to do another row of stitching on the body/sleeve side to hold down the inner cuff/waistband seam allowance. Also 6mm offset topstitching on the waistband probably would have interfered with the waistband tabs…
For the buttonholes, this was the first time I’ve done them horizontal (the first time I did them vertical, the second time I used snap buttons). I had my test buttonhole so could measure the length. The first buttonhole was a bit of a sacrifice to figure out where I should position the buttonhole foot in relation to my markings, hopefully it won’t be noticeable. In hindsight maybe I should have done this first one at bottom since it would be less obvious, but then I would have to jump around positioning wise to do the rest of the buttonholes. Which doesn’t sound like a big deal but I kind of dislike having to move positions a lot, getting things under the buttonhole foot isn’t much fun lol.
I made sure to position the front buttons to the far right of the horizontal buttonhole and it sits quite nicely. For the sleeve cuffs I think the button was probably larger than the pattern called for, so just put it as close to the edge as possible. For the pocket flap and waistband tabs I positioned the button in the middle. And I was left with one spare button 🤔 Did I lose one or did I not math right LOL. I bought them so long ago I don’t remember. I will probably buy one more at some point and add it to the waistband so I can use the waistband tabs to make reduce the waistband length.
Reflections
I’m happy with how this turned out! Finally got the construction method to my satisfaction. There are definitely areas for improvement but it’s all perfectionist stuff like getting the collar points nice and pointy, less gap on the welt pockets and neater flat-felled seams on the sleeve to body seam.
I think this was the first time I sewed with cotton canvas and it’s a good weight for a light jacket! In hindsight maybe I could have used a pattern without panels since the fabric print is quite large and busy. But I think it still looks fine as is.
Things I learnt:
- My preferred way to construct welt pockets
- 6mm guide-stitching for flat-fell shoulder sleeve seams
Categories: Sewing

Leave a Reply