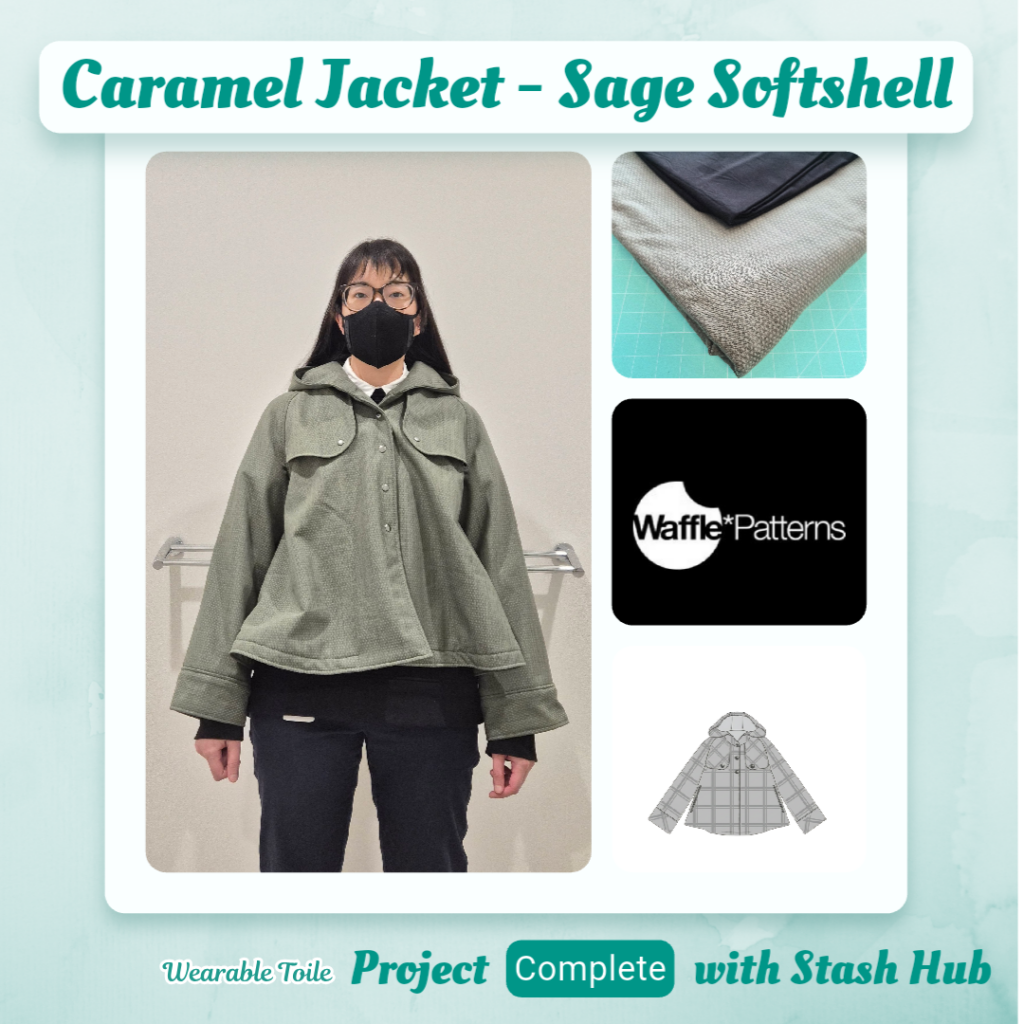
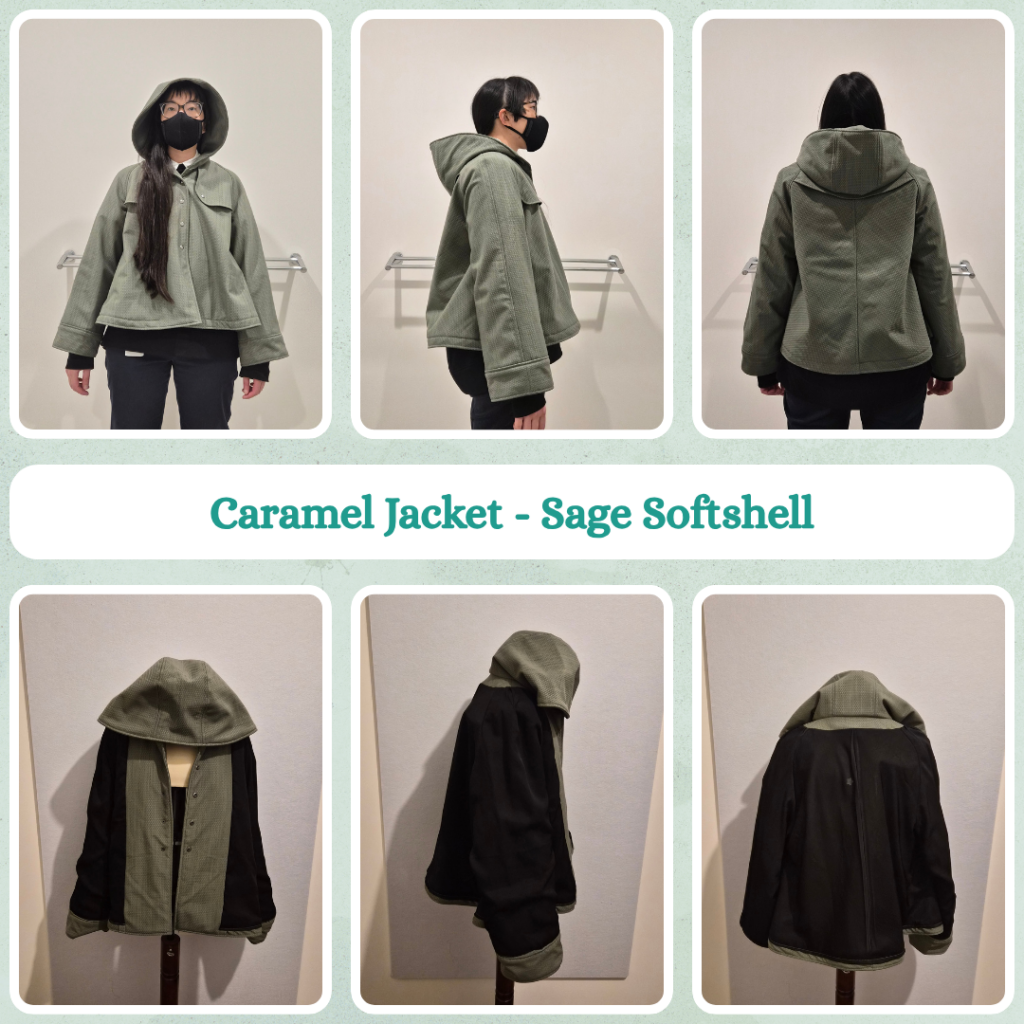
Planning and Design
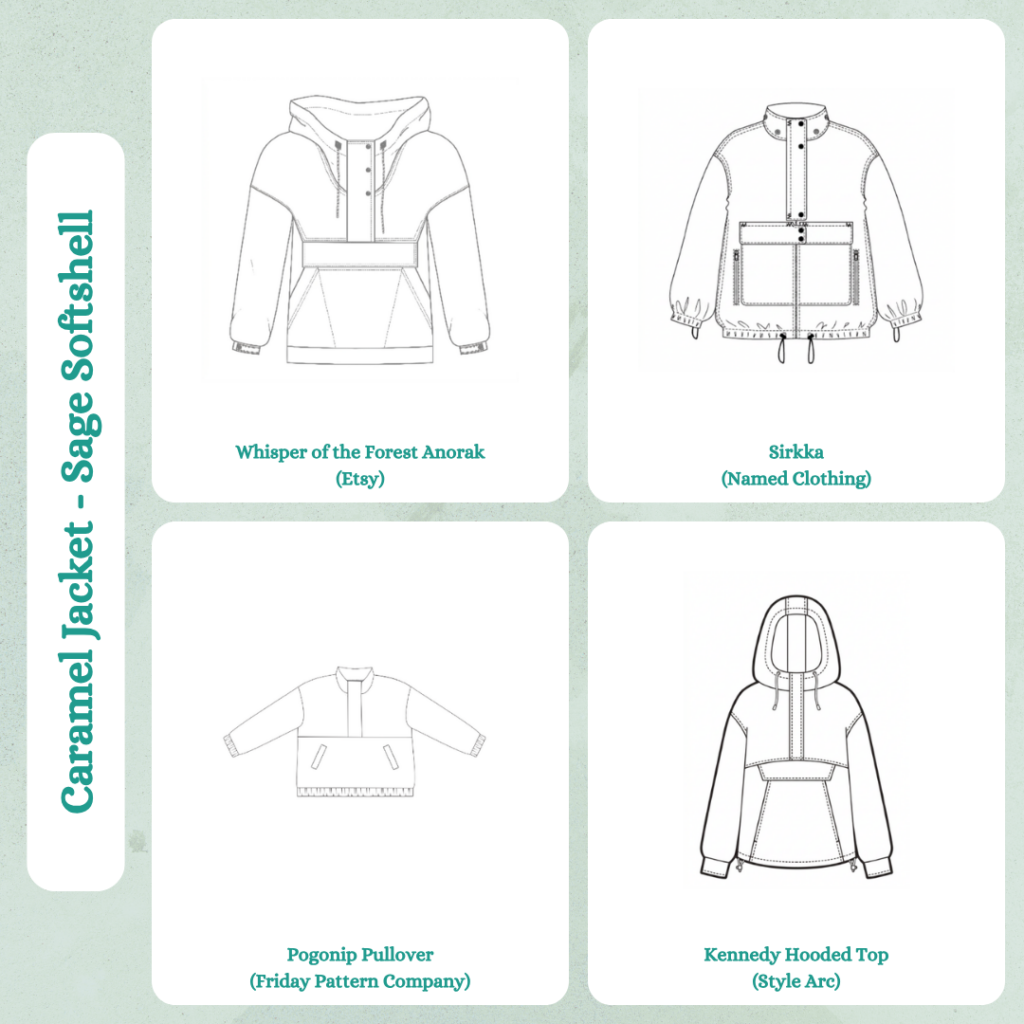
I originally bought this fabric to make a fancy version of the Barazushi Anorak from Splatoon 3. I bought a pattern off Etsy that seemed to match fairly well. But the more I thought about it, the more I thought I didn’t actually like the style LOL. So then I thought, why not go super fancy instead and bought the Sirkka pattern (so getting further away from the original design intent, but sticking with the rain jacket approach). But then I read the pattern instructions and I think it’s designed for thinner fabrics so abandoned that idea. And thought maybe a Pogonip would be good, since it’s a pretty cute pattern (that I know I like). But the fabric/pattern combo didn’t really mesh in my mind. Then I sort of came full circle when I came to the realisation that the Kennedy Hooded Top is pretty similar to the original design and I was planning to make another one of those at some point. But I ended up removing it from my wardrobe after I pretty much never wore the first one.
In the end I decided to make the Caramel Jacket since I wanted to make a wearable toile and I also wanted a rain jacket for this winter. I did um and ah about maybe making the Kelly Anorak instead, but I had bought lots of cool notions for the water resistant grey twill that I was planning to make the Kelly Anorak out of, none of which would stylistically mesh with this fabric. Plus I had bought the black lining fabric. I’m glad that I stuck with the Caramel Jacket in the end. It was a long winding (mental) journey, but the end result was meant to be 😝
Materials
- Pattern
- Caramel Jacket (Waffle Patterns)
- Fabric
- Recycled Fleeceback Softshell Deadstock – Sage Green (Core Fabrics)
- Viscose Satin Twill – Black (Fabric Box)
- Buttons
- Metal Fashion Snap Button (Size 20) – Gunmetal (Snaps Australia)
- Thread
- Rasant col. X0651
- Rasant col. 4000
- HTV
- (probably) Thermoflex – Black
Sustainability Check
🤏 Rasant is OEKO-TEX but not biodegradable
🤏 Buttons are metal, but probably not recyclable
🤏 Soft shell is not biodegradable but is deadstock and made from recycled Repreve polyester fibres
🤏 Viscose is derived from natural materials but isn’t necessarily biodegradable
🤏 HTV are saved scraps (reuse), but I’m pretty sure it’s Thermoflex which is polyurethane and not sustainable
Construction
Preparation
The size range for the pattern was very small and I ended up using the largest one. I obviously bought this variation because it matched my measurements, but I did wonder if I actually need to go up a size if I want something to go over layers (spoiler: it wasn’t an issue).
The seam allowances were 1/2″ so I needed to adjust to 1.5cm. But I got very confused by some of the markings on the pattern – turns out the lining pieces for this jacket have wearing ease/additional pleats. I had printed out the instructions so managed to figure out what it was all about and not end up tracing the wrong parts.
I looked up what needle to use with soft shell and the consensus seemed to be a Microtex needle, which was convenient since I was planning to use that for the lining too. And I also installed the walking foot to help with both fabrics.
Reading the instructions also made it clear that this jacket doesn’t have an unlined option. I think that might be the Tosti Jacket (also by Waffle Patterns) and I was getting them confused. But that does mean I have to rethink the other version I was planning to make. And I’m thinking I might get the same lining as this one because it’s pretty nice to work with.
I didn’t interface anything because this was soft shell. I also traced out the welt pocket pieces but didn’t install these…also because this is soft shell. The plan is to have this as a rain jacket so hopefully pockets aren’t really necessary.
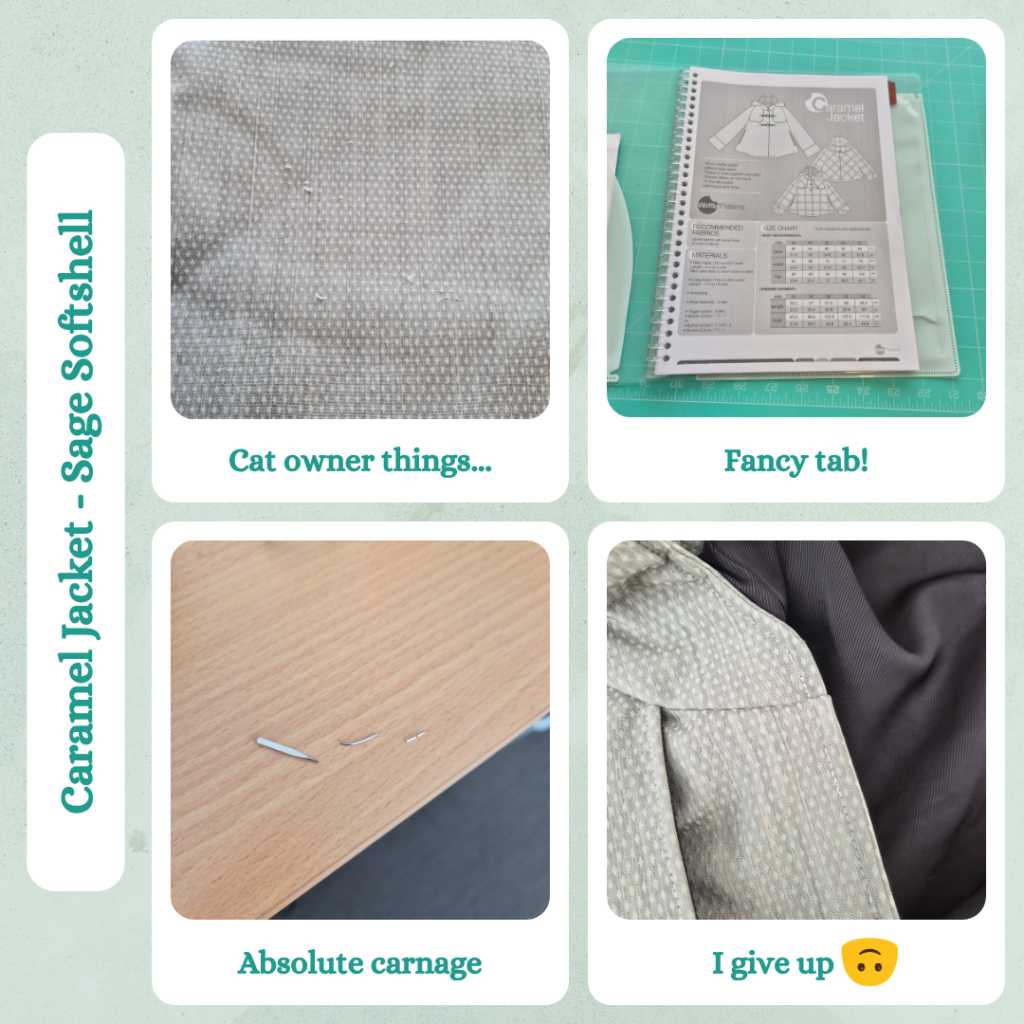
Side note, I left the fabric on my ironing board when I was still figuring out whether I wanted to do the Caramel or Kelly and at some point a cat (probably Button) got to it 😅 So I had to work around this part when I cut the fabric pieces…which almost could have been an issue later on 😬
Sewing
The instructions are quite detailed although sometimes the English was a bit confusing. But the diagrams really help so the wording isn’t really that big a deal. I managed to put together the lining fine despite my anxiety about the wearing ease pleats. I think because this lining presses pretty well it wasn’t too fiddly.
I had to skip the facing part because it turns out I forgot to trace out the front facing pieces and therefore also hadn’t cut it out of the fabric. Luckily I had enough left lengthwise… I blame being really frazzled in the week leading up to sewing this as I was stressing out about an upcoming medical appointment 😣 Usually I would be more thorough in checking the pattern pieces and markings.
I got a bit confused with the yoke pieces (specifically the front ones) as I wasn’t too sure where to stop on the curve. I think it would probably be fine to continue the stitching to the edge of the fabric, it would make the topstitching part a bit easier. The pinking shears came in handy for clipping the curves on this.
Also I really don’t love using clips instead of pins, but can’t be helped with this type of fabric.
The sleeves were the next part and were pretty standard except that I think it would probably help next time if I marked which was front and back. I realised I usually rely on the double notch to figure out which piece is the back, but this has screwed me over before (Style Arc Clayton…) and this pattern doesn’t use double notches so I had to keep referring back to the diagrams in the instructions, which was a bit tricky. I also topstitched the seam allowance down for anything that the instructions said to press open, since that wasn’t an option with this fabric.
For the cuff, I did some guide stitching for the inner seam allowance and tested on scrap fabric and found that I could use a long basting stitch to mark the centre fold and then remove the stitches later without any noticeable marks from the needle (I didn’t end up doing this because I kept accidentally snagging the jacquard with my unpicker so decided it wasn’t worth the accidental damage to the fabric).
For the hood next time I need to mark which one is the inner/outer because that also started getting confusing. I do like that they are separate pieces because the inner hood is smaller. It’s so logical I feel silly for never thinking of it before LOL. This took a bit longer than anticipated because I topstitched all the seam allowances here down as well. I probably would have done this regardless of the fabric, but not being able to press the curved parts made a bigger difference than expected, so I just went very slowly and carefully in these sections.
For the body the back seam was simple and I did a basting stitch to mark the hem line. And basted the yoke pieces on too. Then it was time to add the sleeves. The instructions say to double stitch along the sleeve seam but I didn’t do this and instead topstitched the seam allowances towards the sleeve. Then I finally had enough space on my work table to cut the front facing pieces. I was a bit confused with the little lower side edges that stuck out, but I think this is because the scale of the diagram in the instructions didn’t match the piece at all haha. When I attached the facing to the bodice, I followed the instructions and stopped 1.5cm from the top edge, but I think I could probably stitch all the way to the edge, it would make the next step easier.
Inserting the hood was really cool. I like this method. Unfortunately I couldn’t clip the corners of the doubled parts of the seam allowance like the suggestion (it’s a good idea though, I need to try to make this part of my usual methodology) because I had topstitched most of the seam allowances down. So I knew I was going to be working with a lot of bulk and switched my foot to the normal foot so I could use the hump jumper.
I didn’t realise when I bought the pattern, but the hem construction relies on a lot of hand stitching which I wasn’t very enthused about, particular for this fabric. But I think I stumbled on a good approach when I tackled the sleeve lining and cuffs. I had basting stitched the seam allowance to the cuff since I couldn’t press it. And because it was held securely, I ended up whip stitching the lining edge to the seam allowance edge. Then I removed the basting stitching and sewed through all layers at 1.5cm again. Then I got wonder tape and tried to use this to hold the folded under seam allowance (following the guide stitching) down. But I had to wrangle the cuff piece a bit because I didn’t have the piece folded quite straight. The wonder tape did good enough to hold everything together while I topstitched from the outside. But the cuff fold didn’t like staying so I topstitched this down too and it looked pretty good! So the plan then was to topstitch the whole edge of the jacket, including the hem. Then use wonder tape to position the lining and topstitching that down too, but from the lining side and making sure to be equally offset from the first row of topstitching, and also following the loose facing edge. Hoping that this will remove any need to hand sew at all!
I ran into troubles topstitching along the jacket edges. Firstly the microtex needle couldn’t handle all the layers lol. This is the first time I’ve had a needle break into more than 2 pieces 😶 So I switched to a Universal 90 needle which worked fine for the first bodice/hood seam. I think because I had clipped it a bit (it didn’t feel as thick as the other side). I could not get the stitches to catch on the other side. I could see the bobbin thread going around and around and then getting all jumbled up. So I just gave up 🙃 The topstitching either side holds the main and facing/inner hood in place so really it’s just decorative.
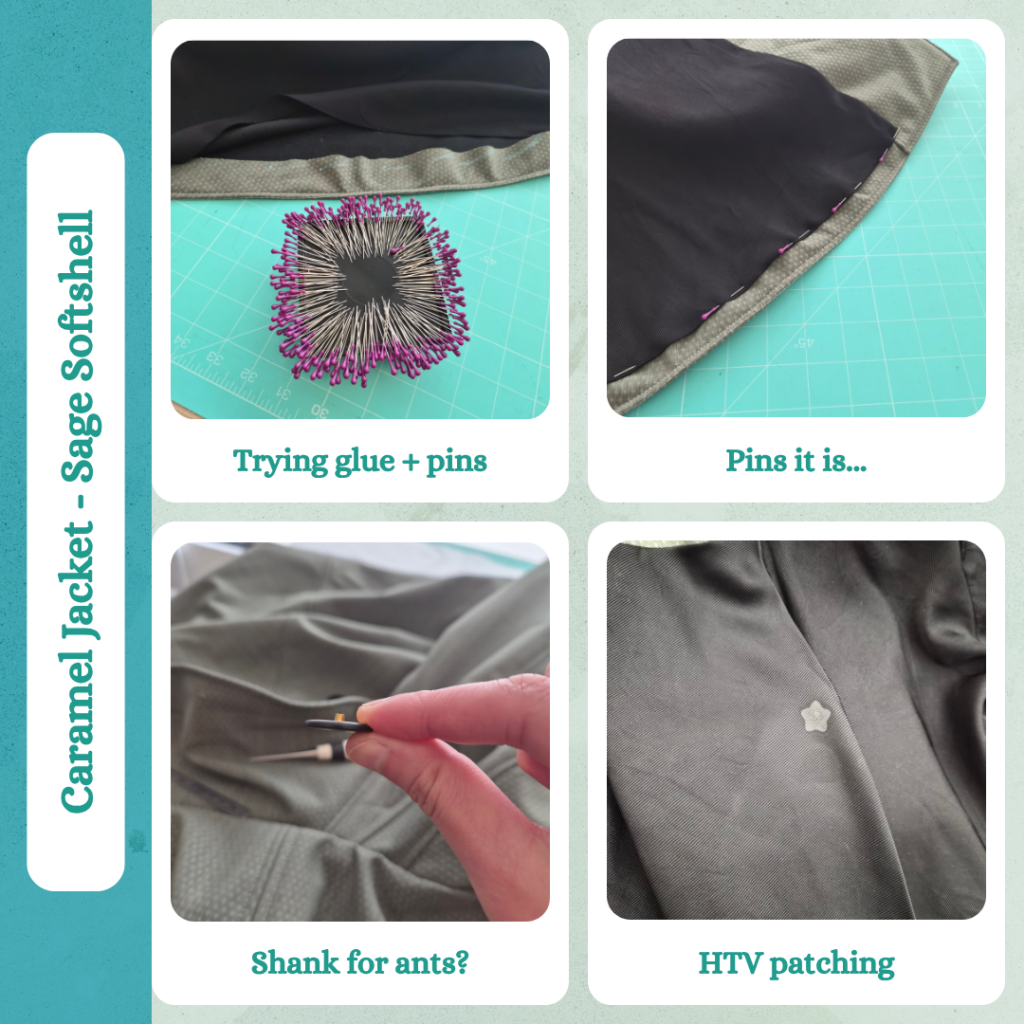
My theory on how to machine sew the lining worked ok. The hem didn’t sit very flat (unsurprisingly since it’s a curve, maybe for next time I should slightly gather the edge) and wonder tape, Steam-A-Seam and fabric glue didn’t really hold the lining in place. So I ended up pinning, but making sure to only go through the folded up hem fabric. Then I sewed 2.5cm from the edge, because I really didn’t want to miss any of the lining and and have to redo it, even if this meant it didn’t look that neat. And yeah, very wavy looking on the inside. But at least the outside seems ok haha. Basically it’s good enough.
Buttons
So my original plan was to use the Black Prym Anorak snaps that I bought for a reversible cardigan idea that I’ll probably still do, but am not hung up on using these buttons for. But if I wanted to use snaps, I really should have installed the yoke buttons before attaching the lining. So I grabbed my big button box and tadah! There were 6 black buttons of a suitable size right there. So I decided to use these. And then changed my mind again when I had issues topstitching the bodice/hood seam. If I can’t topstitch there’s no way I’ll be able to auto-buttonhole-foot it. So that meant back to the snap button idea. I had resigned myself to just punching straight through all the layers of fabric, softshell and lining. But when I tried to do this on the back yoke button, I realised just how hard it would be to line up the lining body and yoke… But I had already poked a hole in my lining… And then I realised two more things: one the shank on the Prym button is way too short to go through all the layers anyway and two I hate using hammers to install hardware (well I kinda already knew this, but it really drove the point home). So another change of plans, lets use the new large snap buttons I bought fairly recently. Except…one of the dies I received seemed a bit off, the piece wouldn’t stay in place??? I tested on all four button colours I bought and only the gold would fit and I didn’t really want to use gold… I was getting really discouraged at this point. But I wanted to finish the jacket. So I just went with my trusty small snap buttons cos I’ve used these lots of times and know it works. I decided to just make the yoke buttons decorative (as they are intended anyway) which meant just using the top of the button snap (hopefully I’ll remember that I have mismatched number of pieces…) and then hand stitching the yokes down so they wouldn’t flap around. Then I did the front buttons and did lots of measuring to make sure everything matched up. And amazingly the hem was nice and flush 😭 Thank god, finally a win of sorts. During the process of making sure everything matched up I tried on the jacket a lot of times and honestly, I do not think I’ll ever button up the hood button, it’s way too constricting. So I just omitted that one…in which case I could have bloody used the non-snap buttons 😣
So the last thing I needed to do was patch up my hole in the lining. I had a couple of ideas. First put a label on it since I sometimes get free labels with my pattern printing orders. But the position of the hole wasn’t quite centered and the labels were the type that you’re meant to install on a hem. So scrap that. Second was to hand embroider over it. But I didn’t have any black DMC embroidery cotton and the Hemmingworth machine embroidery thread is, surprise surprise, a pain in the ass to hand sew with. So then I thought about using an iron-on patch, but I only have Cinnamoroll ones. Which would stand out a bit too much, I don’t want to draw attention to it lol. So I looked up what designs I could buy. And from a quick search it didn’t seem like there were many options and also I had no idea on size and I suspect that are very large patches for sewing onto bags and jackets and stuff. So last idea, heat transfer vinyl to ‘glue’ the fibres back together. This was actually my first thought but I immediately dismissed it because usually they say HTV needs 150 degrees and both of the fabrics were not really very heat tolerant. But I was running out of options so decided to give it a test. I put the iron heat setting to in between wool and cotton and used my Teflon sheet and counted to 20 lol. And it didn’t completely destroy the viscose lining! But then I thought, I better test that it actually works on holes so punched a hole in my test piece and redid the process and hooray! It worked! So I applied my little star (this design from Kirby gets a lot of use lol) to the hole in the lining and while you can see the markings from the iron, at least it’s now patched up.
Reflections
This was a borderline frustrating make. Part of it probably comes from lack of prep due to me stressing over my upcoming medical appointment. Another part is from the various ‘new’ things I had to tackle, even if the lining pleats thing ended up being nothing big. But I think having to be very careful to not forget that I can’t iron or pin this project was actually pretty mentally draining? Especially since my workarounds ended up causing me issues later down the track with my struggles with too bulky seams. The last part was I was kind of rushing the project. I don’t really know why, maybe I was feeling like I hadn’t really accomplished much in August, maybe because I knew it was going to pour down in the coming week and wanted a raincoat, maybe because I have so many projects I want to tackle so I can wear them while it’s still cold 😅
I also think I might need to size up one in order to have a comfortable collar, but this means completely rebuying the pattern? Which I may do, I think the silhouette is very cute and the hood sits amazingly nicely, both up and down. I also really want to do a version with checks so I get that on-the-point look on the back.
I still haven’t had a chance to wear it, but enough time has passed that I don’t really recall the frustration or sub-par parts and just think it’s a cute jacket 🤣 I should probably add the collar button because thinking about it, if it’s raining I don’t think I’ll be as fussed about neck constriction as I will be about getting a wet neck LOL.
Things I learnt:
- Using pleats to create wearing ease for linings
- Sewing with soft shell
- Making the inner hood smaller so it fits nicely
- A new way to attach a lined hood to a lined bodice
- Clipping seam allowances on a 45 degree angle to reduce bulk in joining seams
- The strong snaps I bought are larger than the spring snaps but don’t look as nice (you can see the crimping)
Categories: Sewing

Leave a Reply