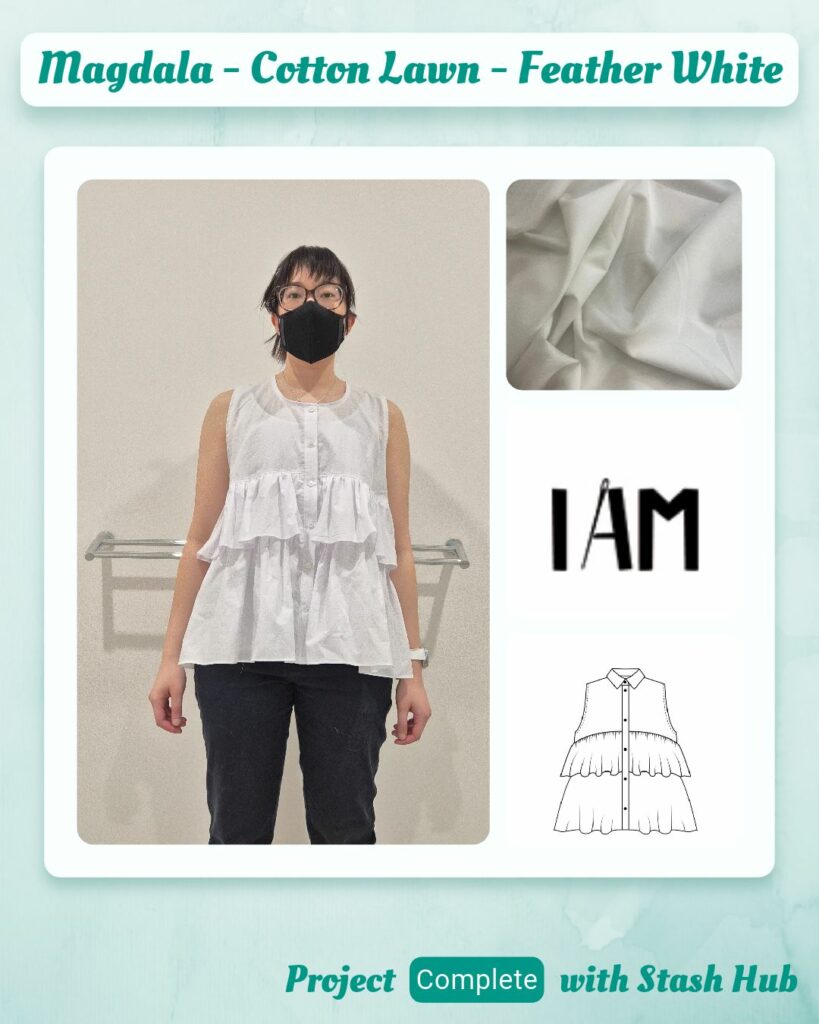
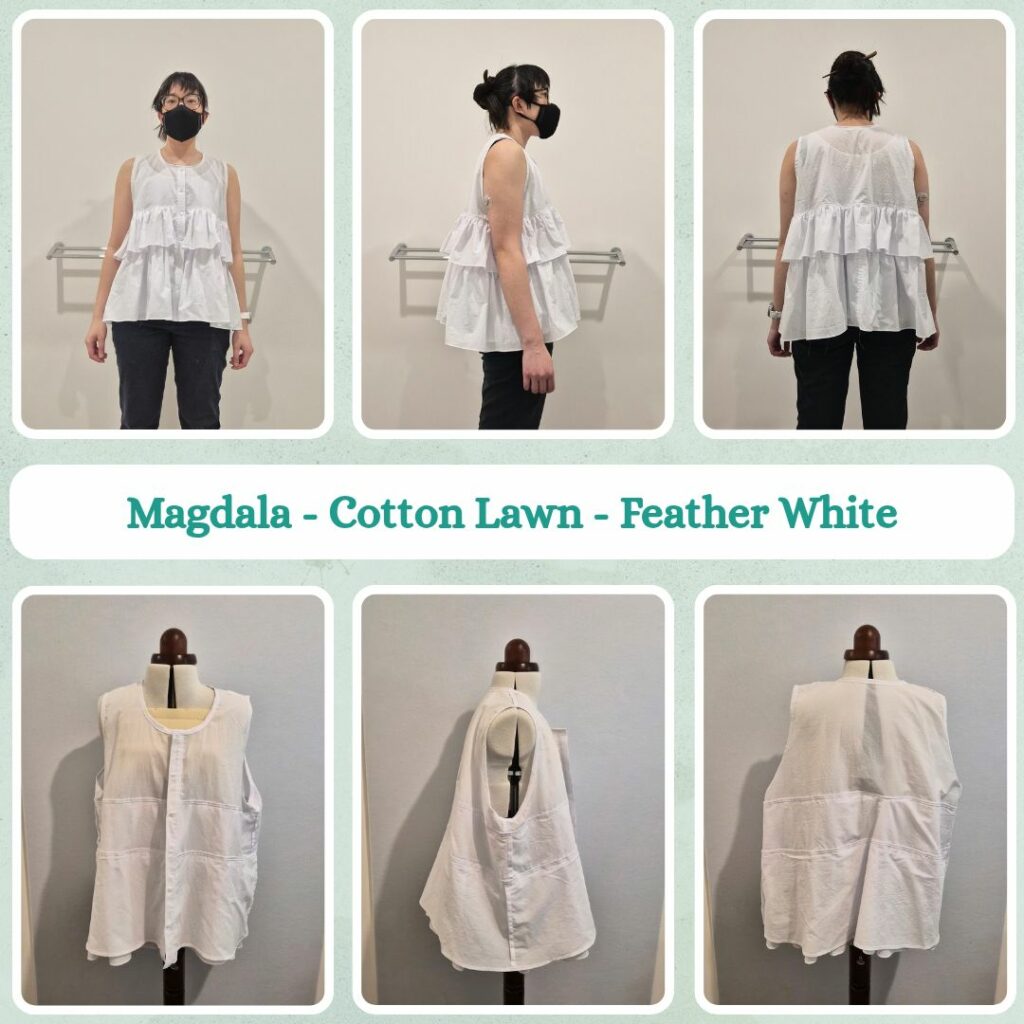
Planning and Design
This was a project that ballooned out 🤣 I was originally only planning to make the Willis, using the salvaged fabric from the Cinnamoroll Relaxed Fit Trooper Shirt I made for my husband. But of course nothing went to plan…
Materials
- Pattern
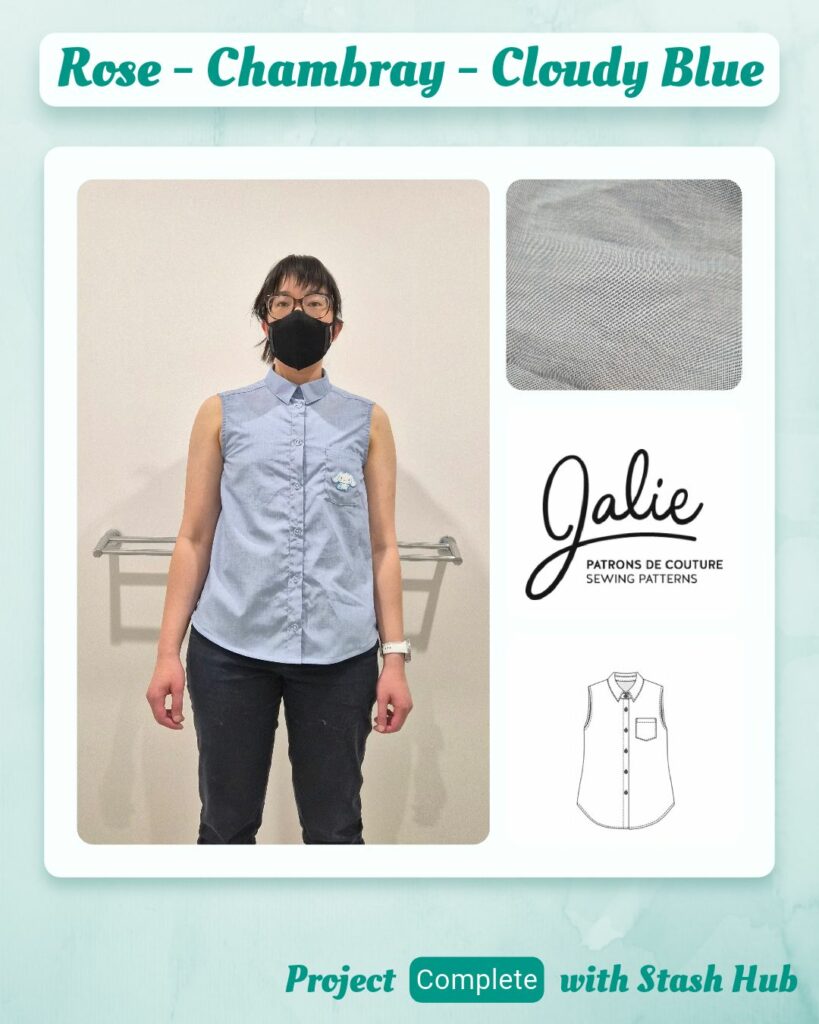
- Rose (Jalie)
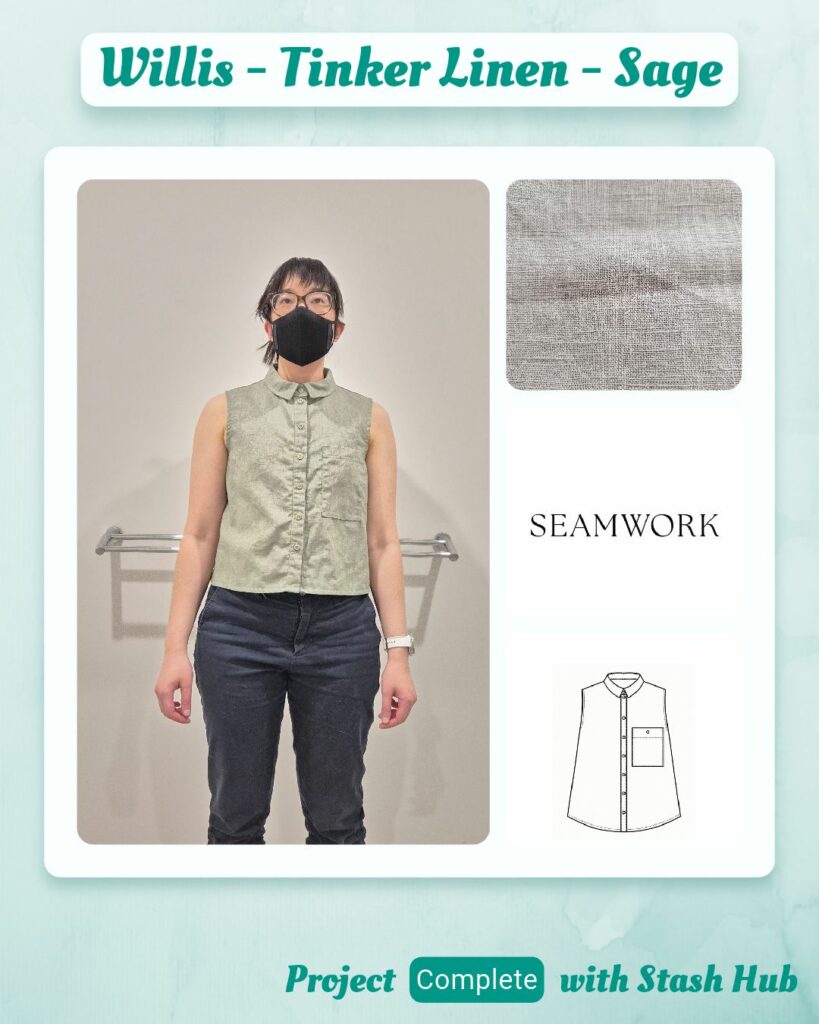
- Willis (Seamwork)
- Magdala (I AM Patterns)
- Fabric
- Light Cotton Blend Chambray – Cloudy Blue (Remnant Warehouse)
- Tinker Linen – Sage (Miss Maude)
- Cotton Lawn – Feather White (The Makers Society)
- Buttons
- UV Colour Change 11mm Plastic Button (Japan)
- meetMilk Corozo Button – Soft Mint (Pattern Scissors Frock)
- Hemline Embossed Edge 2-Hole 11mm Button – White (Spotlight)
- Thread
- Rasant cols. X0651, X2000
- Madeira Aerolock Overlocker Thread – Super White
- SoftLoc™ Tex 35 Wooly Poly Thread – White
- Notions
- Heat n Bond Fusible Interfacing – Light
Sustainability Check
👍 Tinker Linen is 100% linen so biodegradable as well as being scraps from a previous project
👍 Cotton Lawn is 100% cotton so biodegradable as well as being deadstock
👍 Corozo buttons are biodegradable.
🤏 Rasant is OEKO-TEX but not biodegradable
🤏 Chambray is a blend but it’s repurposed from a previous garment
👎 Overlocker threads are 100% Polyester
👎 UV Change and Hemline buttons are plastic
Construction
Willis – Part 1
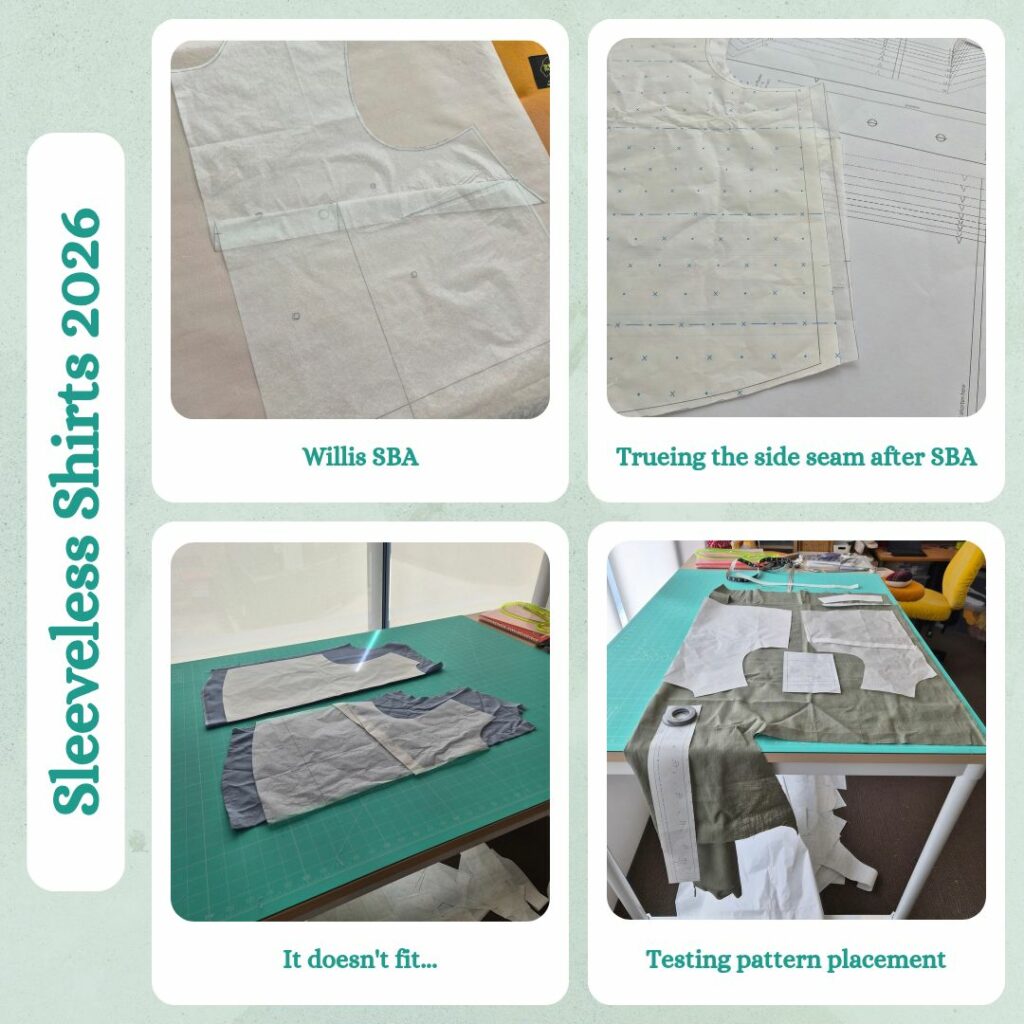
I chose size 10 based on my hip measurement. I used pattern trace to remove dart and assumed the pattern used 1cm seam allowances based on the Hansie but luckily I checked and it actually followed my preference of 1.5cm except for enclosed seams which uses 1cm. The pattern trace was good for pressing out the dart as I could see the grainline marking and make sure everything still sat straight.
Then I grabbed out the Trooper Shirt deconstructed pieces and was worried that I would have to draft a yoke because the Trooper Shirt has one but Willis doesn’t. It fit perfectly though, no issues there. The issue came from the front piece. I didn’t realise the design was so wide at the hips. I was wondering if I could fit the pieces on using the existing placket, but that wouldn’t work because the front piece for the Willis doesn’t include the placket, that’s a separate piece. So I realised I needed to admit defeat, but still wanted to try and make the shirt so recalled I had some leftover shirting fabric from my Roxy Shirt. While unearthing it, I also found the remnants of my Tinker Linen from my Ethel Top failure (the fabric is too weighty for the design) and wondered if there would be enough. And yes there was! But because the fabric is so thick, I wouldn’t want to use the fabric for the bias binding (which I want to do for the hem too). Not that I would have enough fabric to cut long strips on the bias anyway. So looked up if it was easy to buy sage coloured pre-made bias tape. And Jackstock pulled through. But this changed my plans because if I have to wait for bias binding to arrive, I might as well also test out the collar attachment method from the Modern Makers Master Class that I’m only partway through watching…
So instead I decided to trace out the Rose pattern and see if I could use this pattern instead.
Rose Shirt – Part 1
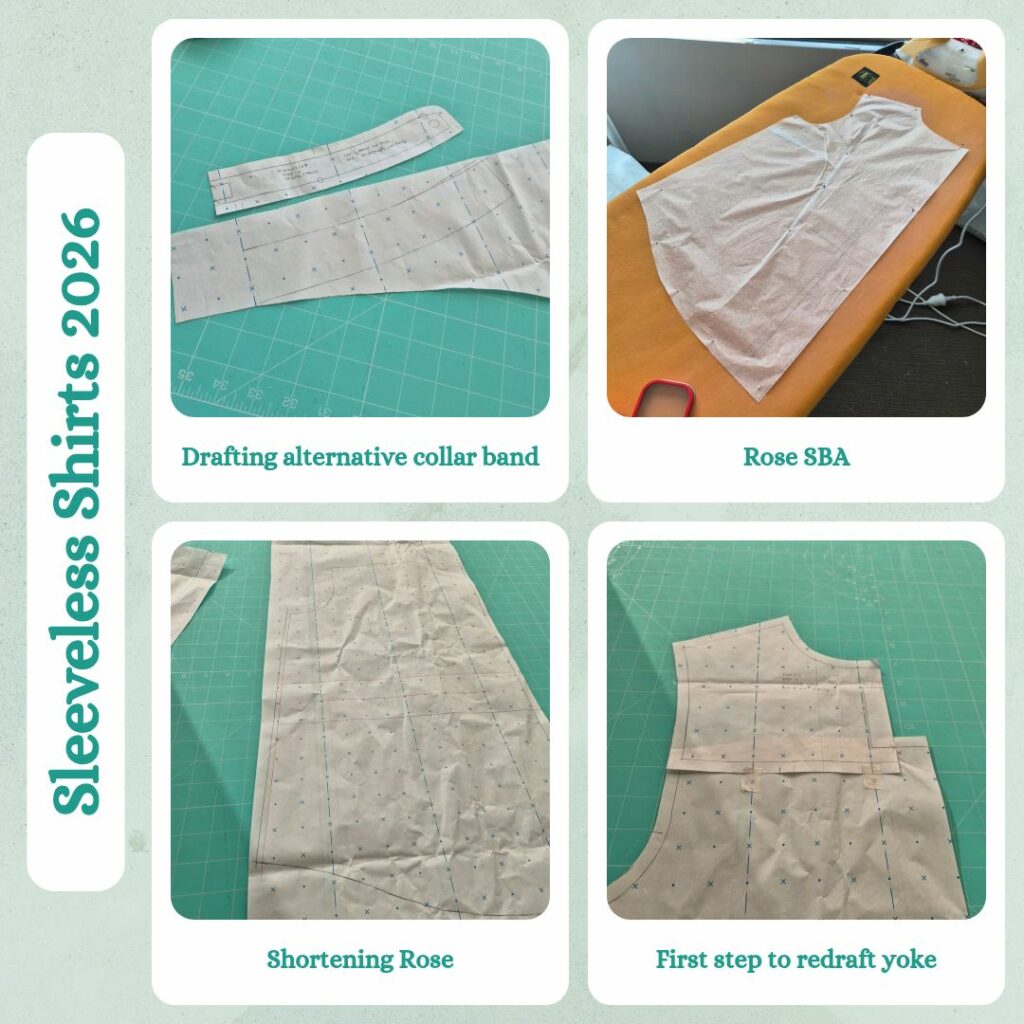
I was actually thinking of using the Le Top pattern for the salvaged Trooper Shirt since it has a centre front seam so the front pieces being separate wouldn’t be an issue, but that pattern is also quite wide at the hips and I also realised that I wouldn’t be able to use the fancy buttons that my husband bought that I had paired with this fabric. Hence looking into the Rose Shirt instead. I did check the instructions to see how the placket was constructed and this one does include it in the front piece!
The instructions said to choose the size based on my full bust measurement. But I know that this doesn’t work out for the waist and hip measurements, so went with my hip measurements which puts me at a size V. It also said to length/shorten if my torso measurement doesn’t match my size but the torso measurement was 157cm so I think they actually mean height? I’m about 3cm off that so I guess I’ll short it 3 cm. Seam allowances are also 1cm so I’ll change to 1.5cm….on the side seam only 🤣 I had even come with a new method for when I have to increase/decrease seam allowances – use a red Frixion pen as the original line then measure the seam allowance and seam lines from this. Previously all the lines of lead pencil got confusing and then I had to try and erase the original without erasing the remarkings and it was just kind of annoying. So now if I need to I can iron the paper to get rid of the Frixion 🤓
I traced the bodice onto the pattern trace and went to press out the dart but maybe because this is designed for a smaller cup size it didn’t fold out neatly like the Willis did. So instead I pressed out parts of it, then pinned those in place then press out more. Then in the end used washi tape to hold all the pressed out parts in place. I also removed 3cm but holding it up to my body it still seemed long, which is by design according to the model photos. But I know long shirts don’t look good on me so I removed an extra 3cm. It started looking better, and I recalled when I did the Chambray Shirt Investigation I was using 55cm as the body length, and I measured my adjusted bodice piece and it was 62cm, but because I could tell from my two adjustments I’d already done that any extra removal would just be removing from the hemline I left as is. Good thing I did because I measured from the wrong spot (highest part of the pattern piece) but my 55cm measurement was actually from centre front. And luckily my 6cm removal made it 57cm, which after removing seam/hem allowances is 55cm 😬
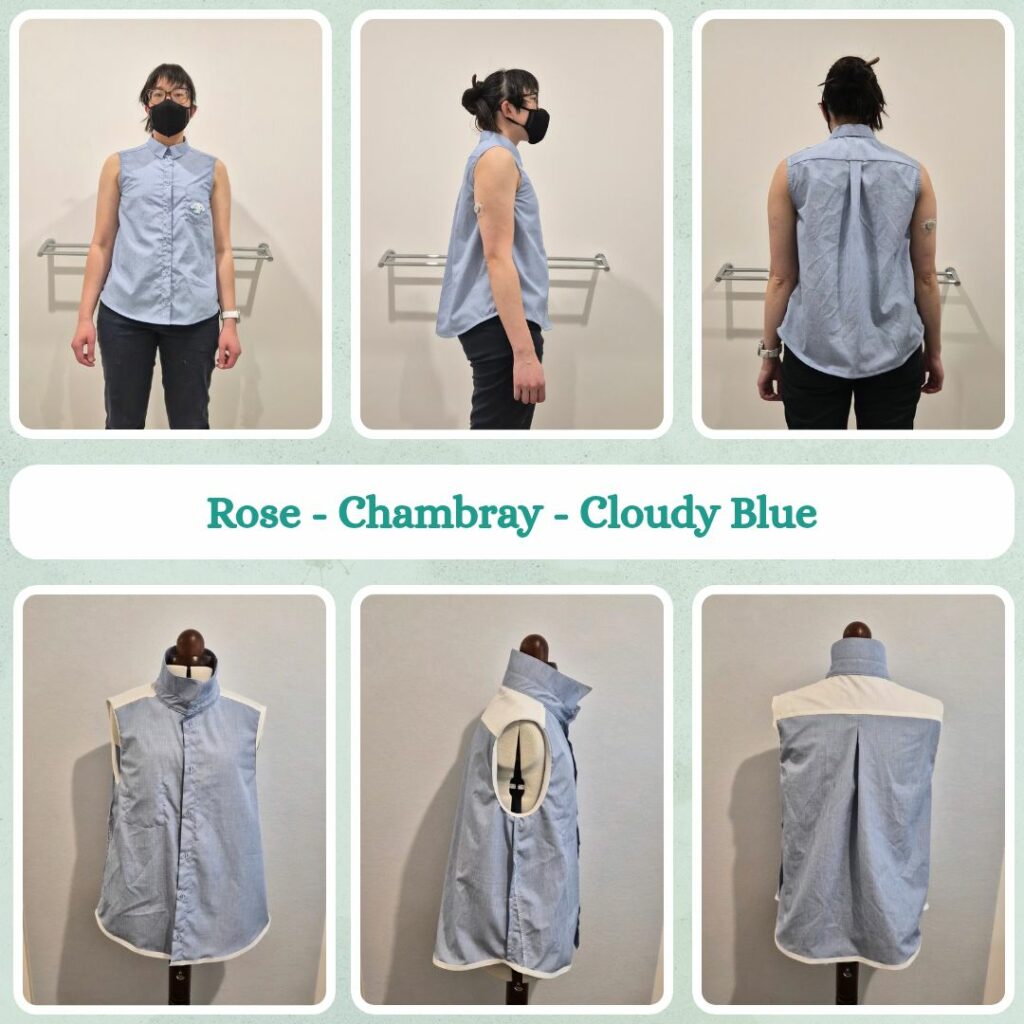
Then I overlaid this on the salvaged Trooper Shirt front piece, match the fold line to the edge of the placket, and it allllmost fit. But I can work with this by adding extra to the sides 🙂 Then I traced the back piece, also removing 6cm and this also fit on the corresponding Trooper Shirt piece. So far so good. But then I had a thought, does the yoke piece fit? Annnnd nope it didn’t. But! I can still work with this! So I attached the yoke to the back pattern piece (amazingly the thick lines matched up) and then traced the back with an extended armhole and then raised the top of the back pattern piece by 2.5cm. Then did the same for the yoke but removed 2.5cm.
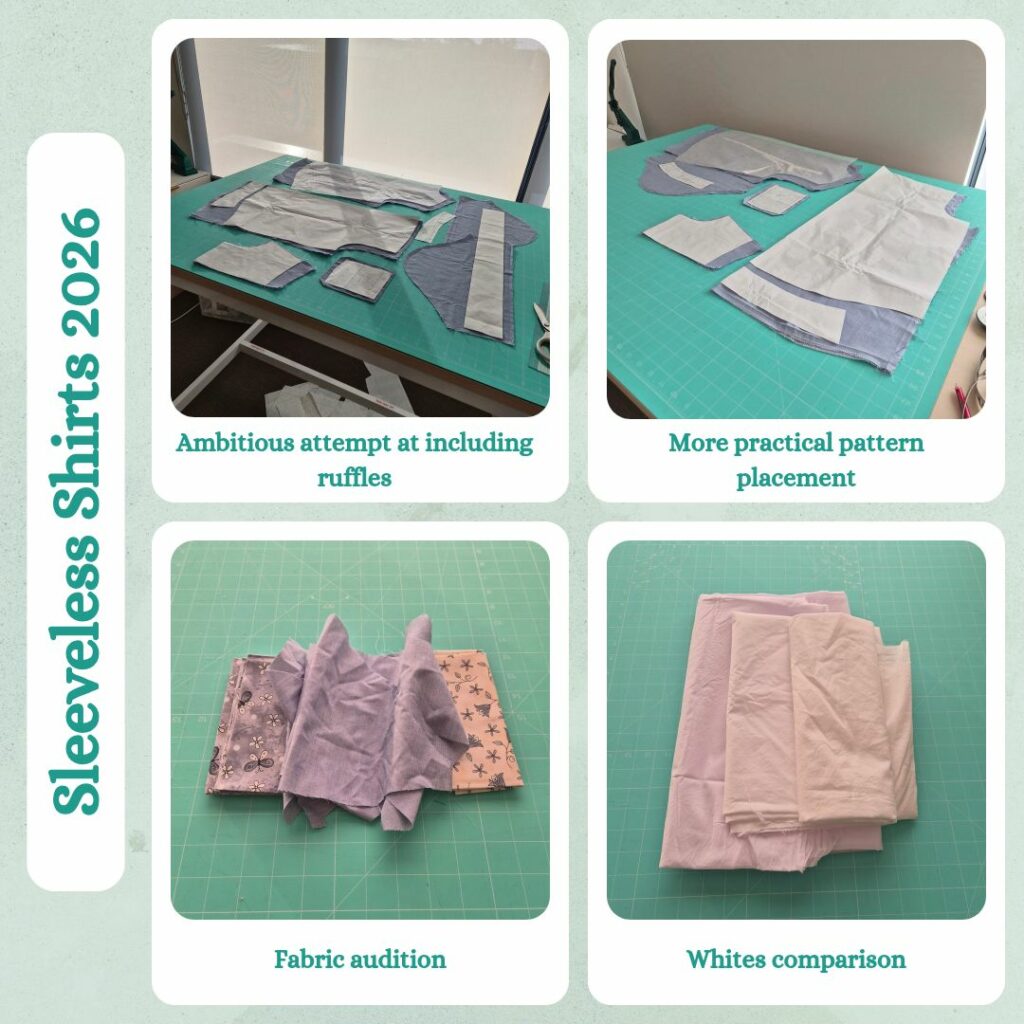
As I was tracing out all the other pieces I had a thought that maybe I could hack the Trooper Shirt sleeve pieces into ruffles for the armhole. So I laid out all my pieces to see if it would work and it would exceeept, I probably wouldn’t have enough for the collar and stand. And then I started thinking about maybe using a contrast fabric for the stand and under collar. Or I could even use a contrast colour for the ruffles and then also make the tie ribbon! But I reined myself in…the point here isn’t to spend more money in order to complete this make. So I rearranged the pieces and I’ll probably still need to use another fabric for some of the small parts (inner collar stand, under collar, inner yoke) but I can just use white voile that I already have in my stash. But now I’m definitely planning a version with ruffles and a tie ribbon….
I’ll also use pre-made bias binding for this one since I don’t want to have to cut my stash voile on the bias (it makes awkward sized remnants) and I’m buying some for the Willis anyway. Since the blue is an interesting shade (almost slightly purple) it will be hard to get matching bias and since I’m using white voile anyway I’ll just get white binding. Although I ended up rethinking the voile and wondered if I would have any fun scraps in my scrap collection to use and when I looked in the blue box I found scraps of the main shirt fabric LOL. So I might actually have enough I don’t need to use another fabric. But just in case I also auditioned some other fabric from the Butterfly Garden fat eighths pack I bought awhile back and the colour match is actually pretty good.
Magdala Part 1
I fell in love with the white Magdala in the model photos so was very keen to see if I could use my remnant white shirting for this project. When I pulled it out of the storage box though, I remembered that there was a stain that I wasn’t able to remove, which means about 20cm of it isn’t really useable. I even doubled the fabric over to see if a double layer would obscure the stain but you can still see it 🙁
When I rolled out the A0 pattern page, I was surprised that there was both bodice pieces and ruffle pieces. And then when I read the instructions, it recommended poplin (which I’m pretty sure the shirting is) for the bodice and cotton voile for the ruffles. Measuring the height of the bodice pieces (70cm) and then how much fabric I had if I removed the section with the stain (also 70cm), I was encouraged a bit haha. The stain isn’t across the full width of that part of the fabric so I could use the adjacent pieces for the stand and collar. So now it’s just is my cotton voile the same (enough) shade of white…
I was really hopeful this would work out because it seemed like the perfect project to test doing gathers with the Gloria attachment foot since it’s not in the round. Alas it was not to be…the voile was a bit more yellow, noticeably so. But! When I was getting the voile out of my ‘lining fabric’ box I noticed another white roll of fabric…and after taking it out recalled that it was cotton lawn I had bought from The Makers Society at the same time as the shirting fabric. I have a whole two metres of this so I’ll use this instead 😁
If the style suits me I could look into a brand that does both poplin and voile so I can get a proper colour match. My first thoughts were MeetMilk (Vida Voile) but they don’t do poplin (it was Mind the Maker who have a Paper Touch Poplin, but not in the same colours). I could always use black I suppose, I leant when I opened the instructions that they have a free dress expansion and that sounds very tempting 😅 Although I could always use the red fabric I originally set aside for this toile…but I’m getting sidetracked.
Onto actual size, according to my hips it’s 44. Interesting that you need to open the French instructions to get the metric measurement chart 😅 Seam allowances are 1cm. I’ll probably not do french seams on this since the gathers mean I’ll have overlocked edges anyway but from the Ashling Dress, 1cm for gathers is a bit tricky to deal with and if I make it 1.5cm I have the choice to french seam or not. And yay, no bust dart to deal with this time!
The Frixion pen markings were very handy here, since all the centre front, collar and armhole seam allowances were left as is. So it was good to be able to tell which line I traced and which ones I extended.
Buying Supplies
Since I’m mostly working with remnants I needed to buy bias binding:
- Magdala – only the sleeve requires binding. pattern says 1 5/8 yards of 3/8 bias binding so 2m
- Rose – the sleeve pattern pieces add up to 1m and I measured the hem as 1.5 so 3m
- Willis – pattern says 1 1/2 yard for sleeves of 3/8 binding and I measured the hem as 1.5m so 4m all up
I checked my stash and had enough suitable buttons. I also bought Banrol for a narrow hem (2m) although I didn’t end up using this.
Rose Part 2
Very glad I took a photo of the layout. I had forgotten I needed to join pieces for the under collar and collar stand.
I ended up needing to cut the inner yoke out of a different fabric. I was indecisive again, after unravelling my white cotton voile I decided to get the quilting cotton out again but then backpedalled since the weights were mismatched.
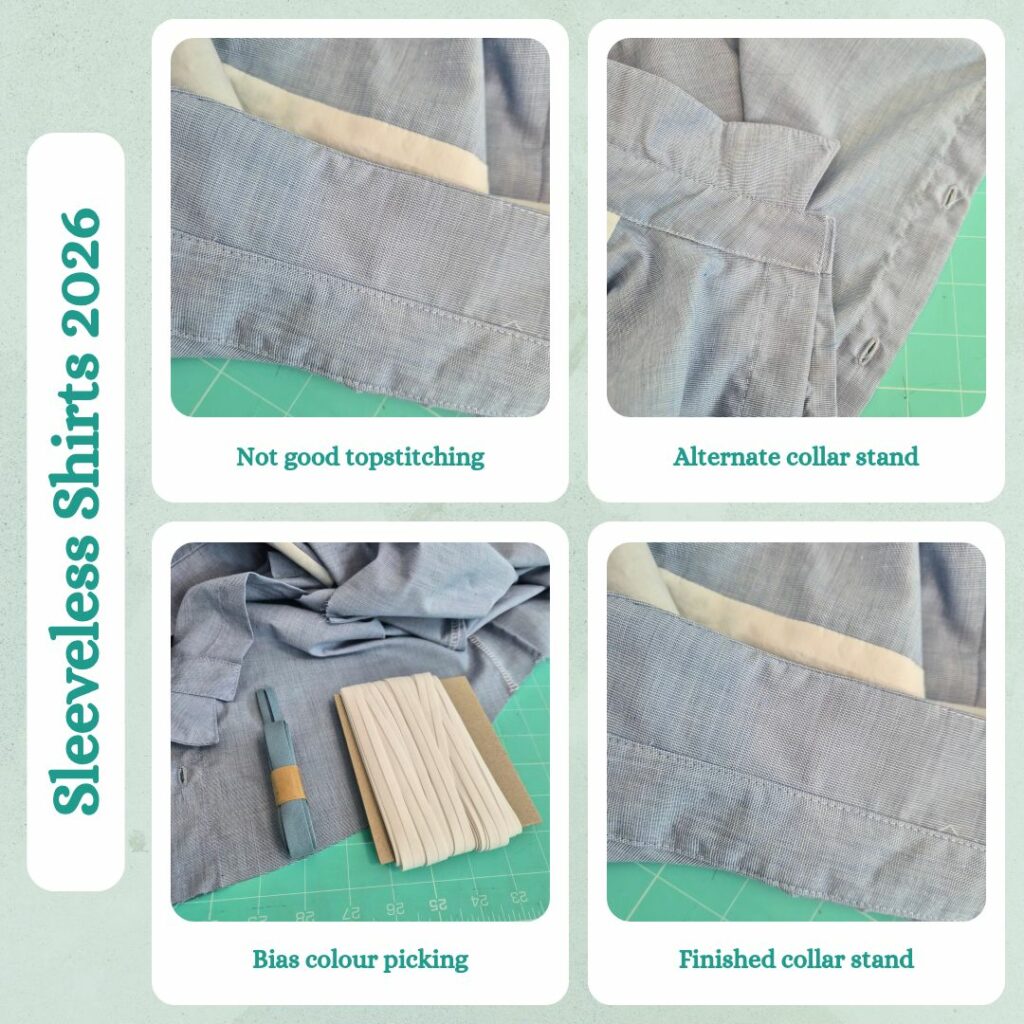
I trimmed 1/8 on the collar to create the under collar. I need to offset the topstitching more if I do this so it doesn’t end up in-the-ditch on the wrong side.
I was really excited to try the alternate collar stand method, I ended up not transferring markings for the collar placement or checking the positioning so they don’t match lol. It’ll probably be ok though since I only have 6 buttons, not enough for one on the collar stand, so this will always be worn open collar.
I did french seams for the sides. Then everything else was already done except the hem and armholes both of which I was going to finish with bias binding. Turns out the blue bias binding I bought isn’t a good colour match, but I bought plenty of white which will match the inner yoke so no issues there either. I ran out of thread while sewing the hem bias binding which made me wish for a model with low bobbin warnings (Janome announced the Skyline S8 recently which would have influenced my thinking). But since I had already massaged the bias to the curves I just resewed it without pinning 🙃
I ended up being wrong about the number of buttons, so belatedly went back to the machine to sew the buttonhole. I yolo-ed and didn’t do a test, I just did my usual ‘2 clicks’ larger on the automatic buttonhole foot. It’s fine, the buttonhole won’t match the existing ones anyway since I used Gutermann thread on that and they the back side is showing cos I flipped the pieces so the button side matches what I’m used to. I hand sewed the buttons on and I don’t know if I got better at stabbing through the holes on the button from the wrong side but this didn’t feel as annoying as usual. Maybe it was more a tiredness thing than actually being bad at it? I also got to use my easy thread needles for the first time. There must be an ideal way to ‘thread’ it, I found it kind of awkward but I also didn’t look up any instructions. Luckily even though my collar wasn’t spaced the same on both sides it still matches up at centre front.
Willis Part 2
Huh, looks like I’m out of prewashed woven interfacing. Since this is a wearable toile thought I’d give weft interfacing a go, since I’ve got prewashed scraps from the Phoebe Coat. I well and truly fully destroyed my Rajah cloth which probably should have been retired a long time ago. I guess I should use baking paper when fusing weft interfacing?
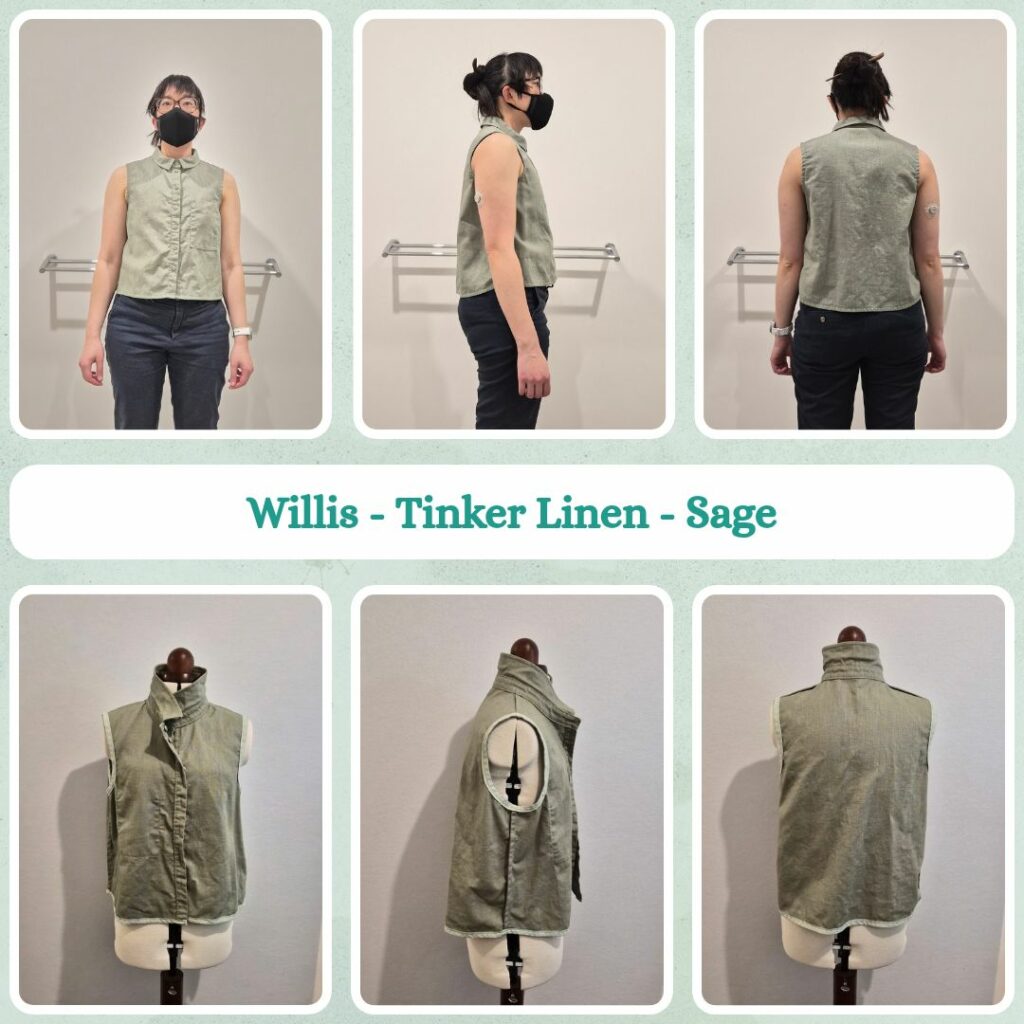
I remembered to stay stitch the necklines this time. But I realised I haven’t really incorporated the seam pressing part into my workflow yet (the part where you sink the stitches before doing anything else). So tried to be more mindful of this. I got a bit confused when I went to add the button placket and the placket piece was way longer. Then I remembered that this was probably a side effect of doing an SBA, and I must have forgotten to trim the placket piece. But this also meant that I had already done the ‘shorten bodice length’ part of shirt making that I’ll probably have to do for every shirt pattern.
For the pocket I aligned the top hem topstitching with the markings on the pattern because placement seemed really low and I didn’t like it.
This time I was both careful trimming the collar corners (so the loose weave wouldn’t end up coming completely undone when pull on the threads to turn the corners out) and also making sure the collar and collar stand were marked all matched up. And last time I tried to do the new collar stand method from memory, this time I referred to the instructions and trimmed some of the seam allowances as directed, I remembered this was a step but didn’t bother with the Rose because the fabric was so light.
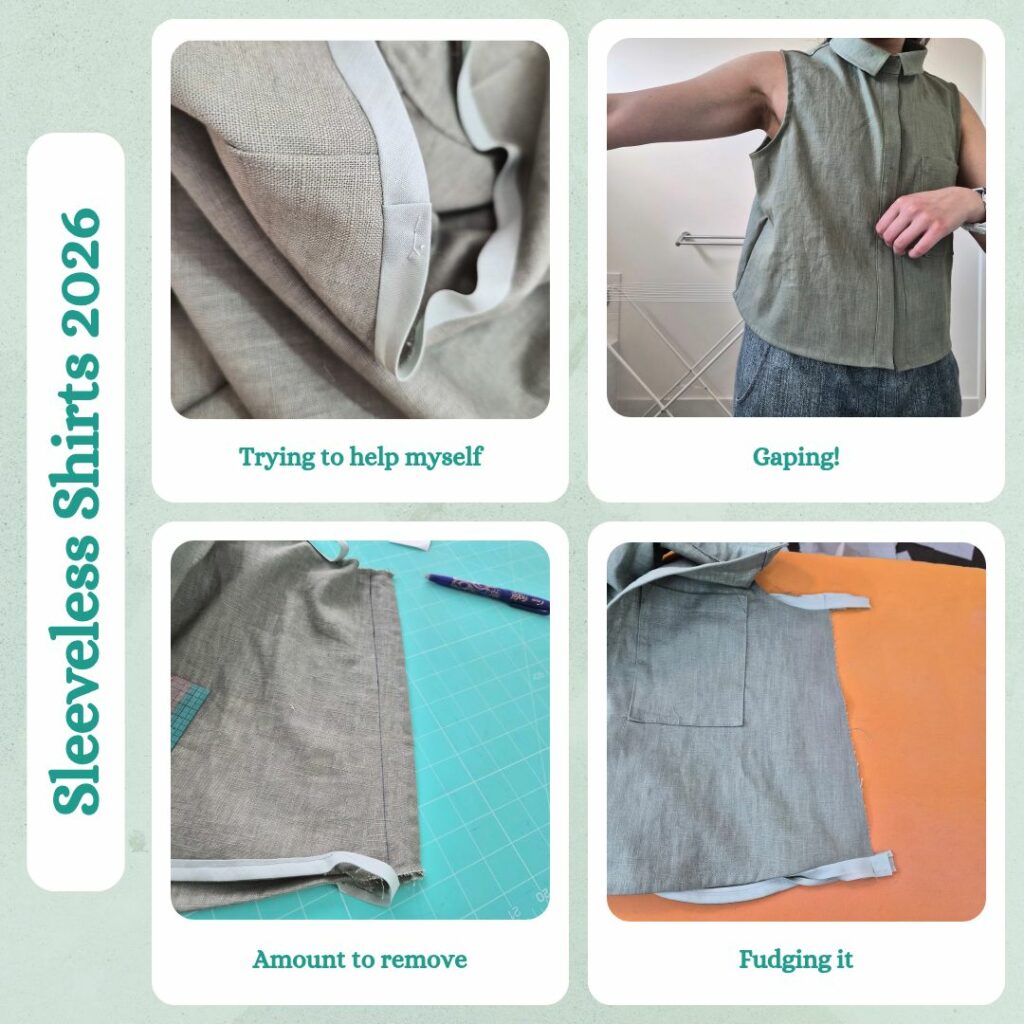
For the bias binding I decided to just overlap for the armholes and didn’t pin it at all. Pinning takes so much time and I’m able to align the bias and fabric edge well enough without. I felt like I was making pretty good progress with just the buttonholes to go and another 30 minutes before I would have to start thinking about wrapping up for the day. Then I went to try it on and realised how wrong I was 🤣 It was a weird feeling, I was simultaneously disappointed but also excited. Disappointed because it was so so wide at the sides it was ridiculous. I did a pinch test and it looked like I needed to remove 3cm from front and back 😶 But excited because otherwise the silhouette looked really good! So for testing, I unpicked the bias binding at the side seams for both the armhole and hem on both sides and sewed the extra 3cm away. Then I retried it and it looked really good, despite me wondering beforehand if this would even work (I thought for sure I would be screwing up the armhole curve). So the plan then was to redo the side french seam and reapply the bias binding. I decided to be a cheater and reattach the bias binding to the raw edges and then include this in the side seam lol. Since it all gets turned all the way to the wrong side I figured it would be ok.
Magdala Part 2
The fabric for this was unearthed from my lining fabrics box, I completely forgot I had bought this. Luckily there was 3m (not two like my memory thought it was) of it because I needed 2.5m.
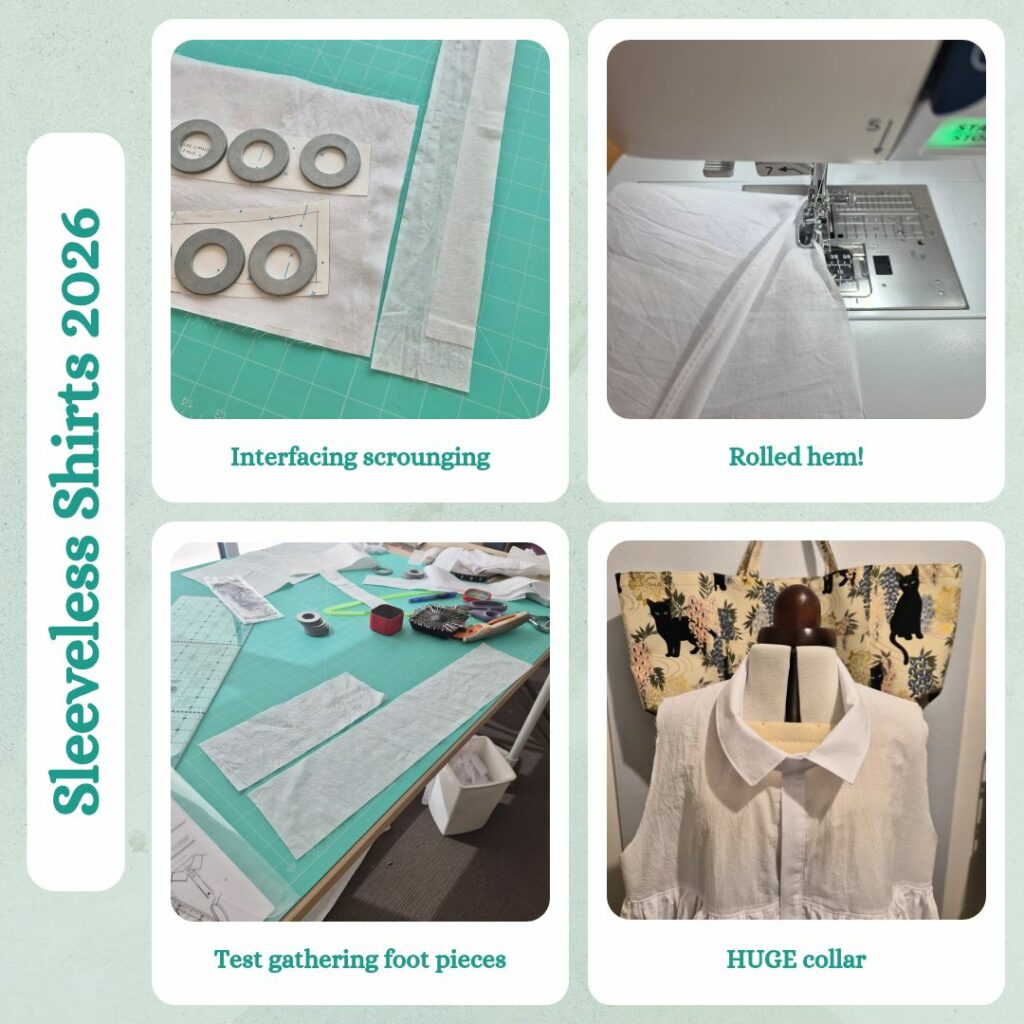
The pattern didn’t call for any interfacing but I thought that would end badly. I suppose the recommended fabric for the non-ruffle parts is poplin, but I still don’t think poplin has enough structure to support buttonholes and buttons and honestly I really like the crisp look of the collars I’ve made for the Rose and Willis. I still hadn’t prewashed my woven interfacing, and since I was planning on using plastic buttons from the stash (and Softloc for the gathers), I didn’t have that compulsion to use the more natural components. What I didn’t expect though was I would need to scrounge the leftovers of my polyester interfacing. I guess I’m finally at the end!
I only put an order in for Banrol the day before starting this so decided to try my rolled hem foot on the Skyline. I did have to refer to a tutorial as the instructions that came with the foot didn’t make sense to me haha. Too brief. I messed up a bit because I read the included instructions which said to fold 3mm for at least 6cm but in my head that became 6mm for 6cm, but once the foot started doing it’s thing I immediately realised my mistake. 3mm doesn’t leave much room for error, my test piece had parts where the fold didn’t get turned completely. I expect this is something I’ll get better at. 3mm hem sure is impressive to look at though 🤣
After the Ashling Dress, I realised that even if I’m going to use the Gloria for the gathers, I really actually want the rest of the seams to be french seams. So did this for the bodice pieces, but overlocked the short ends of the gather pieces and sewed and topstitched the seam allowances down. Then it was time to roll hem 6m of gathers 😂 (or fruffles as I AM Patterns call them, cute term). It actually wasn’t too hard to ensure the hem rolled properly. It seems even if I guided more than 6mm through, it managed the extra width fine. And it handled the seam with multiple layers well too. Quite impressed. It seems easy enough to use that I’ll probably just stick to this method for stable wovens. Banrol might come in handy for more slinky fabrics.
Using the gathering foot on the Gloria to attach the bodice and ruffles at the same time wasn’t too hard either. It was actually probably harder adding the next bodice layer to the already gathered edge. I didn’t manage to keep it flat for the bottom tier and had to unpick and redo a portion of it. I wondered if I should also roll hem the bottom bodice piece, but ended up guide stitching at 6mm and double turning it by hand. I’m not good enough at starting a rolled hem to do it on a pattern piece that doesn’t have sacrificial length at the ends. Then I was going to unpick the gathering threads and reoverlock so all three layers were finished and enclosed, but then decided to just make the overlock stitch as narrow as possible and cut the excess off. Much faster this way 😊
I thought I was onto the easy part now – adding the button plackets and collar. I realised with the collar, I don’t need to match the raw edges when I’m topstitching, I should just roll it enough so that the under collar side doesn’t show from the top side, this will mean I don’t need to do extra wide offset topstitching. Then when I sew the collar to the collar stand, that’s when I align the raw edges and what will give it the slight curve. Being the third shirt to use the new collar construction method, it went very smoothly. Then I tried it on…
The collar opening was super big 😣 But why??? I double checked and I had cut out the right pieces. Then I looked at the front piece and realised that the front neckline kinda scoops a bit? Like, not in a way that you would expect a collar-at-the-neck button-up shirt to look? I went and relooked at the model photos and she definitely has it sitting on her neck. I put it on my dress form and if I make it sit well at the back, the neckline gapes at the front. If I place it so the collar stand is at the neck, there is a huge excess of collar and stand at the back… I tried looking for finished measurements but couldn’t find any in the instructions or product page. I’m wondering if this is something to do with requiring an SBA…although from past experience with no-dart bodices it means reducing length…below the neckline, not as part of the neckline. So I guess this particular shirt needs a Part 3…
Magdala Part 3
So for troubleshooting, I decided to trace the top bodice front and back and a single layer of collar and stand in the smallest size and see how that fits. I did try to do some extra research and could only find one other person who had made it and blogged it and they had it sitting at their neck properly. I was glad for the pattern trace, easy to trace off the pieces and then could sew it without having to cut bedsheets or calico.
I figured this one is still salvageable though. But first I decided to try and figure out what went wrong. I checked the size I chose and realised that there was no guidance on how to choose a size or a finished measurements chart. I even went looking on their website and couldn’t find one. And then I went and studied the model photos a bit more. I also compared the neckline against the Rose. I was curious, so I copied the bodice of the smallest size and sewed it up in pattern trace and placed that on my dress form. And the collar was where it was meant to be. I even tried it on and it fit fine. So basically I had made it 4 sizes too big 😅 In summary:
- In the absence of any size choosing guidance or finished garment measurements, I chose a size based off my hips, since that’s what I did with the Rose and Willis
- I had made the assumption that the SBA was a length-of-bodice thing only, based on my experiences with the Tomigaya and Ashling dresses
- A bonus extra was I converted my metric measurements to imperial to choose my size and ended up choosing one size larger than what the French instructions would have given me (yay for conversion errors)
- I should have chosen based on my bust measurement
- This is why we toile I guess LOL
I wanted to at least make the top look wearable, so I removed the collar and just bias bound the collar instead, as well as the armholes (lazily, I overlapped the ends instead of properly joining them on the diagonal). So it sits properly on me albeit the neckline being a bit scooped. Since the look was very loose I could probably get away with it, but it doesn’t match what I want it look like so it’ll probably go straight into the donation pile 🙃
Reflections
Rose – I think this needs to be in a slightly more structured fabric. but I’m happy with the fit. In the photo it looks like there might be some bunching around the underarm, but it feels comfortable so I’m not going to go all perfectionist on it.
Willis – I wonder if this needs to be a touch longer (like 1 cm), but I’ll wear it and see how I feel
Magdala – I didn’t get a garment I’ll wear out of this but it was really good practice for rolled hemming and using the gathering foot on my Gloria. Also I realised when I was taking the inner photos that I need to redo the topstitching on one of the gathers… 😣
All of them were good practice on doing the new collar stand method and it will be the method I use from now onwards. It really does make the whole collar/stand process much much faster. One thing I will do for all these patterns though is actually draft a separate under collar piece. I think removing 1/8″ worked, but it was an extra step to mark this out and remove.
Things I learnt:
- Frixion pen trick for tracing patterns and adjusting seam allowances
- New method of attaching collar stand
- Removing 1/8″ from a collar to create an under collar piece works pretty well. Also how to properly press and topstitch this
- Pattern trace works well for easy SBA. But I’ll always need to toile post pressing out the dart since I now know that patterns also accommodate bigger busts with width (Willis) and lower necklines (Magdala)
- I prefer self-fabric bias binding to store bought
- Using the rolled hem foot on the Skyline
- Using the gathering foot on the Gloria
I already have fabric lined up to do second (I would say ‘proper’, but the Magdala one will essentially also be a toile) versions of each of these 😊
Categories: Sewing

Leave a Reply