Planning and Design
I’m considering the Cleaveland, Fenix, Simpson and Toaster Sweaters from last year as Part 1. I definitely went overboard buying yellow fabric (got suckered in by all the different shades) and different sweater patterns, 2025 was the year I realised sweaters don’t need to be ‘basic’ LOL.
Materials
- Patterns
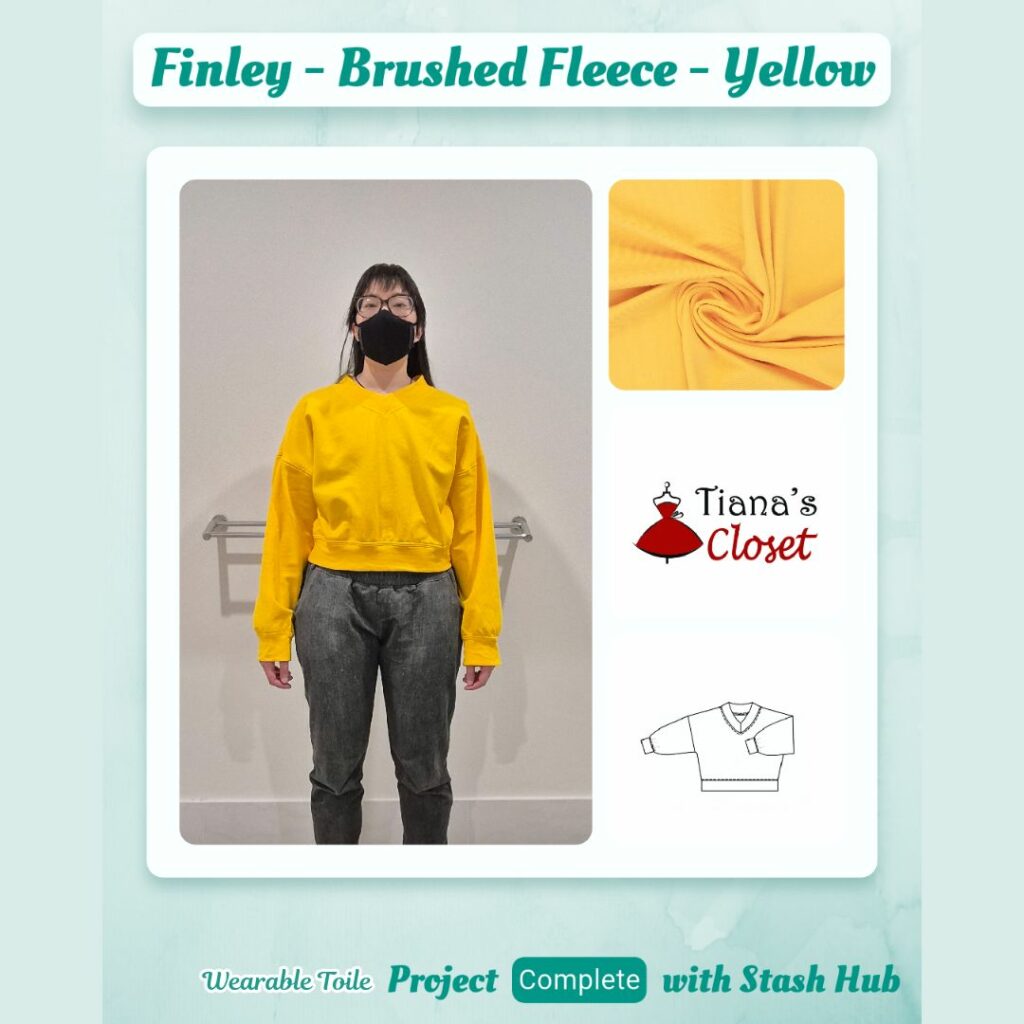
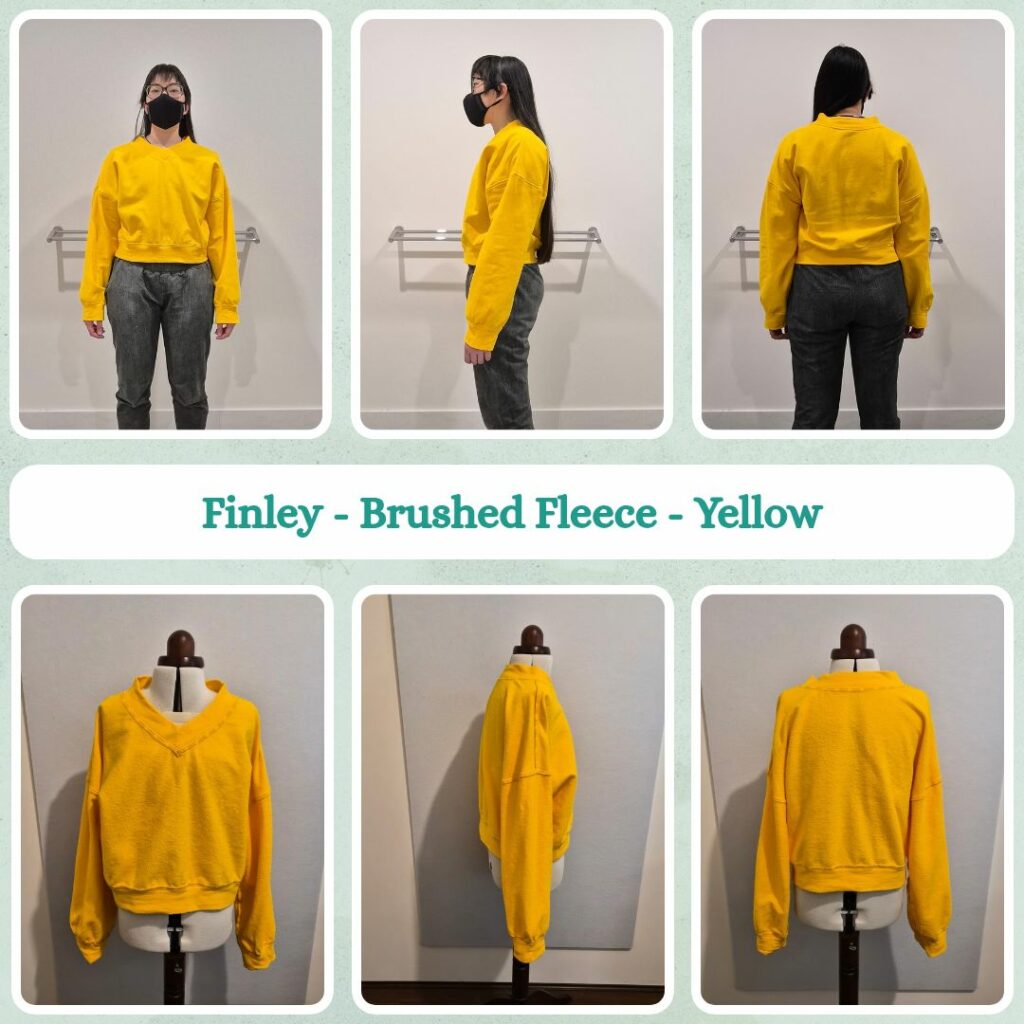
- Finley V-neck Cropped Sweatshirt (Tiana’s Closet)
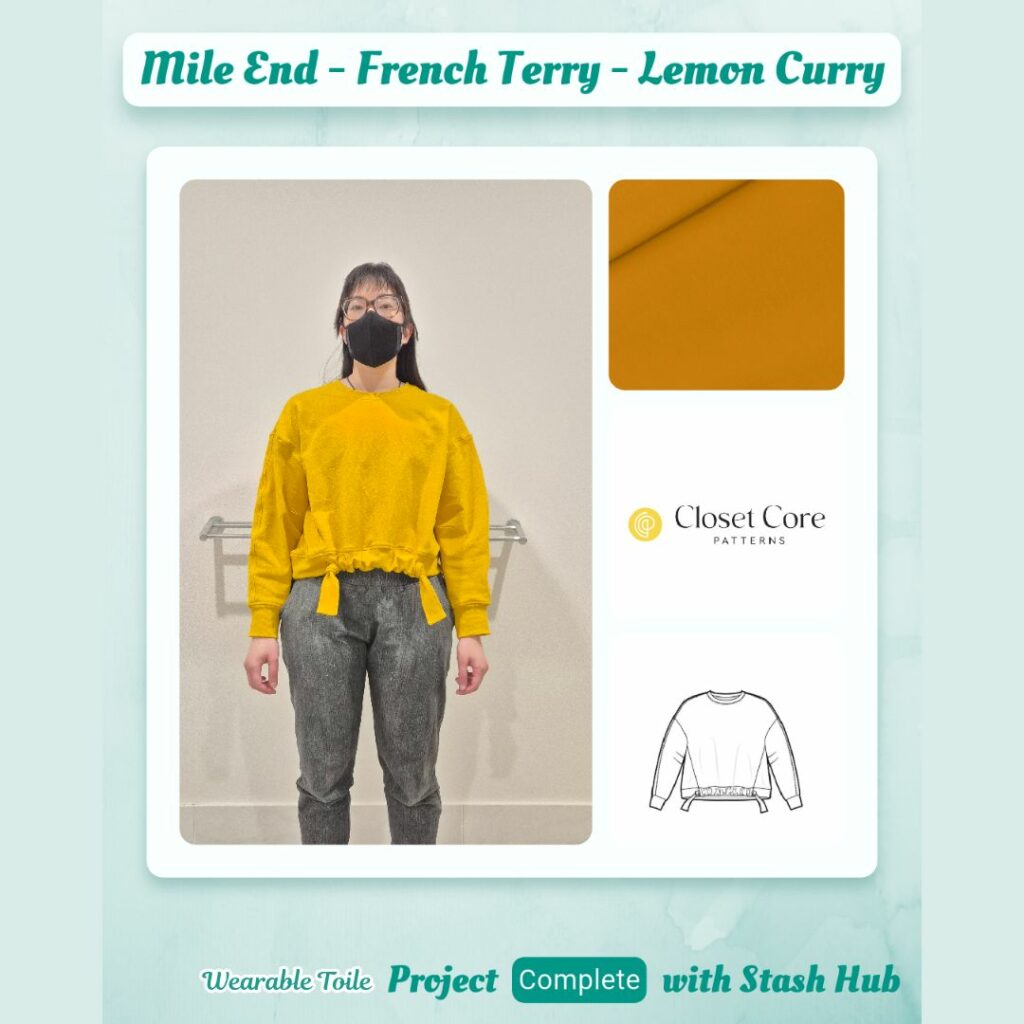
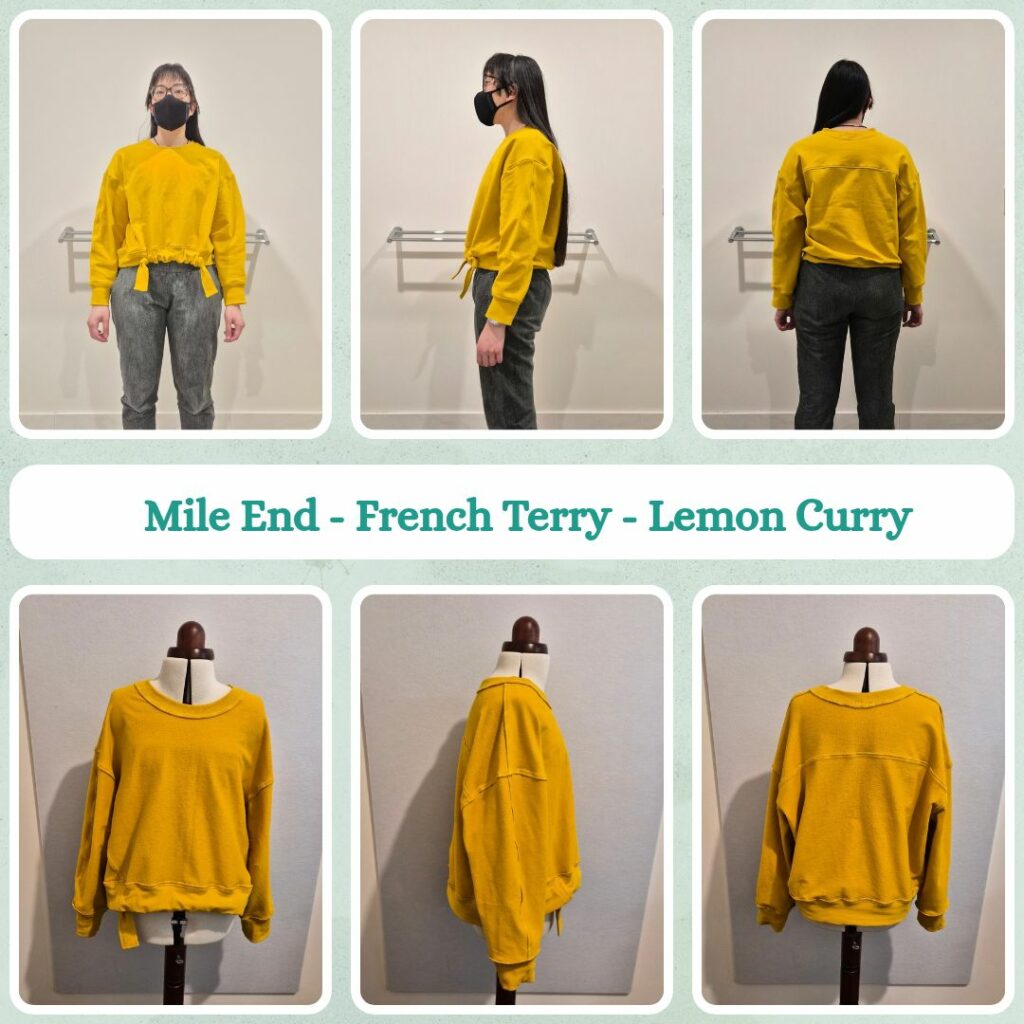
- Mile End Sweater – crew neck with front tie (Closet Core)
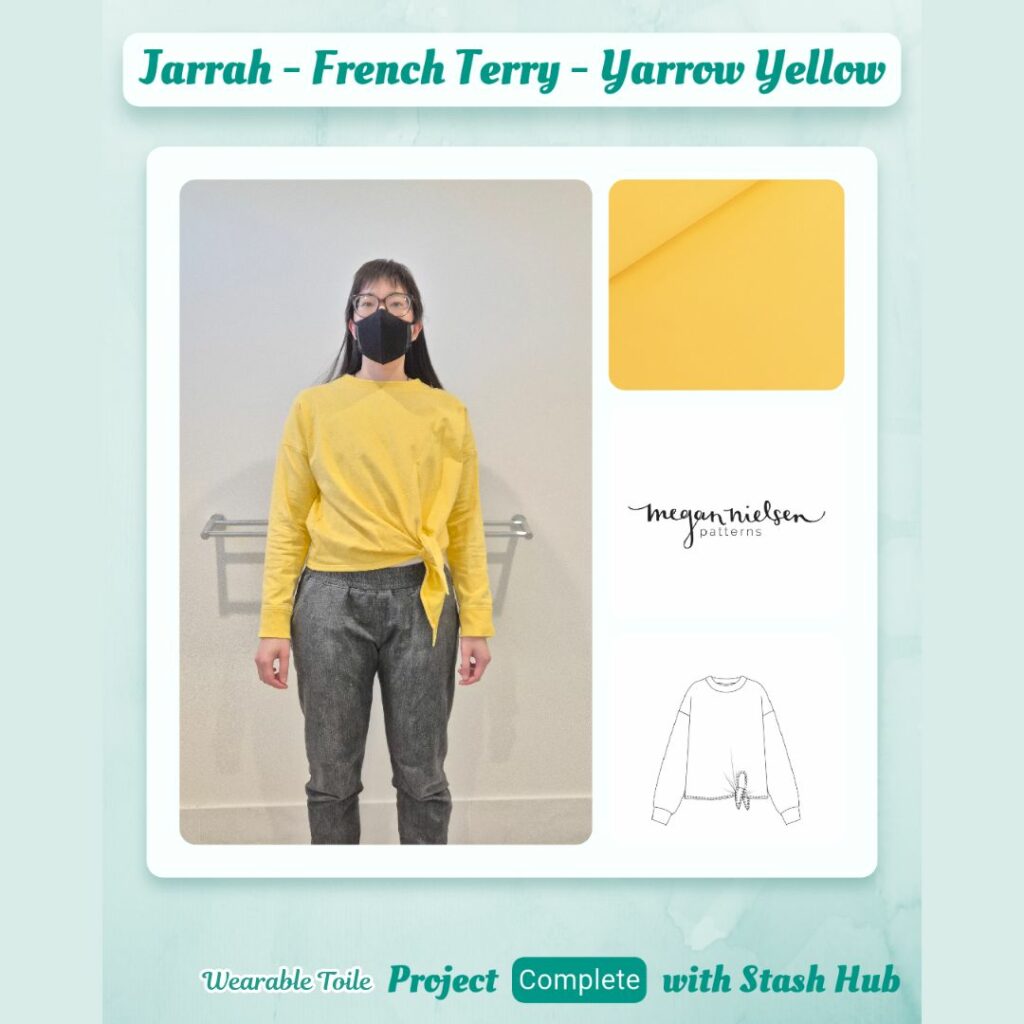
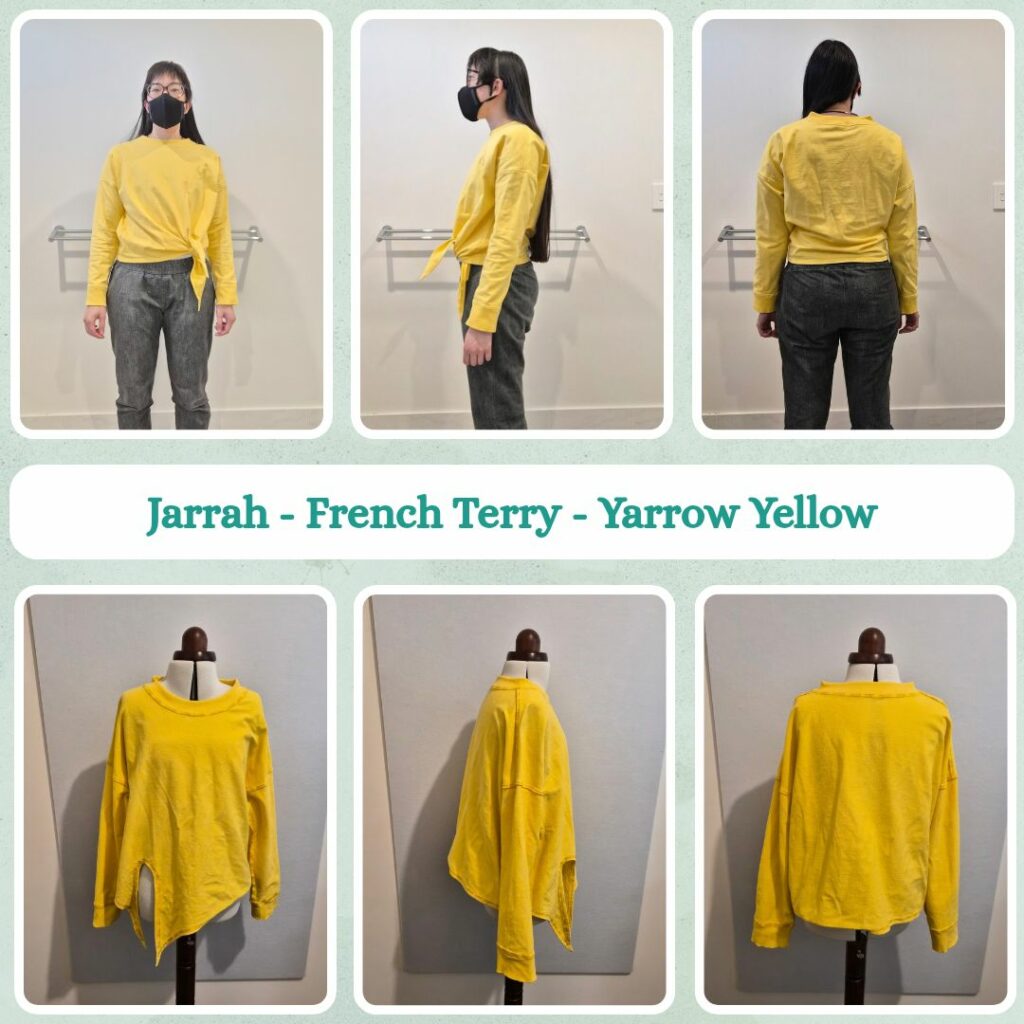
- Jarrah Sweater – crew neck with front tie (Megan Nielsen)
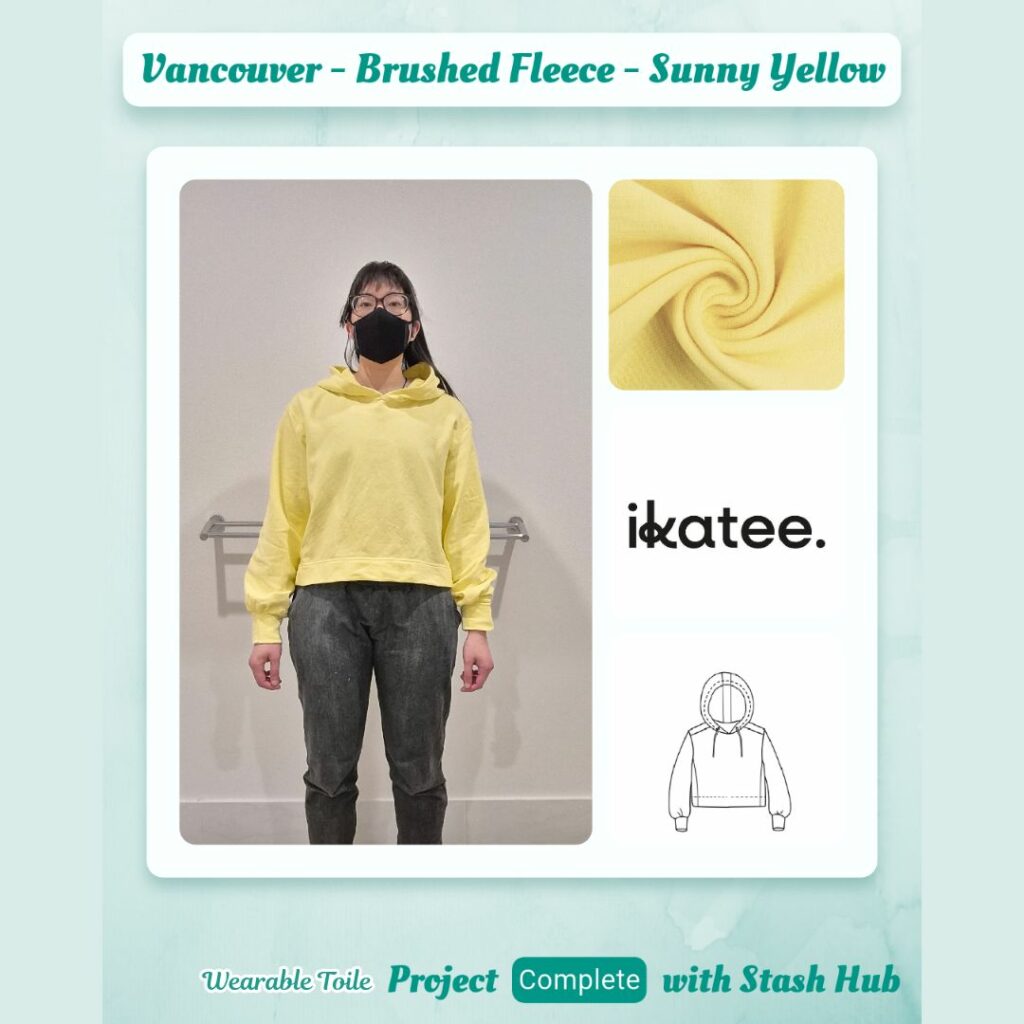
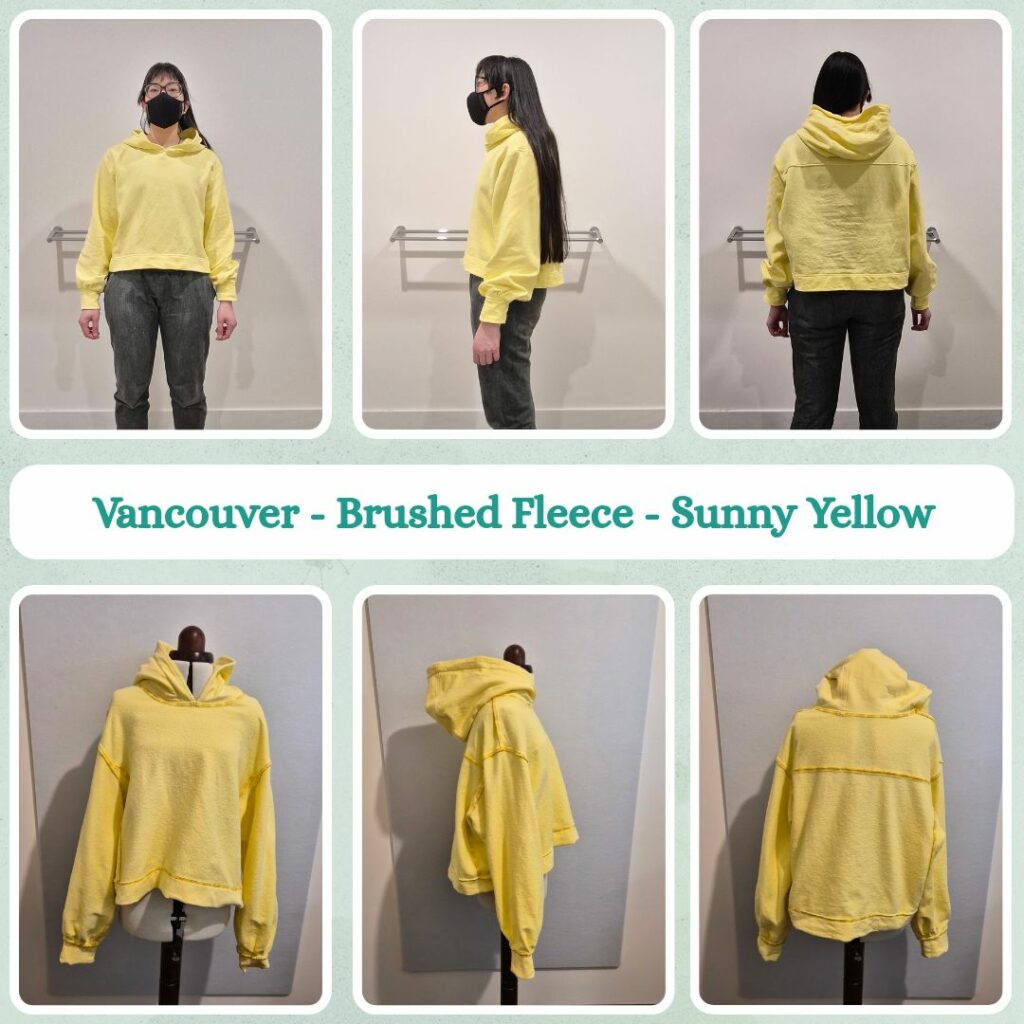
- Vancouver Sweatshirt – with hood (Ikatee)
- Fabric
- European Jogging Sweater Knit – Yellow (Wattle Hill Fabrics)
- See You At Six French Terry/Ribbing – Lemon Curry (MaaiDesign)
- See You At Six French Terry/Ribbing – Yarrow Yellow (MaaiDesign)
- European Jogging Sweater Knit – Sunny Yellow (Wattle Hill Fabrics)
- Thread
- SoftLoc™ Tex 35 Wooly Poly Thread – SLM 47 (Variegated Yellow)
- Maraflex col. 417
- Seraflex cols. 0892, 0120 and 0141
- Notions
- 6mm Cotton Tape – White
Sustainability Check
👍 European Jogging Sweater Knit and See You At Six Ribbing are 95% cotton, 5% elastane so technically biodegradable. Same with the See You At Six French Terry at 96% cotton and 4% elastane.
👍 Maraflex is 100% polybutylene terephthalate and compostable (as long as it’s not in marine or fresh water)
👍 Cotton tape is 100% cotton so fully biodegradable
👎 Seraflex and Softloc are 100% Polyester
Construction
Preparing the Patterns
Size selection:
- Finley size M based on hips
- Vancouver size 40 based on hip measurement.
- Mile End size 10 based on high bust which also matches my waist measurement and is one size down for my hip measurement, but shouldn’t be an issue because of the amount of ease
- Jarrah was in between sizes 10 and 12 for hip but since using tie front variant went with the smaller size since it won’t need to go over my hips and my bust and waist measurements are within the size 10
I also did a bit extra for the Vancouver as the instructions said to lengthen the cuffs 1cm if not using ribbing. Appreciate the guidance! I also investigated the difference between the inner and outer hoods for the Caramel Jacket and drafted an inner hood piece for the Vancouver. I thought about using a woven as the lining instead, but I just really like the inner hood to match the main fabric so I thought this would be the best way to achieve that.
Sewing
Finley
I started with this one because I thought it would be the easiest and it would be good for momentum, since I have 4 to make. It felt like good timing coming from the Keith Knit Vest with the V neck. I don’t think I did as neat a job this time, but it’s good enough, especially once I press it and do the coverstitching. I also added cotton tape to the overlocked part of the shoulder seam and topstitched this down. I used to think the tape needed to be in the seam line, but thinking about how I would cover the seams of t-shirts and how this was also meant to help with stabilisation, this should do the same trick.
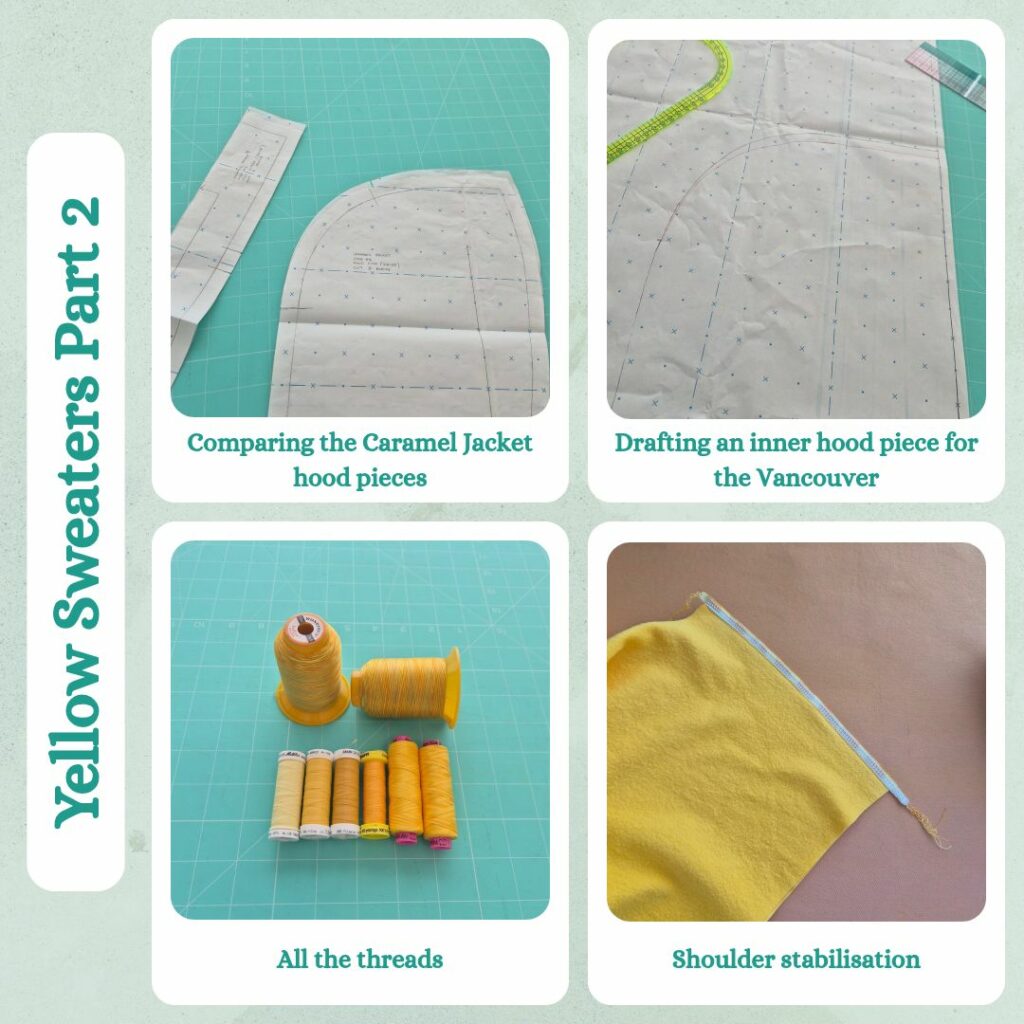
I ran into troubles trying to attach the cuffs. The cuffs just didn’t stretch enough to match up to the sleeve. The pattern doesn’t call for ribbing and it doesn’t specify how much stretch is required from the fabric and the V-neckband worked fine, so I was a bit…miffed haha. I did a row of loose stitches to gather the sleeve to fit the cuff, but then decided that I didn’t want to gather on a fleecy sweater and also that it doesn’t match the design intent of the sweater (I consider it to be a sporty look) so instead, time for math. The sleeve opening was 36cm and my Stitch Buzz stretch ruler said that my fabric has 40% stretch. This means that I need a cuff with circumference 25cm. The original cuff is only 20cm so falls way short of what’s required. Luckily I did have some spare fabric so cut and attached one sleeve for testing before doing the other.
Mile End
I’m so unused to being given markings for the ribbing on the neckband and hem I forgot to transfer them haha. Despite having so many more steps than the Finley, the copious markings that Closet Core always include made it feel like a really straightforward make, even though this is probably the most ‘fancy’ of the four patterns I was testing.
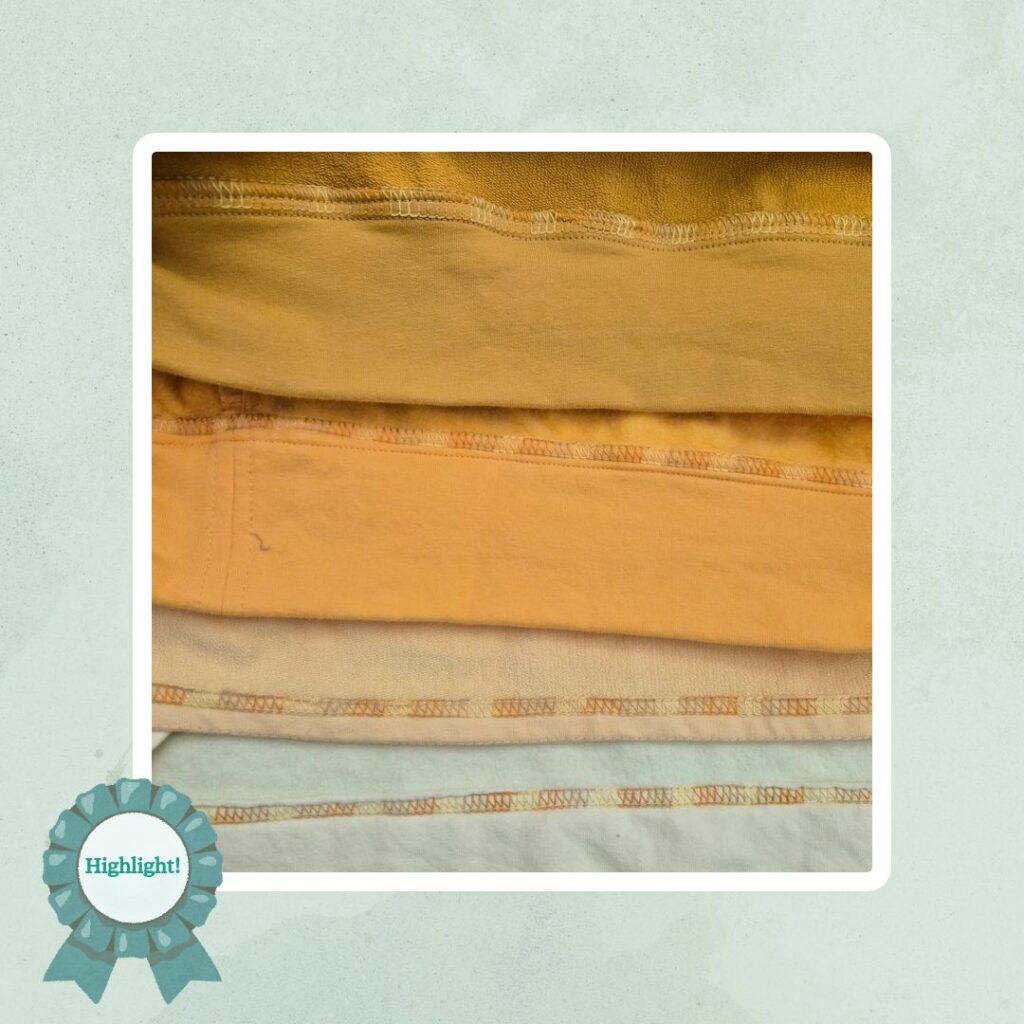
As a side note, I don’t think my Skyline likes Seraflex much…to be honest I prefer Gutermann. And since I’ve used this colour previously on the Melange Ochre Cleaveland Sweater I’m not sure I’ll be able to use it for coverstitching…
Jarrah
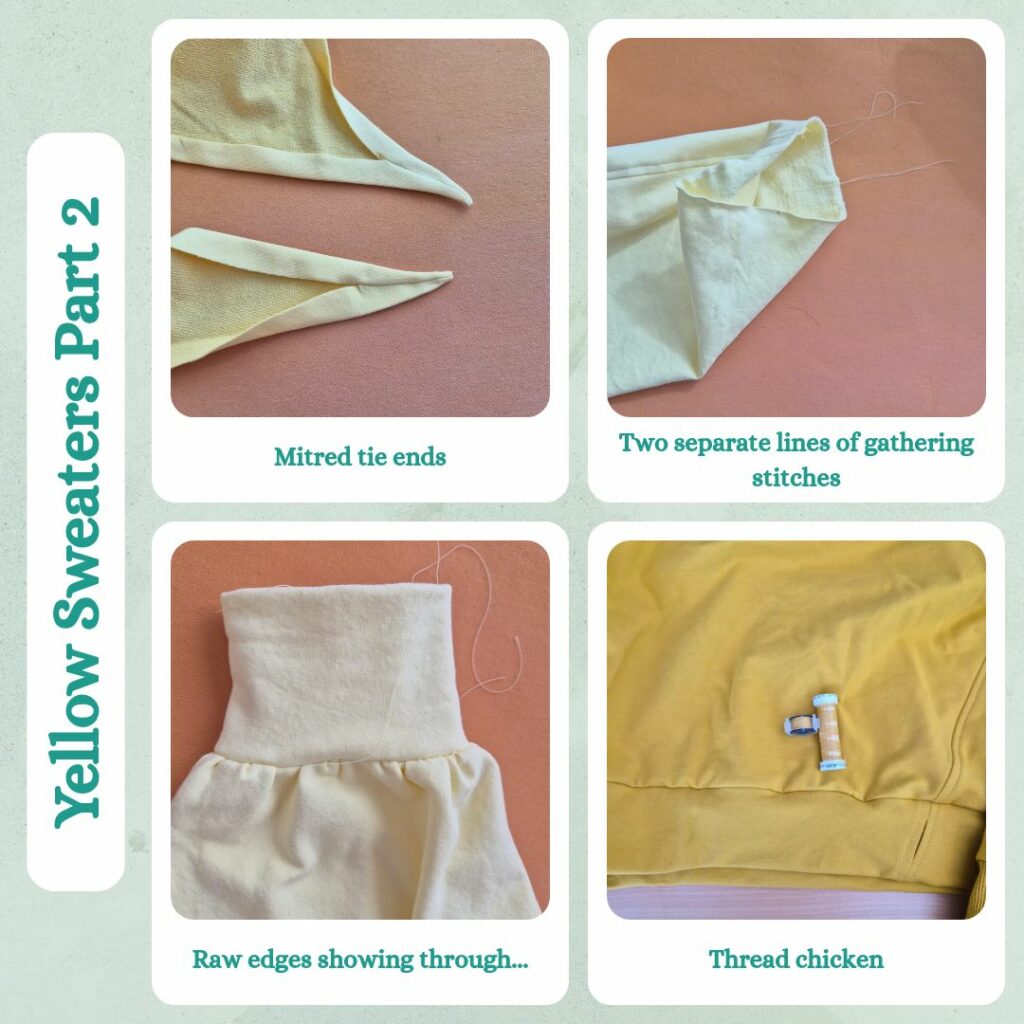
This is pretty much a standard sweater just with a different hem. I overthought the hem because of the pointy parts of the tie ends, hence making this the third instead of the last make. I like how Megan Nielsen patterns give options on the ‘easy’ vs ‘nicer’ construction methods, but I didn’t really like how it directed you to the website for the ‘nicer’ way to finish the tie ends… I definitely wanted to mitre the points instead of just folding them over each other so glad this was an option but would have preferred if it was included in the main instructions. I did guide stitching for the rest of the hem to make it easier to iron the allowance up and then handbasted with water soluble thread and put aside for coverstitching later.
Vancouver
I’d kind of forgotten this one had side panels. This in conjunction with the hood (that I also decided to line with main fabric) meant a lot of topstitching 🤣 So yeah, really should have ended with the Jarrah. I did try to follow the instructions for the side panels, including snipping into the seam allowance, but I’m not sure if I really got it right. It’s not that big a deal since this is a knit so doesn’t fray, but if I ever have to construct something similar out of a woven I really should look into it more because I don’t think I’m understanding the intent quite right… I know I always wing it when I make the Fenix Sweaters which also have a side panel…
This one did actually call for gathering the sleeve into the cuff. I decided to make things a bit easier for myself and stitched two separate gathering lines. One thing I realised, which took a lot of (self-inflicted) pressure off me, was that I don’t really care too much about the gathers being nice and even on knit cuffs. As long as it gathers enough to fit that’s good enough haha. I also realised (and this is probably a combination of me only doing one row of stitching as well as only have 1cm seam allowance) was that I should ‘flatten’ the gathers before sewing, because otherwise it kinda folds over and gets caught in the seam line and then shows on the right side… So I did have to unpick one cuff, but then didn’t have any issues redoing it or on the second cuff.
Another thread side note – this is the only fabric where the variegated thread didn’t match at any point.
Hemming
Mile End
Switched the order around a bit for this part. I really had no confidence I would have enough Seraflex to coverstitch the Mile End so decided to just do it the ‘old way’. But it was still a game of thread chicken haha. I started with the neckline, then the hem, since I figured leaving the cuffs un-topstitched would be better than either of those. And I still had some thread after that which was lucky because I realised I didn’t topstitching the sleeve head seam allowance down. And, tadah! I won thread chicken! Which makes me happy for multiple reasons, the others being I didn’t want to buy more Seraflex (I’m happy to never use this product line again…once I get through all the colours I bought thinking I’d never get a Coverstitch machine) and I also didn’t want to have to wait for Rasant to arrive if I decided to order a matching colour to finish the project off.
Vancouver
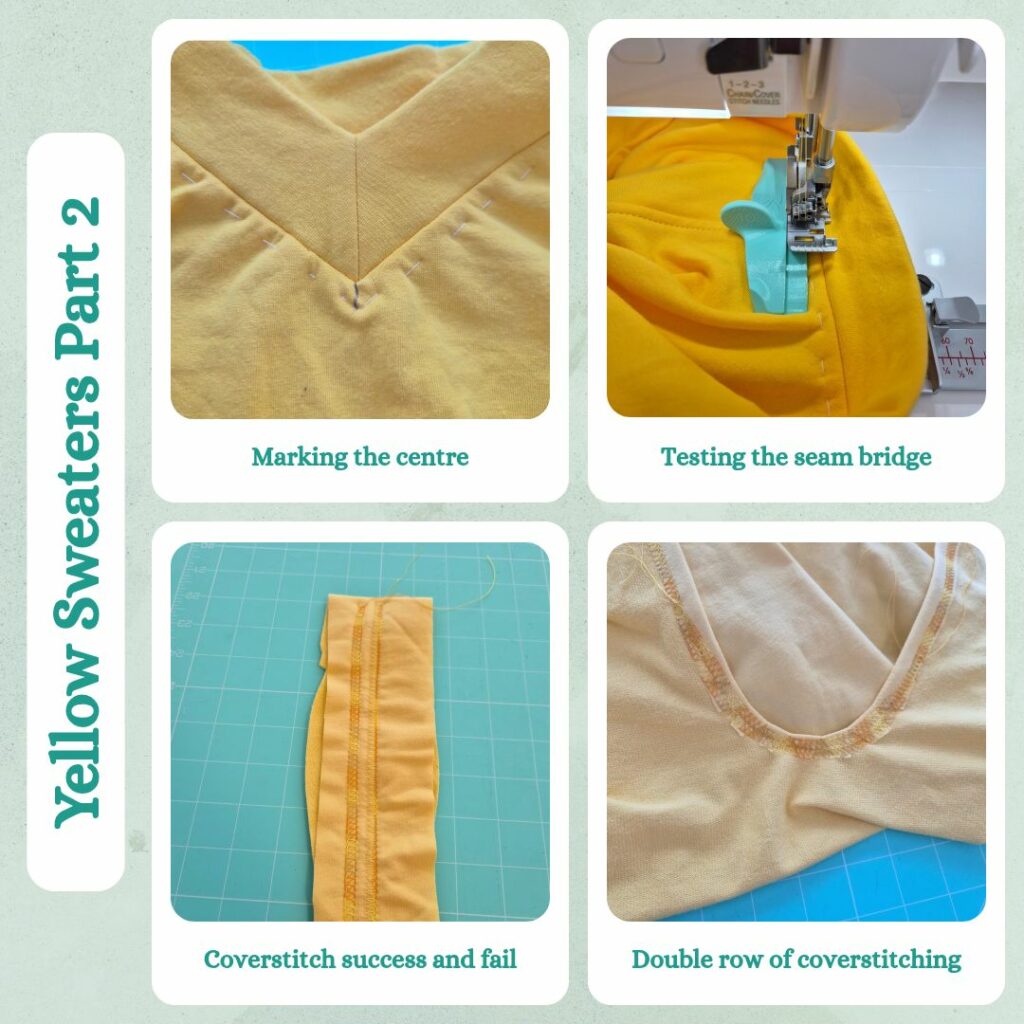
Since this one had gathered cuffs, I decided not to topstitch the seam allowances for this one down. So thought it might be the easiest of the remaining three to try coverstitch the hood and hems down. Straight away I realised I need to handbaste all my seam allowances down…I’m not skilled enough to ensure they are all laying flat as they go under the Gloria’s needles… I also tested out a tip to use a plastic card to bring the top threads to the front when finishing off a coverstitch run and it does work much better than the screwdriver.
But after that I was quite happy with the finish on the hood. Then it was time to unbox the fabric guide attachment. I tried using their guide cardboard piece to position it, but it was kind of annoying so I just aligned the left edge of the screw tab to the edge of the sewing table cover and I think that was pretty good. It’s a really nice and sturdy attachment and I was also happy with the coverstitched wide hem of the Vancouver 😊
Finley
So learning from the Keith Knit Vest, I marked the middle point of the V to help start/stop the coverstitch. This time I also tried out the seam bridge tool and it worked pretty well for the bulky part of the seams but not so well coming down off them. I think I need to practice adjusting the position to help it on the way down.
I know I didn’t put much care into the cuffs for this one, but it seems like the coverstitching smoothed things out so it doesn’t look so low effort haha.
Jarrah
I had a lot of issues with the Seraflex this time around. It snapped while I was trying to coverstitch the second cuff and a couple of times while coverstitching the waist hem. I ended up trying the thread nets on the spool and bobbin, it looked odd but I think it did help. I also found it really hard to use the plastic card method due to the tight circumference of the cuff so ended up snipping the threads and rethreading which isn’t ideal. The screwdriver did work a bit better in this situation. There also seemed to be a pattern (consistent across all three tops that I coverstitched) where straight after threading, the chain looper thread was not tensioned properly, but it fixed it self once I finished off and started again. At first I thought it was a time related thing, where the threads needed to run through the machine until the tension was met, but I tested before the Jarrah with quite a long run of stitching and it was consistently off until I did the second run. Something to keep in mind, although I’ll probably always do a test first whenever I change threads/re-thread.
For the tie waist, I decided to coverstitch in two goes, kind of like how I start/stop at the V on a v-neck but twice since there are two pointed tie ends. I had to retry my placement to catch the edge of the 1.5cm hem but other than the thread snapping, the rest of the hem, including the curve, wasn’t too bad. I wasn’t very happy with the ‘gap’ between the coverstitch and the curved edge with the raw edges of the clipped parts being quite exposed, so did a second round of coverstitching to secure these. Because of this, the two lots of stitching and the broken threads, there were SO MANY THREAD ENDS. It really made me wish I had the easy thread needles I have in transit right now 😅 It would also have been useful for the water soluble thread since that and the Sera/Maraflex all fray so so easily. So there was quite a bit of needle threading and knot tieing, and for the tie ends I did end up threading them through the coverstitch and a bit of the hem fabric, just to make sure they would be secure.
I wasn’t happy with the way the neckband sat on this one, I did some tests and it felt like I could remove 4cm. So I removed the neckband and measured the neckline (66cm). Then I measured the neckband (48cm). Then I took out the pattern piece to adjust to cut out a new neckband. And turns out I somehow cut the neckband 4cm longer than the pattern piece? How does that even work??? So my bad, luckily I had plenty of ribbing remaining so I cut it properly and reattached. It’s much better now, still sticks up a bit but I think that’s because of the width of the neckband, it will probably never sit perfectly flat (something I’ve gathered from the research I’ve done around neckbands prior to this).
Reflections
So in order of how much I like each sweater:
- Mile End – this one looks so cool! I wouldn’t change anything
- Vancouver – this is probably the best fitting hoodie I’ve had. I realise after wearing this that all other hoodies I’ve had were quite tight around the neck and this one isn’t. It also has a nice hood because it has the middle panel. And I’m happy with my smaller inner hood and the wide hem
- Jarrah – I don’t think the slimmer fit style sweater suits me. It kind of explains why I’ve been dissatisfied with the Fenix Sweaters I have made (I think I should probably size up on those for a super oversized look). The tie is pretty cute but it doesn’t feel very practical, as in it feels like it would come undone easily and I don’t want to sew it in place. I do like the wide neckband even though it doesn’t sit flat. So I think I will probably use this pattern (without the tie front) for pajama style sweaters
- Finley – I had pretty low expectations going into this and I guess they were met? I don’t like how the neckband juts up around the shoulders. And I wasn’t happy with the cuffs. I still think v-necks don’t really suit me (although is that just me internalising the ‘fashion rule’ that v-necks don’t people with small busts).
One thing on all of them…none of them have pockets! But I can think of ways to remedy that in future. Say what I will about Style Arc but their sweater patterns all have at least a pocket and these pieces can quite easily be transferred to other patterns. Other things I would try:
- Mile End without the tie
- Vancouver with the shoulder bands and no hood. Also using ribbing for the cuffs (and neckband since no hood)
- If I ever remember to add yellow ribbing to a Wattle Hill Fabrics order (provided it’s still available), I would unpick this current Finly neckband and cuffs and replace with ribbing. I’d also try drafting a pieced neckband where the back is curved (like the WBM Balloon cardigans). Because the high v-neck isn’t too bad and I like the cropped style. I just REALLY hate the super wide cuffs and the way the neckband doesn’t sit nicely at the shoulders.
- I would probably try the View B (high low curved hem) version of the Jarrah if the right fabric presented itself. It would need to be a thick fabric, probably in like a cabled or herringbone style knit.
Things I learnt:
- I can use the thread nets on bobbins and normal spools (in fact it’s probably best to)
- I looked up the instructions for the seam bridge and it turns out it’s made for overlock stitches. It’s really cool and I’ll definitely use it for perfect joins for bias bound edges, but it isn’t designed to help with ‘hump jumping’ while coverstitching.
- Boxy style sweaters suit me best
I still have two yellow fabrics to make up into sweaters, although I will likely buy some more because I have not only the Sheridan to try, but I would like to try the Vancouver with a crew neck and arm bands and the Solar (not yet bought) with the ruffles. So that will be Part 3 in 2027 I guess 😋
I’ve also finally settled on a naming convention for my makes, I was getting frustrated with my inconsistency lol. For the title I’ll use the full pattern name as is with a hypen then the fabric (colour then type, as described by the fabric store) as this helps with searchability. For the Canva and Stash Hub images though I’ll use short name – generalised fabric type – colour. I figure since there are images I don’t need to spell out if it’s a dress or a sweater, and for my own purposes, the information I’m interested in is the category of fabric used, I can go to the blog post or Stash Hub project if I want to know the full fabric details. And I like using the colours as per the listings, because I love colour names haha.
Categories: Sewing

Leave a Reply