Planning and Design
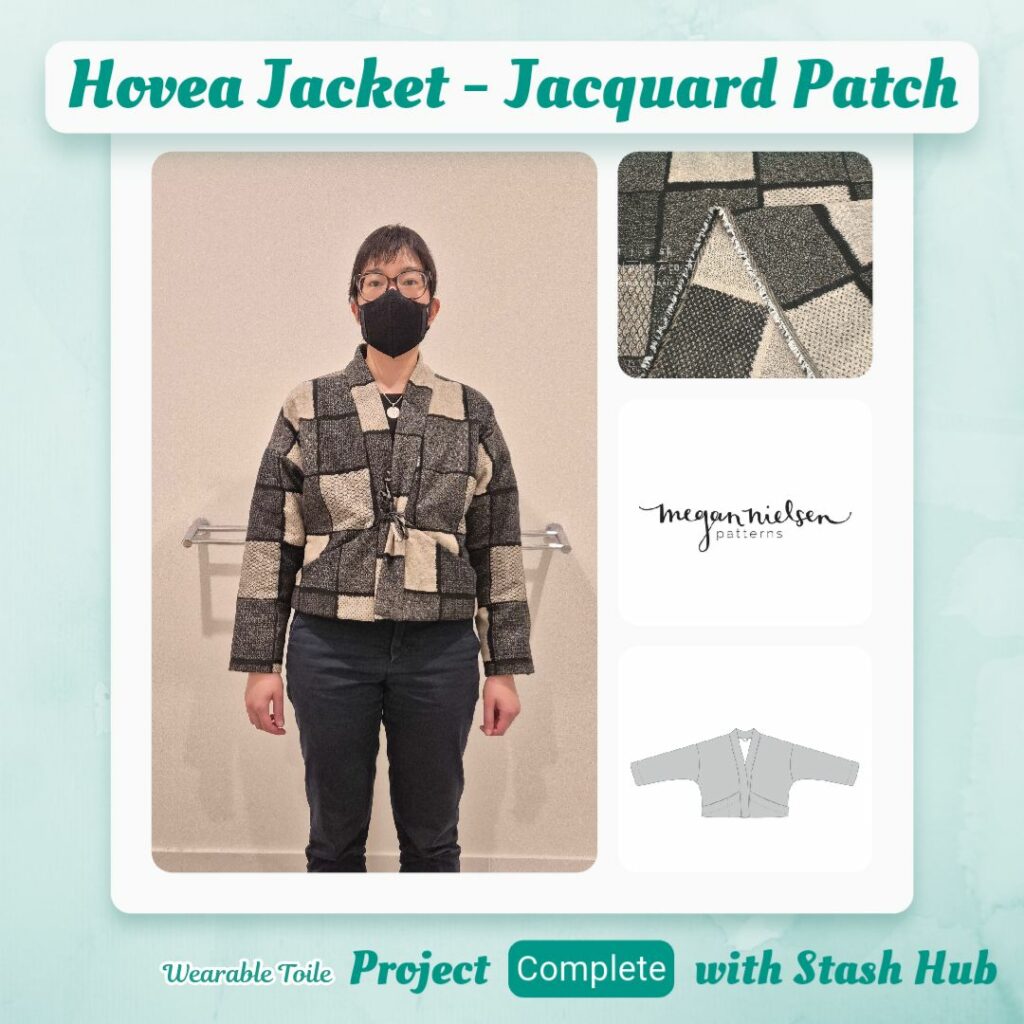
Since I decided to do wearable toiles of all the new patterns I make, I thought I could be strategic and make this into a present for Mother’s Day 😁 Since my mum moved to Albany, it’s even colder than in Perth so I figured having a quilted jacket would be useful. Also, I was sorting my scraps and have heaps of leftover from the flannelette backed blanket I made for my dad, which also fits into my hang-up of keeping things made from the same fabric within the family…
…was the original plan but of course I misremembered how much scrap fabric I had! So had to scrounge around my stash to find something else suitable. I ended up choosing the Woven Jacquard with a cotton sheeting lining and I’m really happy because when I settled on this combination, it was that feeling of ‘oh, that’s what this fabric was meant to be’ 🤣
Materials
- Pattern
- Hovea Jacket (Megan Nielsen)
- Fabric
- Yarn Dyed Woven Jacquard Patch – Black, Latte
- Thread
- Rasant col. 4000
- Invisafil col. IF101
- Notions
- Sew Easy 100% Bamboo Natural Batting
Sustainability Check
👍 Fabric is 100% cotton and batting is 100% bamboo
🤏 Rasant is OEKO-TEX but not biodegradable
👎 Invisafil is a mix of cotton and polyester and I can’t see that Wonderfil has OEKO-TEX certification?
Construction
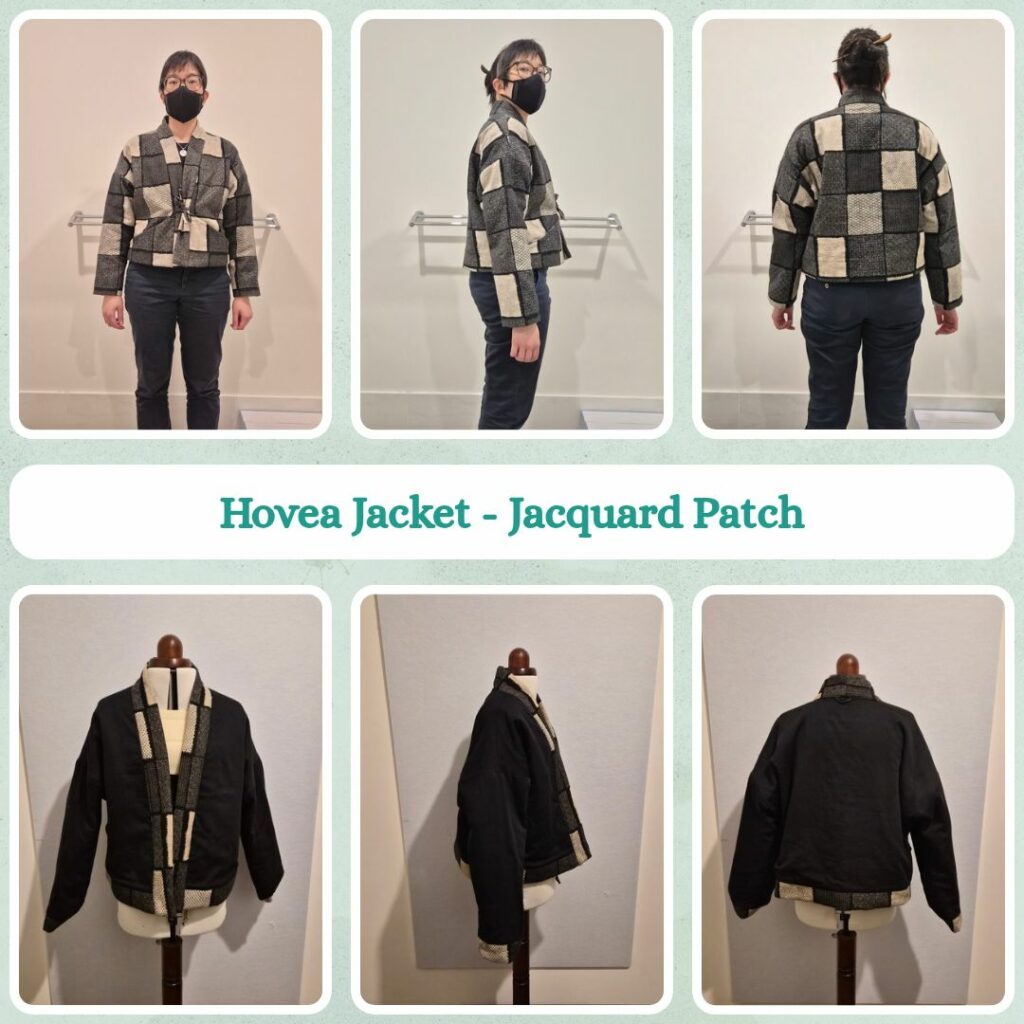
I’m a bit taller than my mum and my shoulders are broader, so I figured that if I made it to my size then it should comfortably fit over a sweater on my mum. Based on the measurements I’m a size 10 but the fit is oversized and to be honest, I don’t think I would wear this over a sweater, so went with size 8.
I tested out Invisafil thread for the first time. I looked up the Wonderfil tips and reduced my stitch length to 1.5. I decided to try and stitch close to the middle of the black lines going horizontally and vertically. I’m very impressed by how little bulk it adds! I love all-over free-motion quilting designs but don’t love how stiff it makes it.
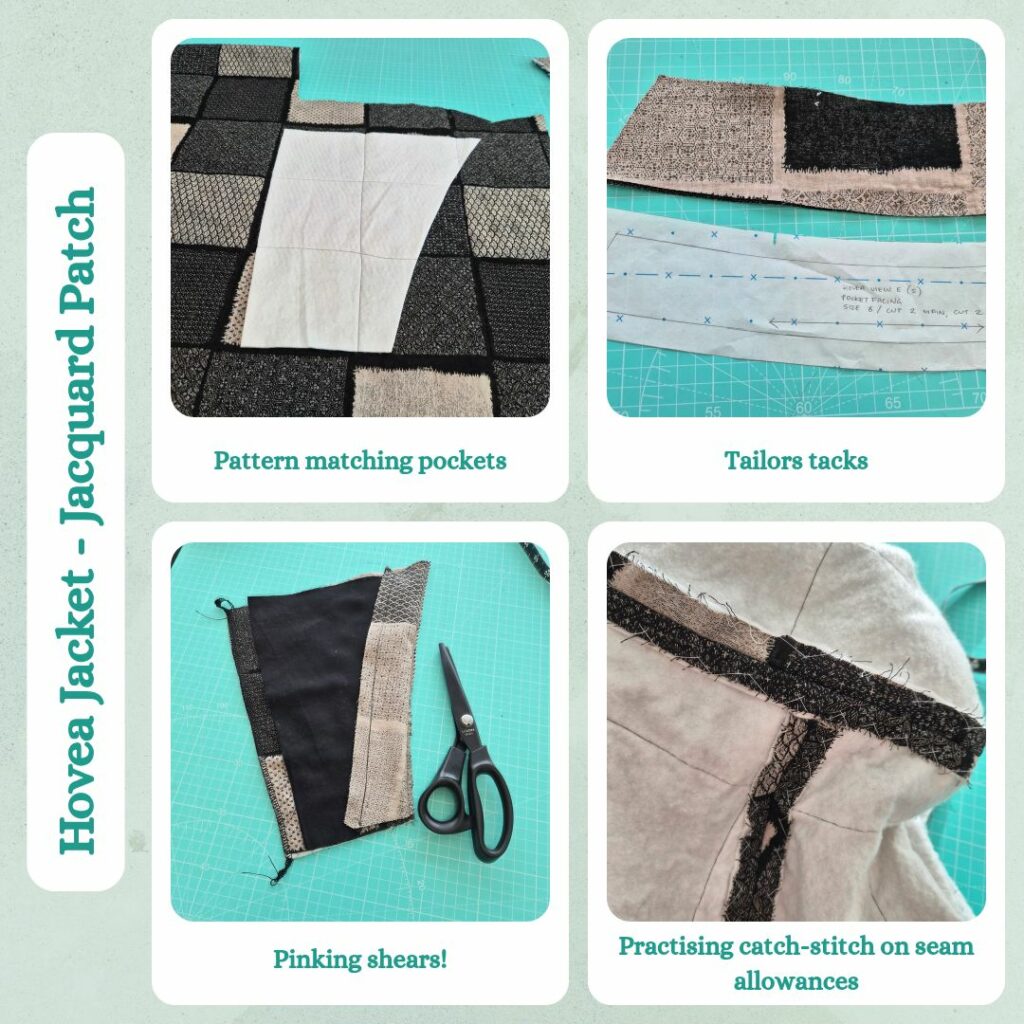
When cutting the pieces from the fabric I did make an effort to make sure the pockets would be symmetrical. And since it was quilted fabric decided to not use any interfacing and to use tailors tacks. I also used my new LDH light-weight pinking shears for the pocket facing, when the instructions said to clip triangles to help everything lie flat. Not sure if it made much of a difference but at least it was fast! I also split the front pockets into half. Since they are so shallow I would worry about things falling out, but once the pocket width is reduced it makes me feel more confident that they’ll keep the contents secure. And splitting it half-way will fit our flip phones 😁
I decided to do set-in sleeves since the instructions said they found the drop sleeve fell better with this method. After sewing the body together and the constructing the sleeves I remembered the Closet Core coat making course and decided to catch-stitch the seam allowances down, to make sure they stay down. Figured it would be good practice for when I make a wool coat. I had to look up some instructions but I think I lost my browsing history when I was setting up Vivaldi on my new laptop and trying to enable sync so I can’t remember which site I used.
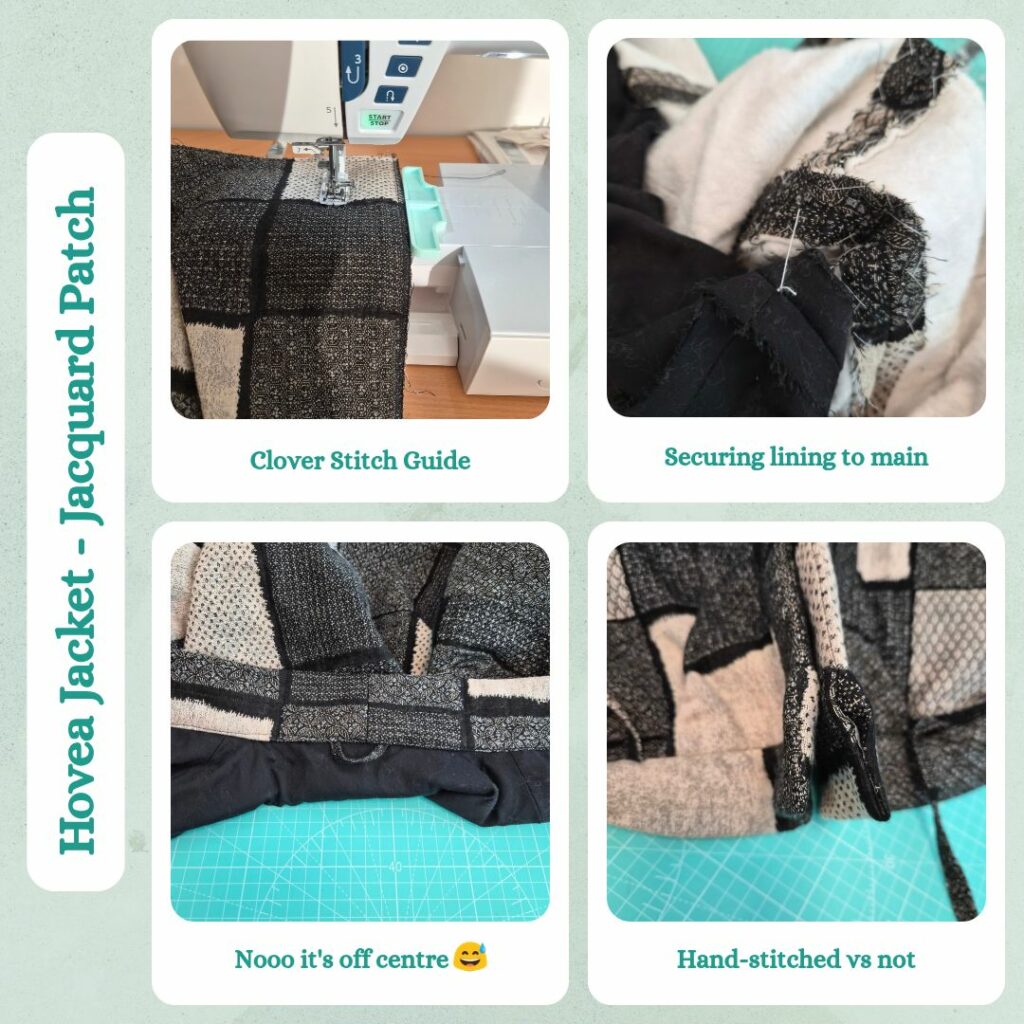
The rest of the construction (body and lining) was pretty standard. I did decide to do guide-stitching for the hems, but of course the 6cm mark on my sewing machine falls in the transition from cover plate to sewing machine body. So this was the first time I had a proper use for the Clover sticky sewing guides.
Another suggestion in the instructions were to secure the lining to the body at the underarm using a length of thread. I used the basting thread since it seemed sturdy and did this at both the underarm and top of the shoulder. Then for the rest of the finishing touches, I added the hanging loop (off centre apparently…whoops) and guide-stitched the neckband at 1cm instead of 1.5 because I wanted to make sure it would get caught when stitched-in-ditch…which it didn’t. I realised that not only do I need the Steam-A-Seam, but to also pin it since it’s such a pudgy ‘fabric’ it’s easy for it to get pushed out of alignment. I also made a mistake of not following the instructions to sew the bottom of the neckband and instead just folded it over and used Steam-A-Seam to try and keep it together. Since that didn’t work I hand-stitched the bottom. It works since this fabric (and the pudginess) camouflages the hand-stitching but will definitely machine sew it next time. Might even extend the neckband seam allowance to 2cm to make it a bit easier to deal with.
Oh yeah and the ties. Both the ties and hang loop I folded and pressed in half and then in pressed down the seam allowances too and secured with fusible tape. Because I went to look to see if I had a loop turner and apparently I don’t! From past experience though I kind of hate using loop turners so will just stick to this method until I find a reason to invest in a loop turner.
Reflections
I’ve been sewing so many knits lately that it was nice to sew a stable woven 😂 Also pleasantly surprised that things went quite smoothly. I like how detailed the instructions were and how it clearly identifies the optional steps to give a more professional finish. And it fits nicely too, the crop length is good as is the sleeve length.
Things I learnt:
- Using Invisafil (shorten stitch length for straight stitches)
- Catch stitch for securing seam allowances
- Thread ties to secure lining to main body at sleeve underarm and shoulder point
- When topstitching fabrics with high loft need to anchor the fabric more securely to ensure it gets caught by the stitch line
Surprisingly I actually had this completed for Mother’s Day. Not that it mattered, since my mum was out of the country haha. But after I gave it to her and she returned home I got a cute photo of her wearing it while sitting under the wool blanket I made her last year 😊
Categories: Sewing

Leave a Reply